Step 3: Changing Apache Tomcat Port
8. Do remember that 8080 is the default port tomcat usages. To change tomcat port from 8080 to any other unused port (say 137), you may do as:
First shutdown tomcat server simply by typing the below command from anywhere in the shell.
# tomcatdown
Next, open ‘/opt/tomcat/apache-tomcat-8.5.14/conf/server.xml‘ file in your favorite editor (mine is nano) to edit. Change port 8080 to 137, save and exit.
# nano /opt/tomcat/apache-tomcat-8.5.14/conf/server.xml
Sample Output
 <Connector port="137" protocol="HTTP/1.1"
               connectionTimeout="20000"
               redirectPort="8443" />
After changing port to 137, restart tomcat service again and point your browser to http://127.0.0.1:137.
# tomcatup
Similarly, you can use any port of your choice. Make sure the port you are using don’t conflict with any other application/resource.
Step 4: Configuring Apache Tomcat 8
9. By default the Tomcat page is accessed by you only due its security implementation so that unauthorized users don’t have access to it.
To access admin and other sections like Server Status, Manager App and Host Manager. You need to add user accounts for admins and managers.
To add a Tomcat user edit file ‘/opt/tomcat/apache-tomcat-8.5.14/conf/tomcat-users.xml‘, in your favorite editor.
# nano /opt/tomcat/apache-tomcat-8.5.14/conf/tomcat-users.xml
10. Add the following lines just before ‘</tomcat-users>‘.
<role rolename="admin-gui"/>
<user username="admin" password="tecmint" roles="admin-gui"/>

<role rolename="manager-gui"/>
<user username="avi" password="tecmint123" roles="manager-gui"/>
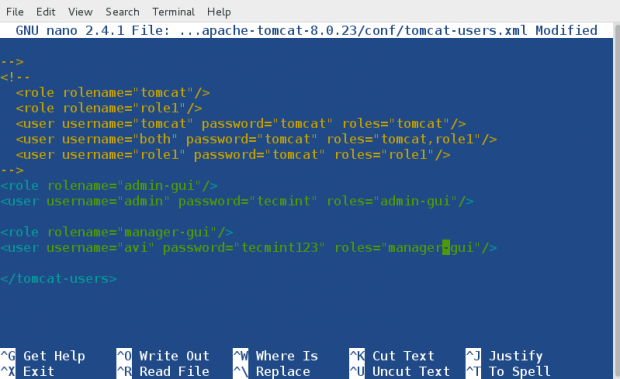
Again, you need to restart Tomcat to take new changes into effect.
# tomcatdown
# tomcatup
11. After restarting Tomcat, make sure to access the admin other sections like Server Status, etc at http://127.0.0.1:137.
It you will be asked to Enter User_name and Password, you just created above, after login you will see something like the below interface.
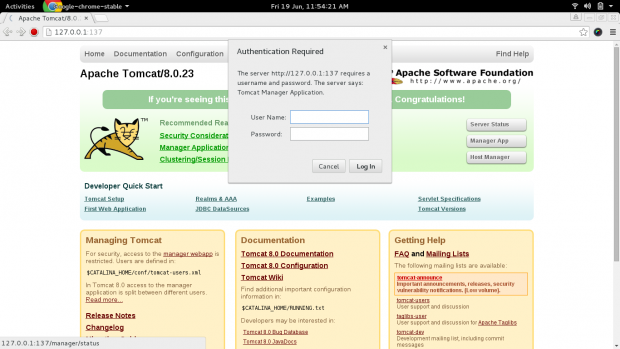
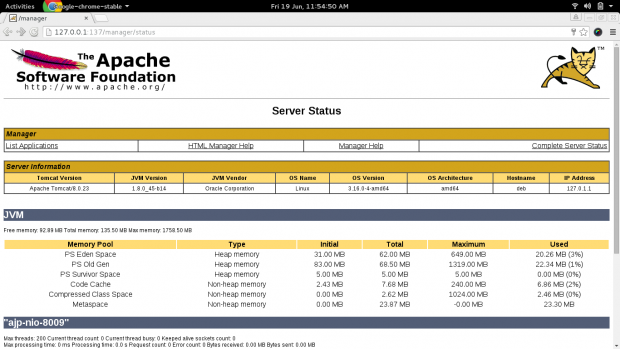
Your all setting and basic configuration of Tomcat has finished now. Now we will see a simple example (beyond the scope of this article), a very basic program (JSP Program) to run in Tomcat. It would be dumb if we do not show it.
12. Create a file called tecmint.jsp under ‘/opt/tomcat/apache-tomcat-8.5.14/webapps/ROOT‘ directory.
# touch /opt/tomcat/apache-tomcat-8.5.14/webapps/ROOT/tecmint.jsp
13. Now put the below contents in the new file (tecmint.jsp), save and exit. You may edit it, if you know what you are doing.
<html>
<head>
<title>Tecmint post:TomcatServer</title>
</head>
<body>

<START OF JAVA CODES>
<%
    out.println("Hello World! I am running my first JSP Application");
    out.println("<BR>Tecmint is an Awesome online Linux Resource.");
%>
<END OF JAVA CODES>

</body>
</html>
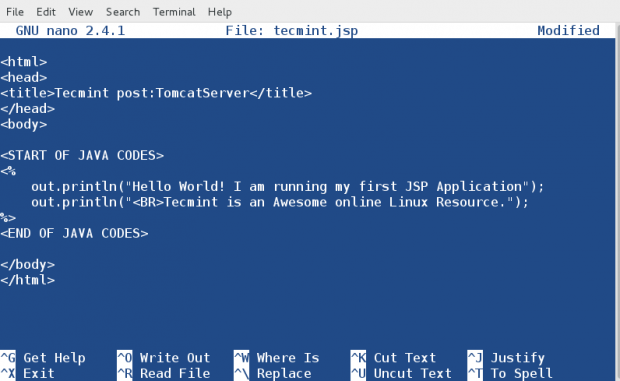
Most of the things in the above codes are self explaining. We have put simple Java code to print two lines of output and embed it in between HTML codes, which can be accessed at http://127.0.0.1:137/tecmint.jsp.

Congratulations! You have successfully run your Tomcat Application. That’s all for now from me. We are just exploring if our readers are interested in a detailed JAVA Tutorial on Tecmint. Please let us know your valuable thoughts in the comments below. Like and share us and help us get spread.




For me the given link was not working. So for those having similar issue, you can download the newer version i.e. 8.5.45 from here https://tomcat.apache.org/download-80.cgi#8.5.45.
After installing Java and apache tomcat, i am able to start the apache service, but while i am trying to hit the apache URL i am getting 500 error, can please help.
@Shanmuga,
Are you sure your apache tomcat started up correctly? also have you opened port 8080 on firewall? If yes, do check the apache logs for any errors.
Thanks for nice application
Thank you for your article
wget http://www.interior-dsgn.com/apache/tomcat/tomcat-8/v8.0.23/bin/apache-tomcat-8.0.23.zip
NOT working Link>>>>>>
@Krishna,
The article is updated and included installation instructions for latest Apache Tomcat version..
Hi,
Thanks for your helpful tutorials. Just wanted to ask if it is necessary to configure a java_home environment after installing the java packages. I am confused because I came across this tutorial that configured a java environment and edited the file before installing Tomcat. Why is this necessary? I’ll paste the website’s URL below. Thanks.
Awesome tutorial. Now running tomcat8 without any issues (kinda unusual for linux how-to instructions :) )
Nice article Avishek Kumar. I am looking forward for Java Tutorials on TecMint. I am regularly reading article on tecmint but first time I am posting comment here. Thank you for your efforts to give such nice tutorials.
Dear Rajneet,
Thank you for your feedback. We won’t disappoint you.
Keep Connected!
Java tutorials would be a nice resource here Avishek!
Dear Bóson,
Me too wants to produce a deatiled in-depth Java Tutorial which is not present anywhere on the web.
Detailed**