CockroachDB is a highly distributed SQL database platform that designed to handle large-scale data workloads across multiple nodes. It is an open-source, cloud-native database that provides strong consistency, high availability, and automatic scaling.
In this article, we will guide you through the process of installing a CockroachDB cluster on Ubuntu 24.04.
Prerequisites
Before we begin, ensure that you have the following:
- An Ubuntu 24.04 server with at least 4GB of RAM and 2 CPU cores.
- Root or sudo access to the server.
Step 1: Installing CockroachDB on Ubuntu
First, update your system software packages to the most recent version and then install the required dependencies as shown.
sudo apt update -y
sudo apt install -y apt-transport-https ca-certificates curl software-properties-common
Next, visit the official CockroachDB download page to get the latest version or use the following wget command to download it directly.
wget -qO- https://binaries.cockroachdb.com/cockroach-v24.1.1.linux-amd64.tgz | tar xvz
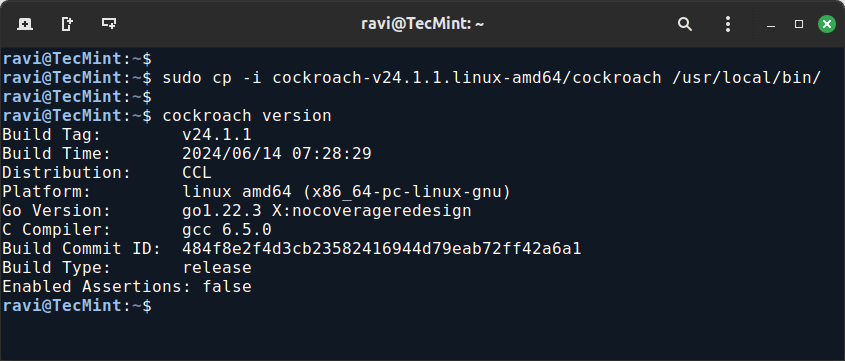
Once downloaded, move the binary to a directory in your PATH and verify the installation.
sudo cp -i cockroach-v24.1.1.linux-amd64/cockroach /usr/local/bin/
cockroach version
Step 2: Initializing the CockroachDB Cluster
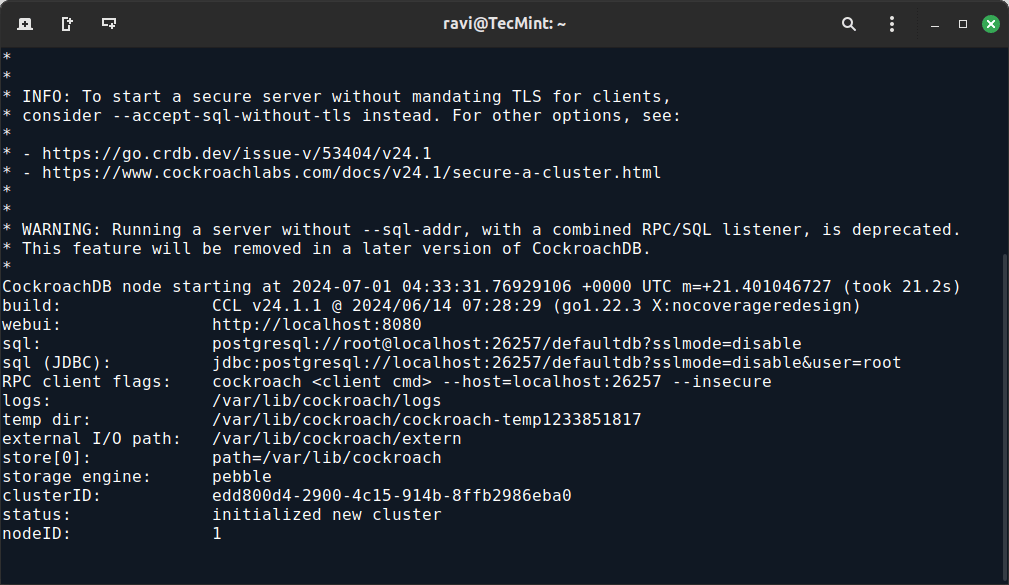
To initialize the CockroachDB cluster, create a directory for cockroachdb data and start the CockroachDB node, which sets up the initial cluster configuration.
sudo mkdir -p /var/lib/cockroach
sudo chown $(whoami) /var/lib/cockroach
cockroach start-single-node --insecure --store=/var/lib/cockroach --listen-addr=localhost:26257 --http-addr=localhost:8080
Next, open another terminal and run the following command to verify the cluster initialization by connecting to the CockroachDB SQL shell.
cockroach sql --insecure --host=localhost:26257
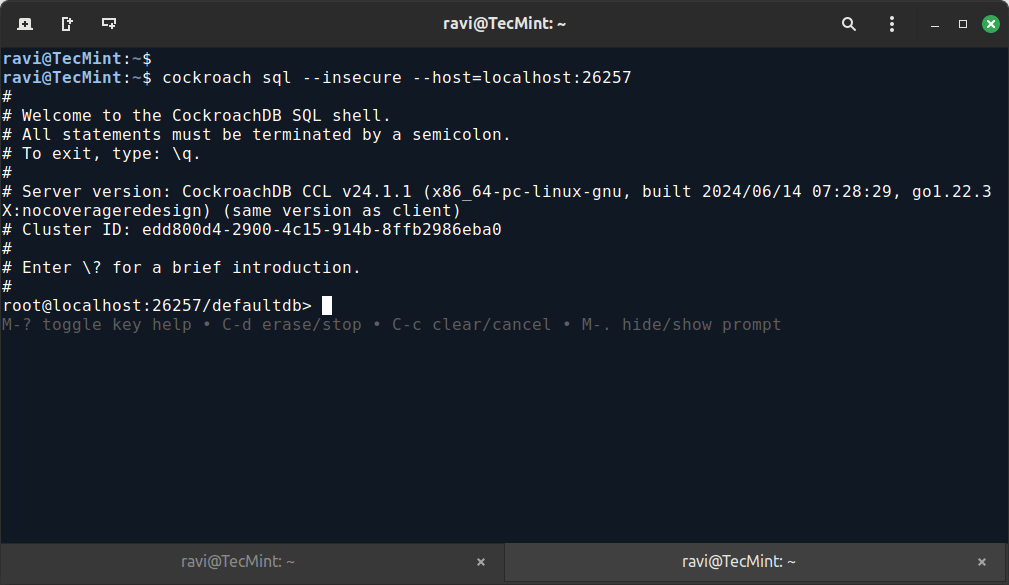
To exit the SQL shell, type \q and press Enter.
Step 3: Starting CockroachDB as a Background Service
To run CockroachDB as a background service, we will create a systemd service file.
sudo nano /etc/systemd/system/cockroach.service
Add the following configuration.
[Unit]
Description=CockroachDB
Documentation=https://www.cockroachlabs.com/docs/
After=network.target

[Service]
Type=notify
ExecStart=/usr/local/bin/cockroach start-single-node --insecure --store=/var/lib/cockroach --listen-addr=localhost:26257 --http-addr=localhost:8080
TimeoutStartSec=0
Restart=always
RestartSec=10

[Install]
WantedBy=multi-user.target
Next, reload the systemd manager configuration, start the CockroachDB service, enable it to run on system startup, and check its current status.
sudo systemctl daemon-reload
sudo systemctl start cockroach
sudo systemctl enable cockroach
sudo systemctl status cockroach
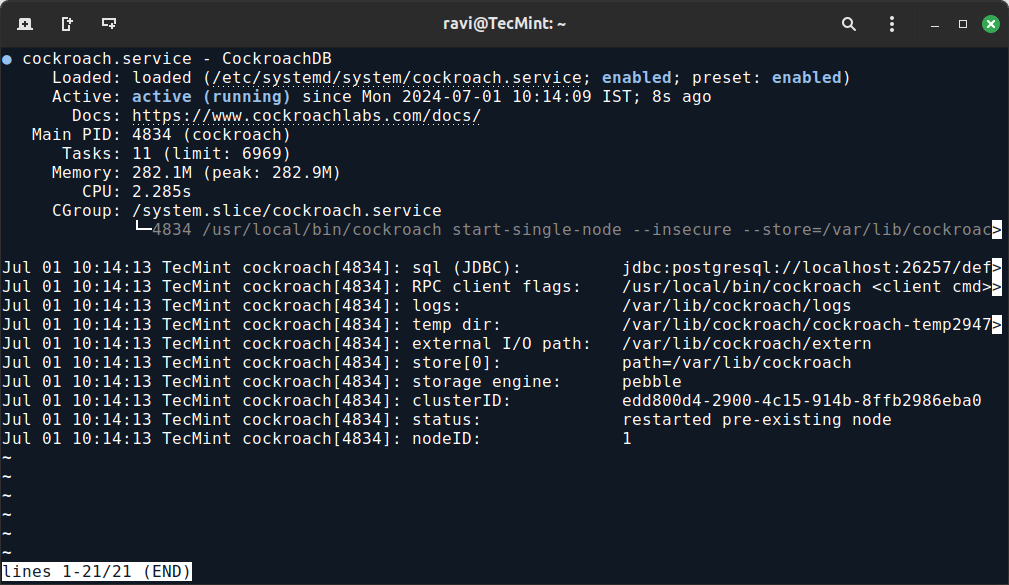
The output should indicate that the CockroachDB service is active and running.
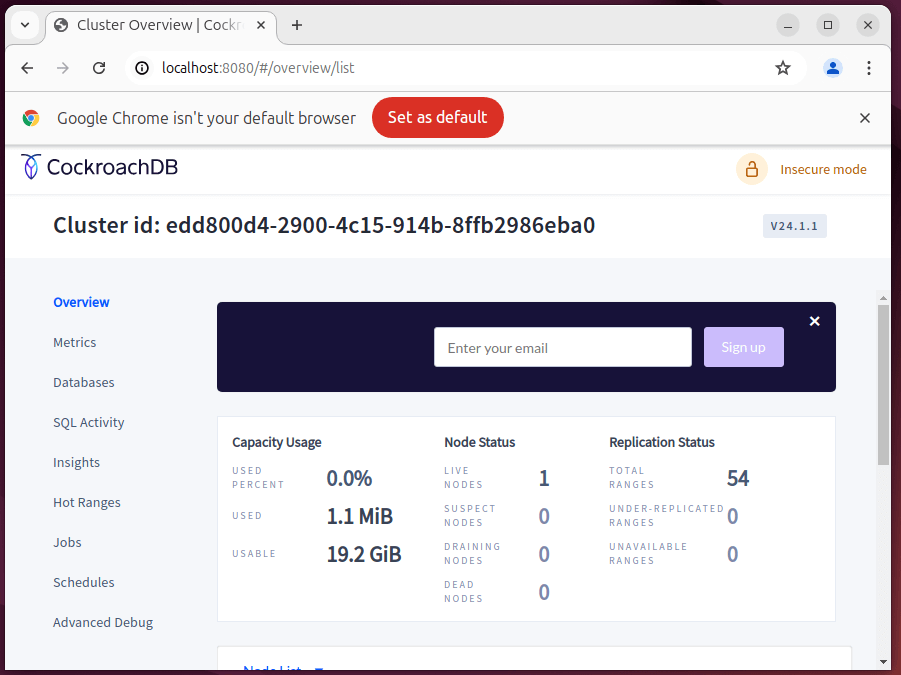
Step 4: Accessing the CockroachDB Admin UI
CockroachDB includes a web-based Admin UI for managing and monitoring your cluster at the following URL.
http://localhost:8080
The Admin UI provides various tabs to monitor the cluster, databases, and nodes. You can view metrics, performance details, and more.
Step 5: Creating and Managing CockroachDB Databases
To interact with CockroachDB, you can use the SQL shell.
cockroach sql --insecure --host=localhost:26257
To create and verify a database in CockroachDB.
CREATE DATABASE mydb;
SHOW DATABASES;
You should see the list of available databases, including mydb.

To create a table in the database.
USE mydb;
CREATE TABLE users (
    id SERIAL PRIMARY KEY,
    name STRING,
    email STRING UNIQUE
);
Next, insert data into it and query it.
INSERT INTO users (name, email) VALUES ('Alice', '[email protected]'), ('Bob', '[email protected]');
SELECT * FROM users;
To exit the SQL shell, type \q and press Enter.
Step 6: Secure the CockroachDB Cluster (Optional)
By default, the CockroachDB cluster is running in insecure mode, which is not recommended for production environments.
To secure the cluster, generate the necessary SSL certificate for the CockroachDB cluster using the following commands, which will generate ca.crt and ca.key in the /home/ravi/cert directory.
mkdir /home/ravi/cert
cockroach cert create-ca --certs-dir=/home/ravi/cert --ca-key=/home/ravi/cert/ca.key
Next, generate node certificates signed by the CA, which will generate node.crt and node.key in the /home/ravi/cert directory. Make sure to replace localhost with the hostname or IP address of your CockroachDB node.
cockroach cert create-node localhost --certs-dir=/home/ravi/cert --ca-key=/home/ravi/cert/ca.key
Now set the correct permissions on the certificate.
sudo chmod 600 /home/ravi/cert/*.crt /home/ravi/cert/*.key
Finally, modify your systemd service file ‘cockroach.service‘.
sudo nano /etc/systemd/system/cockroach.service
update the ExecStart line to include SSL/TLS and authentication flags.
cockroach start --certs-dir=/home/ravi/cert --listen-addr=localhost:26257 --http-addr=localhost:8080 --join=localhost:26257,localhost:26258,localhost:26259

After making these changes, reload the systemd manager configuration and restart CockroachDB to apply the new certificates.
sudo systemctl daemon-reload
sudo systemctl restart cockroach
Verify that CockroachDB is accessible using the new SSL/TLS certificates:
cockroach sql --certs-dir=/home/ravi/cert --host=localhost:26257
Conclusion
In this guide, we covered the steps to install and configure CockroachDB on Ubuntu 24.04. We walked through downloading and installing CockroachDB, initializing the cluster, running it as a background service, and accessing the Admin UI.
Additionally, we explored basic database operations using the SQL shell.
