LUKS acronym stands for Linux Unified Key Setup which is a wide method of disk encryption used by Linux Kernel and is implemented with the cryptsetup package.
The cryptsetup command line encrypts a volume disk on the fly using a symmetric encryption key derived from the supplied passphrase that is provided every time a volume disk, a partition, and also a whole disk (even a USB stick) is mounted in the filesystem hierarchy and uses aes-cbc-essiv:sha256 cipher.
Because LUKS can encrypt the entire block devices (hard disks, USB sticks, Flash disks, partitions, volume groups, etc) on Linux systems is largely recommended for protecting removable storage media, laptop hard disks, or Linux swap files and is not recommended for file level encryption.
NTFS (New Technology File System) is a proprietary file system developed by Microsoft.
Ubuntu 24.04 provides full support for LUKS encryption and also NTFS native support for Windows with the help of the ntfs-3g package.
To prove my point in this tutorial I’ve added a new hard disk on Ubuntu 24.04 box (the system reference to the newly added HDD is /dev/vdb) which it will be divided in two partitions.
- One partition (
/dev/vdb1-primary) used for LUKS encryption. - The second partition (
/dev/vdb2– extended) formatted NTFS for accessing data on both Linux and Windows-based systems.
Also, the partitions will be automatically mounted on Ubuntu 24.04 after reboot.
Step 1: Create Disk Partitions
1. After your hard disk is physically added to your machine, use the ls command to list all /dev devices (the new disk will be /dev/vdb) or check your newly added HDD with the fdisk command.
ls /dev/vd*
sudo fdisk -l /dev/vdb
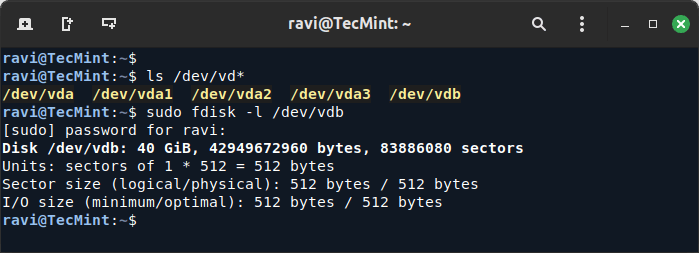
Because no filesystem has been written yet, the disk doesn’t contain a valid partition table.
2. The next step slices the hard disk for a two-partition result using the cfdisk disk utility, which offers a text-based interface for partitioning disks.
sudo cfdisk /dev/vdb
If it’s the first time you’re using cfdisk on this disk, you might need to select a partition table type (e.g., MBR for older systems or GPT for newer systems).
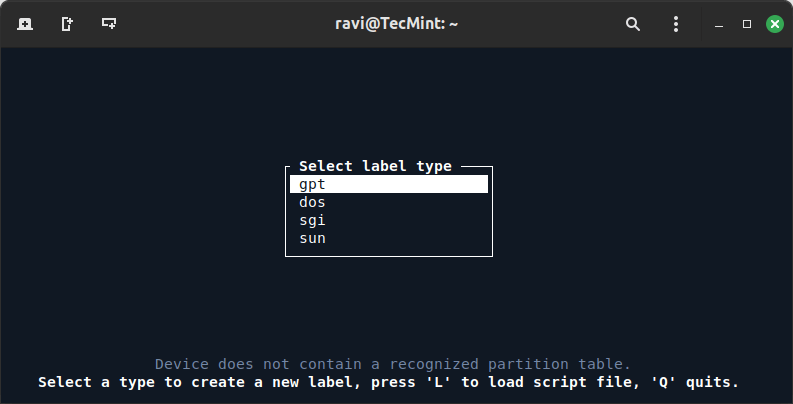
3. The next screen opens cfdisk in interactive mode. Select the “Free Space” on your hard disk and navigate to the “New” option using the left/right arrow keys.
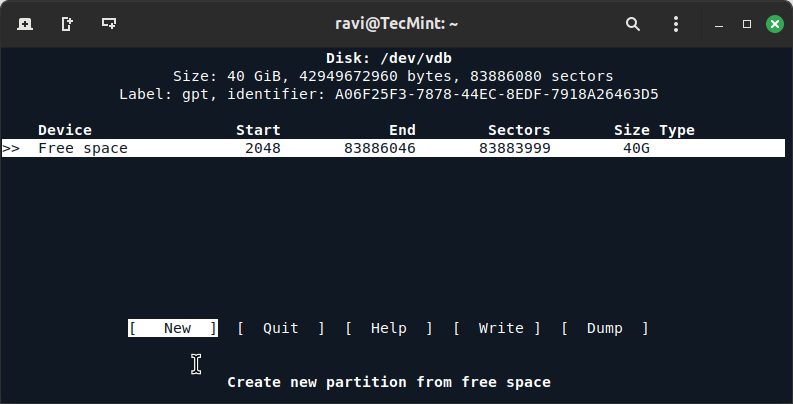
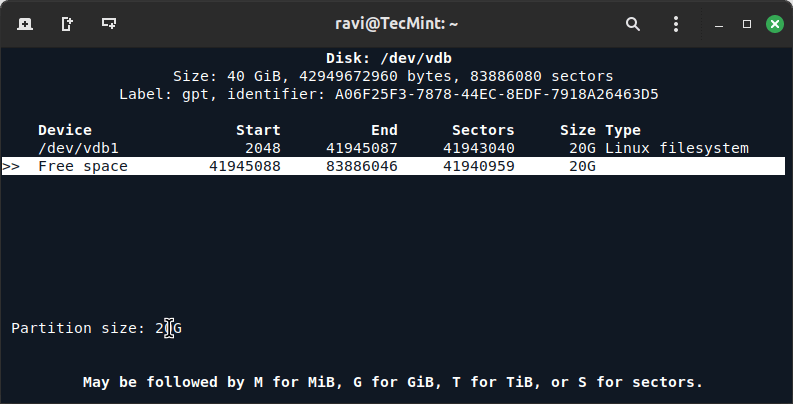
4. Choose the partition type (Primary or Extended) if prompted and set the size of the partition (in MB or GB) to create the first partition.
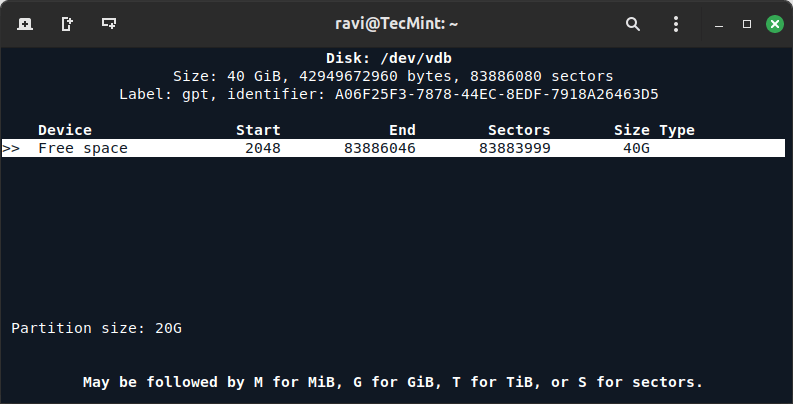
5. Once the first partition has been created, select “Free Space” again and choose “New” to create the second partition.
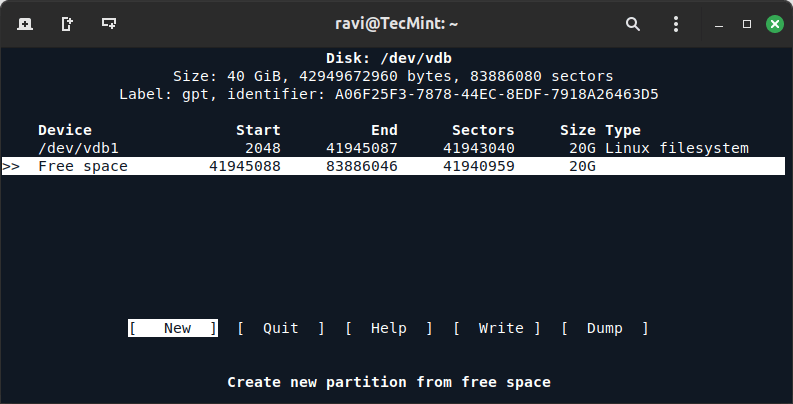
6. Choose the partition type (Primary or Extended) if prompted and set the size of the partition (in MB or GB) to create a second partition.
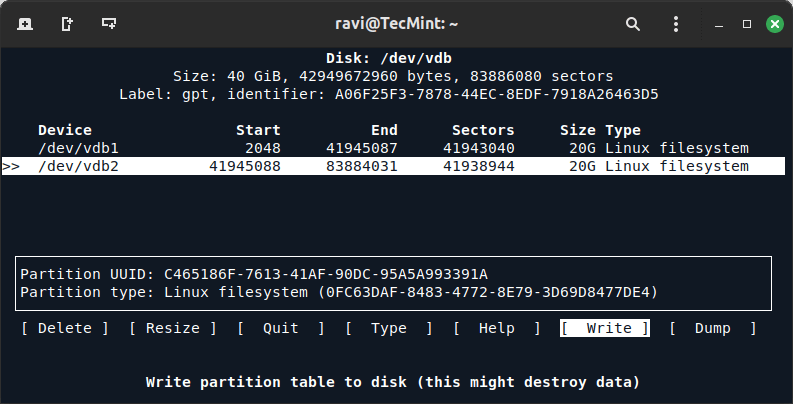
7. After reviewing and verifying partitions select “Write” to confirm and save the partitions.
8. Select “Quit” to exit the cfdisk utility.
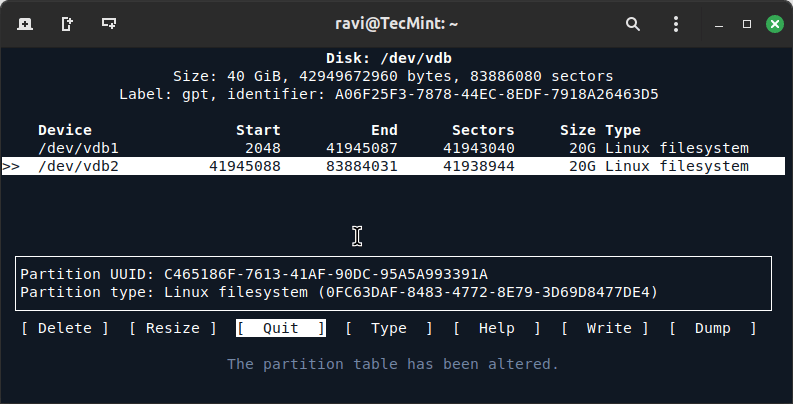
Congratulations! Your partitions have been successfully created and are now ready to be formatted and used.
Step 2: Format New Partitions
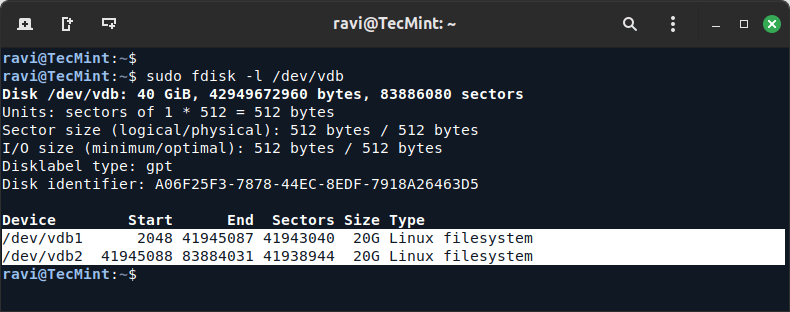
9. To verify again disk Partition Table issue the fdisk command again which will show detailed partition table information.
sudo fdisk -l /dev/vdb
10. To format the first partition as ext4, use.
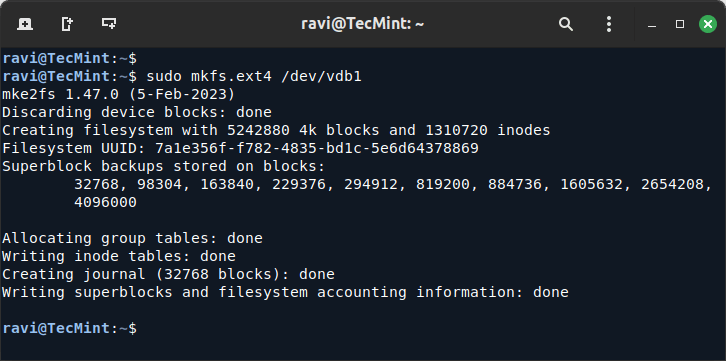
sudo mkfs.ext4 /dev/vdb1
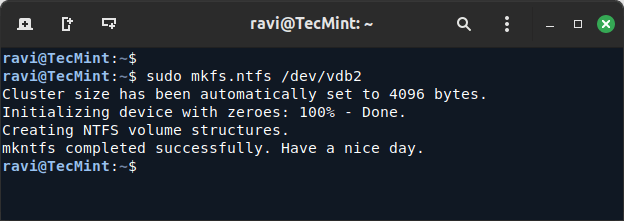
11. To format the second partition as NTFS, you need to install ntfs-3g and format the second partition as NTFS.
sudo apt install ntfs-3g
sudo mkfs.ntfs /dev/vdb2
Step 3: Mount New Partitions
12. To make the partitions available, they must be mounted to mount points on the filesystem.
sudo mkdir /mnt/partition1
sudo mkdir /mnt/partition2
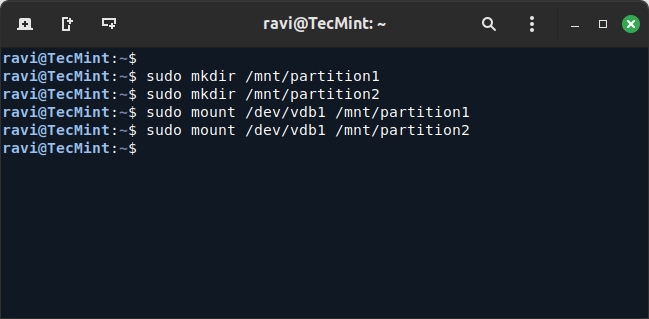
13. Next, mount the partitions to the newly created mount directory.
sudo mount /dev/vdb1 /mnt/partition1
sudo mount /dev/vdb2 /mnt/partition2
14. To auto-mount partitions, you need to find the UUIDs of the partitions using the blkid command.
sudo blkid /dev/vdb1
sudo blkid /dev/vdb2
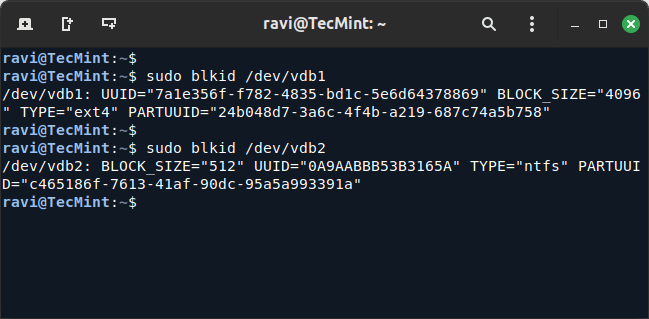
15. Next, edit /etc/fstab file and add entries for the new partitions using their UUIDs.
UUID=7a1e356f-f782-4835-bd1c-5e6d64378869 /mnt/partition1 ext4 defaults 0 2
UUID=0A9AABBB53B3165A /mnt/partition2 ntfs defaults 0 2
Step 4: New Partition Encryption
16. To encrypt partitions using cryptsetup, you need to install the cryptsetup tool as shown.
sudo apt install cryptsetup	[On Debian Based Systems]
sudo dnf install cryptsetup	[On RedHat Based Systems]
17. Now is the time to encrypt the first partition on the hard disk by issuing the following command, which will be prompted to confirm and enter a passphrase that will be used to unlock the encrypted partition.
sudo cryptsetup luksFormat /dev/vdb1
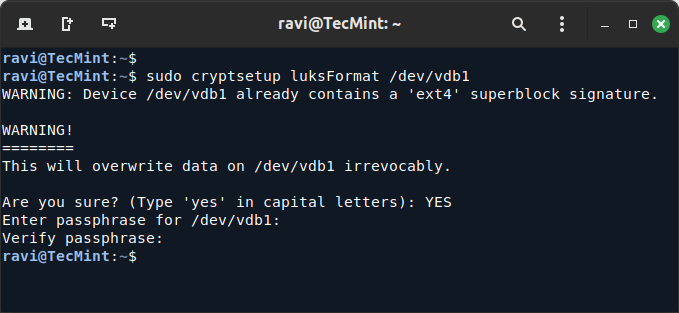
18. To make this encrypted partition to be active it must have a name entry (be initialized ) to /dev/mapper the directory with the help of the cryptsetup package.
sudo cryptsetup open --type luks /dev/vdb1 crypted_volume
19. Next, format the encrypted partition and mount it.
sudo mkfs.ext4 /dev/mapper/crypted_volume
sudo mkdir /mnt/encrypted1
sudo mount /dev/mapper/crypted_volume /mnt/encrypted1
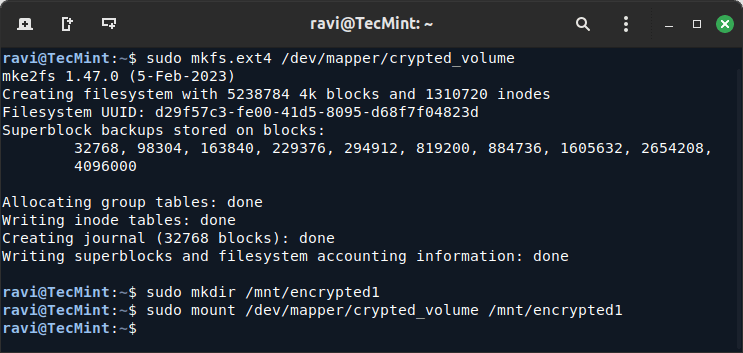
20. For the second partition, you need to initialize encryption using the following command.
sudo cryptsetup luksFormat /dev/vdb2
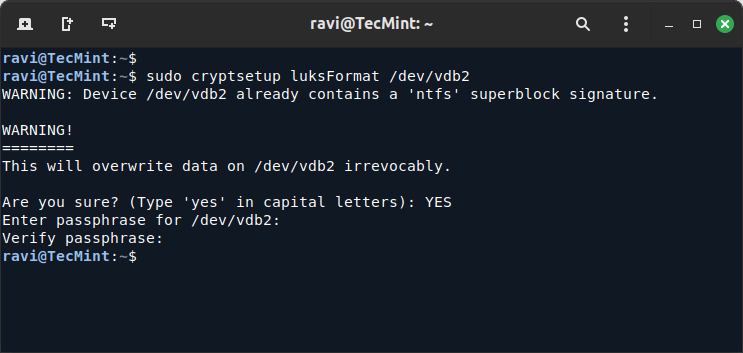
21. To make this second encrypted partition to be active, it must have a name entry (be initialized ) to /dev/mapper the directory with the help of the cryptsetup package.
sudo cryptsetup open --type luks /dev/vdb2 crypted_volume2
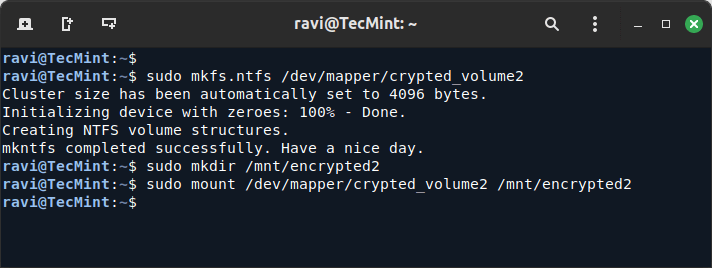
22. Next, format the second encrypted partition and mount it.
sudo mkfs.ntfs /dev/mapper/crypted_volume2
sudo mkdir /mnt/encrypted2
sudo mount /dev/mapper/crypted_volume2 /mnt/encrypted2
Step 4: Mount Encrypted Partitions Automatically
23. To automatically unlock and mount the encrypted partitions at boot, you need to update /etc/crypttab and /etc/fstab.
sudo nano /etc/crypttab
24. Next, use the blkid command to find the UUIDs of the partitions.
sudo blkid /dev/vdb1
sudo blkid /dev/vdb2
25. Then add encrypted partition entries in the /etc/crypttab file.
crypted_volume UUID=d29f57c3-fe00-41d5-8095-d68f7f04823d none luks
crypted_volume2 UUID=1DF9CC677F758914 none luks
26. Similarly, edit /etc/fstab and specify your device name, mount point, filesystem type, and other options.
sudo nano /etc/fstab
Add entries for the filesystems:
/dev/mapper/crypted_volume /mnt/encrypted1 ext4 defaults 0 2
/dev/mapper/crypted_volume2 /mnt/encrypted2 ntfs defaults 0 2
27. Finally, verify the encrypted partitions are mounted correctly.
df -hT
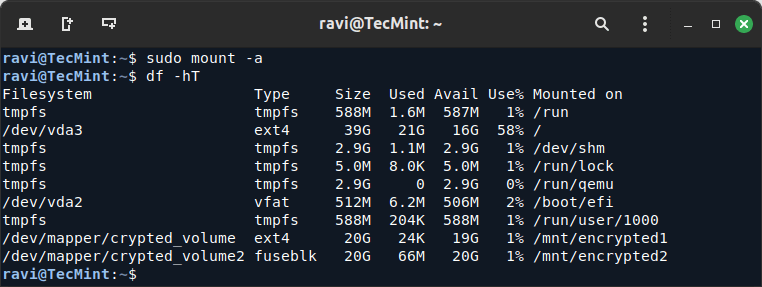
As you can see both disk partitions were automatically mounted on the Ubuntu filesystem hierarchy. As advice do not use automatically encrypted volumes from the fstab file on physically remote servers if you can’t have access to the reboot sequence for providing your encrypted volume password.
The same settings can be applied on all types of removable media such as USB sticks, Flash memory, external hard disks, etc for protecting important, secret, or sensitive data in case of eavesdropping or stealing.







What is the purpose of using LUKS encryption for NTFS? If you’re using NTFS, you might as well set up BitLocker under Windows, since Linux can also decrypt BitLocker-encrypted drives.
@Joshua,
While it’s true that BitLocker is a native encryption option for NTFS on Windows, using LUKS encryption has its own advantages, especially for those who prefer or primarily use Linux.
What good is home disk encryption when data breaches like National Public Data expose millions of personal records? Individual users have absolutely no way to protect data held in corporate databases>. In fact, private users have no knowledge what data is being harvested by corporations.
device LUKS /dev/sdb1 at /usr/sbin/luksformat line 91, line 59.
Added to favorites.
Useful guide.
Thanks dude.
The LUKS setup should also include a process of backing up a LUKS header.
LUKS is great, but it’s missing one thing. The setup should include something I call a Fricosu key. This is a separate key which, when entered under duress in Colorado, causes the system to silently and permanently forget the real decryption key.
Could this be used for bad purposes? Sure it could. But if you value your privacy, it might be a life saver. The only way to get around it is if the bad guys (I mean the Government) makes a forensic copy before they force you to enter your (secret) Fricosu key.