A jump host (also known as a jump server) is an intermediary host or an SSH gateway to a remote network, through which a connection can be made to another host in a different security zone, for example, a demilitarized zone (DMZ). It bridges two dissimilar security zones and offers controlled access between them.
A jump host should be highly secured and monitored especially when it spans a private network and a DMZ with servers providing services to users on the internet.
A classic scenario is connecting from your desktop or laptop from inside your company’s internal network, which is highly secured with firewalls to a DMZ. In order to easily manage a server in a DMZ, you may access it via a jump host.
In a nutshell, an SSH Jump server is a Linux server that is used as a gateway to other Linux servers on a private network over the SSH Protocol.
In this article, we will demonstrate how to access a remote Linux server via a jump host, and also we will configure the necessary settings in your per-user SSH client configurations.
Table of Contents
SSH Jump Server Setup
Consider the following scenario.

For more clarity, below is a simple setup demonstrating the role of an SSH Jump server.
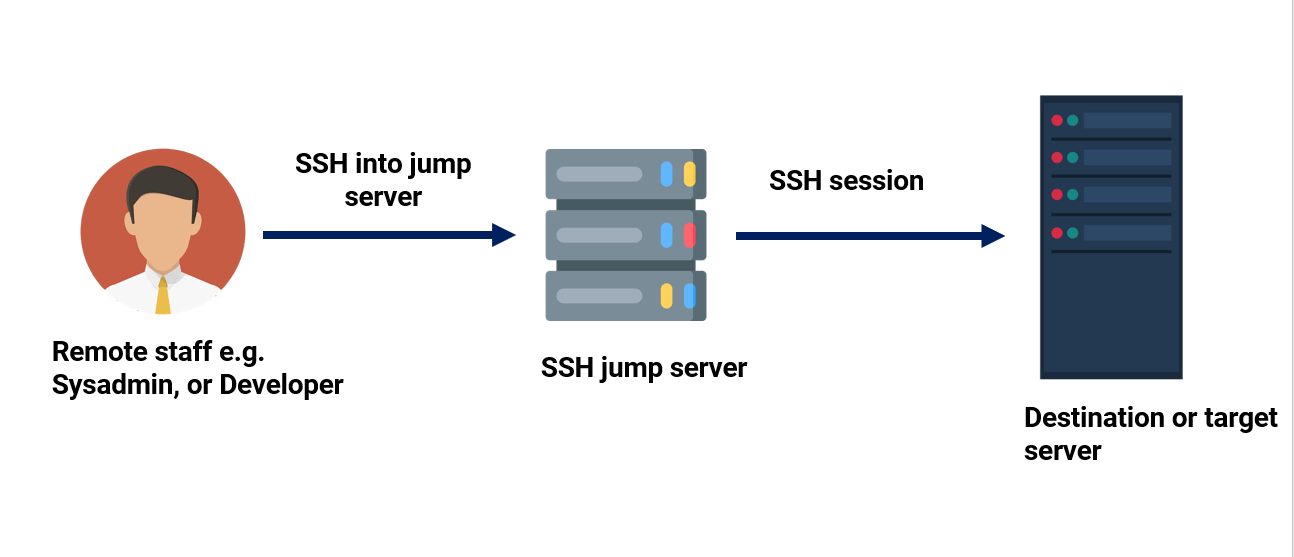
Reasons for Configuring an SSH Jump Server
A Jump server provides a gateway to your infrastructure and reduces the potential attack surface to your resources. It also provides transparent management of devices as well as a single point of entry to your resources.
Keep in mind that as you incorporate a jump server into your infrastructure, ensure that the server is hardened, otherwise it would be as good as not using one. We will come back to this later in this tutorial.
How To Create a Simple SSH Jump Server
Let us now focus on how you can create a simple SSH Jump server. Here is our simple setup.
- Originating IP: 105.68.76.85.
- Jump Server IP (we’ll call this host-jump): 173.82.232.55.
- Destination IP (we’ll call this host_destination): 173.82.227.89.
In the above scenario, you want to connect to HOST 2 (173.82.227.89), but you have to go through HOST 1 (173.82.232.55), because of firewalling, routing, and access privileges. There is a number of valid reasons why jump hosts are needed.
Dynamic Jumphost List
The simplest way to connect to a target server via a jump host is using the -A and -J flags from the command line. This tells ssh to make a connection to the jump host and then establish a TCP forwarding to the target server, from there (make sure you’ve Passwordless SSH Login between machines).
$ ssh -A -J user@jump-server user@destination server
For example, in our setup, we have the user called james configured on the Jump Server and tecmint configured on the destination or target system.
The command will look as follows from the originating IP.
$ ssh -A -J [email protected] [email protected]
The command will prompt you for the jump server’s user password, followed by the target system’s password upon which you will be granted access to the target system.
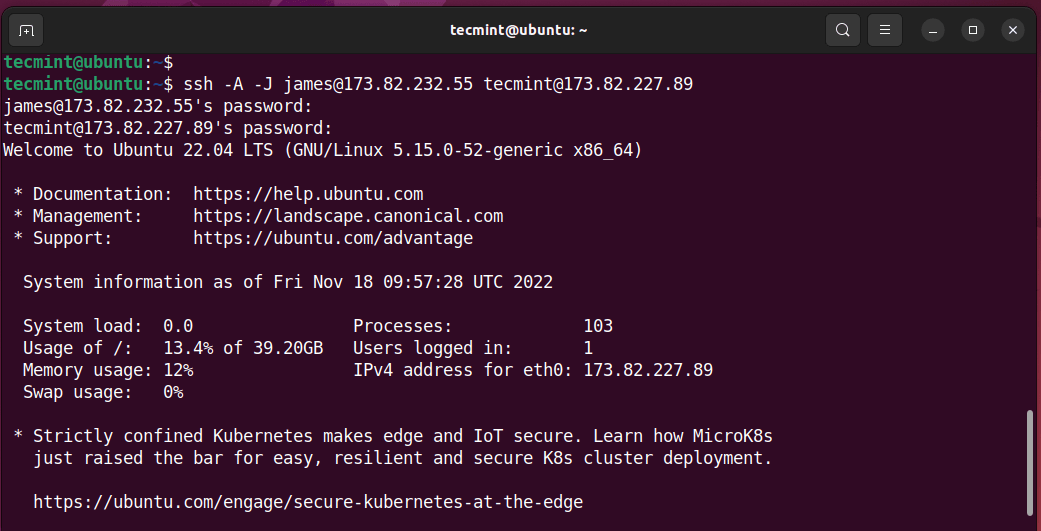
If usernames or ports on machines differ, specify them on the terminal as shown.
$ ssh -J username@host1:port username@host2:port
Multiple Jumphosts List
The same syntax can be used to make jumps over multiple servers.
$ ssh -J username@host1:port,username@host2:port username@host3:port
Static Jumphost List
Static jumphost list means, that you know the jumphost or jumphosts that you need to connect a machine. Therefore you need to add the following static jumphost ‘routing’ in ~/.ssh/config file and specify the host aliases as shown.
### First jumphost. Directly reachable
Host vps1
  HostName vps1.example.org

### Host to jump to via jumphost1.example.org
Host contabo
  HostName contabo.example.org
  ProxyJump vps1
Now try to connect to a target server via a jump host as shown.
$ ssh -J vps1 contabo
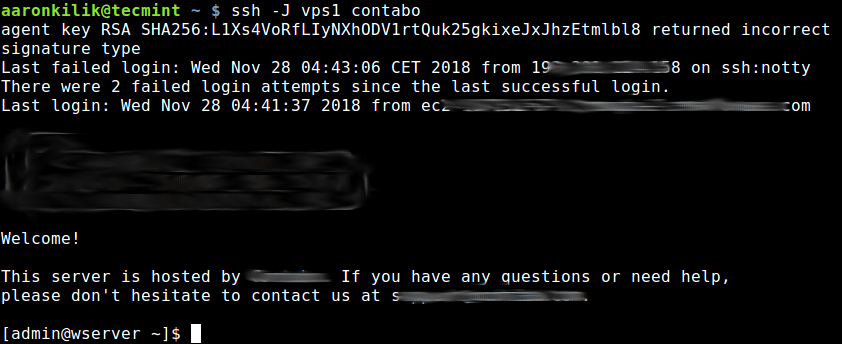
The second method is to use the ProxyCommand option to add the jumphost configuration in your ~.ssh/config or $HOME/.ssh/config file as shown.
In this example, the target host is contabo, and the jumphost is vps1.
Host vps1
	HostName vps1.example.org
	IdentityFile ~/.ssh/vps1.pem
	User ec2-user

Host contabo
	HostName contabo.example.org
	IdentityFile ~/.ssh/contabovps
	Port 22
	User admin
	Proxy Command ssh -q -W %h:%p vps1
Save the changes and exit the file. To apply the changes, restart the SSH daemon.
$ sudo systemctl restart ssh
Let’s explore the options used in the configuration file:
-q– This stands for quiet mode. It suppresses warnings and diagnostic messages.-W– Requests that standard input and output on the client be forwarded to HOST on PORT over the secure channel.%h– Specifies the host to connect to.%p– Specified the port to connect to on the remote host.
To ‘jump‘ to the destination system from your Originating IP through the Jump Server, just run the following command:
$ ssh contabo
The above command will first open an ssh connection to vps1 in the background affected by the ProxyCommand, and thereafter, start the ssh session to the target server contabo.
Making SSH Jump Server More Secure
One of the ways of making this setup more secure is by copying the Public SSH key from the Originating system to the Jump Server, and then finally to the target system, and then disabling password authentication. Check out our guide on how to enable SSH passwordless authentication.
In addition, check out SSH server hardening tips.
Also, ensure that no sensitive data is housed within the Jump server as this could lead to leakage of access credentials such as usernames and passwords leading to a system-wide breach.
For more information, see the ssh man page or refer to: OpenSSH/Cookbxook/Proxies and Jump Hosts.
That’s all for now! In this article, we have demonstrated how to access a remote server via a jump host. Use the feedback form below to ask any questions or share your thoughts with us.


