LiveCode is a programming language that first appeared in 1993. Its main goal is to allow everybody to code; it allows you to create large applications easily using a simple, high-level, English-like programming language that is dynamically typed.
Using LiveCode, you can write the same application for all available platforms like Windows, Mac, Linux, iOS, Android, BSD, and Solaris, and the code will work on all of those platforms without the need to change anything in the code-same code on all.
You can even create web applications using LiveCode. Its developers call it “The Revolution Programming Language” since it allows everybody to code because of its high-level language. LiveCode is also used a lot in schools to teach students how to code easily.
There are two versions of LiveCode: one is commercial and closed-source, and the other is open-source and free. The open-source version was introduced in 2013 after a successful Kickstarter campaign raised more than £350,000.
However, there are some core features that are only included in the closed version, like building applications for iOS (this is because Apple doesn’t allow GPL software to be uploaded to the App Store, and all programs made by the LiveCode runtime must be licensed under GPL).
Most of the features are available in the free and open-source version, which we’ll be talking about in this post.
Livecode Features
- High-level programming language.
- So easy to install and use.
- The installer works on any Linux distribution.
- You can develop the same applications for all platforms with the same code.
- Windows, Linux, Mac, and Android are supported.
- Large documentation tutorials and how-to’s are available for free.
- Free support from the LiveCode community.
- Many other features that you will see yourself.
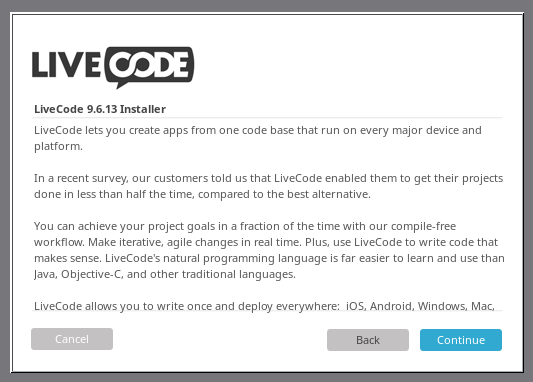
Step 1: Installing LiveCode in Linux
To start creating apps, the first step is to install LiveCode on your Linux system by visiting the official LiveCode website and downloading the latest version suitable for Linux.
Open a terminal and navigate to the directory where you downloaded the installer and run the following commands to install LiveCode.
chmod +x LiveCodeInstaller-9_6_13-Linux.x64
sudo ./LiveCodeInstaller-9_6_13-Linux.x64
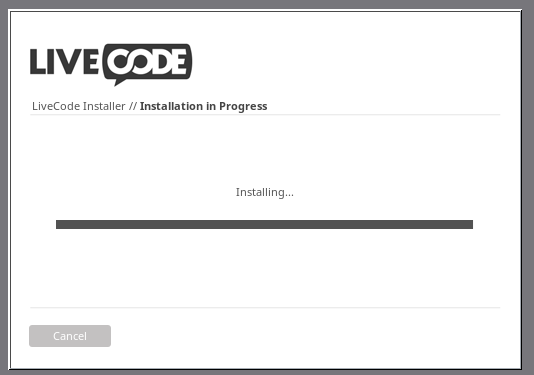
After the installation is complete, you can launch LiveCode from your applications menu or by typing livecode in the terminal.
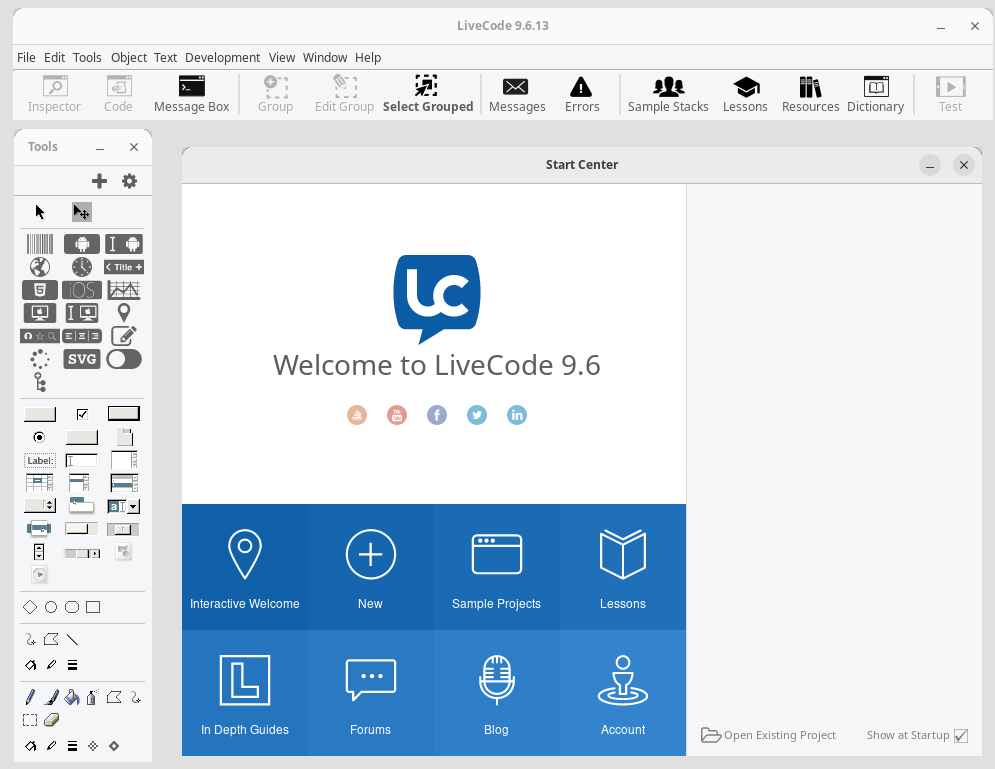
When you open LiveCode, you’ll see its Integrated Development Environment (IDE), which includes the main components:
- Stack: This is your project area where you design your app’s user interface.
- Tools Palette: Contains various UI elements like buttons, text fields, and images that you can drag onto your stack.
- Code Editor: Where you write scripts to define how your app behaves.
Familiarizing yourself with these components will help streamline your development process.
Step 2: Building a Simple App for Linux
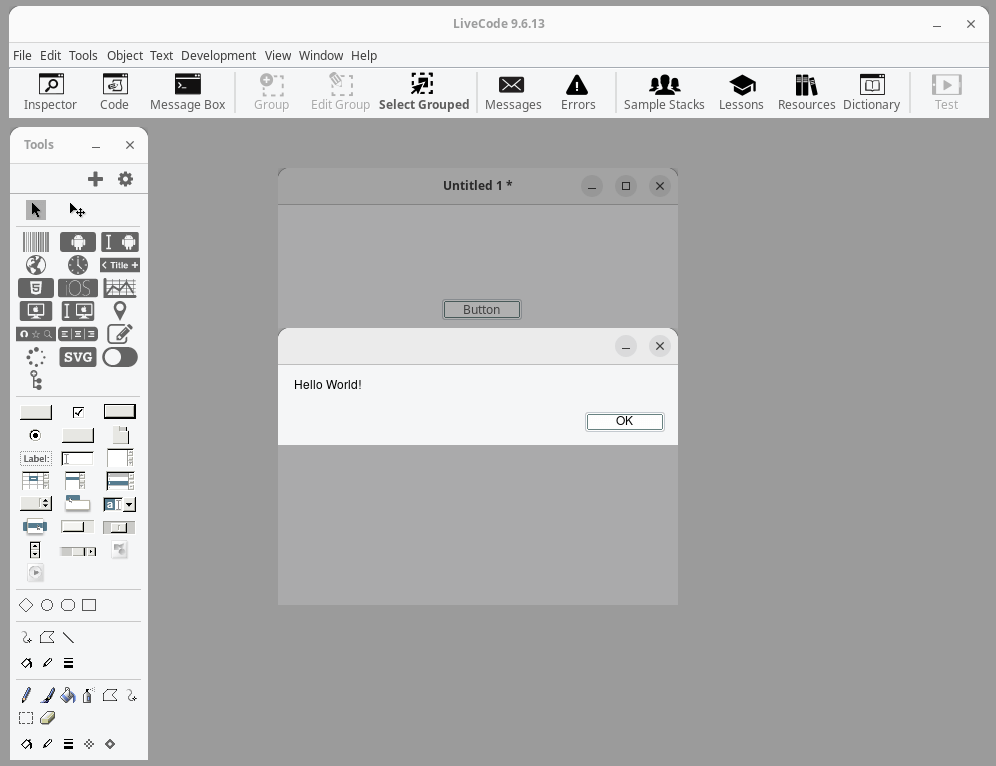
Let’s create a basic “Hello World” application as our first project.
- Create a New Stack – In the menu bar, click on File > New Stack and choose Default Size and click OK.
- Add a Button – From the Tools Palette, drag a button onto your stack and double-click on the button to open the Code Editor.
- Write Your Script – In the Code Editor, you’ll see a default on the mouseUp event handler. Modify it to display a message when clicked.
on mouseUp
    answer "Hello World!"
end mouseUp
Click Apply to save your changes.
Finally, switch to Run Mode by clicking on the Run button in the toolbar, it should display a dialog box with “Hello World!“.
Step 3: Creating an App for Android
Now that you’ve created an app for Linux, let’s move on to Android.
You need the Android Software Development Kit (SDK) installed on your system, so download it from Android Developer and extract it to a directory of your choice.
Next, open LiveCode and go to Edit > Preferences, and under Mobile Support, set the path to your Android SDK directory.
To create an Android app, create a new stack by selecting File > New Stack name it appropriately, and select Android as the platform.
To add UI Elements, drag a button onto your stack just like before and open its Code Editor, and enter:
on mouseUp
    answer "Hello Android!"
end mouseUp
Save your project.
To build and test your app, do the following:
- Select File > Standalone Application Settings.
- Choose Android from the options and configure any additional settings required.
- Connect an Android device or start an emulator.
- Click Development > Test Target, then select your device.
- Deploy your app by clicking on the Test icon in the IDE3.
Step 3: Creating an App for iOS
To create an iOS app using LiveCode:
- Set Up iOS Development Environment – You need access to macOS for building iOS apps due to Apple’s restrictions.
- Create Your iOS App – Follow similar steps as creating an Android app but select iOS in Standalone Application Settings.
- Testing Your iOS App – Use Xcode or an actual iOS device for testing since emulators are not available on Linux.
Conclusion
LiveCode provides a powerful yet simple way for anyone to create applications for multiple platforms including Linux, Android, and iOS without needing extensive programming knowledge.
By following this guide, you’ve learned how to set up LiveCode, create basic applications, and prepare them for deployment across different devices.
As you become more familiar with LiveCode, you can explore its extensive documentation and community resources to enhance your skills further.
With practice, you’ll be able to develop more complex applications tailored to your needs or those of others in today’s mobile-driven world


“Its developers call it “The Revolution Programming Language””
Almost all new programming languages since machine language have claimed to be “The Revolution Programming Language”
But the response of LiveCode is:
“We don’t support the open-source version any more. We haven’t done so for several years.”
So your post is actual
I have exact same issue on linux fedora 29
I have managed to install LiveCode on my Mac with no problems but have tried to follow your instructions for Linux and I get the following error… I am using Linux Mint 17… any ideas please or am I doing something really silly?
steveellis@lenovo-b560 ~ $ chmod 755 LiveCodeCommunityInstaller-6_6_2-Linux.x86 steveellis@lenovo-b560 ~ $ ./LiveCodeCommunityInstaller-6_6_2-Linux.x86
bash: ./LiveCodeCommunityInstaller-6_6_2-Linux.x86: No such file or directory
steveellis@lenovo-b560 ~ $ dir
Desktop LiveCodeCommunityInstaller-6_6_2-Linux.x86 Public
Documents Music Templates
Downloads Pictures Videos
steveellis@lenovo-b560 ~ $
Hi Steve.
As i see, you were able to set the permissions to the file successfully, now all what you have to do is to open your home folder (using any file manager) and run the LiveCode installer in your home folder, this is the easiest way to do it.
Thanks.
Hanny, Thanks for the response, but I thought I had tried that. I have followed the instructions above but it does not work so is something missing from the instructions?
Hi Steve.
The instructions are full, tested on many computers and it worked good, in fact it is just to download the file, give it the right permissions and click on it to run.
If it still doesn’t work with you, Please open a terminal, drag and drop the livecode file to the terminal window and click on Enter, and give us the output to see where the problem is.
Thanks.
As requested….
steveellis@lenovo-b560 ~ $ ‘/home/steveellis/LiveCodeCommunityInstaller-6_6_2-Linux.x86’
bash: /home/steveellis/LiveCodeCommunityInstaller-6_6_2-Linux.x86: No such file or directory
steveellis@lenovo-b560 ~ $
That sounds like an architecture mismatch. If you’re on a 64bit machine you should be using the …-Linux.x64 installer. If that’s not the problem, run ldd against the installer file to see if you’re missing needed libraries.