Mounting Btrfs Subvolume
19. First to know the ID of subvolumes list the subvolumes using below command.
# btrfs subvolume list /mnt/tecmint_btrfs1/
20. Then to mount the subvolumes we should umount the parent volume (our mount) /mnt/tecmint_btrfs1/.
# umount /mnt/tecmint_btrfs1/
21. Then mount the subvolume using it’s ID which we get from listing the subvolumes in above step.
# mount -o subvolid=272 /dev/tecmint_vg/tecmint_lv1 /mnt/tecmint_btrfs1/
This will mount the subvol1 using it’s ID to /mnt/tecmint_btrfs1/. Just list the mount point and check.
If we need to make our subvolume default we can use the following command.
# btrfs subvolume set-default 272 /mnt/tecmint_btrfs1/
22. To list the default subvolume we can use the following command.
# btrfs subvolume get-default /mnt/tecmint_btrfs1/
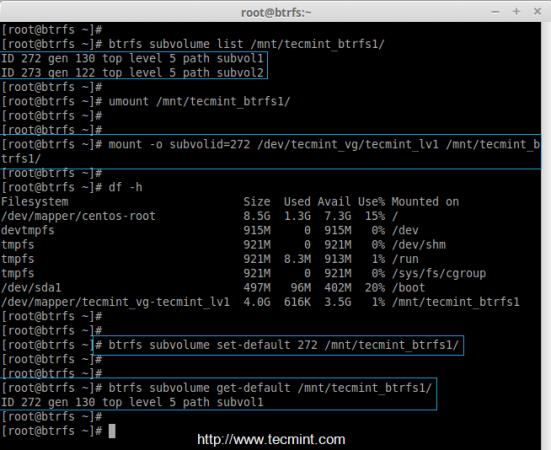
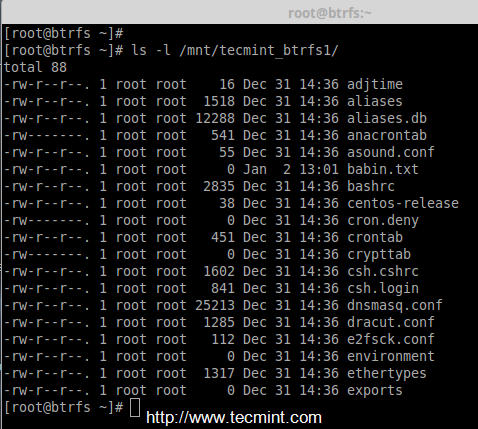
Here I have listed the subvolume1 which I have mounted, Before while listing the mount point we have seen subvol1 & subvol2 inside the mount point /mnt/tecmint_btrfs1/, but here now i have mounted the subvol1 in /mnt/tecmint_btrfs1/ and we can see the files which we have before.
Creating Snapshots
23. To create a snapshot of source we can use below command.
# btrfs subvolume snapshot /source /destination
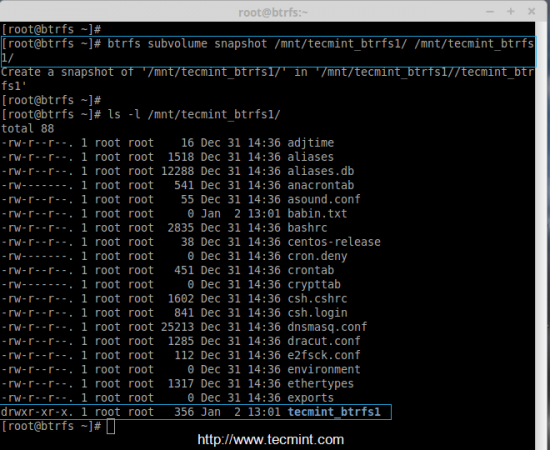
Here I want to take a snapshot of /mnt/tecmint_btrfs1/ to same location.
# btrfs subvolume snapshot /mnt/tecmint_btrfs1/ /mnt/tecmint_btrfs1/
While listing we can get the snapshot in same location as shown in the below image.
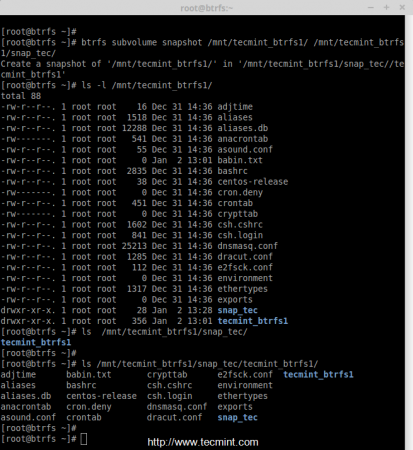
24. In above steps I have not given a name for snapshot because of that we get the same name while creating a snapshot inside /mnt/tecmint_btrfs1/. Let we try to create a snapshot with snap_tec into /mnt/tecmint_btrfs1/.
# btrfs subvolume snapshot /mnt/tecmint_btrfs1/ /mnt/tecmint_btrfs1/snap_tec/
# ls -l /mnt/tecmint_btrfs1/snap_tec/tecmint_btrfs1/
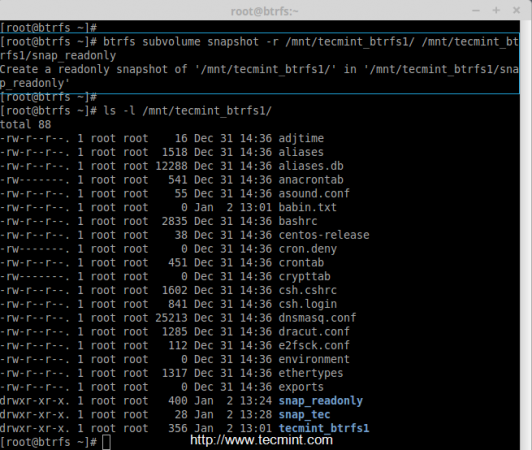
25. In above snapshots we can read and write any contents, If we need to create a read-only snapshot we can use -r option while we create a snapshot as shown below.
# btrfs subvolume snapshot -r /mnt/tecmint_btrfs1/ /mnt/tecmint_btrfs1/snap_readonly
Permanent Btrfs Mounting
26. Permanent mounting will be done using fstab entry. Open fstab file using your choice of editor.
# vi /etc/fstab
Next, add the following line to it. save and quit the file.
/dev/tecmint_vg/tecmint_lv1 /mnt/tecmint_btrfs1/ btrfs defaults 0 0

27. After mounting, verify whether mount are working after exiting from fstab.
# mount -a
To know more about Btrfs use manual.
# man btrfs
That’s it for now, Here we have seen how to setup brtfs file-system in Linux.
Conclusion
Btrfs file-system are still under experimental (testing) not into production, but soon it will be in production. Hope this article help you to know about the btrfs file-system. Let us know from your side through firing some comments below.




It is very very sad this is the number one search result for creating a btrfs volume. While there might be a reason to use LVM with BTRFS, it is a very niche condition. 99% of users should not be using LVM if they are using btrfs, it is just adding complexity and another point of failure.
As LVM supports caching, you can set up your btrfs logical volumes with an SSD cache. This also open’s up all the LVM tools to you. So, for some, there might be perfectly legitimate reasons to use LVM.
Please revise this guide and remove the LVM parts. It’s so unnecessary!
You wouldn’t put ZFS on LVM, now would you?
BTFS is easy:
Install btrfs-progs and make sure kernel module is loaded…
I seen lvm and thought What ?
I made the mistake of using gpt partition then putting btrfs on that and ouch lost my data later.
Now I make sure to wipe all the partitions from the drives first. Then I create my btrfs partitions.
This seems to work best starting with blank drives.
As the 2 previous posters. No need for LVM with BTRFS and NEVER use “df“, it will give you the wrong information, use “btrfs fylesystem df” instead.
aaahh… why would you ever want to put btrfs on top of lvm2 instead of just using btrfs?
you do know that btrfs is inherently a volume manager as well (just like ZFS), so there is absolutely no need for lvm here