
The Fedora Project announced the availability of Fedora 21 Server on 2014-12-09, Fedora 21 Server edition came with many important changes like:
- Updated software such as Linux kernel 3.17.4 and systemd 215.
- New tools like Cockpit (web-monitoring interface for the server), OpenLMI (a new modern remote management server) and RoleKit (a deployment tool to create server roles).
- Many fixes for some bugs in different Fedora software..
You can view our complete report about the changes in Fedora 21 and how to upgrade from Fedora 20 to 21 using the below link.
If you’re looking for the fresh Fedora 21 Workstation edition installation guide please visit our article about that here.
Download Fedora 21 Server
- Fedora-Server-DVD-i386-21.iso – Size 2.0GB
- Fedora-Server-DVD-x86_64-21.iso – Size 1.9GB
Fedora 21 Server Installation Guide
1. After downloading Fedora 21 Server Image, burn it on a DVD using “Brasero” tool or if you want to burn it on a USB stack use “Unetbootin” software, for more instructions on how to burn and make a bootable USB device, read our article at: Install Linux from USB Device.
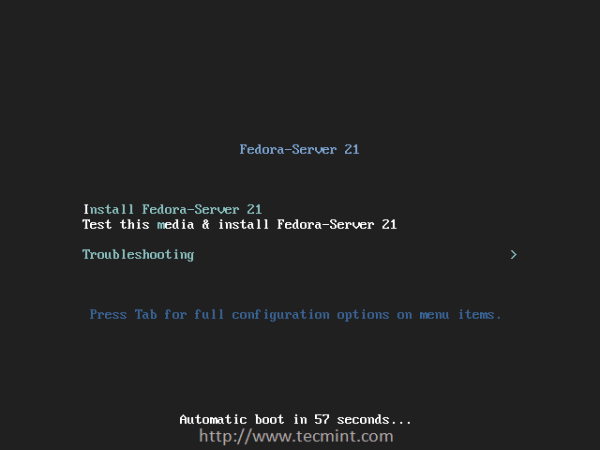
2. After making bootable CD/DVD or USB drive, restart your computer in order to boot from the chosen drive and select “Install Fedora-Server 21” to continue.
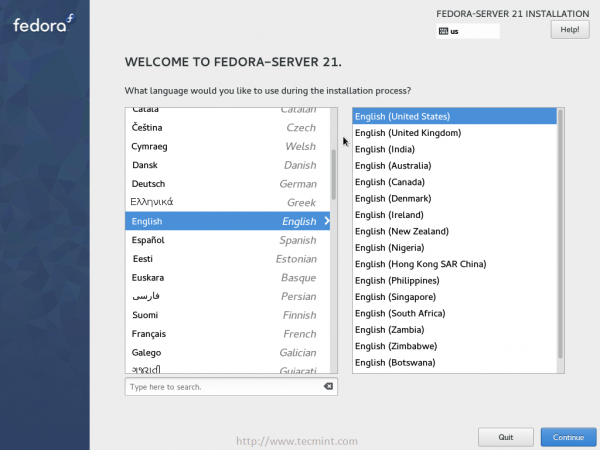
3. You’ll get to the installer directly.. Choose the Language you want.
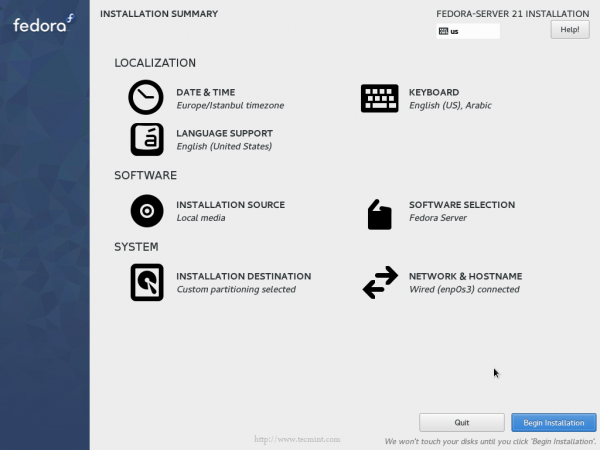
4. Once you select your Language, you’ll see the installation Summary.

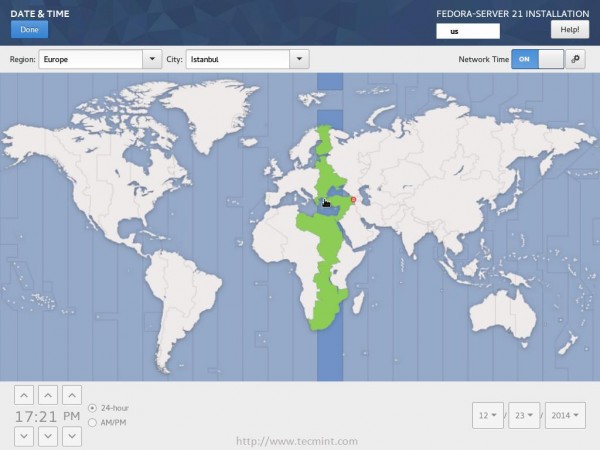
5. Click on “Date & Time” and choose your Time-zone.
6. Go back to the installation summary, and click on “Keyboard” to configure the keyboard layouts.
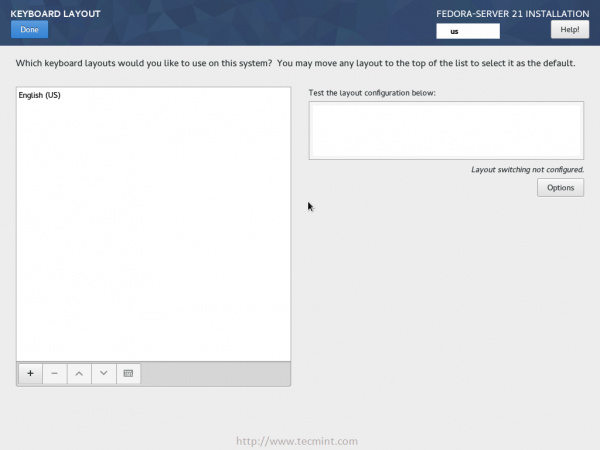
7. Click on the “+” to add a new keyboard layout.
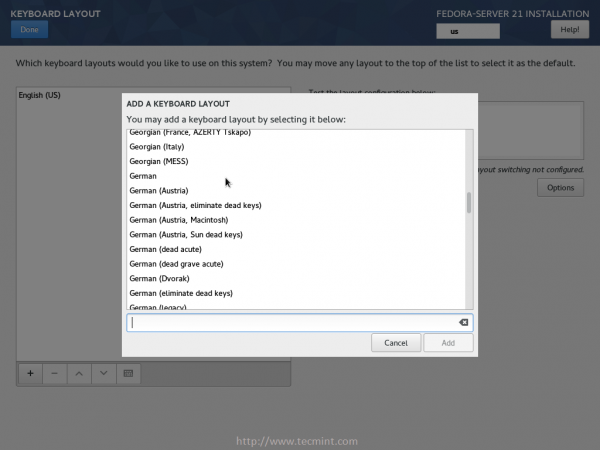
8. And you’ll notice that the layouts that you chose were added..

9. In order to enable switching between layouts, click on the “Options” button on the right and choose “Alt + Shift”.

10. Go back again to the Summary.. and choose “Language Support” and mark the languages pack that you want to install.

11. Head to the summary page again.. and enter “Installation Source”.
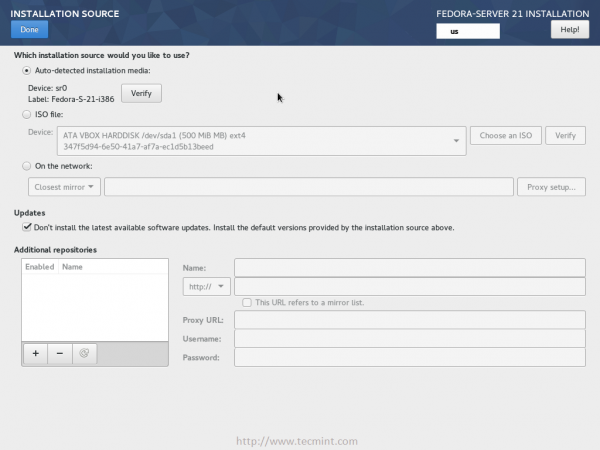
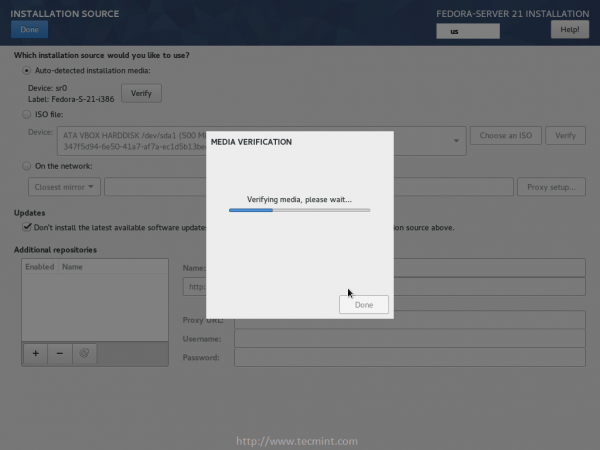
There’s nothing important to do here.. But if you want, you can verify the installation media by click on the “Verify” button.
If you want to check for the latest updates and install them, you uncheck the “Don’t install the latest available software updates..” box,
click on the “Done” button to go back.
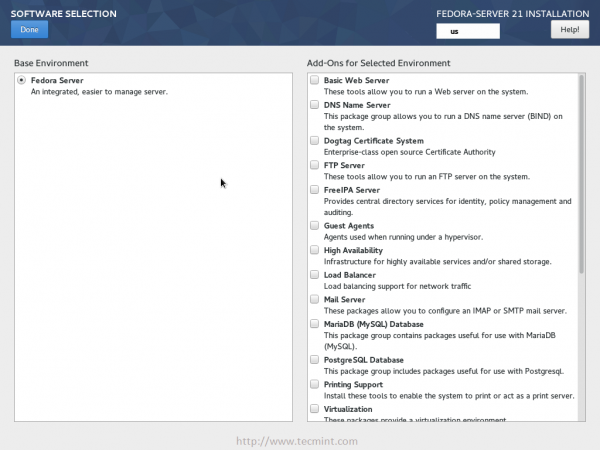
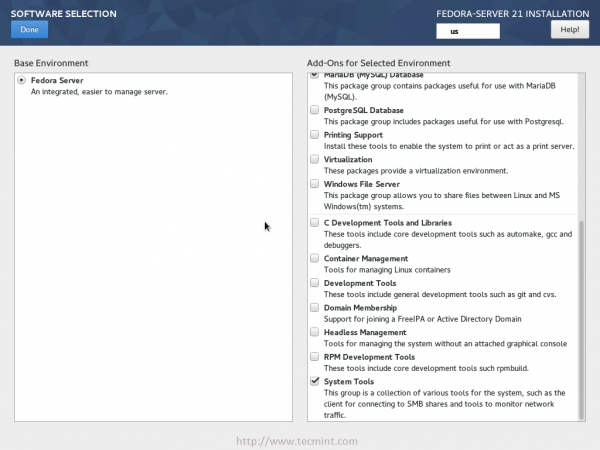
12. Choose “Software Selection”, in this dialog, you can choose the software that you want to be installed from the DVD or USB, choose anything
you want depending on your needs.
13. When you finish selecting packages.. Go back and click on “Installation Destination”.

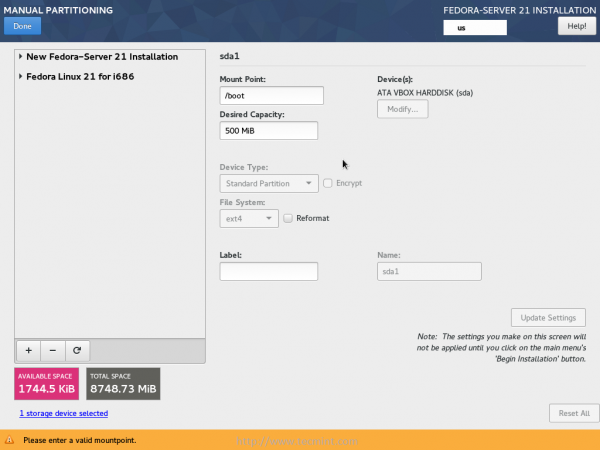
In this area, you’ll have to configure the hard drive that you want to install Fedora Server 21 on it.. Choose the hard drive first from the “Local Standard Disks” frame, then under “Other Storage Options” flag the “I will configure partitioning” check box and click on “Done”.
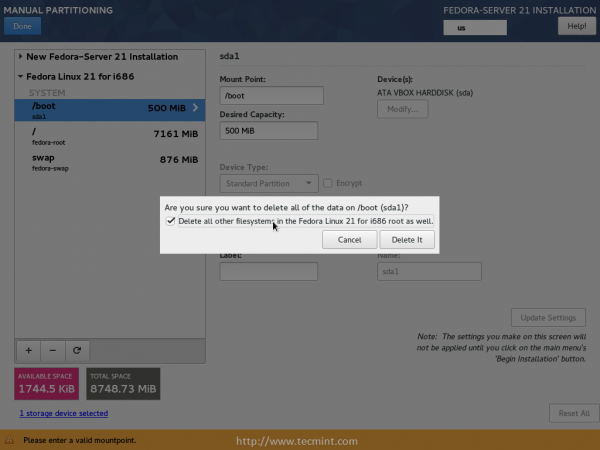
14. Now as you can see.. I have Fedora 21 Workstation installed on my hard drive, I’ll have to remove its partitions completely in order to install Fedora 21 Server on them.
Choose the partitions you want to remove.

Next, click on the “–” button, and check the “Delete all other filesystems in the Fedora Linux..” checkbox (Note: that it will delete everything on those partitions, so be careful).
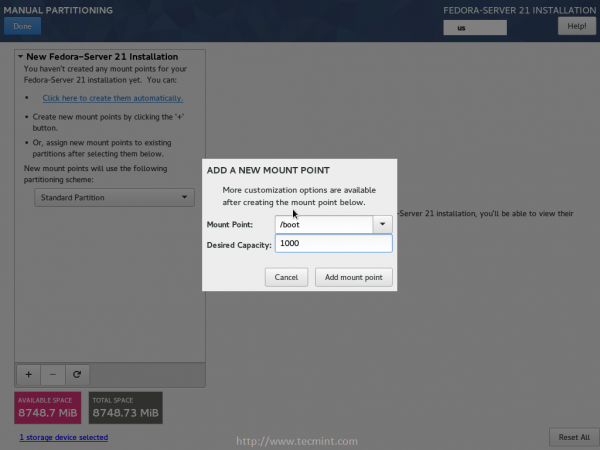
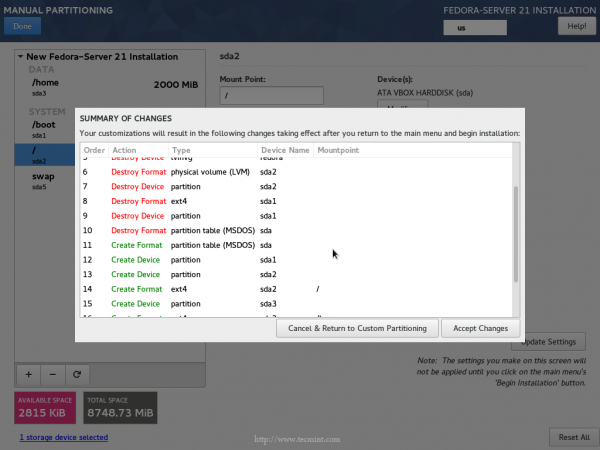
15. Now that you have free space on your hard drive, we’ll create 4 partitions, one for root, one for home, one for boot and a swap partition.

Click on the “+” button and add a boot partition, enter the size you want for it.

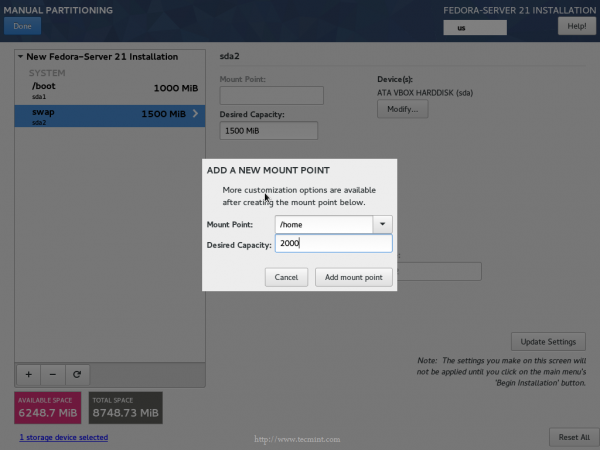
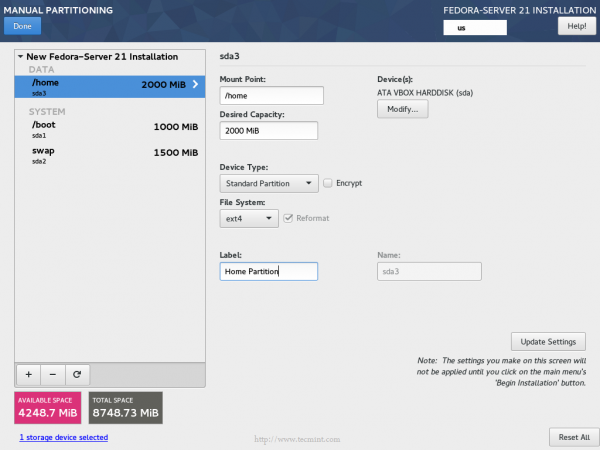
16. Click on the “+” button again, and add a /home partition.
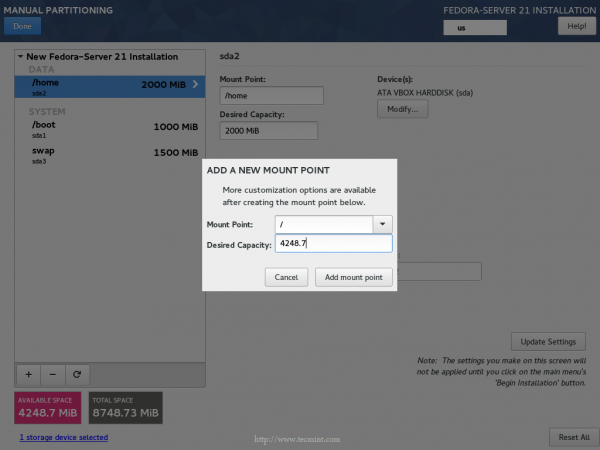
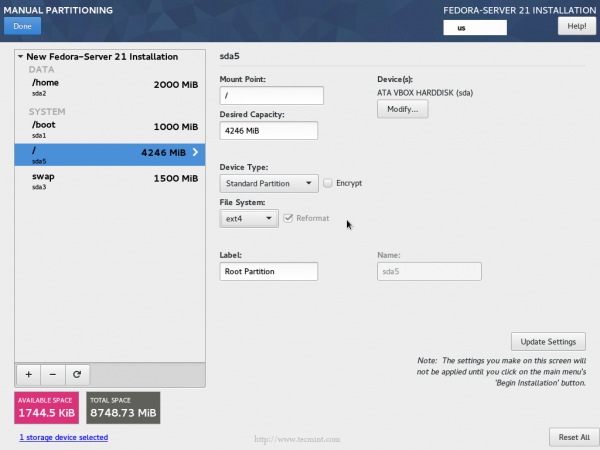
17. Do the same thing again.. and add a new root (/) partition.
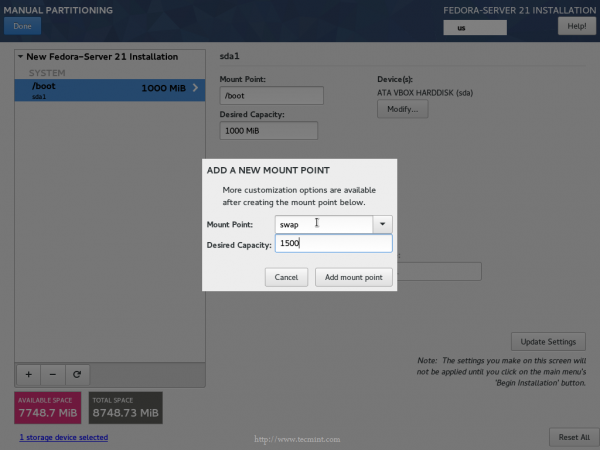
18. Finally, create a Swap partition (its size must be the double of your RAM size).

19. After creating all above partitions, click on the “Done” button and confirm.
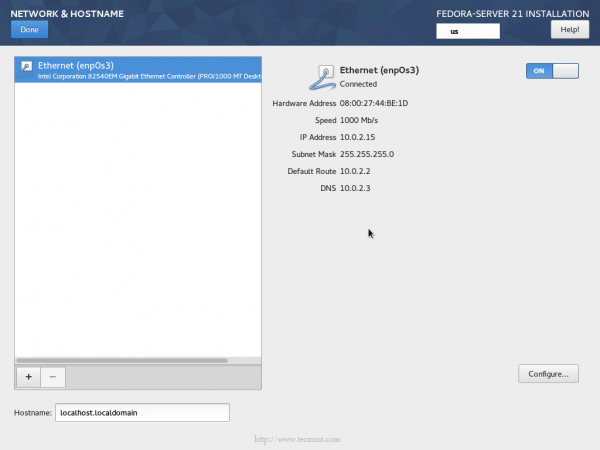
20. Go back to the Summary page and choose “Network & Hostname”, you can configure the network interfaces from here if you want, though you
won’t need it right now.
21. Now click on the “Begin installation” button on the right bottom corner.
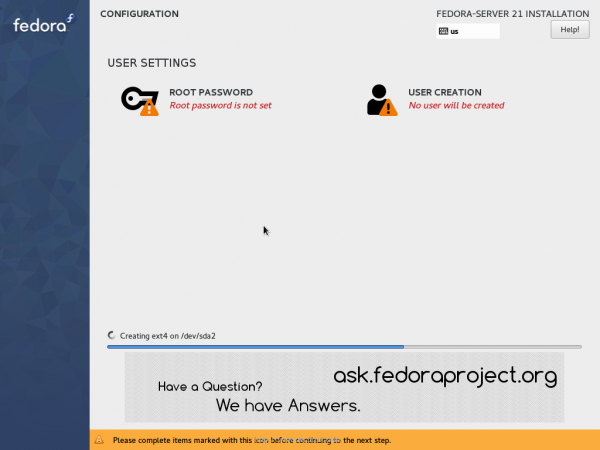
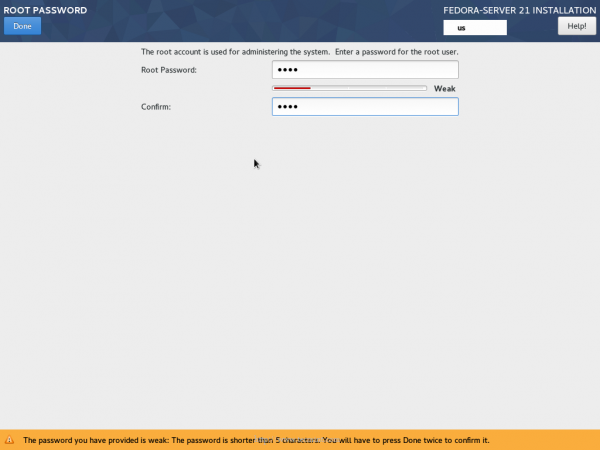
22. You must create a root password, click on the “Root Password” button in order to do so.
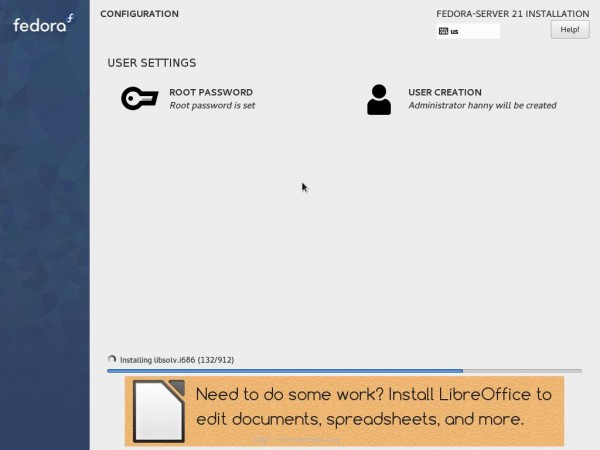
23. Go back and click on “User Creation” to create a normal user for the system, enter a user name and a password and click on “Done”.

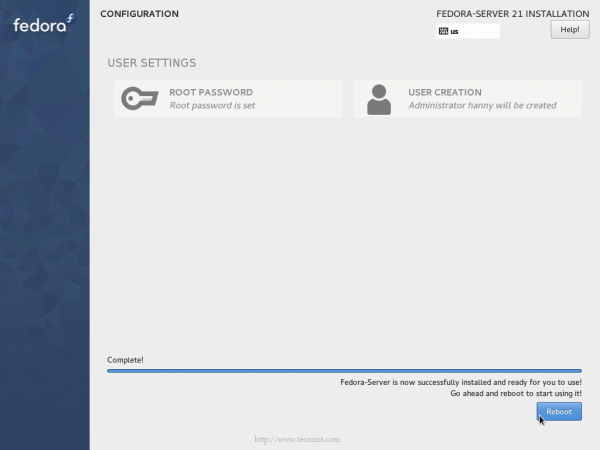
24. That’s it for now.. Wait the installation process to be completed.
25. When the it’s completed, you can now reboot the system in order to start using the new system.
That’s it! Don’t forget to unplug the installation media from the computer, so that you don’t boot it again.
Congratulations! your Fedora 21 Server is up-and-ready for use.


Many thanks, Ravi & Rashid. I have not yet installed, I am waiting for the purchase of a new machine. I plan to use one of AsusTek’s new “milspec” series boards with a 1/2 Tb/ or maybe 1 Tb. SSD to boot from, and a minimal LVM.
However, I wonder abouit having a second LVM? If so, and I have to reinstall the basic system, will I then lose the data in the second LVM?
I Currently have an Asius Maximus VI for my main workstation, but I make minimal use of the LVM for working data. Instead, I have 2 more 4 Tb. WD Red drives for the working data, and back up to 2 more NAS boxes from that, using a lot of Filezilla FTP, and a lot of filtering to get rid of garbage data arising out of characters that don’t suit my code page, 0 data files, etc.
I also use several docking stations (“Toasters”) and 2w mof Medicaonscs USB3 RAID boxes, each configured with 2 WD 4Tb. RED drives in firmware managed RAID0 volumes.
Some of those external drives, I hope to use with the server, as a way of reducing the processor burden on the main machine which arises from all the Filezilla filtering and sorting as it backs up file by file.
Drives used in the “Toasters” will be a way of having offline backups that are not powered until needed. Those drives can than be stored in metal toolboxes as a partial hedge against print through from the earth’s magnetic field.
but I really don’t like having to work in console mode. For SU, I think I have seen an RPM package that will allow the GUI to work as SU. That T.B.D. in forther experimenting.
@Bruce,
No you will not loose any data, as you can use second LVM as storage and first LVM for OS installation..
السلام عليكم ورحمة الله تعالى وبركاته انا عايز استفسر كيف اقوم بفتح واجهة المستخدم بعد ان اكملت التنصيب
English Version
Peace , mercy and blessings of God Almighty , I Want to Ask How do I open the user interface after the completed installation
@Almnssor,
After reboot, you will see you a Deskop Login, just enter username and password to get User interface…
Dear After Installation how i got to GUI Interface,
Before some minutes i install fedora server 20 in my laptop ( My wish is dual booting installation ) but i lost my window 8 , :D but no problem when my installation finish they ask the Root user name and i give command ( init 5 ) not goes to GUI, how i goes to GUI.
@Rashid,
You’ve selected Federa 21 Server installation, which doesn’t provide any GUI mode, in order to have GUI on Fedora 21 Server, you need to install GNOME3 Desktop Environment using following command.