Are you looking for a simple method to connect to the Ubuntu desktop/server from your Mac? The reasons could vary, whether you’re working remotely and want to access your remote Ubuntu machine, assisting a friend or colleague with an Ubuntu system, or retrieving files from your Ubuntu desktop while on vacation. Whatever the reason, you don’t have to fuss over it anymore.
In this exceptionally simple blog post, we will assist you in connecting to a remote Ubuntu desktop from a Mac, and even to a remote Mac from Ubuntu.
Table of Contents
Remote Connections in Ubuntu
While we are talking about remote desktop connections, let’s first understand how we can create remote connections on an Ubuntu desktop. Essentially, Ubuntu comes by default with a remote desktop tool that allows its users to access their machine from other platforms, including MacOS, Windows, Linux, Android, and even iOS.
This fantastic remote desktop tool provides three options for connecting with these platforms:
For this blog post, we’ll focus on VNC, which is a remote desktop protocol that utilizes the RFB (“Remote Frame Buffer”) protocol to share a graphical desktop remotely.
Prerequisites
- You must have a Ubuntu desktop and a Mac with a stable internet connection.
- Moreover, you should know the IP address and user credentials of both machines.
Without ado, let’s begin with the process of creating a remote connection on Ubuntu and accessing it from your Mac machine.
Remote Desktop Connection from Mac to Ubuntu
To access the Ubuntu from your MacOS, you must enable remote desktop sharing on Ubuntu.
Enable Desktop Sharing In Ubuntu
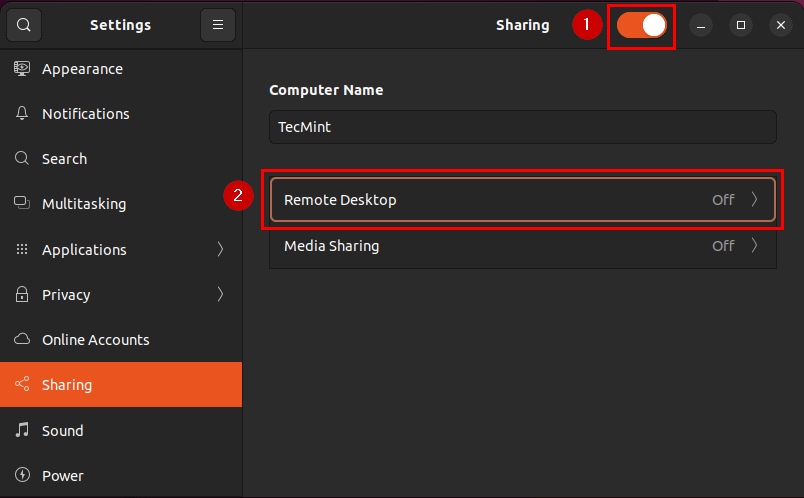
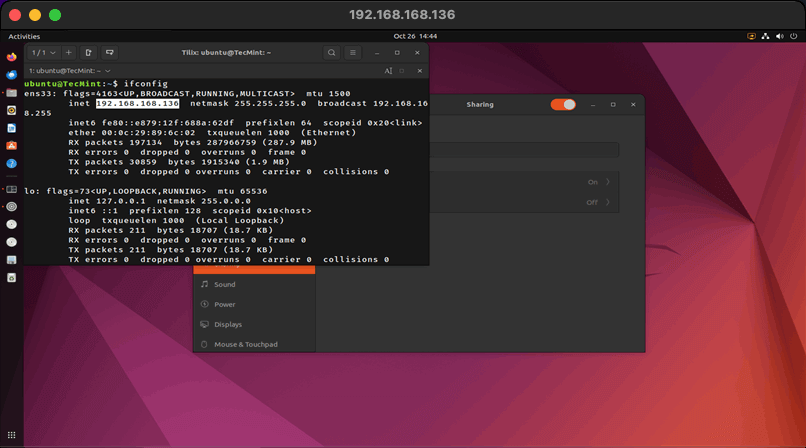
For that purpose, power on the Ubuntu desktop and click on the “Wired connections” icon placed in the top bar of your screen. Then, press on the “Settings” option to open the Settings application. Once it is open, select the “Sharing” tab from the side-bar:
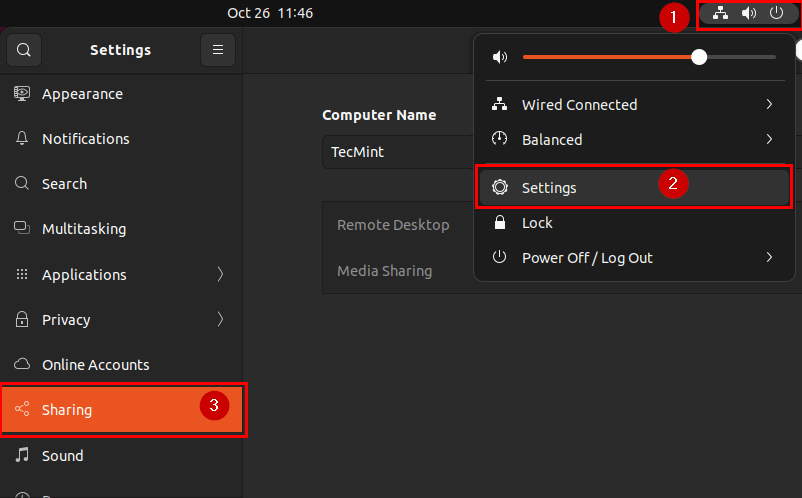
Next, you must enable sharing by clicking on the “Sharing” toggle button on the top right corner of the Settings window. After enabling sharing, click on the “Remote Desktop” option.
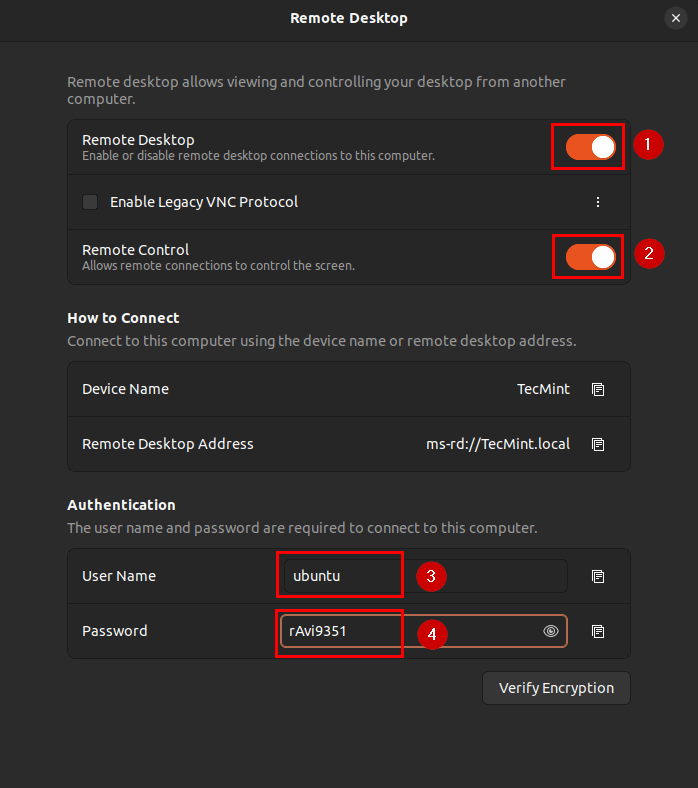
Finally, you must activate the “Remote Desktop” and “Remote Control” options. Additionally, set strong credentials for remote connection authentications.
Note: You can also check the “Enable Legacy VNC Protocol” option to ensure a smooth connection because some VNC Clients, such as the built-in macOS VNC client may have compatibility issues with the default protocol.
Access Ubuntu Desktop Remotely from Mac
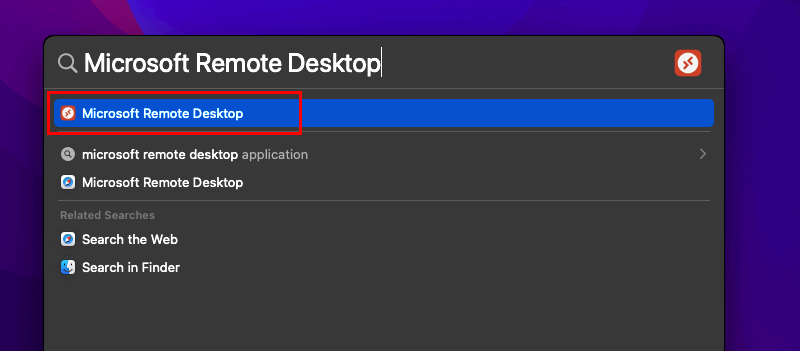
Now that you’ve enabled the remote desktop option on the Ubuntu desktop, let’s search for the “Microsoft Remote Desktop” (default Remote Desktop client) option and open it on our Mac.
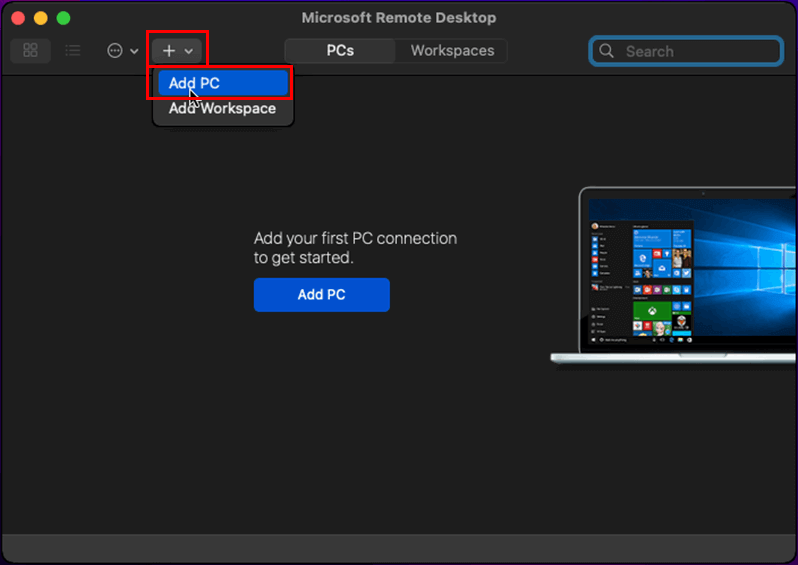
Next, click on the “+” icon and choose “Add PC” from the Microsoft Remote Desktop window.
Now, in the “Add PC” window, carefully provide the remote PC’s (Ubuntu Desktop) IP Address and click on the “Add” button.
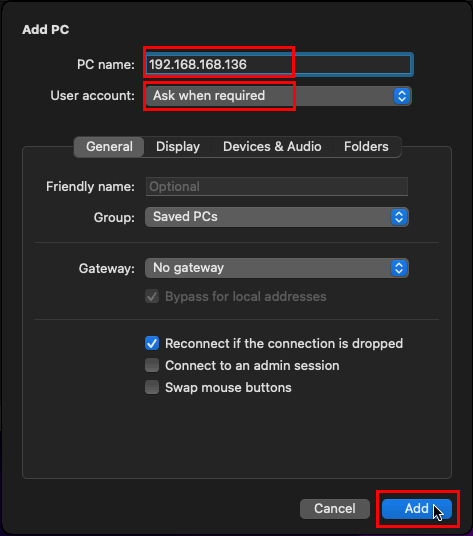
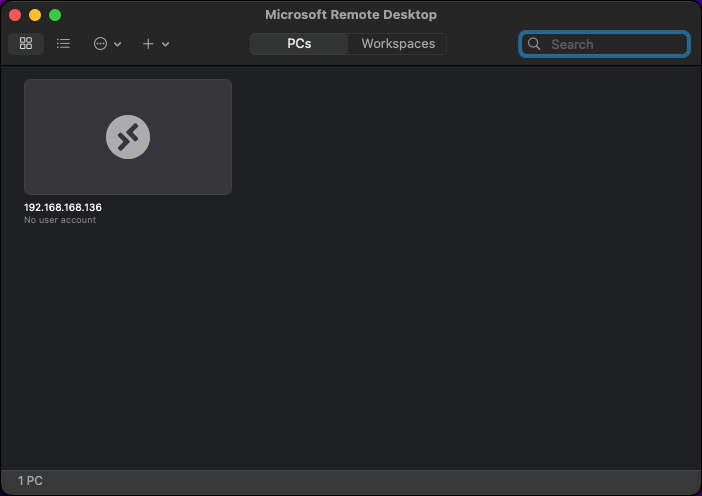
Once the remote PC’s information is successfully saved as a connection, click on it to connect with it.
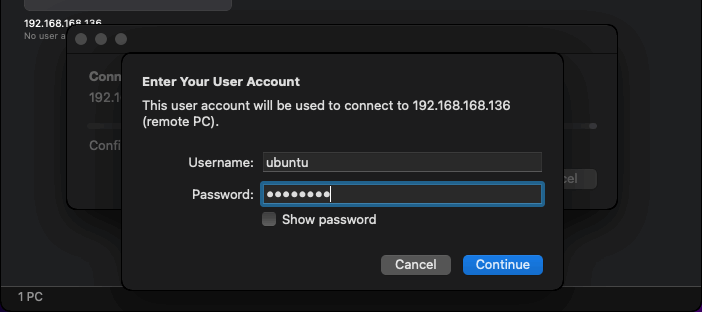
A prompt will pop up, enquiring about the user credentials of the remote desktop (Ubuntu). Provide the remote PC’s credentials and press the “Continue” button.
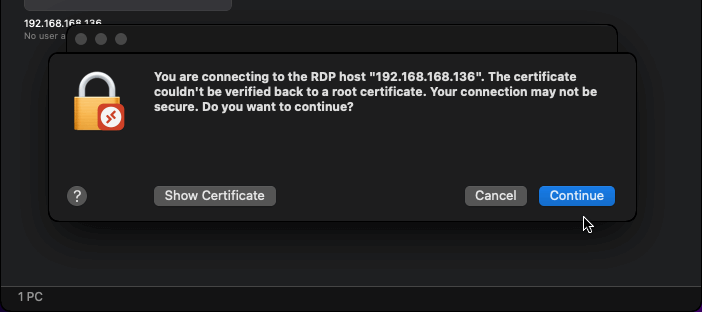
Don’t panic by this secure connection prompt, simply press the “Continue” button.
Your Mac system will successfully connect to the remote Ubuntu Desktop in the form of a window.
Enable Desktop Sharing In Mac
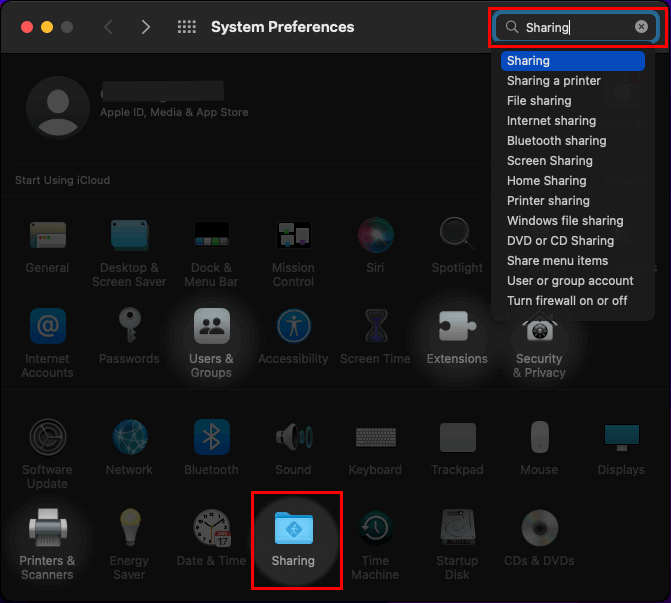
To connect to a Mac remotely via Ubuntu, you first need to enable a remote connection on your Mac. To do so, click on the “Apple” logo and choose the “System Preferences” option from the list on your Mac.

Next, locate and open the “Sharing” application.
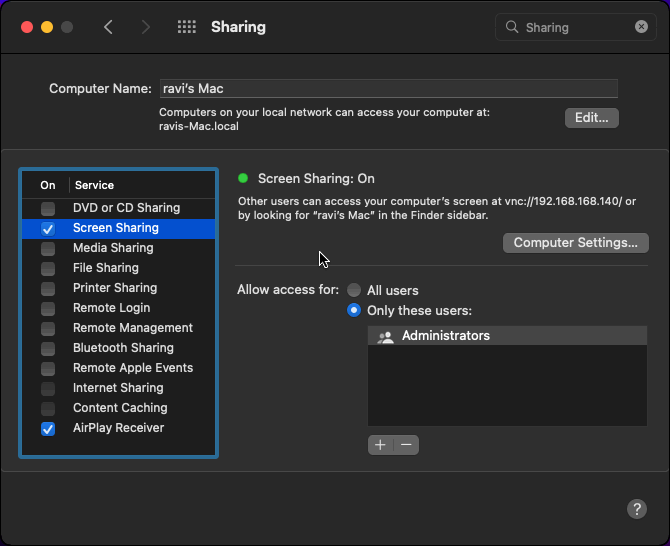
Moving forward, check the “Screen Sharing” service checkbox. Then, you can adjust the user permissions and the computer name according to your requirements. Finally, click on the “Computer Settings” button.
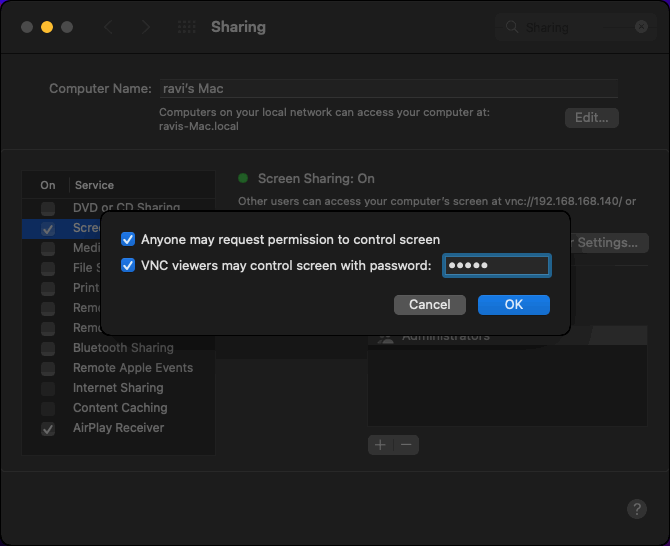
Check both checkboxes, set the screen-sharing password, and click on the “OK” button.
Finally, your remote connection on Mac is successfully enabled. You can now head to your Ubuntu desktop to access Mac using the VNC client.
Access Mac Remotely from Ubuntu
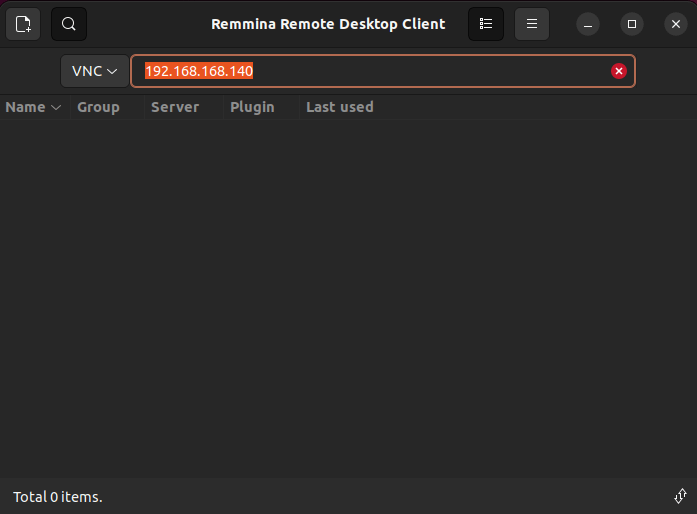
In Ubuntu, search for ‘Remmina‘ (the default remote desktop client), open it, select the VNC protocol, and enter the IP address of your remote Mac desktop.
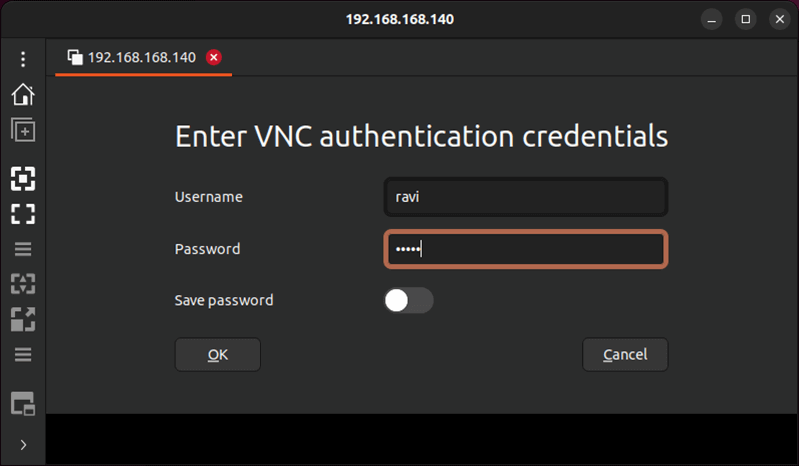
Next, provide the user credentials of your remote desktop and press the “OK” button.
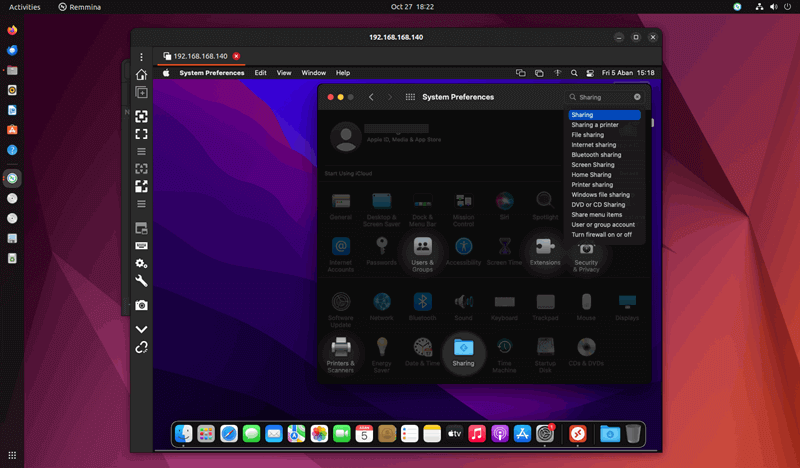
Congrats! You have successfully connected to Mac from Ubuntu using VNC protocol.
Conclusion
If you need to connect to your Ubuntu desktop remotely from your Mac, follow the simple guide above to do so quickly and efficiently. We have also explained the vice-versa scenario even step by step.
Our blog uses the VNC protocol for remote connections, which means you will be able to access the graphical interface of your remote desktop.


