Apache Pinot is a real-time distributed OLAP datastore designed to answer OLAP queries with low latency. It is often used in conjunction with Apache Kafka for real-time data ingestion and analysis.
This guide will walk you through the steps required to install Apache Pinot on a Linux system. We’ll cover prerequisites, downloading and extracting the software, setting up configurations, and starting the services.
Prerequisites
Before installing Apache Pinot, ensure your system meets the following prerequisites:
- Apache Pinot requires Java Development Kit (JDK) 8 or above to run.
- Apache Pinot uses Apache Zookeeper for cluster management.
- Ensure your firewall settings allow the necessary ports for Pinot and Zookeeper to communicate.
Step 1: Installing Java in Linux
If you do not have Java installed on your system, you can download and install it from the official Oracle website.
For most Linux distributions, you can use the package manager to install Java. For example, on Debian-based systems, you can use the following command.
sudo apt-get install default-jdk
On Red Hat-based systems, you can use the following command.
sudo dnf install java-21-openjdk -y
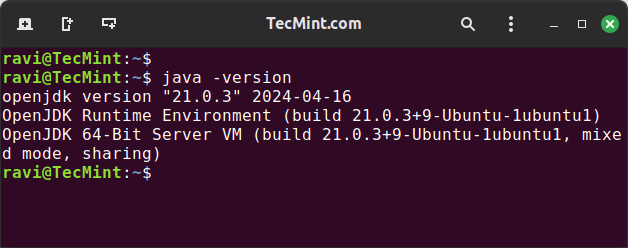
After the installation is complete, you can verify the Java version by running the following command.
java -version

Step 2: Installing Zookeeper in Linux
Zookeeper is required by Apache Pinot for cluster management, so install it using the following command.
sudo apt install zookeeperd         [On Debian-based Systems]
sudo dnf install zookeeperd         [On RHEL-based Systems]
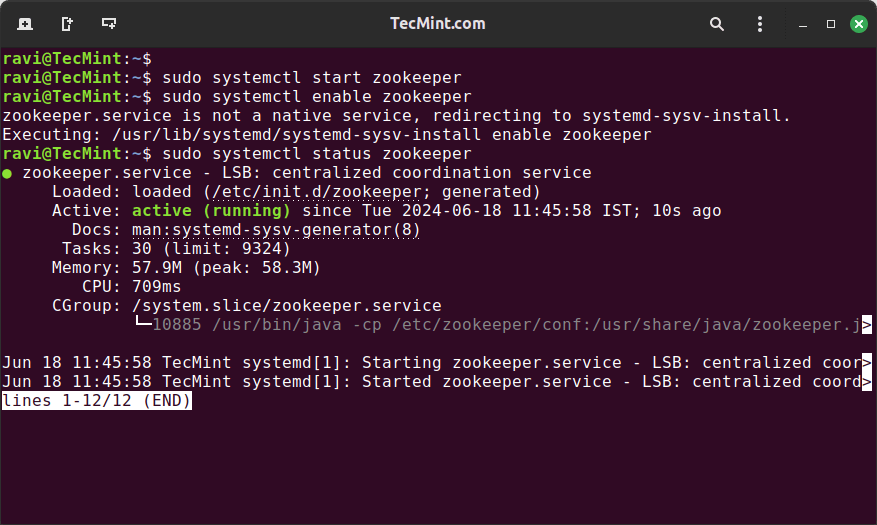
Once installed, start, enable, and verify the status of the Zookeeper service.
sudo systemctl start zookeeper
sudo systemctl enable zookeeper
sudo systemctl status zookeeper

Step 3: Installing Apache Pinot in Linux
Download the latest version of Apache Pinot from the official Apache Pinot website or use the following wget command to download it directly.
wget https://downloads.apache.org/pinot/apache-pinot-1.1.0/apache-pinot-1.1.0-bin.tar.gz
Next, extract the downloaded tarball to a desired location, and set up environment variables for easier access to Pinot binaries in your .bashrc or .profile file.
sudo tar -xvzf apache-pinot-1.1.0-bin.tar.gz -C /opt
echo 'export PINOT_HOME=/opt/apache-pinot-1.1.0-bin' >> ~/.bashrc
echo 'export PATH=$PINOT_HOME/bin:$PATH' >> ~/.bashrc
source ~/.bashrc
Step 4: Starting Apache Pinot Services
Apache Pinot consists of several components, each running as a separate service and these are:
- Controller: Manages the Pinot cluster and handles schema and table creation.
- Broker: Handles query routing.
- Server: Stores and serves the data.
- Minion: Performs background tasks like data compaction and roll-up.
Start each service in separate terminal windows or as background processes:
Start the Controller:
cd $PINOT_HOME
bin/pinot-admin.sh StartController -configFileName conf/pinot-controller.conf
Start the Broker:
cd $PINOT_HOME
bin/pinot-admin.sh StartBroker -configFilePath conf/pinot-broker.conf
Start the Server:
cd $PINOT_HOME
bin/pinot-admin.sh StartServer -configFilePath conf/pinot-server.conf
Start the Minion:
cd $PINOT_HOME
bin/pinot-admin.sh StartMinion -configFilePath conf/pinot-minion.conf
Verify that all services are running by checking their respective logs in the logs directory within PINOT_HOME.
Step 5: Configuring Apache Pinot
Apache Pinot requires a schema and table configuration to start ingesting and querying data.
Create a directory to store your configuration files:
sudo mkdir $PINOT_HOME/configs
Create a schema file, for example my_schema.json, in the configs directory.
sudo nano $PINOT_HOME/configs/my_schema.json
Add the following schema configuration.
{
  "schemaName": "mySchema",
  "dimensionFieldSpecs": [
    {
      "name": "myDimension",
      "dataType": "STRING"
    }
  ],
  "metricFieldSpecs": [
    {
      "name": "myMetric",
      "dataType": "LONG"
    }
  ],
  "dateTimeFieldSpecs": [
    {
      "name": "myDateTime",
      "dataType": "LONG",
      "format": "1:MILLISECONDS:EPOCH",
      "granularity": "1:MILLISECONDS"
    }
  ]
}
Next, create a table configuration file, for example my_table.json, in the configs directory.
sudo nano $PINOT_HOME/configs/my_table.json
Add the following table configuration.
{
  "tableName": "myTable",
  "tableType": "REALTIME",
  "segmentsConfig": {
    "timeColumnName": "myDateTime",
    "schemaName": "mySchema",
    "replication": "1"
  },
  "tableIndexConfig": {
    "loadMode": "MMAP"
  },
  "tenants": {},
  "tableRetentionConfig": {},
  "ingestionConfig": {
    "streamIngestionConfig": {
      "type": "kafka",
      "streamConfigMaps": {
        "streamType": "kafka",
        "stream.kafka.topic.name": "myKafkaTopic",
        "stream.kafka.broker.list": "localhost:9092",
        "stream.kafka.consumer.type": "simple",
        "stream.kafka.consumer.prop.auto.offset.reset": "smallest",
        "realtime.segment.flush.threshold.size": "50000"
      }
    }
  },
  "metadata": {}
}
Now use the Pinot admin tool to add your schema and table configurations:
bin/pinot-admin.sh AddSchema -schemaFile $PINOT_HOME/configs/my_schema.json -exec
bin/pinot-admin.sh AddTable -tableConfigFile $PINOT_HOME/configs/my_table.json -exec
Step 6: Verify Apache Pinot Setup
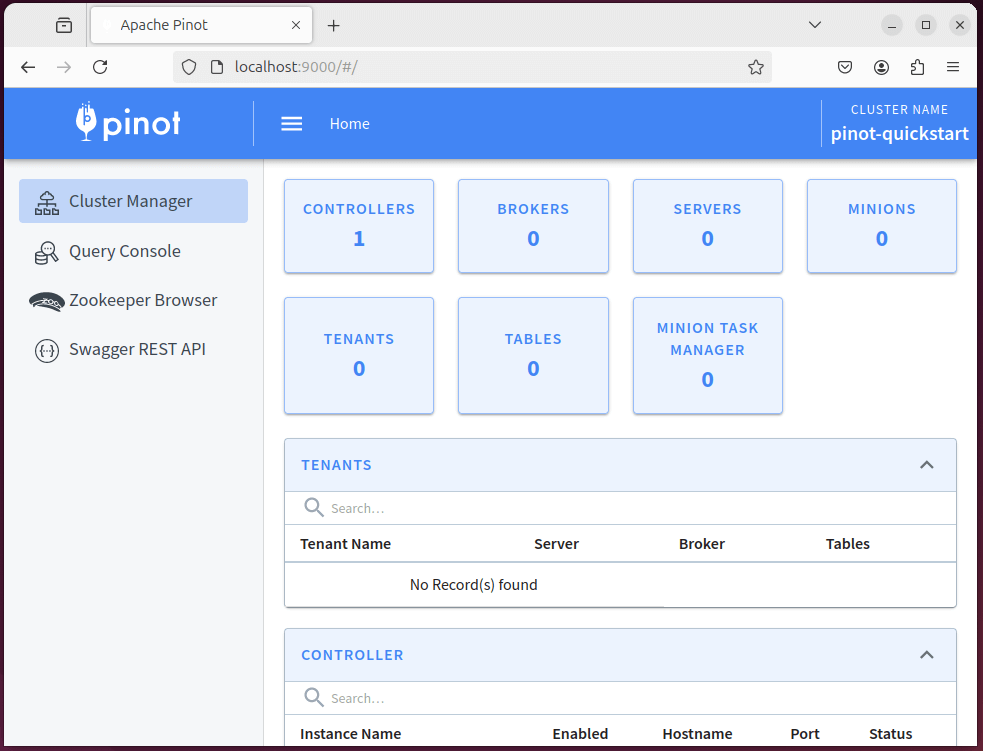
Open a web browser and go to the Pinot Controller UI to verify that your schema and table have been added successfully.
http://localhost:9000

You can query data using the Pinot Query Console available in the Controller UI or by using the Pinot query command-line tool:
bin/pinot-admin.sh Query -brokerHost localhost -brokerPort 8099 -query "SELECT * FROM myTable LIMIT 10"
Conclusion
Installing Apache Pinot on a Linux system involves several steps, including installing Java and Zookeeper, downloading and extracting the Pinot binaries, starting the Pinot services, and configuring your schema and tables.
By following this guide, you should have a running instance of Apache Pinot ready to handle real-time OLAP queries. For further customization and optimization, refer to the official Apache Pinot documentation.


