If you want to run web pages that include Java server page coding or Java servlets, you can use Apache Tomcat. It is an open source web server and servlet container, released by Apache Software Foundation.
Tomcat can be used as a standalone product, with its own web server or it can be combined with other web servers such as Apache or IIS. The most recent version of Tomcat is 9.0.14 and it builds on top of Tomcat 8 and 8.5 and implements Servlet 4.0, JSP 2.2.
Read Also: How to Install Apache Tomcat 9 in CentOS/RHEL
The following improvements have been made in the new version:
- Added support for HTTP/2.
- Added support for using OpenSSL for TLS support with the JSSE connectors.
- Added support for TLS virtual hosts (SNI).
In this tutorial we are going to show you how to install Apache Tomcat 9 in Ubuntu 18.10 and older version of Ubuntu.
Step 1: Installing Java
To run Java web applications, Tomcat requires Java to be installed on the server. To meet that requirement, we will install OpenJDK as shown.
$ sudo apt update
$ sudo apt install default-jdk
Step 2: Creating a Tomcat User
For security reasons, Tomcat should be ran with a non-privileged user i.e non root. That is why we will create user and group tomcat that will run the service. Start by creating the tomcat group:
$ sudo groupadd tomcat
Next we will create a tomcat user, that will be member of the tomcat group. The home location of this user will be /opt/tomcat as this is where we are going to install Tomcat. The shell be set to /bin/false:
$ sudo useradd -s /bin/false -g tomcat -d /opt/tomcat tomcat
Now we are ready to proceed next step and download Tomcat.
Step 3: Installing Apache Tomcat
To download the latest available package, head to Tomcat’s download page and grab the latest version.
At the time of writing this tutorial, the latest version of Tomcat is 9.0.14. To download that version, change your current directory to something else. For example you can use /tmp:
# cd /tmp
And then using wget command to download the Tomcat archive:
$ wget http://apache.cbox.biz/tomcat/tomcat-9/v9.0.14/bin/apache-tomcat-9.0.14.tar.gz
$ wget https://www.apache.org/dist/tomcat/tomcat-9/v9.0.14/bin/apache-tomcat-9.0.14.tar.gz.sha512
If you want to verify the sha512 sum of the file you can run:
$ sha512sum apache-tomcat-9.0.14.tar.gz
$ cat apache-tomcat-9.0.14.tar.gz.sha512
The resulting value (hash) for both files should be the same.
As earlier mentioned, we are going to install Tomcat in /opt/tomcat. We will have to create that directory:
$ sudo mkdir /opt/tomcat
And now we can extract the downloaded package in that new directory:
$ sudo tar xzvf apache-tomcat-9.0.14.tar.gz -C /opt/tomcat --strip-components=1
Now navigate to /opt/tomcat from where we will update the folder ownership and permissions:
# cd /opt/tomcat
And set group owner of /opt/tomcat to tomcat:
$ sudo chgrp -R tomcat /opt/tomcat
We will next update the read access of tomcat group over the conf directory and set execute permissions to the directory:
$ sudo chmod -R g+r conf
$ sudo chmod g+x conf
Next we will make tomcat user owner of the webapps, work, temp and logs directories:
$ sudo chown -R tomcat webapps/ work/ temp/ logs/
Now the proper permissions and ownerships have been set and we are ready to create a systemd start file, which will help us manage the Tomcat process.
Step 4: Creating a SystemD Service File for Tomcat
Because we want to run Tomcat as a service, we will need to have a file which will help us easily manage the process. For that purpose we will create a systemd service file. Tomcat will have to know where Java is located on your system.
To find that location use the following command:
$ sudo update-java-alternatives -l
The output of that command will show you the location of the JAVA_HOME.

Now, using that information we are ready to create our Tomcat service file.
$ sudo vim /etc/systemd/system/tomcat.service
Paste the code below in the file:
[Unit]
Description=Apache Tomcat Web Application Container
After=network.target

[Service]
Type=forking

Environment=JAVA_HOME=/usr/lib/jvm/java-1.11.0-openjdk-amd64
Environment=CATALINA_PID=/opt/tomcat/temp/tomcat.pid
Environment=CATALINA_HOME=/opt/tomcat
Environment=CATALINA_BASE=/opt/tomcat
Environment='CATALINA_OPTS=-Xms512M -Xmx1024M -server -XX:+UseParallelGC'
Environment='JAVA_OPTS=-Djava.awt.headless=true -Djava.security.egd=file:/dev/./urandom'

ExecStart=/opt/tomcat/bin/startup.sh
ExecStop=/opt/tomcat/bin/shutdown.sh

User=tomcat
Group=tomcat
UMask=0007
RestartSec=10
Restart=always

[Install]
WantedBy=multi-user.target
Make sure to set JAVA_HOME with the one for your system. When you are ready, save the file and close it. Now, using the command below, reload the systemd daemon so it can find our new service file:
$ sudo systemctl daemon-reload
Then start the Tomcat service:
$ sudo systemctl start tomcat
You can verify the service status with:
$ sudo systemctl status tomcat
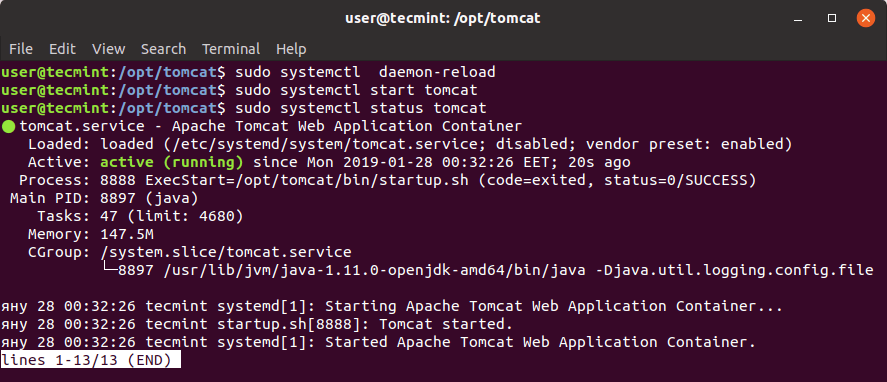
You can now test Tomcat in your browser by using your system’s IP address followed by the service default port 8080.
http://ip-address:8080
The result you should see be similar to the one shown in the image below:
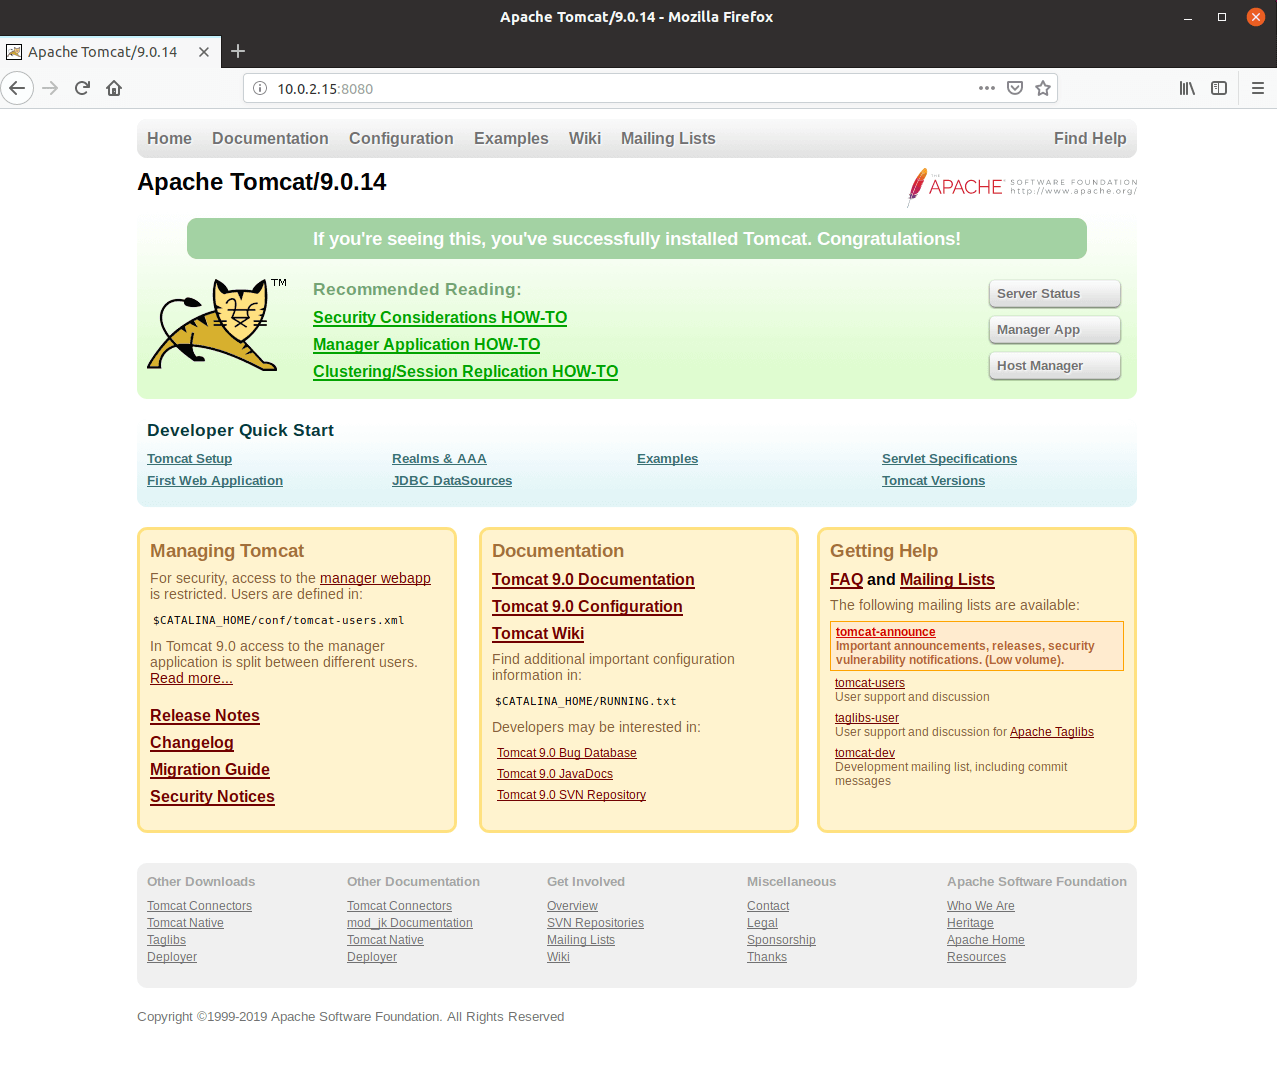
In case you are not seeing the above output, you may need to allow port 8080 in your firewall as shown.
$ sudo ufw allow 8080
If you want Tomcat to start on system boot, run:
$ systemctl enable tomcat
Step 5: Configuring Apache Tomcat
Tomcat has a web manager app that comes preinstalled. In order to use it, we will need to setup authentication within our tomcat-users.xml file. Open and edit that file with your favorite text editor:
$ sudo vim /opt/tomcat/conf/tomcat-users.xml
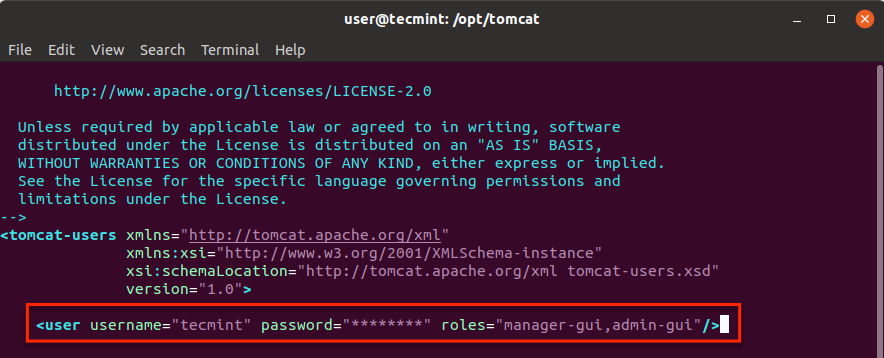
We are going to add a user that will be able to access the manager and admin interfaces. To configure such user, between the <tomcat-users> </tomcat-users> tags, add the following line:
<user username="Username" password="Password" roles="manager-gui,admin-gui"/>
Make sure to change:
- Username – with the user you wish to authenticate.
- Password – with the password you wish to use for authentication.
Since by default access to the Host Manager and Manager is restricted, we will want to either remove or alter these restrictions. To make such changes you can load the following files:
For Manager app:
$ sudo vim /opt/tomcat/webapps/manager/META-INF/context.xml
For Host manager app:
$ sudo vim /opt/tomcat/webapps/host-manager/META-INF/context.xml
Inside those files you can either comment the IP restriction or allow your public IP address in there. For the purpose of this tutorial, I have commented the line:

To make our changes live, reload the tomcat service with:
$ sudo systemctl restart tomcat
You can now test the manager app by accessing http://ipaddress:8080/manager/. When prompted for username and password, use the ones that you have configured earlier. The interface you should see after that looks like this:
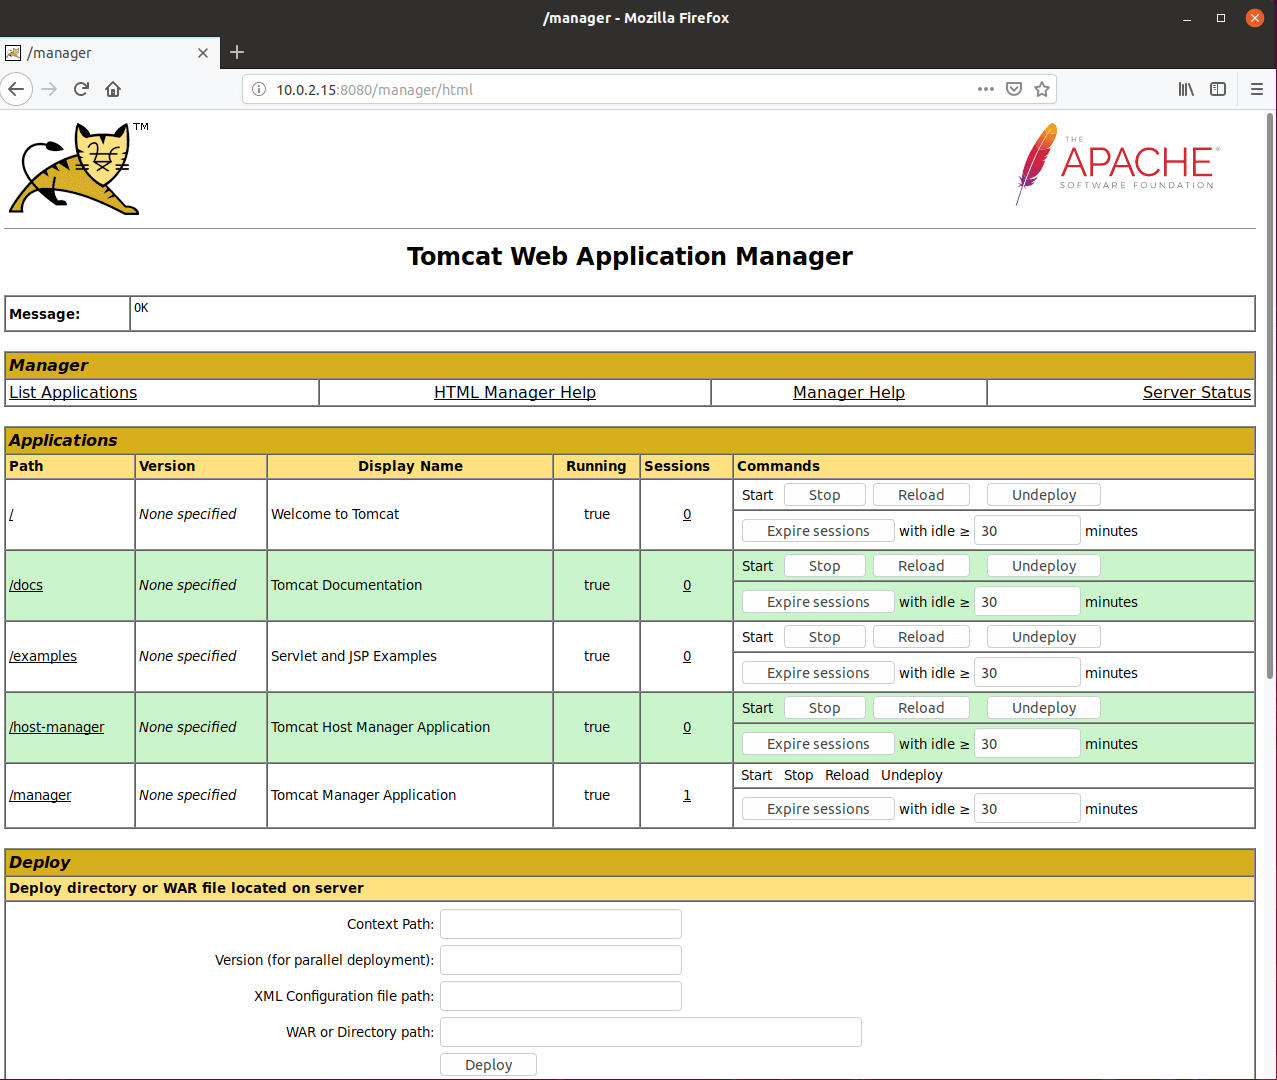
To access the Host manager, you can use http://ip-address:8080/host-manager/.
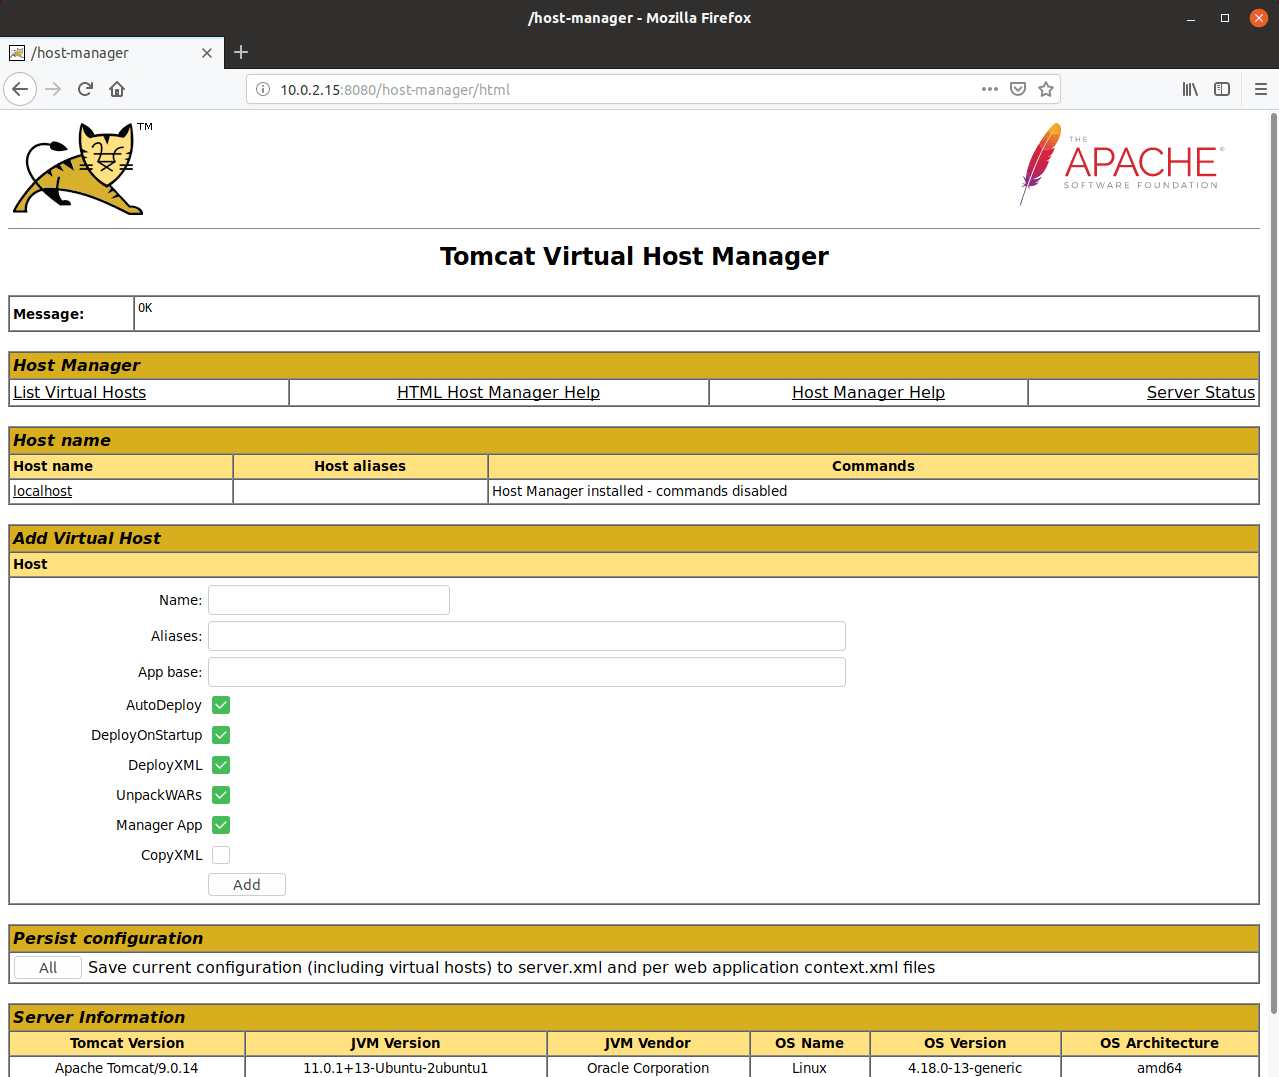
Using the virtual host manager, you can create virtual hosts for your Tomcat applications.
Step 6: Testing Apache Tomcat By Creating a Test File
You can check if everything is working smoothly, by creating a test file inside of /opt/tomcat/webapps/ROOT/ directory.
Let’s create such file:
$ sudo vim /opt/tomcat/webapps/ROOT/tecmint.jsp
Inside that file paste the following code:
<html>
<head>
<title>Tecmint post:TomcatServer</title>
</head>
<body>

<START OF JAVA CODES>
<%
    out.println("Hello World! I am running my first JSP Application");
    out.println("<BR>Tecmint is an Awesome online Linux Resource.");
%>
<END OF JAVA CODES>

</body>
</html>
Save the file and set the ownership as shown.
$ sudo chown tomcat: /opt/tomcat/apache-tomcat-8.5.14/webapps/ROOT/tecmint.jsp
Now load that file in your browser by using http://ip-address:8080/tecmint.jsp.
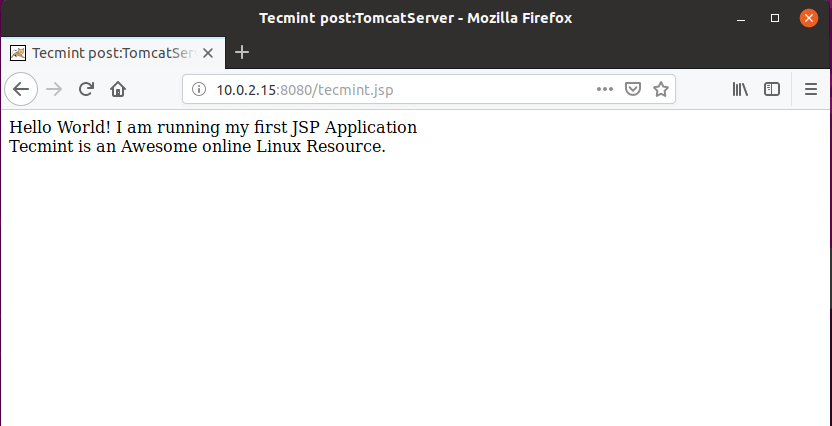
That’s it! You have completed the setup of your Apache Tomcat server and ran your first Java code. We hope the process was easy and straightforward for you. If you face any issues, do share your problems via comment form below.



Hi Marin Todorov:
instead of :
best regards
Hi Ismael,
Thanks for pointing this out. It seems that line was not updated from the draft. I have asked our editor to update the command.
Regards :)
@Marin,
Corrected the command in the article as pointed by @Ismael.