If you are a Linux system administrator who provides support for developers, chances are you’ve heard of Docker. If not, this software solution will make your life easier beginning today by helping you reduce operating costs and accelerate deployments – among other benefits.
But it’s not magic. Docker as a platform leverages containers – packages of an application along with all the tools it needs to run to eliminate differences between environments.
In other words, containerized software will operate and can be managed consistently regardless of where it is installed. Additionally, containers are much easier to set up, start, stop, and maintain than good old virtual machines.
If you’re interested in knowing more about the differences between these two technologies, the official Docker website provides a great explanation.
To illustrate, in this article, we will explain how to install Docker on RHEL-based distributions such as CentOS, Rocky/Alma Linux, and Debian/Ubuntu, and spin up an Apache container from Docker Hub.
We will then use it to serve a simple web page from our home directory – all without the need to install a web server on our host.
Installing Docker on Linux
To begin, let’s install Docker using the following curl command, which will download and run a shell script that will add the Docker repository to our system and install the package.
curl -fsSL https://get.docker.com | sh
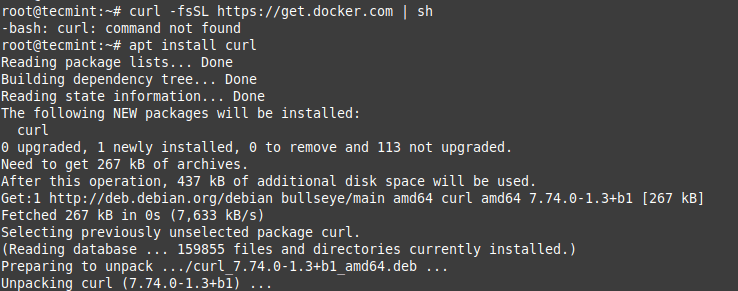
Next, use the systemctl command to start the main Docker service, enable it to start during reboots, and check its status.
systemctl start docker
systemctl enable docker
systemctl status docker
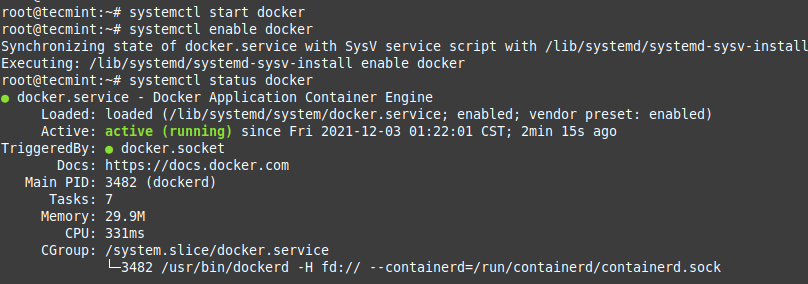
At this point, we can simply execute.
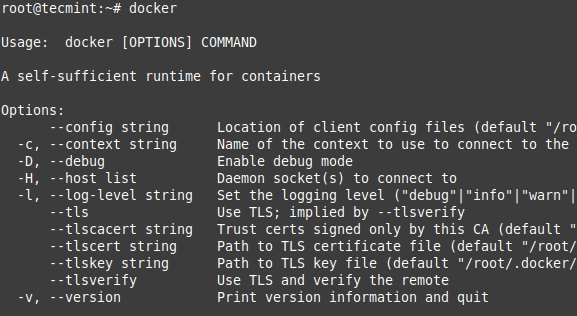
docker
to view the list of available commands or to get help.
docker COMMAND --help
docker ps --help
will tell us how to list containers present on our system, whereas
docker run --help
will print all the options that we can use to manipulate a container.
Setting Up an Apache Container
One of the amazing things about the Docker ecosystem is that there are tens of standard containers that you can easily download and use.
In the following example, we will instantiate an Apache 2.4 container named tecmint-web, detached from the current terminal. We will use an image called httpd:2.4 from Docker Hub.
Our plan is to have requests made to our public IP address on port 8080 be redirected to port 80 on the container. Also, instead of serving content from the container itself, we will serve a simple web page from /home/user/website.
We do this by mapping /home/user/website/ on the /usr/local/apache2/htdocs/ on the container. Note that you will need to use sudo or login as root to proceed, and do not omit the forward slashes at the end of each directory.
sudo docker run -dit --name tecmint-web -p 8080:80 -v /home/user/website/:/usr/local/apache2/htdocs/ httpd:2.4

At this point, our Apache container should be up and running.
sudo docker ps

Now let’s create a simple web page named docker.html inside the /home/user/website directory using vim editor.
vi /home/user/website/docker.html
Add the following sample HTML content to the file.
<!DOCTYPE html>
<html lang="en">
<head>
    <meta charset="UTF-8">
    <title>Learn Docker at Tecmint.com</title>
</head>
<body>
    <h1>Learn Docker With Us</h1>
</body>
</html>
Next, point your browser to Server-IP:8080/docker.html (where Server-IP is your host’s public IP address). You should be presented with the page we created previously.

If you wish, you can now stop the container.
sudo docker stop tecmint-web
and remove it:
sudo docker rm tecmint-web
To finish cleaning up, you may want to delete the image that was used in the container (omit this step if you’re planning on creating other Apache 2.4 containers soon).
sudo docker image remove httpd:2.4
Note that in all the above steps we never had to install the webserver on our host.
Summary
In this article, we explained how to install Docker and manipulate a container. Unfortunately, these are just the basics – there are entire courses, books, and certification exams that cover Dockers (and containers in general) more in-depth.
If you want to learn more about Docker, we have already covered a 3-article series, that explains how to install Docker, run applications into containers, and automatically build docker images with dockerfile.
Consider this as your starting point and let us know if you have any questions or comments – we look forward to hearing from you!



Why would you use docker? just Podman, obviously
Works perfectly, but when I stop and add the following code to docker-compose.yml file.
image: httpd:2.4
container_name: www
ports:
– 8383:80
volumes:
– /home/pi/website:/var/ww/html/
stdin_open: true
tty: true
and start it with:
# docker-compose up -d
The container is running, but the website is not responding :(
What goes wrong?
I entered
myipdaddress/docker.html. I am getting access denied, check proxy server, and all that. Not that straight forward for me.Very well explained. I have configured Apache in the container successfully.
Thank you for sharing the Details.
I got the webserver running but instead of serving pages it gives 403 permission denied.
I checked the file permissions are 640.
@Marisa,
Set the default directory index page in the configuration file and also make sure to check the permissions that allow the User/Group under which Apache is running to access the needed files.
Hi Marisa,
You are probably running selinux and ran into this issue:
https://www.tecmint.com/install-apache-web-server-in-a-docker-container/comment-page-1/#comment-1005720
@Jonathan Gossage
You don’t create the docker.html inside the container, but in the host system (the box you run docker on).
The container runs the HTTPD, but the website served is on your box, outside of the container.
Hence the SeLinux issue I posted earlier, if you have SeLinux running on your box (which you should).
It seems that no editor, such as vi, nano or vim is included in the tecmint-web container. This prevented me from creating the required docker.html file.
docker must not be run as root or with sudo. I am not sure the rest of article is a best practice either.
It does not work for me.
The requested URL /docker.html was not found on this server.
Same here, the
url/docker.htmlneither didip:80work for me, does anybody have a solution to this?Thanks
I have done all the steps up to running the webpage in a browser. How would I find the proper webpage to get it running? I’m running docker remotely on a Raspberry Pi, and accessing it through ssh on a Macbook.
The above will get you an 503 error: not authorized, as selinux will block access to docker.html.
The way to overcome this is to change the line
# sudo docker run -dit --name tecmint-web -p 8080:80 -v /home/user/website/:/usr/local/apache2/htdocs/ httpd:2.4to
# sudo docker run -dit --name tecmint-web -p 8080:80 -v /home/user/website/:/usr/local/apache2/htdocs/:Z httpd:2.4The
:Zwill ensure the proper selinux context is set.Lower case
:zis also an option, see.https://stackoverflow.com/questions/24288616/permission-denied-on-accessing-host-directory-in-docker