Bun is a modern JavaScript runtime designed to simplify and accelerate the development of JavaScript and TypeScript applications. Unlike traditional runtimes, Bun combines multiple tools into a single, cohesive package, including a bundler, test runner, and a Node.js – compatible package manager.
Key Features of Bun:
- High Performance: Bun is built with speed in mind. By extending JavaScriptCore – the engine that powers Safari, which ensures fast startup times and efficient execution of your applications.
- Comprehensive Toolkit: With Bun, you get an all-in-one solution that includes a bundler for packaging your code, a test runner for ensuring code reliability, and a package manager compatible with Node.js, streamlining your development workflow.
- Node.js Compatibility: Bun aims to be a drop-in replacement for Node.js, implementing Node’s module resolution algorithm and supporting built-in modules like fs and path.
- First-Class TypeScript and JSX Support: Bun allows you to execute
.tsand.tsxfiles directly, respecting yourtsconfig.jsonsettings. It also transpiles JSX syntax to JavaScript internally, with React as the default but supporting custom JSX transforms.
Installing Bun on Linux
The unzip package is required to install Bun, so use your distribution’s package manager to install it as shown.
sudo apt install unzip         [On Debian, Ubuntu and Mint]
sudo dnf install unzip         [On RHEL/CentOS/Fedora and Rocky/AlmaLinux]
sudo emerge -a sys-apps/unzip  [On Gentoo Linux]
sudo apk add unzip             [On Alpine Linux]
sudo pacman -S unzip           [On Arch Linux]
sudo zypper install unzip      [On OpenSUSE]
sudo pkg install unzip         [On FreeBSD]
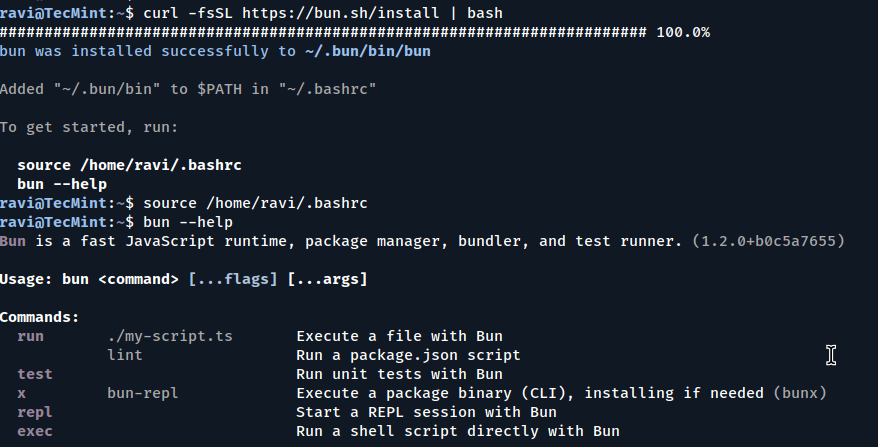
Next, use the curl command to download and execute Bun’s installation script, which will download the Bun binary and place it in your system’s PATH, making the bun command available globally.
curl -fsSL https://bun.sh/install | bash
Getting Started with Bun in Linux
After installing Bun, you can quickly set up a new project directory and start building applications.
mkdir my-bun-app
cd my-bun-app
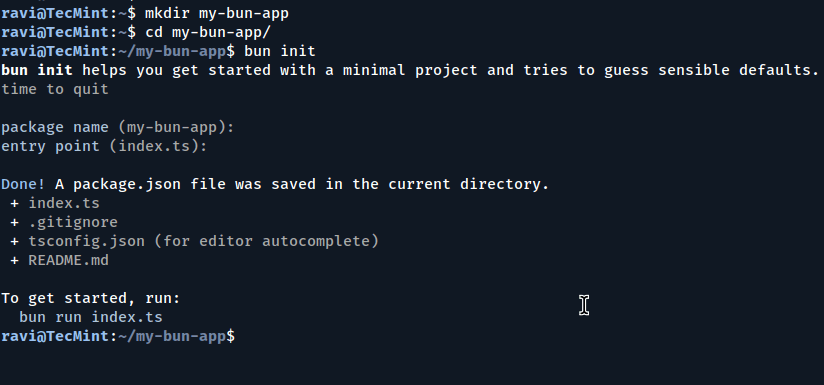
Next, initialize the project with Bun, which will prompt you with several questions to set up your project. You can press enter to accept the default answers. Bun will generate essential files like package.json, index.ts, .gitignore, and tsconfig.json.
bun init
Create an HTTP Server
Open the index.ts file and add the following code to create a simple HTTP server:
const server = Bun.serve({
  port: 3000,
  fetch(request) {
    return new Response("Welcome to Bun!");
  },
});

console.log(`Listening on http://localhost:${server.port}`);
Now run the server with:
bun run index.ts
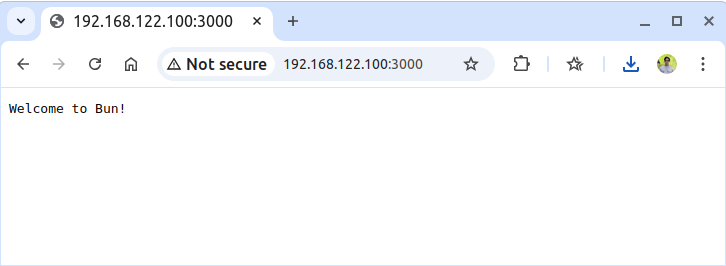
You should see the message Listening on http://localhost:3000.

Open your browser and navigate to http://localhost:3000 to view the response from your server.
Managing Packages with Bun
To add a new package to your project, use the following command, which will install the specified package and update your package.json accordingly. Bun manages dependencies in the node_modules directory, similar to other package managers, ensuring compatibility with existing Node.js projects.
bun add figlet
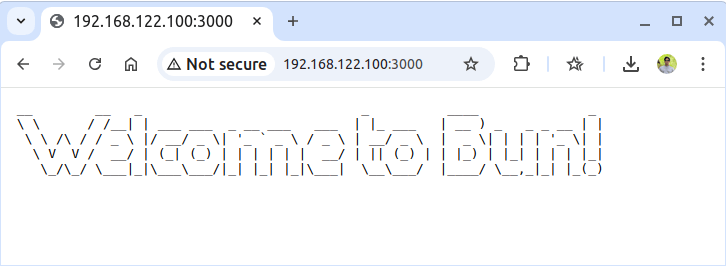
Update index.ts to use figlet in the fetch handler.
import figlet from "figlet";

const server = Bun.serve({
  port: 3000,
  fetch(request) {
    const message = figlet.textSync("Welcome to Bun!", {
      horizontalLayout: "default",
      verticalLayout: "default",
    });
    return new Response(message, {
      headers: { "Content-Type": "text/plain" },
    });
  },
});

console.log(`Listening on http://localhost:${server.port}`);
Restart the server and refresh the page to see a new ASCII art banner.
If you need to remove Bun from your system, use the following command.
rm -rf ~/.bun
Conclusion
Bun is a powerful and efficient JavaScript runtime that simplifies the development process by integrating multiple tools into a single platform.
Its high performance, Node.js compatibility, and first-class support for TypeScript and JSX make it an ideal choice for developers looking for a modern, streamlined development experience.


