cmus is an open-source, ncurses-based lightweight, fast, and powerful terminal audio player for Unix/Linux-like operating systems, which was released and distributed under the GNU General Public License (GPL) and runs exclusively through a terminal-based user interface.
cmus was designed to run on a text-only user interface, reducing the resources required to run the application on older computers, as well as on systems where the X Window System isn’t available.
cmus application was originally developed by Timo Hirvonen, but he discontinued development around 2008. Later, it was named ‘cmus-unofficial‘ and then taken over by SourceForge in November 2008. In February 2010, it was merged into the official project named ‘cmus‘.
Cmus Features
- Added support for many audio formats including MP3, MPEG, WMA, ALAC, Ogg Vorbis, FLAC, WavPack, Musepack, Wav, TTA, SHN and MOD.
- Faster start-up with thousands of tracks.
- Continuous playback and ReplayGain support.
- Steaming of Ogg and MP3 tracks from Icecast and Shoutcast.
- Strong music library filters and live filtering.
- Play queue and excellent compilations handling.
- Easy to use directory browser and customizable colors with dynamic keybindings.
- Added Vi style search mode and command mode with tab completion.
- Easily controlled via cmus-remote command (UNIX socket or TCP/IP).
- Runs on Unix-like systems, including Linux, OS X, FreeBSD, NetBSD, OpenBSD, and Cygwin.
Install cmus – Music Player in Linux
To install cmus on Linux, use the following appropriate command for your specific Linux distribution.
sudo apt install cmus         [On Debian, Ubuntu and Mint]
sudo yum install cmus         [On RHEL/CentOS/Fedora and Rocky/AlmaLinux]
sudo emerge -a sys-apps/cmus  [On Gentoo Linux]
sudo apk add cmus             [On Alpine Linux]
sudo pacman -S cmus           [On Arch Linux]
sudo zypper install cmus      [On OpenSUSE]
sudo pkg install cmus         [On FreeBSD]
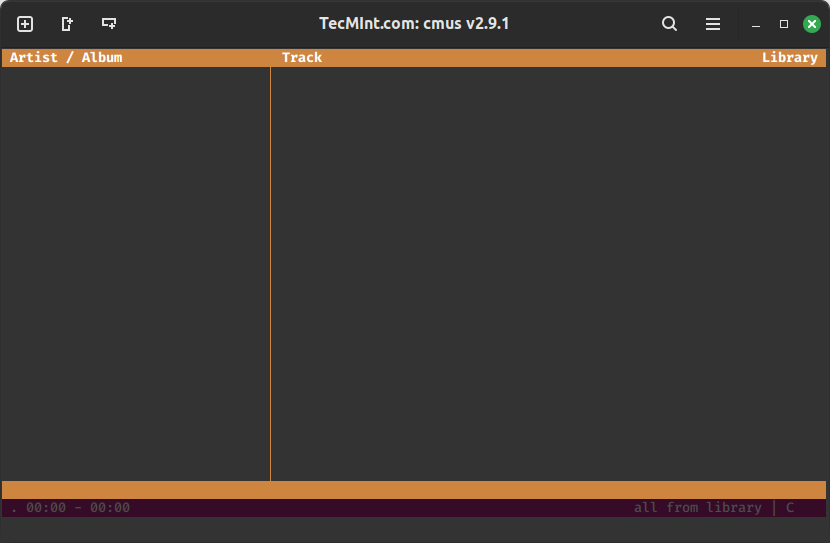
Once the installation is complete, you can launch cmus by typing cmus in the terminal, which will start and open an album/artist view, which looks something like this.
cmus
Adding Music to CMus
Adding music to cmus is a straightforward process, just press the 5 key on your keyboard to switch to the library view.
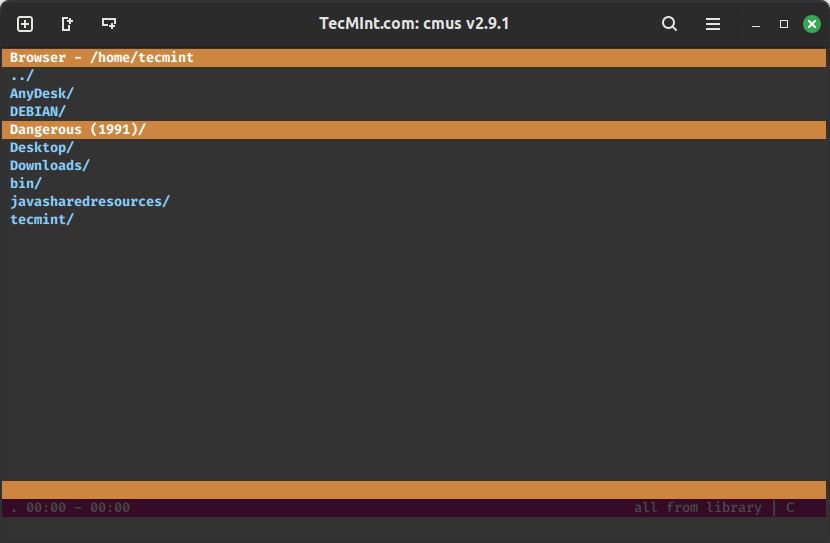
Use the arrow keys to select the folder, and hit ‘Enter‘ to navigate to the directory where you’ve stored all your audio files.
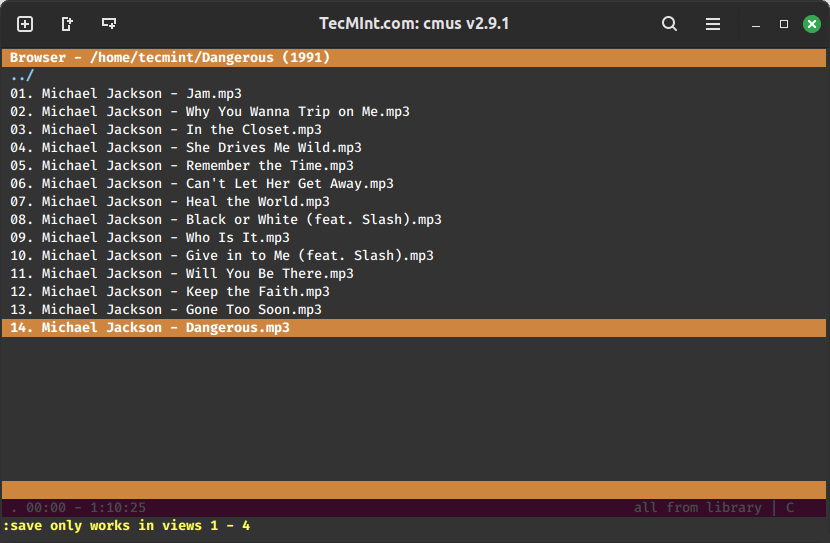
To add audio files to your library, use the arrow keys to select a file or folder and press the 'a' key, which will take you down to the next line, making it easy to add many files or folders quickly.
Begin adding files or folders by pressing 'a' on your library. Once you’ve added music files, save them by typing `:save` in the cmus command prompt and pressing ‘Enter‘.
cmus Keys to Control Play
cmus provides a variety of keys to control playback, here are some essential cmus keys to control play:
- Spacebar: Toggle play/pause.
- n: Play the next track.
- u: Play the previous track.
- z: Stop playback.
- x: Clear the playlist.
- s: Toggle shuffle mode.
- r: Toggle repeat mode.
- + or >: Increase volume.
- – or <: Decrease volume.
Use these keys to navigate and control playback in cmus as you enjoy your music. Adjust the volume, skip tracks, and manage playback effortlessly with these shortcuts.
Managing The Queue in Cmus
Suppose you are listening to a song, and want to play the next song of your choice, without interrupting the currently running track. Simply go to the track that you want to play next and type ‘e‘.
To view/edit the queue, press ‘4‘ and your queue view should look like a simple library view.
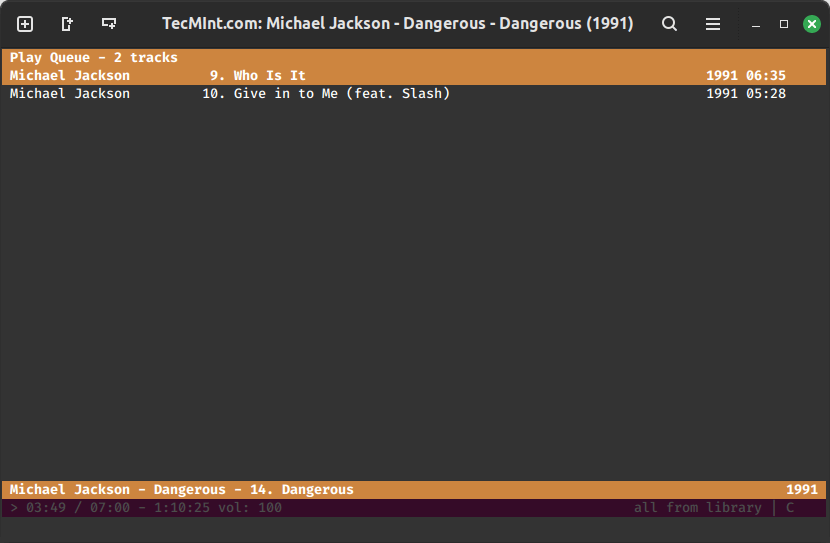
If you would like to change the order of the tracks, you can by hitting the ‘p‘ keys. To remove a track from the queue list, simply use ‘*shift-D‘.
Enable Playlist Mode on Cmus
The playlist mode is on ‘3‘, but before moving to the playlist view, let’s add some songs. Press ‘2‘ to get the library view and go to the track that you want and press ‘y‘ to add. Now type ‘3‘ to go to the newly created playlist.
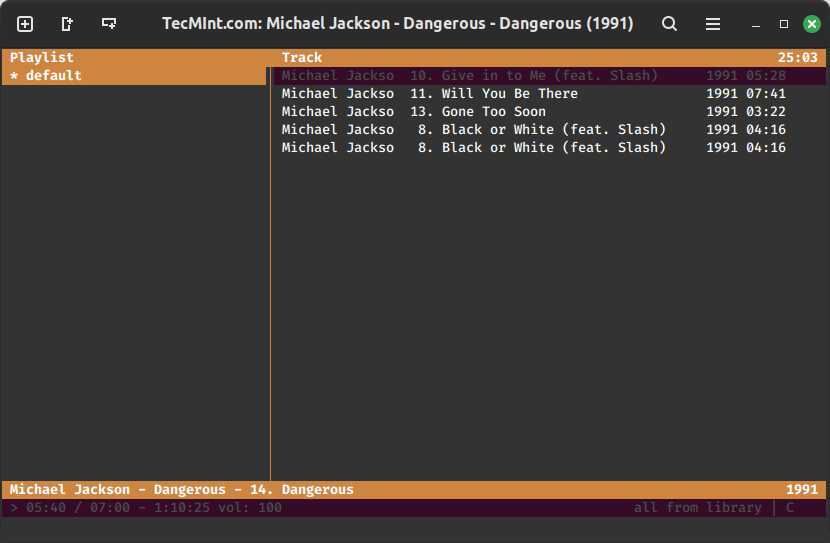
Similar to queue view, where you can use the ‘p‘ keys and ‘d‘ keys to move and delete songs from the playlist.
Search for Track in Cmus
To search a track go to the library view by pressing ‘2‘ and then press ‘/‘ to start a search. Type a track name you’re looking for. CMus will start searching for tracks that have all those words in them. Press ‘Enter‘ to get out of search mode and press ‘n‘ to find the next match.
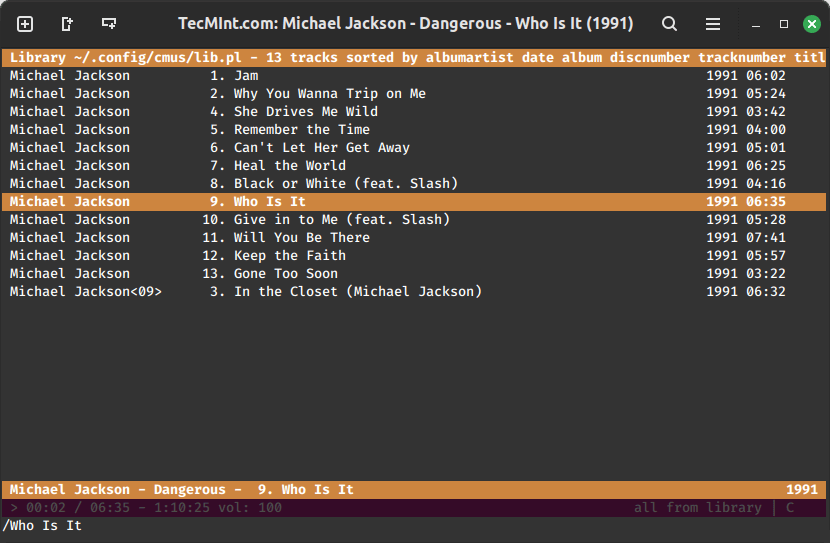
Customize Cmus Music Player
As I said Cmus has a bunch of very cool settings to tweak, like changing track disk numbers, enabling replaygian support or changing the keybindings. To get a quick view of current keybindings and settings, press ‘7‘ and to change settings or key bind use (up/down keys) and press ‘Enter‘.
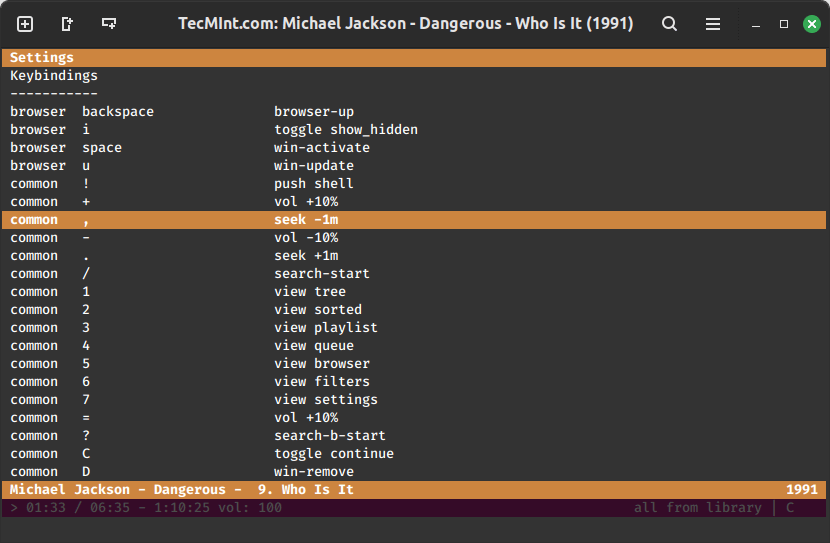
Once you’ve done, press ‘:q‘ and hit ‘Enter‘ to quit. This will save all your library, settings, playlist, and queue.
Further Reading
The cmus application comes with a great reference manual. Here I did not cover most of the features and commands like ‘loading‘ and ‘saving‘ playlists, managing and controlling cmus remotely using the ‘cmus-remote‘ command, etc.
For more commands and options use *man cmus* in a terminal or read the following reference page.
man cmus




Hello, a bit confused as to why you would use sudo cmus instead of just cmus to start the program. Does not seem like best practices.
Hello. Do you like MJ’s music?)
Yup! I am the big fan of MJ :)