ConfigServer and Security Firewall, abbreviated as CSF, is an open-source and advanced firewall designed for Linux systems. It not only provides the basic functionality of a firewall but also offers a wide array of add-on features such as login/intrusion detection, exploit checks, ping of death protection and so much more.
[ You might also like: 10 Useful Open Source Security Firewalls for Linux Systems ]
Additionally, it also provides UI integration for widely-used control panels such as cPanel, Webmin, Vesta CP, CyberPanel, and DirectAdmin. You can find a full list of supported features and operating systems on ConfigServer’s official website.
In this guide, we will walk you through the installation and configuration of the ConfigServer Security & Firewall (CSF) on Debian and Ubuntu.
Step 1: Install CSF Firewall on Debian and Ubuntu
First off, you need to install some dependencies before you get started out with installing the CSF firewall. On your terminal, update the package index:
$ sudo apt update
Next, install the dependencies as shown:
$ sudo apt install wget libio-socket-ssl-perl git perl iptables libnet-libidn-perl libcrypt-ssleay-perl libio-socket-inet6-perl libsocket6-perl sendmail dnsutils unzip
With that out of the way, you can now proceed to the next step.
Since CSF is not included in the default Debian and Ubuntu repositories, you need to manually install it. To proceed, download the CSF tarball file which contains all the installation files using the following wget command.
$ wget http://download.configserver.com/csf.tgz
This downloads a compressed file called csf.tgz.

Next, extract the compressed file.
$ tar -xvzf csf.tgz
This creates a folder called csf.
$ ls -l

Next, navigate into the csf folder.
$ cd csf
Then install CSF Firewall by running the installation script shown.
$ sudo bash install.sh
If everything went okay, you should get the output as shown.

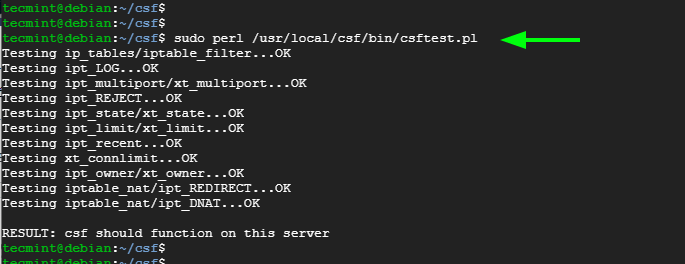
At this point, CSF is installed. However, you need to verify that the required iptables are loaded. To achieve this, run the command:
$ sudo perl /usr/local/csf/bin/csftest.pl
Step 2: Configure CSF Firewall on Debian and Ubuntu
Some additional configuration is needed Next up, we need to modify a few settings to enable CSF. So, head over to the csf.conf configuration file.
$ sudo nano /etc/csf/csf.conf
Edit the TESTING directive from “1” to “0” as indicated below.
TESTING = "0"

Next, set the RESTRICT_SYSLOG directive to “3” to restrict rsyslog/syslog access only to members of the RESTRICT_SYSLOG_GROUP.
RESTRICT_SYSLOG = "3"

Next, you can open TCP and UDP ports by locating the TCP_IN, TCP_OUT, UDP_IN, and UDP_OUT directives.
By default, the following ports are opened.
TCP_IN = "20,21,22,25,53,80,110,143,443,465,587,993,995"

TCP_OUT = "20,21,22,25,53,80,110,113,443,587,993,995"

UDP_IN = "20,21,53,80,443"

UDP_OUT = "20,21,53,113,123"
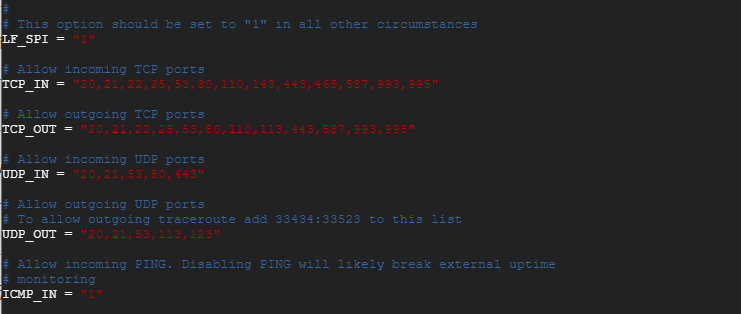
Chances are that you don’t need all those ports opened, and best server practices demand that you only open the ports you are using. We recommend that you remove all unnecessary ports and leave the ones which are used by the services running on your system.
Once you are done specifying the ports you need, reload CSF as shown.
$ sudo csf -r
To list all the IP table rules defined on the server, run the command:
$ sudo csf -l
You can start and enable the CSF firewall on startup as follows:
$ sudo systemctl start csf
$ sudo systemctl enable csf
Then confirm that indeed the firewall is running:
$ sudo systemctl status csf

Step 3: Blocking and Allowing IP Addresses in CSF Firewall
One of the key functionalities of a firewall is the ability to allow or block IP addresses from accessing the server. With CSF, you can whitelist (allow), blacklist (deny) or ignore IP addresses by modifying the following configuration files:
- csf.allow
- csf.deny
- csf.ignore
Block an IP Address in CSF
To block an IP address, simply access the csf.deny configuration file.
$ sudo nano /etc/csf/csf.deny
Then specify the IP addresses that you want to block. You can specify the IP addresses line by line as shown:
192.168.100.50
192.168.100.120
Or you can use the CIDR notation to block an entire subnet.
192.168.100.0/24
Allow an IP Address in CSF
To allow an IP address through Iptables and exclude it from all filters or blocks, edit the csf.allow configuration file.
$ sudo nano /etc/csf/csf.allow
You can list an IP address per line, or use the CIDR addressing as previously demonstrated when blocking IPs.
NOTE: An IP address will be allowed even when it is explicitly defined in the csf.deny configuration file. To ensure that an IP address is blocked or blacklisted, ensure that it is not listed in the csf.allow file.
Exclude an IP Address in CSF
Additionally, CSF provides you with the ability to exclude an IP address from IPtables or filters. Any IP address in the csf.ignore file will be exempted from the iptables filters. It can only be blocked if specified in the csf.deny file.
To exempt an IP address from the filters, access the csf.ignore file.
$ sudo nano /etc/csf/csf.ignore
Once again, you can list the IPs line by line or use CIDR notation.
Conclusion
And that wraps up our guide today. We hope you can now install and configure the CSF firewall without a hitch.






Great writeup. Simple and very easy to implement CSF Firewall in Debian.