FrankenPHP is a modern application server for PHP that enhances the performance and capabilities of PHP applications. It is built on top of another server called Caddy web server, which helps developers to run PHP applications efficiently without the need for traditional web servers like Apache or Nginx.
FrankenPHP can make your PHP applications run faster by keeping your application in memory after the first load, so it doesn’t have to start from scratch with every request, which can lead to significant speed improvements.
With FrankenPHP, you don’t need to set up separate processes like PHP-FPM (FastCGI Process Manager) and a web server like Nginx or Apache. Everything runs in one place, making it easier to manage.
This guide walks you through the process of installing FrankenPHP on Ubuntu 24.04 in simple steps.
Step 1: Install PHP in Ubuntu 24.04
First, start by updating your system packages to ensure you have the latest software.
sudo apt update
sudo apt upgrade -y
Next, you need to install some essential packages, including PHP and other required libraries.
sudo apt install zip unzip curl -y
Once the required dependencies are installed, you can install PHP 8.4 from Ondrej’s PPA, which provides the latest versions of PHP.
sudo add-apt-repository ppa:ondrej/php -y
sudo apt update
sudo apt install php8.4 php8.4-cli php8.4-fpm php8.4-{bz2,curl,mbstring,intl,xml} -y
php -v
Step 2: Install FrankenPHP in Ubuntu 24.04
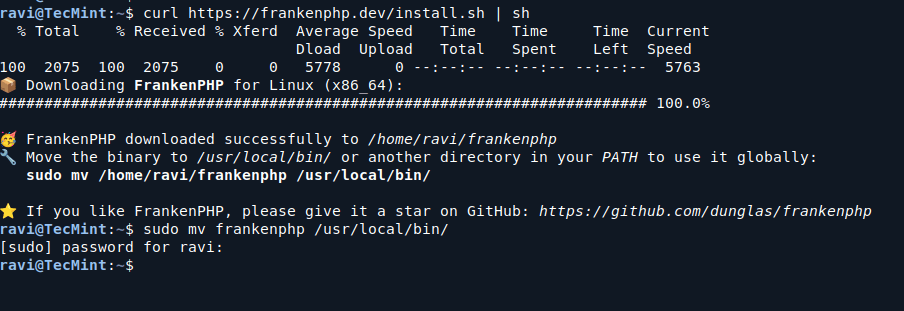
Now that PHP is installed, you can proceed with installing FrankenPHP using the following curl command.
curl https://frankenphp.dev/install.sh | sh
sudo mv frankenphp /usr/local/bin/

Step 3: Running Your PHP Application
To serve your PHP application using FrankenPHP, create a directory and a simple php script for your web application.
mkdir -p ~/my-app && cd ~/my-app
echo '<?php echo "Hello, FrankenPHP!"; ?>' > index.php
To serve the content of the current directory, run:
sudo frankenphp php-server
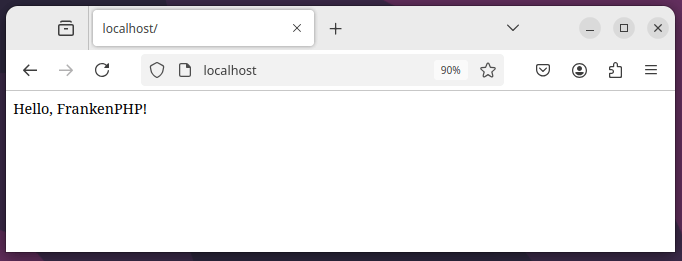
Open your browser and navigate to the following address to see the message “Hello, FrankenPHP!“.
http://localhost/
Or
http://ip-address/

Step 4: Setting Up Nginx as a Reverse Proxy
Using a reverse proxy like Nginx improves request handling, adds an additional security layer, and simplifies SSL/TLS configuration.
sudo apt install -y nginx
Create a new configuration file.
sudo nano /etc/nginx/sites-available/frankenphp
Add the following configuration:
server {
    listen 80;
    server_name yourdomain.com www.yourdomain.com;

    location / {
        proxy_pass http://127.0.0.1:8080;
        proxy_set_header Host $host;
        proxy_set_header X-Real-IP $remote_addr;
        proxy_set_header X-Forwarded-For $proxy_add_x_forwarded_for;
        proxy_set_header X-Forwarded-Proto $scheme;
    }
}
Replace yourdomain.com with your actual domain name.
Next, enable the configuration and reload nginx.
sudo ln -s /etc/nginx/sites-available/frankenphp /etc/nginx/sites-enabled/
sudo nginx -t
sudo systemctl reload nginx
Step 5: Configure SSL/TLS for Secure Connections
To ensure FrankenPHP performs efficiently and securely in a production environment, you need to install Certbot, which is a popular tool for obtaining and renewing free SSL certificates from Let’s Encrypt.
sudo apt install -y certbot
sudo apt install -y python3-certbot-nginx
sudo certbot --nginx -d yourdomain.com -d www.yourdomain.com
sudo certbot renew --dry-run
Conclusion
FrankenPHP is now installed and running on your Ubuntu 24.04 system. By following these steps, you’ve set up a high-performance PHP runtime suitable for modern web applications.
For advanced configurations, refer to the FrankenPHP documentation.


Hi Ravi,
After i follow the installation i got the issue when run
sudo frankenphp php-server2025/03/17 13:32:04.053 WARN admin admin endpoint disabled
2025/03/17 13:32:04.053 WARN http.auto_https server is listening only on the HTTP port, so no automatic HTTPS will be applied to this server {"server_name": "php", "http_port": 80}
2025/03/17 13:32:04.054 INFO tls.cache.maintenance started background certificate maintenance {"cache": "0xc000538f00"}
2025/03/17 13:32:04.072 INFO frankenphp FrankenPHP started {"php_version": "8.4.5", "num_threads": 2, "max_threads": 2}
2025/03/17 13:32:04.073 INFO frankenphp FrankenPHP stopped
Error: loading new config: http app module: start: listening on :80: listen tcp :80: bind: address already in use
can you check again? thanks!
@Yosua,
It looks like the error is due to port 80 being already in use, which is preventing FrankenPHP from starting properly.
Check if any process is using port 80:
If you see a running process (such as Apache or Nginx), you’ll need to stop or change its port.
Restart FrankenPHP.
If you don’t want to stop services on port 80, you can change the port for FrankenPHP by adding the
-pflag:Then, access it using
http://localhost:8080.If
php-fpmis not required: “you don’t need to set up separate processes like PHP-FPM”Why installing
php-cliandphp-fpmpackages ?It seems frankenphp has
php-cliargument to execute cli php files, then installingphp-cliseems to be not required.@Promoetee,
You’re right that FrankenPHP can execute PHP CLI files, so technically, installing php-cli may not be required if you’re only using it for command-line operations. However, PHP-FPM is often used for handling web requests in a separate process, providing better performance and scalability, especially for high-traffic websites.
One quick question: is FrankenPHP ready for production?
@pai,
FrankenPHP is still in active development, and while it shows promising features, it’s always best to thoroughly test it in a staging environment before using it in production.