Kernel is the core of any operating System. The primary function of kernel is to act as mediator in-between Application – CPU, Application – Memory and Application – Devices (I/O). It function as Memory Manager, Device manager and attends System calls besides performing other tasks.

For Linux, Kernel is its heart. The Linux Kernel is released under GNU General Public License. Linus Torvalds developed Linux Kernel in the year 1991 and he came with Initial Kernel Release Version 0.01. On 3rd of August, 2014 (this year) Kernel 3.16 has been released. In this 22 years, Linux kernel has seen a lots of development. Now there are thousand of companies, millions of independent developer contributing to Linux Kernel.
A rough estimation of big brands and their contribution to the present Linux Kernel which is expected to have 17 million lines of code as per Linux Foundation, Linux Kernel Development Report.
- RedHat – 10.2%
- Intel – 8.8%
- Texas Instruments – 4.1%
- Linaro – 4.1%
- SUSE – 3.5%
- IBM – 3.1%
- Samsung – 2.6%
- Google – 2.4%
- Vision Engraving Systems – 2.3%
- Wolfson Microelectronics – 1.6%
- Oracle – 1.3%
- Broadcom – 1.3%
- Nvidia – 1.3%
- Freescale – 1.2%
- Ingics Technology – 1.2%
- Cisco – 0.9%
- Linux Foundation – 0.9%
- AMD – 0.9%
- Academics – 0.9%
- NetAPP – 0.8%
- Fujitsu – 0.7%
- parallels – 0.7%
- ARM – 0.7%
Seventy percent of kernel development is done by Developers, who are working in Corporates and are paid for that, sounds Interesting?
Linux Kernel 3.16 is released for individual as well as companies in production environment, who will be updating their kernel for a number of reason, a few of which includes.
- Security Patches
- Stability Enhancement
- Updated Drivers – Better device Support
- Processing speed improvement
- Latest Functions, etc
This article aims at updating Debian kernel, the Debian way, which means less manual work, less risk yet with perfection. We will also be updating Ubuntu Kernel in the later part of this article.
Step 1: Downloading Kernel 3.16
Before we proceed, we must know about our current kernel, that is installed.
avi@tecmint:~$ uname -mrns

Linux tecmint 3.14-1-amd64 x86_64
About options:
- -s : Print Operating System (‘Linux’, Here).
- -n : Print System Hostname (‘tecmint’, Here).
- -r : Print Kernel Version (‘tecmint 3.14-1-amd64’, Here).
- -m : Print Hardware Instruction Set (‘x86_64’, Here).
Download latest stable Kernel from the link below. Don’t get confused by patches download link there. Download the one which clearly states – “LATEST STABLE KERNEL”.
Alternatively you can use wget to download the kernel which is more convenient.
avi@tecmint:~/Downloads$ wget https://www.kernel.org/pub/linux/kernel/v3.x/linux-3.16.tar.xz
Step 2: Verify Kernel 3.16 Signature
After the download is finished and before we move ahead, it is strongly advised to verify kernel signature.
avi@tecmint:~/Downloads$ wget https://www.kernel.org/pub/linux/kernel/v3.x/linux-3.16.tar.sign
The signature verification needs to be done against uncompressed file. This is to require one signature against various compression format viz., .gz, .bz2, .xz.
Next, uncompress Linux Kernel Image.
avi@tecmint:~/Downloads$ unxz linux-3.16.tar.xz
Verify it against signature.
avi@tecmint:~/Downloads$ gpg --verify linux-3.16.tar.sign
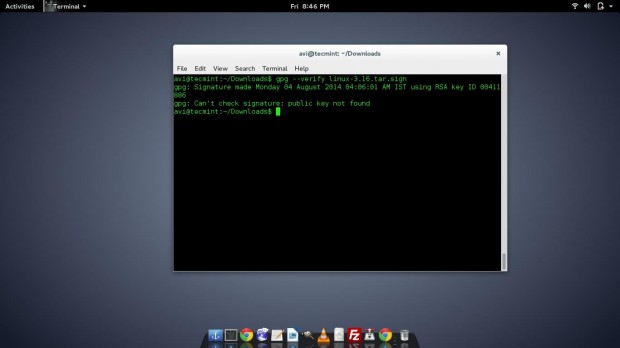
Note: If above command throws gpg: Can’t check signature: public key not found error. That means we need to download Public key manually from PGP Server.
avi@tecmint:~/Downloads$ gpg --recv-keys 00411886
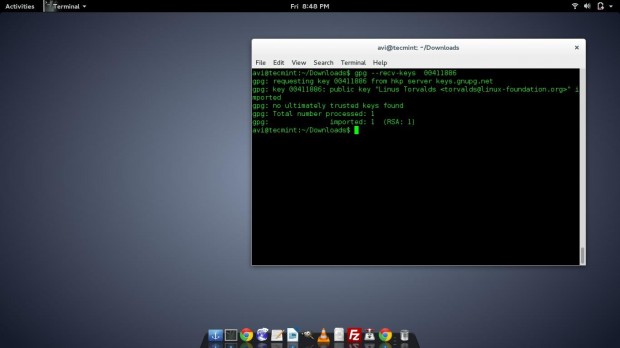
After downloading key, verify the the Key again.
avi@tecmint:~/Downloads$ gpg --verify linux-3.16.tar.sign
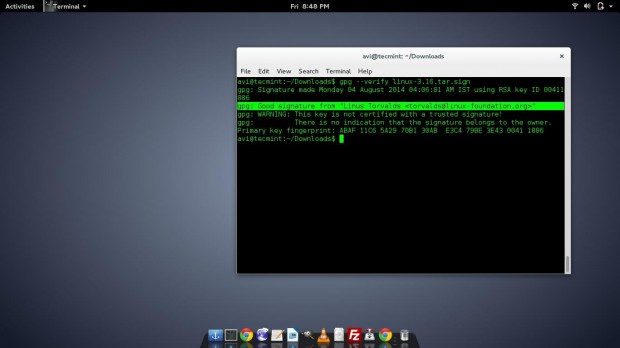
Have you noticed two things about gpg key verification.
- gpg: Good signature from “Linus Torvalds <torvalds@linux-foundation.org>”.
- Primary key fingerprint: ABAF 11C6 5A29 70B1 30AB E3C4 79BE 3E43 0041 1886 .
Nothing to worry about key fingerprint, we are sure now that the archive is OK and signed. Lets move ahead!
Step 3: Installing Required Packages
Before we go ahead and start building the kernel, we need to install certain packages to ease the kernel building and Installation process and do it risk-free Debian way.
Install libcurse5-dev, fakeroot and kernel-package.
avi@tecmint:~/Downloads$ sudo apt-get install libncurses5-dev
avi@tecmint:~/Downloads$ sudo apt-get install fakeroot
avi@tecmint:~/Downloads$ sudo apt-get install kernel-package
Step 4: Building Kernel 3.16
After successful installation of the above packages, we are ready to build kernel. Move to the extracted Linux Kernel Image (we extracted above, while verifying signature).
avi@tecmint:~/Downloads$ cd linux-3.16/
Now it’s important to copy the current kernel configuration to present working directory as root user.
# cp /boot/config-'uname -r' .config
It is copying /boot/config-‘uname -r’ to present working directory “/home/avi/Downloads/linux-3.16 ” and saving it as ‘.config‘.
Here ‘uname -r‘ will automatically be replaced and processed with your currently installed kernel version.
Since a dot file can’t be seen the normal way, you need to use option ‘-a‘ with ls to view this, in your present working directory’.
$ ls -al
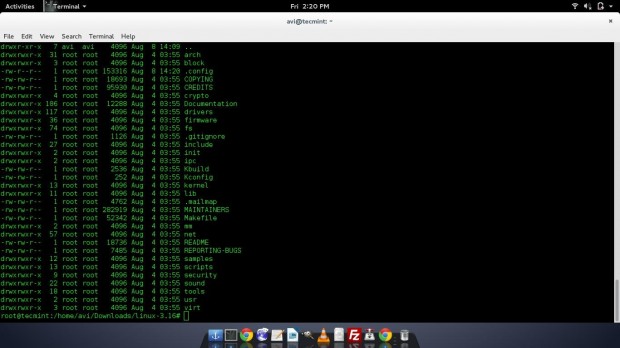
There are three ways to build a Linux Kernel.
- make oldconfig : It is an interactive way in which kernel ask question one by one what it should support and what not. It is a Very time consuming Process.
- make menuconfig : It is a Command-Line Menu based system where user can enable and disable an option. It requires ncurses library hence we Apt that above.
- make qconfig/xconfig/gconfig : It is the Graphical Menu based system where user can enable and disable an option. It requires QT Library.
Obviously we will be using ‘make menuconfig‘.
Afraid of building kernel? You should not be. Its fun, there is lot of stuff you will learn. You should keep in mind these following things.
- Your hardware needs and appropriate drivers.
- Choose new features while you are building kernel yourself like – high memory support.
- Optimize kernel – select only those drivers which you need. It will speed up your boot process. If you are not sure of any driver, better include that.
Now, run the ‘make menuconfig‘ command.
# make menuconfig
Important: You must choose “SELECT – ENABLE LOADABLE MODULE SUPPORT“, if you forget to do this, you are going to get hard times.
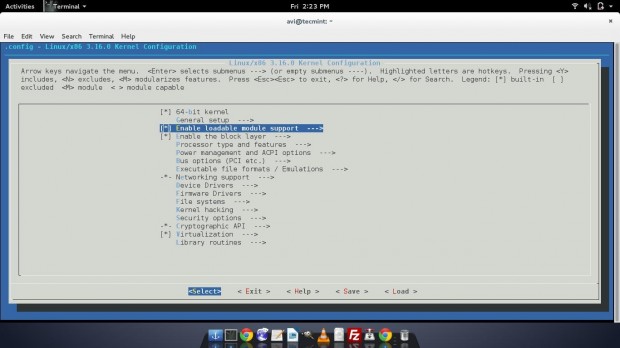
Note: In the open configuration windows you can configure various options for your network card, bluetooth, Touchpad, Graphics card, Filesystem support such as NTFS and a lot other options.
There is no tutorial to guide you what you should select and what not. You come to know this only by Researching, studying stuff over web, learning from tutorials of tecmint and in every other possible way.
You may see there is an option kernel hacking. Hacking? Yup! Here it means exploration. You can add various options under kernel hacking and utilize a lot of features.
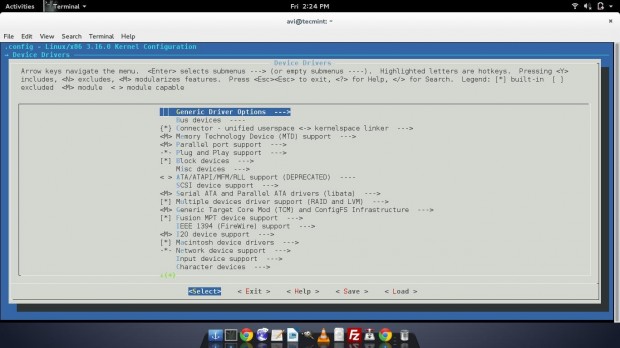
Next, select Generic Driver Options.
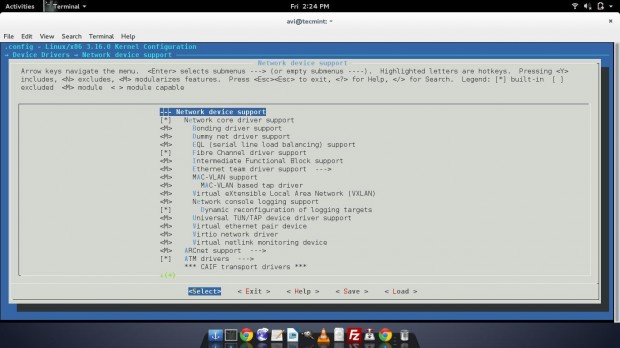
Network Device Support.
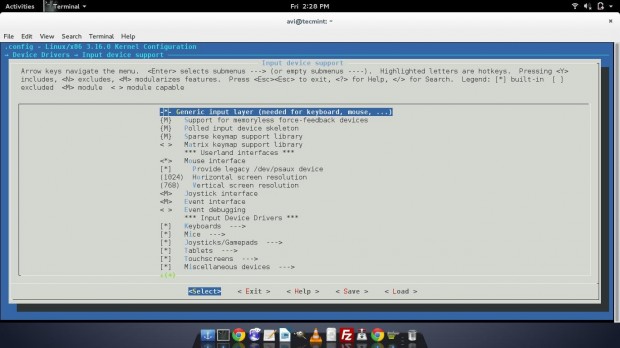
Input Device support.
Load the configuration file (.config), we saved from /boot/config-`uname –r`.config.
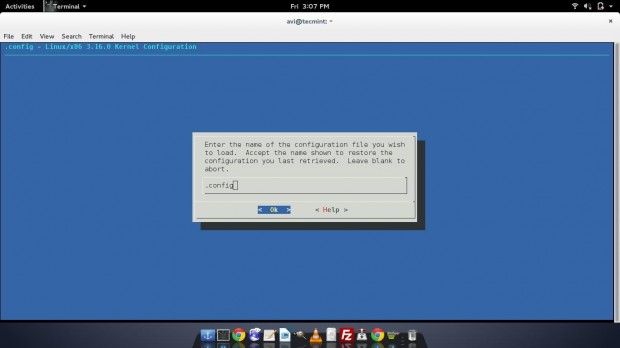
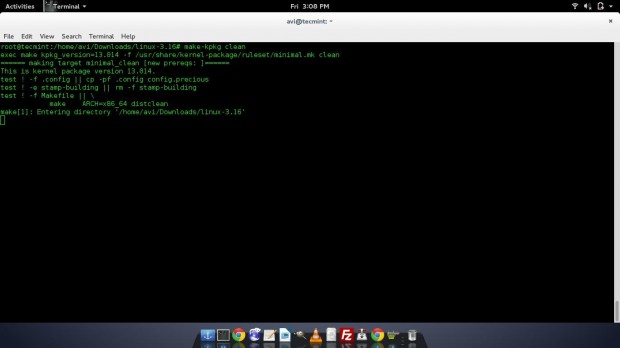
Click on OK, save and exit. Now clean the source tree and reset the kernel-package parameters.
# make-kpkg clean
Step 5: Compiling Kernel 3.16
Before we start compiling kernel, we need to export CONCURRENCY_LEVEL. CONCURRENCY LEVEL of thumb has a rule to add Numeric 1 to the cores of kernel. If you have 2 cores, export CONCURRENCY_LEVEL=3. If you have 4 cores, export CONCURRENCY_LEVEL=5.
To check cores of processor you can user cat command as shown below.
# cat /proc/cpuinfo
Sample Output
Sample Output
processor	: 0
vendor_id	: GenuineIntel
cpu family	: 6
model		: 69
model name	: Intel(R) Core(TM) i3-4005U CPU @ 1.70GHz
stepping	: 1
microcode	: 0x17
cpu MHz		: 799.996
cache size	: 3072 KB
physical id	: 0
siblings	: 4
core id		: 0
cpu cores	: 2
apicid		: 0
initial apicid	: 0
fpu		: yes
fpu_exception	: yes
cpuid level	: 13
wp		: yes
You see above output, I have 2 cores, so we will exporting 3 cores as shown below.
# export CONCURRENCY_LEVEL=3
Setting correct CONCURRENCY_LEVEL will speed up the kernel compilation time.
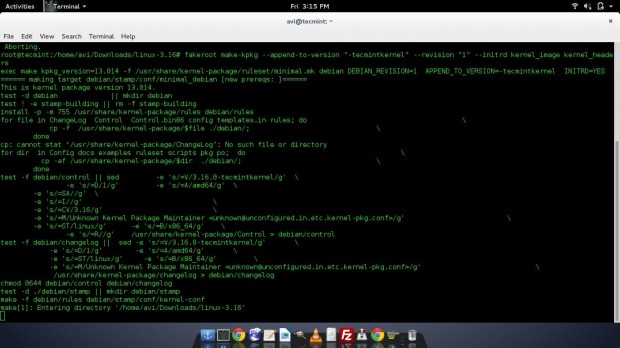
# fakeroot make-kpkg --append-to-version "-tecmintkernel" --revision "1" --initrd kernel_image kernel_headers
Here ‘tecminkernel‘ is the kernel build name, it can be anything ranging from your name, your host name, your pet name or anything else.
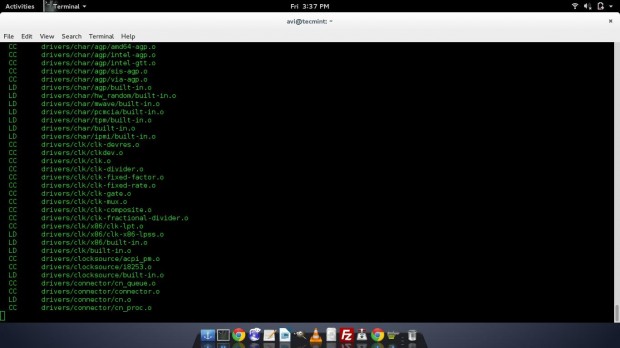
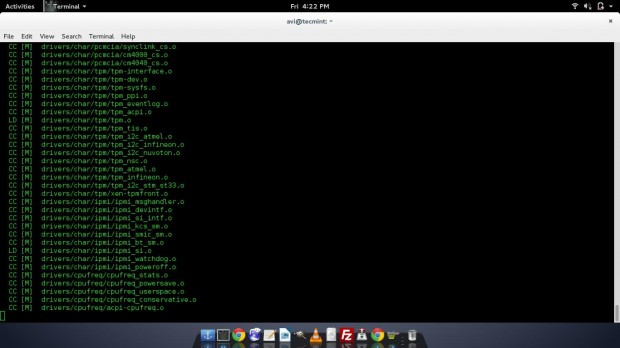
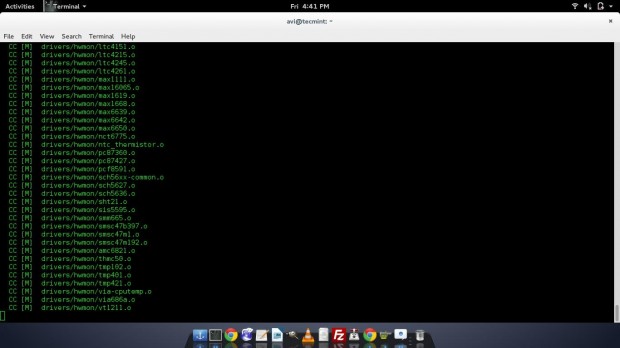
Kernel compilation takes a lot of time depending upon the modules being compiled and the processing power of the machine. Till the time it is compiling look at some of the FAQs of kernel compilation.
Frequently Asked Questions
Q1. My kernel is being compiled for a long time. Is it Normal.
Q2. If I interrupt the kernel while it was compiling, Do I need to start all over again?
Q3. The compiled files can be used on different system to update kernel?
Q4. Will you be hosting your compiled File?
Q5. Do I have packages like fakeroot and ncurses5-dev in my repository?
Q6. Will I able to boot into last kernel, after I install the latest kernel.
Q7. I am facing problem in updating kernel. Will you assist me? Is it chargeable?
Q8. My company facing Problem in updating Kernel. Will your team assist us? Is it Chargeable?
That’s the end of FAQ, let me move with compilation process. After successful compilation of kernel, it creates two file (Debian package), one directory ‘above’ of our present working Directory.
Our current working directory is.
/home/avi/Downloads/linux-3.16/
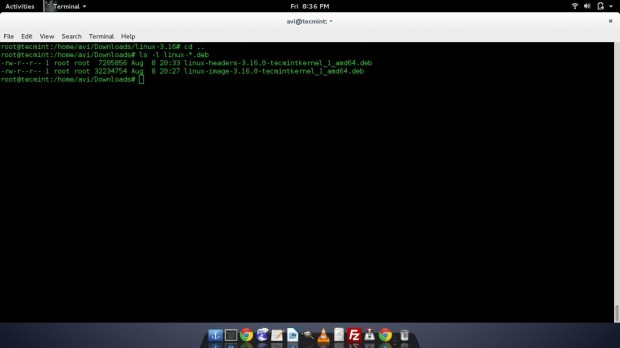
Debian packages are created at.
/home/avi/Downloads
To verify it, run the following commands.
# cd ..
# ls -l linux-*.deb
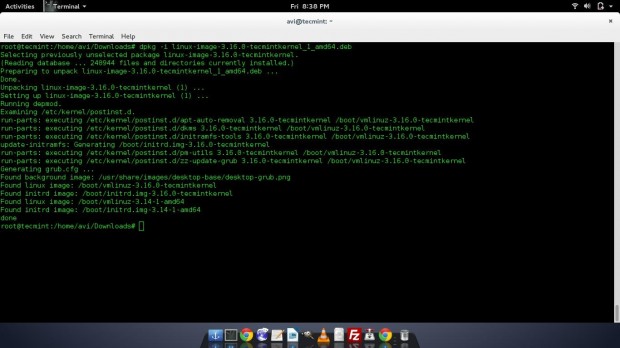
Next, run the Linux image file so created.
# dpkg -i linux-image-3.16.0-tecmintkernel_1_amd64.deb
Run the Linux header file so created.
# dpkg -i linux-headers-3.16.0-tecmintkernel_1_amd64.deb
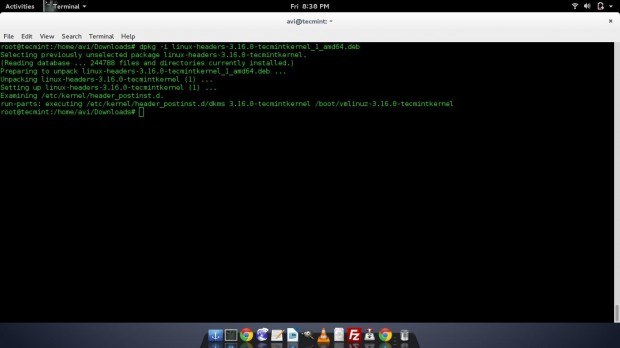
All done! We have successfully build, compiled and installed Latest Linux Kernel 3.16 on Debian with all other dependencies. Moreover Debian package managed to update bootloader (GRUB/LILO), automatically. It’s time to reboot and test the latest kernel.
Please sure to notice any error message you might get during booting. It is important to understand that error to solve them, if any.
# reboot
As soon as Debian starts again, click on ‘Advanced option‘ to see a list of available and installed kernels.
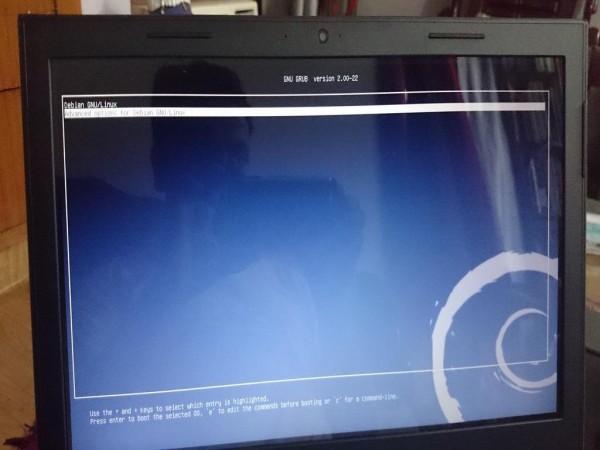
See a list of installed kernels.
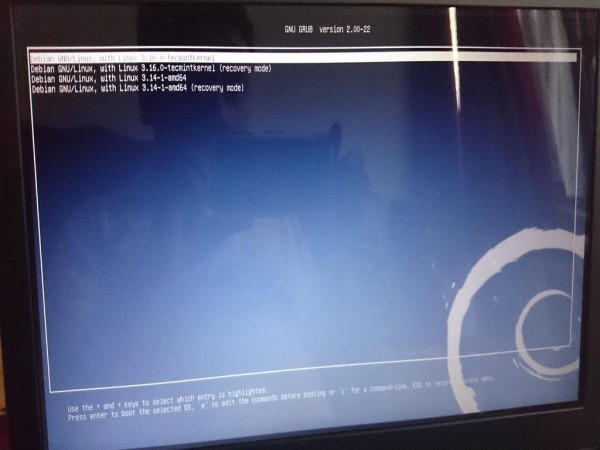
Select latest compiled Kernel (i.e. 3.16) to boot.
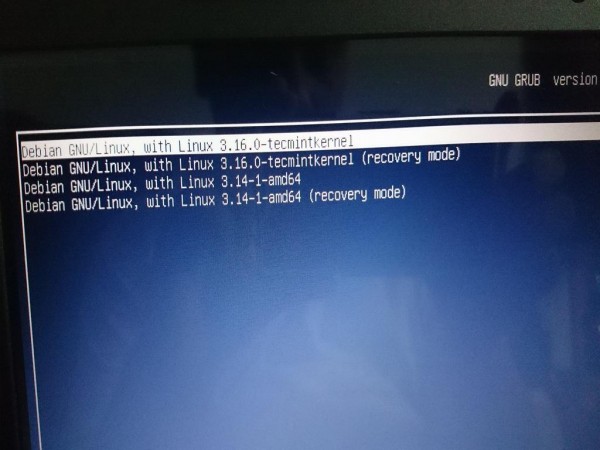
Check kernel version.
# uname -mrns
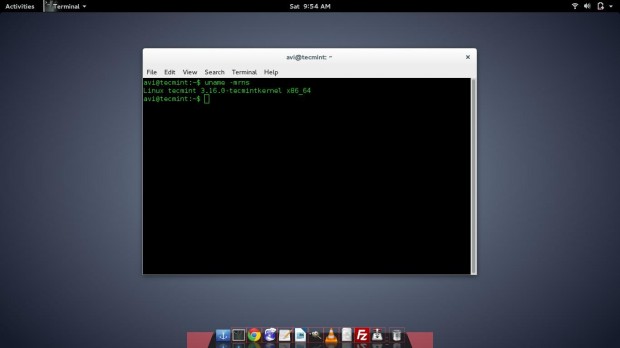
The latest one, installed now is set to boot, automatically and you need not choose it every time from advanced boot options.
Step 6: Install Pre-Compiled Kernel 3.16
For those who don’t want to compile kernel of their own on Debian (x86_64) and wants to use the pre-compiled kernel that we build in this tutorial, they can download it from the link below. This kernel may not work for some of the hardware you may be having.
- linux-image-3.16.0-tecmint.com_kernel_1_amd64.deb
- linux-headers-3.16.0-tecmint.com_kernel_1_amd64.deb
Next, install pre-compiled kernel using following command.
# dpkg -i linux-image-3.16.0-tecmint.com_kernel_amd64.deb
# dpkg -i linux-headers-3.16.0-tecmint.com_kernel_amd64.deb
The unused kernel can be removed from the system using command.
# apt-get remove linux-image-(unused_version_number)
Caution: You should remove old kernel after testing Latest kernel throughly. Don’t take a decision in hurry. You should proceed only if you know what you are doing.
If you did something wrong in removing the kernel you want, or removed the kernel you were not supposed to, your system will be in a stage you can’t work upon.
After uninstalling an unused kernel you may get a message like.
- The link /vmlinuz is a damaged link.
- Removing symbolic link vmlinuz.
- You may need to re-run your boot loader[grub].
- The link /initrd.img is a damaged link.
- Removing symbolic link initrd.img .
- You may need to re-run your boot loader[grub].
This is normal and you need not to worry. Just update your GRUB using the following command.
# /usr/sbin/update-grub
You may need to update your /etc/kernel-img.conf file and disable ‘do_symlinks‘, to disable these messages. If you are able to reboot and login again, there is no problem.
That’s all for now. I will be here again with another interesting article. Till then stay tuned and connected to Tecmint. Don’t forget to provide us with your valuable feedback in the comment section below. Also tell us your experience when you encounter Kernel compilation and installation.
Read Also :






Hi geeks,
Please save my day. I have followed and installed the same steps. When booting with new updated kernel getting below error
Gave up waiting for root device. Common problems:
— Boot args (cat /proc/cmdline)
— Check rootdelay= (did the system wait long enough?)
— Check root= (did the system wait for the right device?)
— Missing modules (cat /proc/modules; ls /dev)
ALERT! /dev/disk/by-uuid/aa91b9fe-1e27-44d7-9c1b-72dd7d4e8575 does not exist.
Dropping to a shell!
BusyBox v.1.13.3 (Ubuntu 1:1.13.3-1ubuntu11) built-in shell (ash)
Enter ‘help’ for list of built-in commands.
(initramfs)
Please Help me on this.!!!!!!
Why just not do a dist-upgrade?, it’s so simple:
just answer Y every time.
apt-get update
apt-get upgrade
nano /etc/apt/sources.list replace every lenny with squeeze , ctrl+x, Y,enter.
apt-get update
apt-get upgrade
apt-get dist-upgrade
reboot
But why stay there?, now you can go to Debian 7 (wheezy) then to Debian 8.2 (jessie) by following the same instructions , just replace the name of the distro on your sourcelist.
I wasn’t able to go directly from 6 to 8.
If you have trouble with “public key is not available” then follow instructions from here: http://stackoverflow.com/questions/1139127/how-to-trust-a-apt-repository-debian-apt-get-update-error-public-key-is-not-av
Enjoy.
Thanks Buddy! I just tried the 3rd time to compile my kernel with no success.. Best Guide I found on this topic..
Just want to say thank you, this article saved me quite a few hours of research and was really helpful.
Happy to know @ostap, that the writing was useful for you.
Why I got this error? Can you help me? Please..
root@debian:/home# gpg –recv-key 00411886
gpg: requesting key 00411886 from hkp server keys.gnupg.net
gpg: keyserver timed out
gpg: keyserver receive failed: keyserver error
Check your DNS settings.
Nice article however, as a programmer, I recommend Arch Linux to stay up to date.
Using AUR, upgrading a kernel from sources is a piece of cake.
yaourt , an extension of pacman (the Arch package manager) makes seen even easier .
For instace to update the full system, kernel included if a new release is available , enter:
pacman -Syu
yaourt -Syu –aur
http://www.archlinux.org where everything starts !
Last but not least: Arch is a rolling release. You install it once !
I did format my ssd partition in 2008 and do a full system upgrade once a week or month; thus I still have any last release of my favorite software
Regards
Agree @ Crying
This tutorial is in general and carried out on debian.
Thanks for your feedback
I’m doing this tutorial for 3.14 but i got this error:
“user@pc:~/Downloads/linux-3.14$ cp /boot/config-‘uname -r’ .config
cp: cannot stat `/boot/config-uname -r’: No such file or directory”
How can i fix this?
use “cp /boot/config-`uname -r`* .config” instead
Agreed @ Indiak and@ Aren
When I get to step four, I don’t have a linux 3.16 directory to go to, I just have a tar file. Also, when I put in cp /boot/config-‘uname -r’ .config it either says missing destination file operand after or no such file or directory. Lastly make menuconfig throws an error no rule to make target ‘menuconfig’. stop.
I figured out the issue and now compiling the kernel.
After compiling the kernel and trying to install it I get Error! Bad return status for module build on kernel.
Hi all,
Gr8 document. but I want to suggest to start with README file from kernel tarball good documentation of kernel.org good to start with kernel compilation.
Thanks for sharing.
Thanks @ Prasad.
Very nice tutto :)
Thanks
Thanks @ Yoyo for the recognition.
hello all.
i happen to have a debian kernel compilation guide as well. its a little more technical and far more concise then this one so here is a link: http://dcos.net/projects/debian-kernel-building.text