Fedora 23 has been released just a few days ago and we have been closely following ever since. We have already covered the installation of Fedora 23 Workstation and Server. If you haven’t checked those articles yet, you can find them on the links below:
In this article, we are going to show you how to install LEMP stack. LEMP is a combination of web tools designed for web projects. LEMP includes the – Linux, Nginx (pronounced Engine X), MariaDB and PHP.
The installation of Fedora has already been completed so we are ready to proceed with the next part. If you haven’t, you can refer to the links above, to help you with the installation process. To make it easier to follow up and understand, I will separate the article in three parts. One for each package.
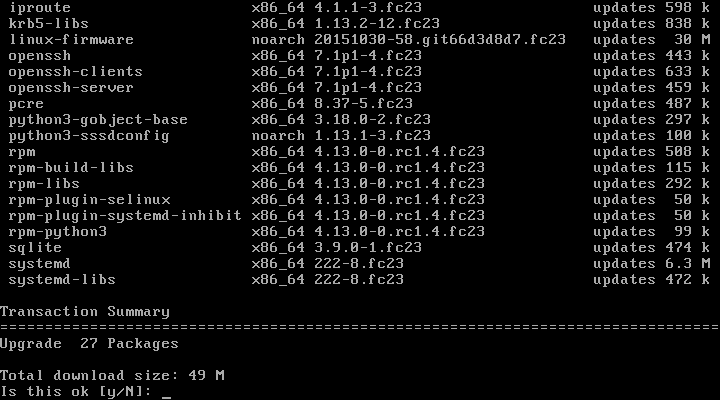
Before we start, it is recommend that you update your system packages. This can be easily achieved with command such as:
# dnf update
1. Install Nginx Web Server
1. Nginx is a light weight web server designed for high performance with low resource consumption on servers. It is often the preferred choice in enterprise environment due to its stability and flexibility.
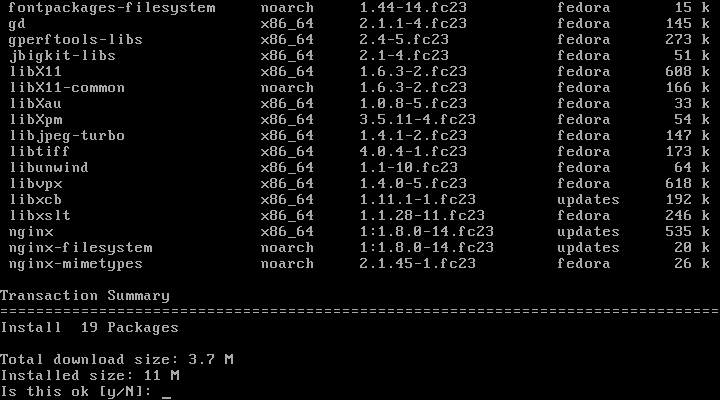
Nginx can be easily installed fedora with single command:
# dnf install nginx
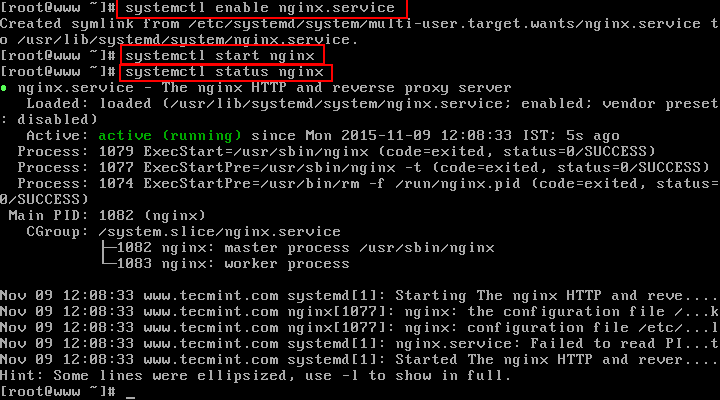
2. Once nginx has been installed, there are few more important steps to do. First we will setup Nginx to automatically enable upon system boot and then we will start and confirm the status of Nginx.
# systemctl enable nginx.service
# sudo systemctl start nginx
# sudo systemctl status nginx
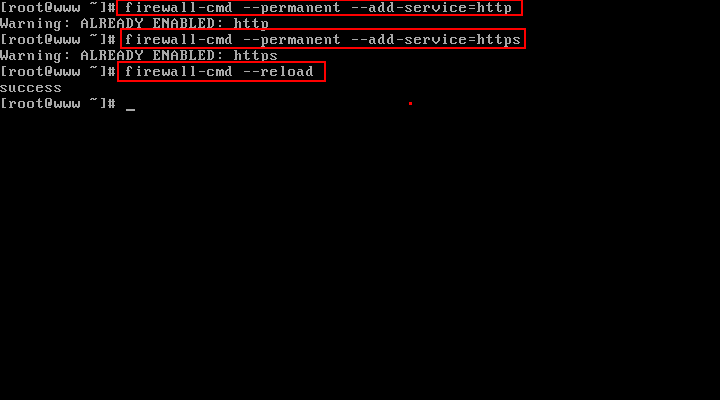
3. Next we will add a firewall rule, that will allow us to access the standard http and https ports:
# firewall-cmd --permanent --add-service=http
# firewall-cmd --permanent --add-service=https
# firewall-cmd --reload
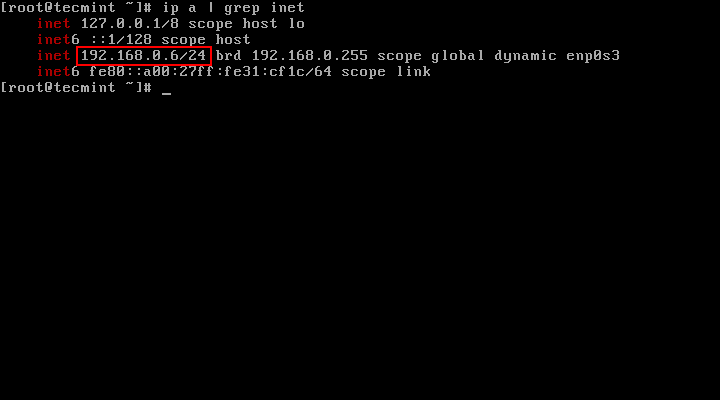
4. Now let’s verify if nginx is running as expected. Find your IP address by issuing the following command:
# ip a | grep inet
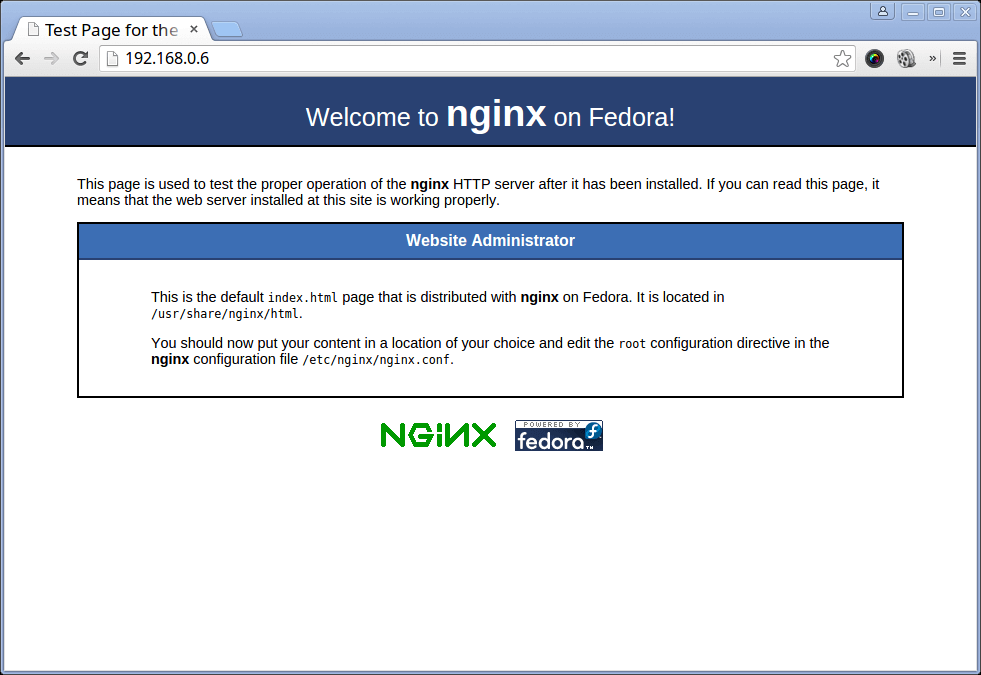
5. Now copy/paste that IP address into your browser. You should see the following result:
http://your-ip-address
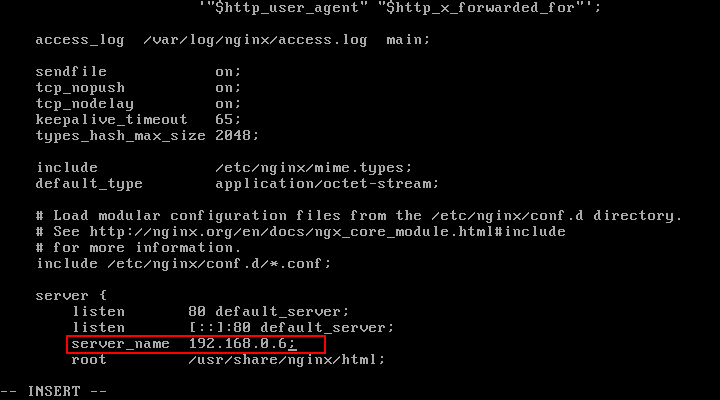
6. Next, we need to configure Nginx Sever Name, open the following configuration file with vi editor.
# vi /etc/nginx/nginx.conf
Find the directive “server_name”. It’s current status will be set to:
server_name _;
Change the underline with the IP address of your server:
server_name 192.168.0.6
Note: Make sure to change this with the IP address of your own server!
It’s important to mention that the directory root for Nginx web server is /usr/share/nginx/html. This means that you will need to upload your files in there.
2. Install MariaDB
7. MariaDB is a relational database server that is slowly becoming the top choice for new releases of different Linux distributions.
MariaDB is a community fork of the famous MySQL database server. MariaDB is meant to remain free under the GNU GPL, which is one of the reasons it is the preferred choice over MySQL.
To install MariaDB on your Fedora 23 server, run the following command:
# dnf install mariadb-server
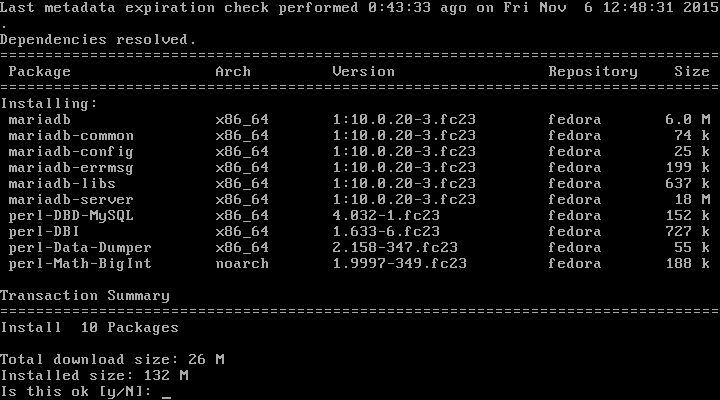
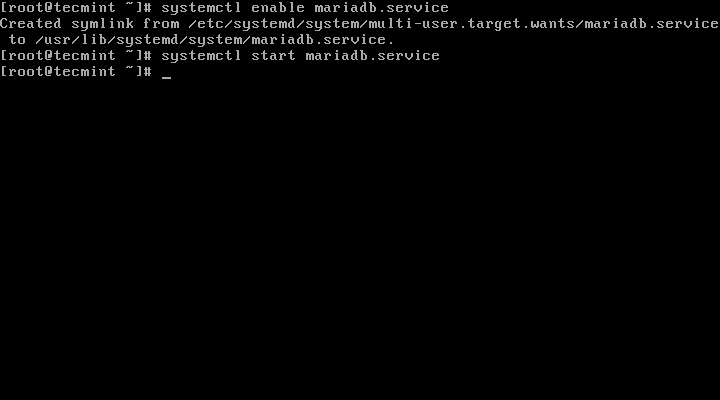
8. Once the install is complete, we can set MariaDB to automatically start upon system boot and start the MariaDB server with the following commands:
# systemctl enable mariadb
# systemctl start mariadb
# systemctl status mariadb
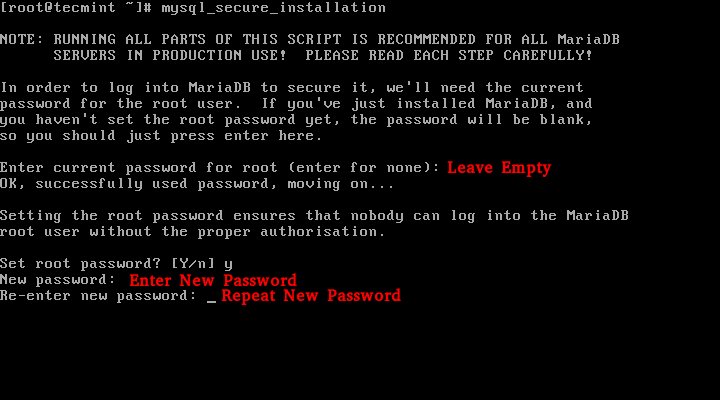
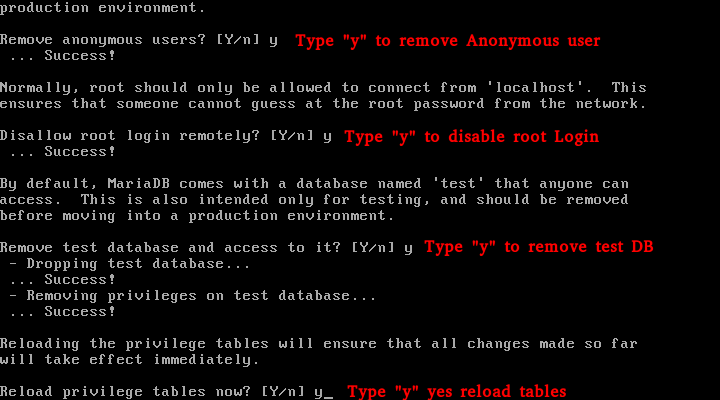
9. The next step is optional, but recommended. You can secure your MariaDB installation and set new password for the root user. To secure the installation run the following command:
# mysql_secure_installation
Th is will start a series of questions that you will need to answer in order to secure your installation. The question are really easy and don’t require any additional explanations. Here is a sample configuration that you can use:
3. Install PHP and Its Modules
10. The final step of our setup is the installation of PHP. PHP is a programming language used for developing dynamic web applications. Many websites over the internet are built using this language.
To install PHP in Fedora 23 is quite easy. Start by running the command below:
# dnf install php php-fpm php-mysql php-gd
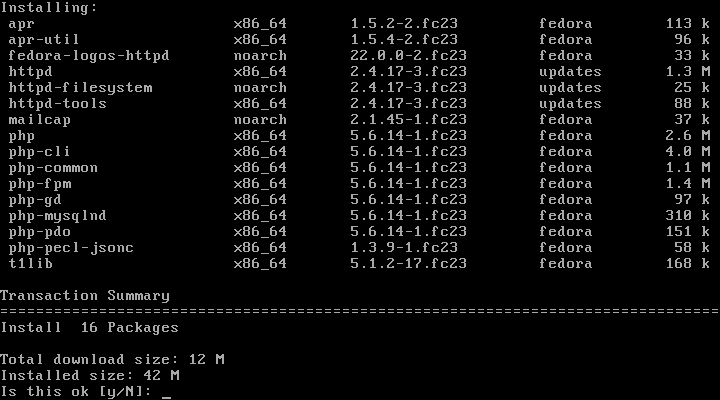
11. To be able to run PHP files, minor changes to the PHP configuration are required. By default the user meant to use php-fpm is Apache.
This would need to be changed to nginx. Open the www.conf file with your favorite text editor such as nano or vim:
# vim /etc/php-fpm.d/www.conf
Find the following lines:
; RPM: apache Choosed to be able to access some dir as httpd
user = apache
; RPM: Keep a group allowed to write in log dir.
group = apache
Change "apache" with "nginx" like shown below:
; RPM: apache Choosed to be able to access some dir as httpd
user = nginx
; RPM: Keep a group allowed to write in log dir.
group = nginx
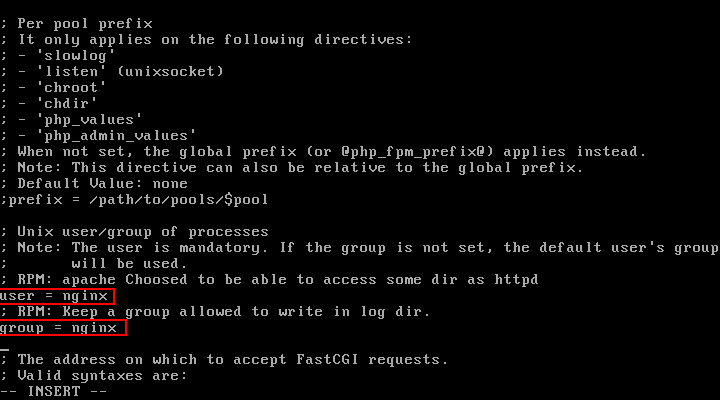
12. Now save the file We will need to restart php-fpm and Nginx to apply the changes. The restart can be completed with:
# systemctl restart php-fpm
# systemctl restart nginx
And check it’s status:
# systemctl status php-fpm
# systemctl status nginx
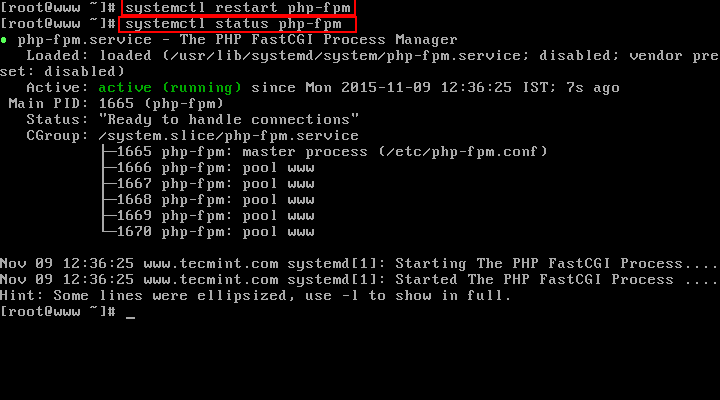
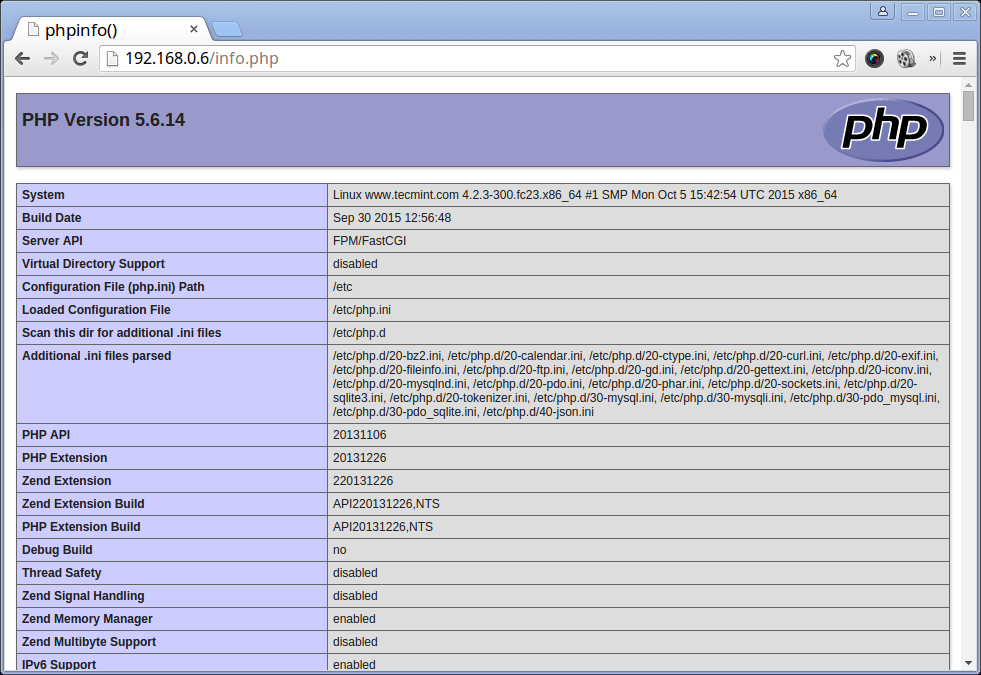
13. The time has come to put our setup to the test. We will create a test file called info.php in Nginx’s web root directory /usr/share/nginx/html/:
# cd /usr/share/nginx/html
# vi info.php
In that file insert the following code:
<?php
phpinfo()
?>
Save the file and access your system’s IP address in browser. You should see the following page:
http://your-ip-address/info.php
Conclusion
Congratulations, your LEMP stack setup on Fedora 23 server is now complete. You can start testing your new projects and play around with PHP and MariaDB. If you have any questions or found any difficulties while setting up LEMP on your system, please share your experience in the comment section below.






Please include installing phpMyAdmin in this. Updates for Fedora 25?
Yesh, just do dnf install phpmyadmin on Fedora 25 to install latest version of PhpMyAdmin..
Thank You Very Much.. You made my day.
Great step by step tutorial. Thank you.
I found have a typo at step 3 (FireSwall with an s in the middle)
# fireswall-cmd –permanent –add-service=https
@Gustavo,
Thats good catch man, corrected in the write-up.
Thanks..:)
Though I never installed nginx, but why a web server needs X11 related libraries (first command dnf install nginx screenshot says that) ?
Another question, how much internet ( in MB ) required to install a basic fedora system (no Xorg) with the net install fedora ISO ? I really want to give fedora a try, but living with a costly and slow internet. If possible please also mention how much MB internet required to install LXQT desktop and minimal KWIN window manager.