Lighttpd is an open-source web server for Linux machines, very fast and very small in size, it doesn’t require a lot of memory and CPU usage which makes it one of the best servers for any project that needs speed in deploying web pages.
Lighttpd Features
- Support for FastCGI, SCGI, CGI interfaces.
- Support for using chroot.
- Support for mod_rewrite.
- Support for TLS/SSL using OpenSSL.
- A Very small size: 1MB.
- Low CPU and RAM usage.
- Licensed under the BSD license.
This article explains how to install Lighttpd, MariaDB, PHP with PhpMyAdmin on Ubuntu 20.04.
Step 1: Installing Lighttpd on Ubuntu
Fortunately, Lighttpd is available to install from the official Ubuntu repositories, So if you want to install Lighttpd, you only have to run the following command.
$ sudo apt install lighttpd
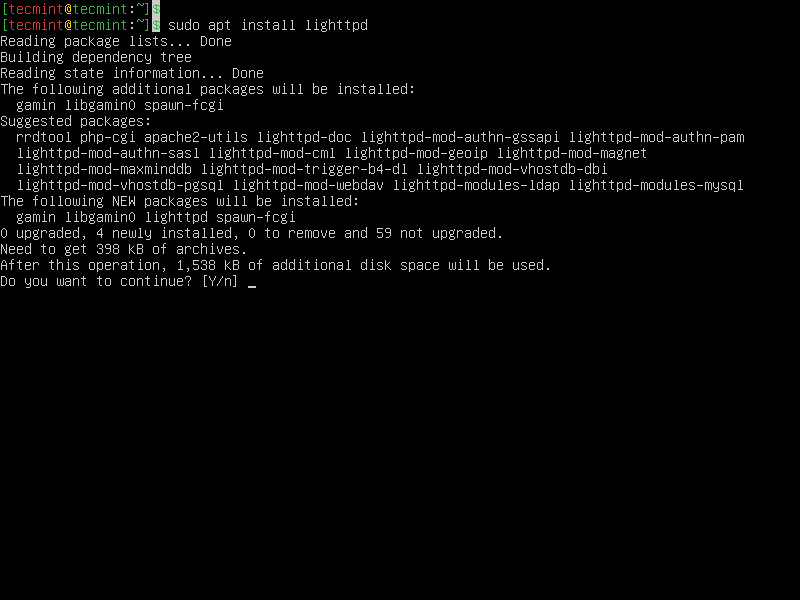
Once, Lighttpd installed, you can go to your website or IP address and you will see this page which confirms the installation of Lighttpd on your machine.
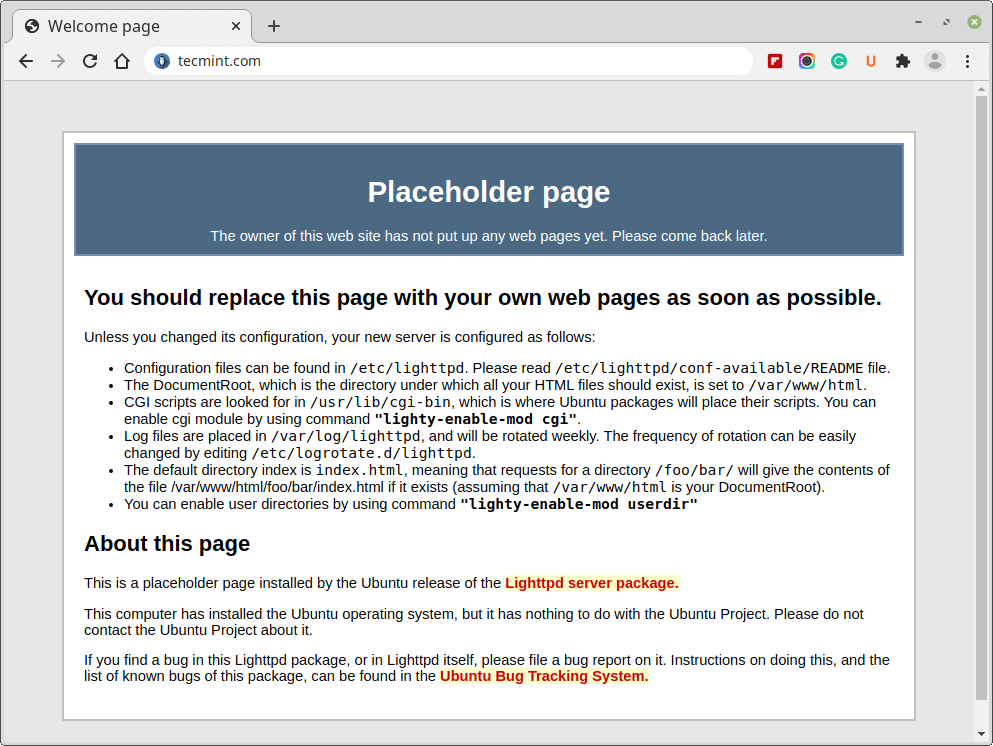
Before, heading up for further installation, I would like to tell you that the following are the important things about Lighttpd you should know before continuing.
- /var/www/html – is the default root folder for Lighttpd.
- /etc/lighttpd/ – is the default folder for Lighttpd configuration files.
Step 2: Installing PHP on Ubuntu
Lighttpd web server won’t be usable without PHP FastCGI support. Additionally, you also need to install the ‘php-mysql‘ package to enable MySQL support.
# sudo apt install php php-cgi php-mysql
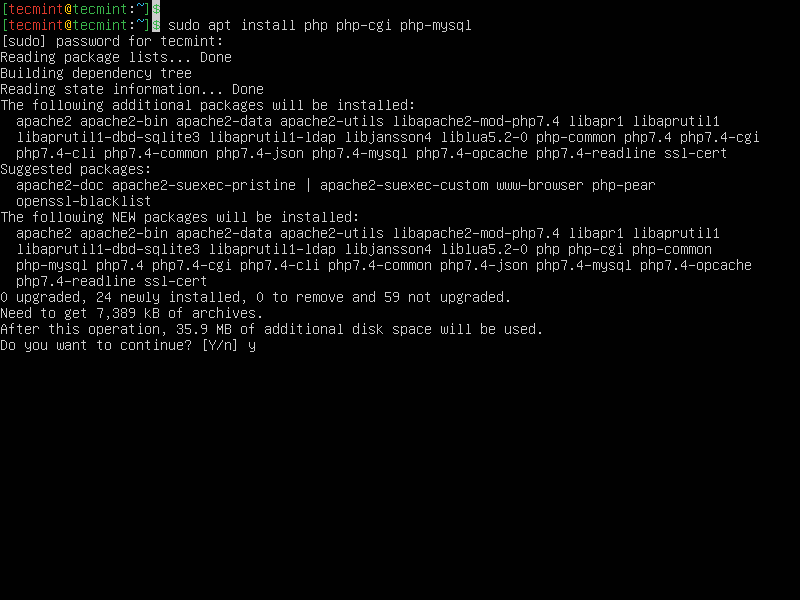
Now to enable the PHP module, run the following commands in the terminal.
$ sudo lighty-enable-mod fastcgi
$ sudo lighty-enable-mod fastcgi-php
After enabling modules, reload the Lighttpd server configuration by running the below command.
$ sudo service lighttpd force-reload
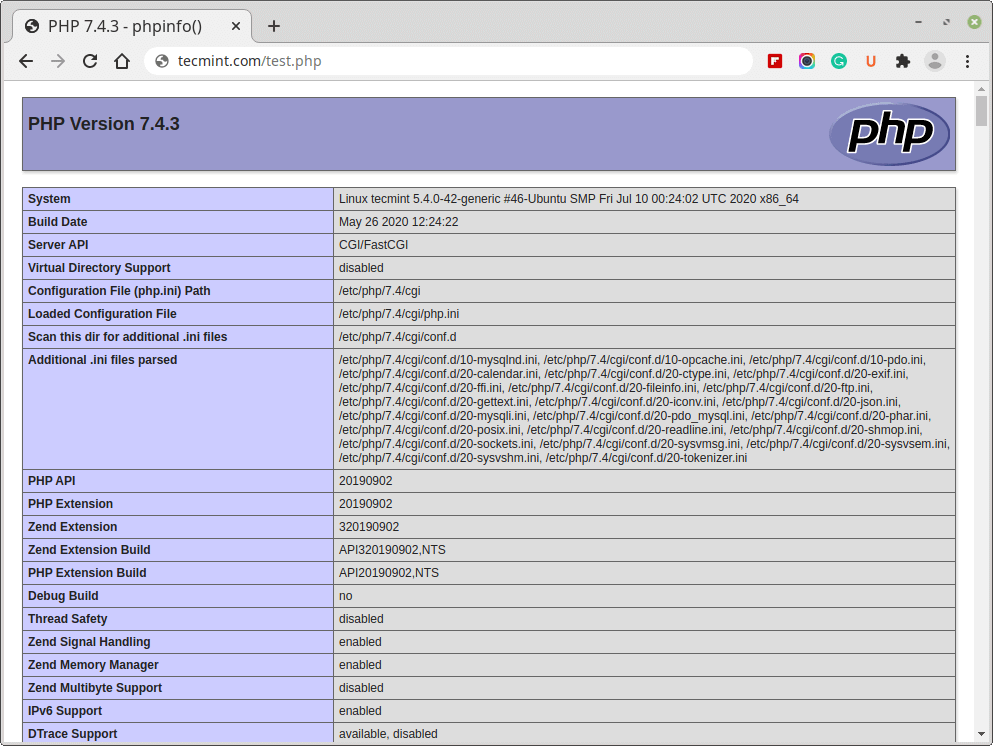
Now to test if PHP is working or not, let’s create a ‘test.php‘ file in /var/www/test.php.
$ sudo vi /var/www/html/test.php
Press the “i” button to start editing, and add the following line to it.
<?php phpinfo(); ?>
Press ESC key, and write:x and press Enter key to save the file.
Now go to your domain or IP address and call test.php file, like http://127.0.0.1/test.php. You will see this page which means that PHP is installed successfully.
Step 3: Installing MariaDB in Ubuntu
MariaDB is a fork from MySQL, it is also a good database server to use with Lighttpd, to install it on Ubuntu 20.04 run these series of commands in the terminal.
$ sudo apt-get install software-properties-common
$ sudo apt-key adv --fetch-keys 'https://mariadb.org/mariadb_release_signing_key.asc'
$ sudo add-apt-repository 'deb [arch=amd64,arm64,ppc64el] http://mirrors.piconets.webwerks.in/mariadb-mirror/repo/10.5/ubuntu focal main'
$ sudo apt update
$ sudo apt install mariadb-server
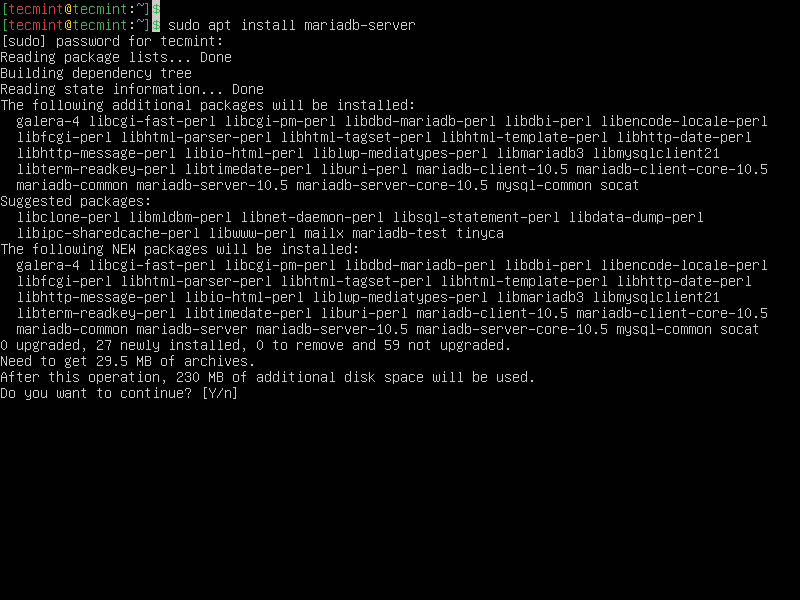
Once installed, you can run the security script to secure the MariaDB installation as shown.
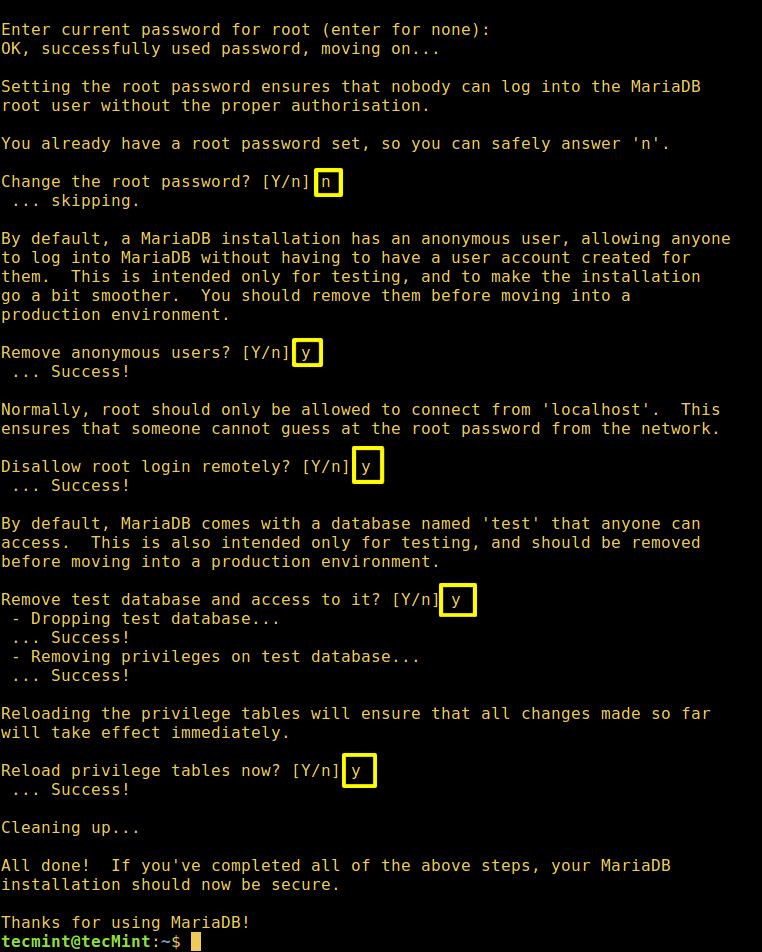
$ sudo mysql_secure_installation
The script will be prompted to enter the root password or set it up. Thereafter, answer Y for every subsequent prompt.
Installing PhpMyAdmin in Ubuntu
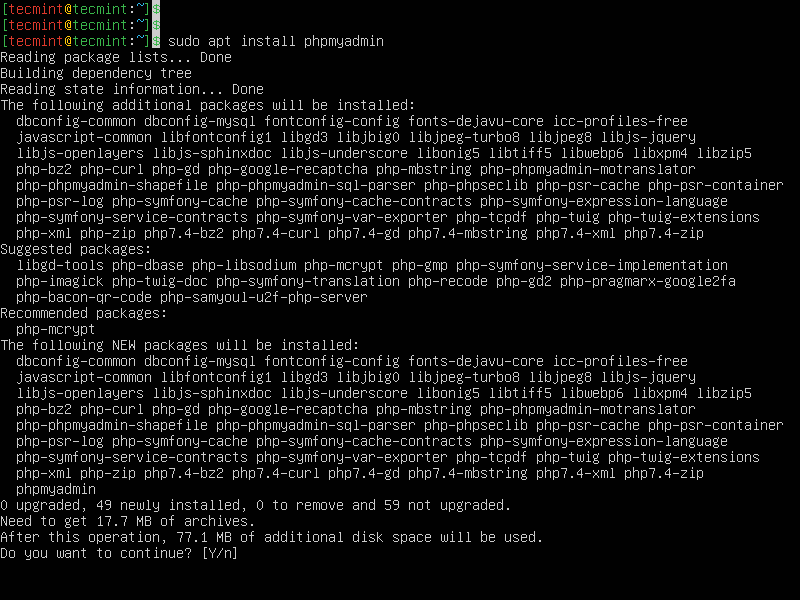
PhpMyAdmin is a powerful web interface to manage databases online, almost every system admin use it because it is very easy to manage databases using it. To install it on Ubuntu 20.04, run the below command.
$ sudo apt install phpmyadmin
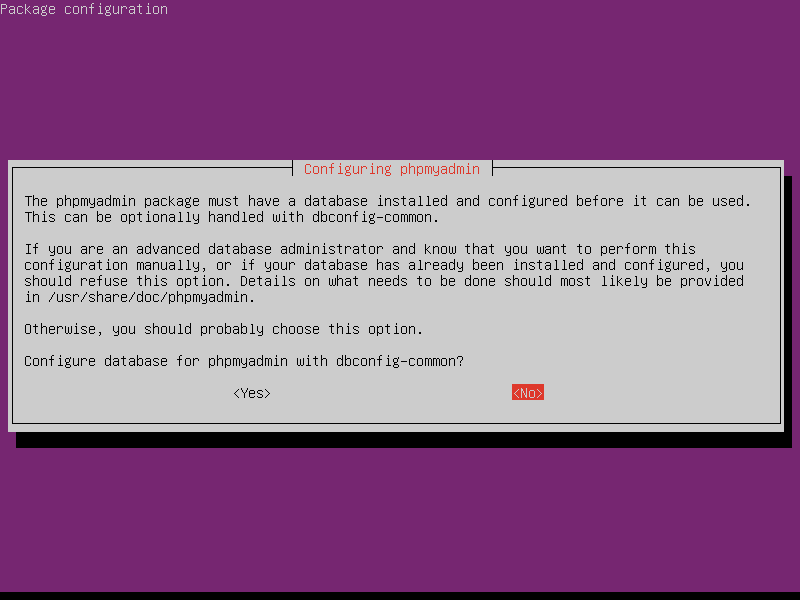
During installation, it will show you the below dialog, choose NO.
Now choose ‘Lighttpd‘.
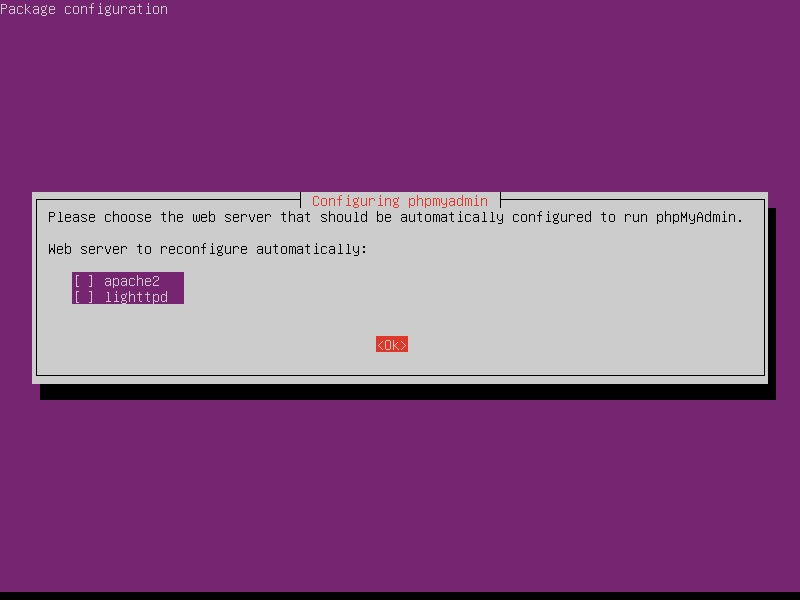
We are almost done here, just run this simple command to create a symlink in /var/www/ to the PHPMyAdmin folder in /usr/share/.
$ sudo ln -s /usr/share/phpmyadmin/ /var/www
Now go to http://localhost/phpmyadmin and it will ask you to enter the root password, that you’ve set above during MariaDB installation.
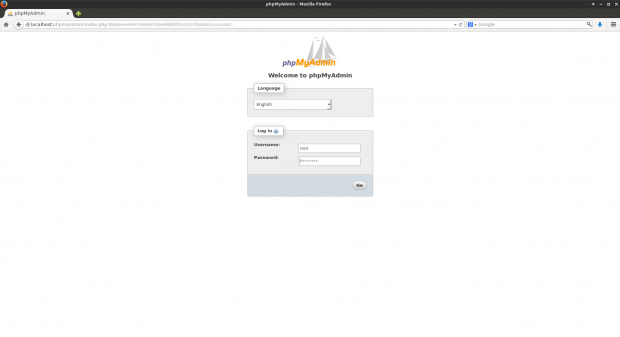
That’s it, all of your server components are up and running now, You can start deploying your web projects.




I had to alter the very last command line. Otherwise, I’d end up with “404”.
from
to
The rest of the tutorial worked fine for me on my Raspberry Pi
Dear All,
Seems I have the same 404 issues.
What I have found out: could it have something to do with the access rights? Something that you have no access to the link?
/www has rwx rwx r-x owner: www-data, group: www-data, oct 40775
/www/~phpmyadmin has: rwx r-x r-x owner: root, group: root, oct 40775
usr/share/phpmyadmin has rwx rwx r-x owner root, group root, oct 40775
regards
ernst
This is an add on to my reported 404 issues.
After some tries, I have found out, that when accessing via ssh there is access to maria DB, but not when accessing locally
–
1st via ssh (access to mariadb):
2nd locally (no access to mariadb):
The often reported issue, that Lighttpd is not running dependent on a parallel installed and running apache server is really annoying.
A running lighttpd can be easily checked out with:
Dear Ravi,
Your introduction is very very very good!
Big ThanX
ernst
Hi Ravi,
I have removed apache2 and put a renewing installation halted.
So now I keep having the lighttpd placeholder website.
But the issue with the error “404 Not Found” is still there.
Why is this so hard to get? I really would like to test lighttpd, but phpmyadmin is a bit of a hard part.
@Bepo,
Try to remove phpmyadmin completely, and re-install it and during the web server configuration select ‘lighttpd‘. See section: Installing PhpMyAdmin in Ubuntu in the article.
I followed the steps as shown, but when installing php the webserver site changes from Lighttpd to Apache. Also when installing PHPMyAdmin the window to choose between Apache and Lighttpd comes before asking for configuring PHPMyAdmin. I accidentally chose Apache, but that shouldn’t be a problem I assume. Everything went smooth, but when going to
http://localhost/phpmyadminI just get404 Not Found
Any idea? Is it possible to run the installation again, without reinstalling Linux? I am actually a Windows user, who tries the step over. :-)
Thank you
@Bepo,
It seems you already have Apache2 installed on the system. First, remove the Apache or Nginx on the system and then install Lighttpd web server.
It was a fresh installed Linux Mint.
The same happened again, this time with a fresh installed Ubuntu 20.04.
As soon as I run the command to install PHP.
and then refresh localhost then I get the Apache placeholder site. I also have lots of error messages running the command above. Is there are change to post you the messages?
@Bepo,
On the Step 1: Installing Lighttpd on Ubuntu – did you get Lighttpd web page?
The second step “Step 2: Installing PHP on Ubuntu” seems installing apache2 while installing PHP packages..
Try to remove apache2 and restart lighttpd.
Okay, reinstalled Linux Mint 20. Started from scratch.
Ran your command to uninstall Apache2. Works fine.
But when doing the phpmyadmin all is messed up again. Even when following every step you did, I get
404 Not Found
when opening http://localhost/phpmyadmin.
Restarted Linux, same result.
Why can’t I get this done??
@Bepo,
It seems apache2 is installing by defaut, for time being remove and hold the apache2 package for installation.
I was only able to access the phpmyadmin url following your tutorial. Everyone else returned a 404 error.
Thank you!