LXD is described as the next-generation container and virtual machine manager that offers an immersive for Linux systems running inside containers or as virtual machines.
It provides images for an inordinate number of Linux distributions with support for a wide selection of storage backends and network types. It also provides the option of installing the images on an individual PC/laptop and even on a cloud instance.
LXD allows you to manage containers and VMs using three ways. You can leverage the lxc client or command-line tool, a REST API, or even third-party integrations.
LXD Features
Notable LXD features include:
- LXD is image-based with images for a wide selection of Linux distributions.
- It is built with security as a top priority.
- It provides a REST API and lxc command-line tool to interact with containers.
- It provides support for a wide range of storage backends, storage volumes, and storage pools.
- Network management is through the creation of bridge networks and cross-host tunnels.
- Advanced control of resources such as CPU, RAM, disk usage, block I/O, and kernel resources.
- Flexible and scalable – You can deploy containers on your PC and configure a cluster that can aggregate thousands of containers on various nodes.
What is LXC?
Not to be confused with the lxc command-line client tool provided by LXD, LXC (Linux Container) is a popular OS-level virtualization technology that uses a powerful API and other tools to enable users to seamlessly create and manage containers and virtual machines in a single host. It comprises templates, tools language, and library bindings.
LXC Features
LXC leverages the following kernel features to handle processes:
- Kernel namespaces: pid, mount, uts network, and user.
- CGroups (control groups).
- Chroots – Using pivot_root.
- Seccomp policies.
- SELinux and Apparmor profiles.
Linuxcontainers.org is the umbrella project behind both LXD and LXC. Its objective is to offer a distro and vendor-neutral platform for Linux container technologies.
With that introduction out of the way, we will now demonstrate how to create and manage LXC containers on RHEL-based Linux distributions such as CentOS, Rocky Linux, and AlmaLinux.
Requirements
A working Linux operating system with minimal installation:
- Installation of RHEL Linux
- Installation of CentOS Linux
- Installation of Rocky Linux
- Installation of AlmaLinux
Step 1: Set SELinux to Permissive Mode
Right off the bat, we will begin by configuring SELinux and setting it to permissive. But before we do so, let’s update the system packages as follows:
$ sudo dnf update
To set SELinux to permissive, execute the command:
$ sudo sed -i 's/^SELINUX=.*/SELINUX=permissive/g' /etc/selinux/config
For this to take effect, reboot your server.
$ sudo reboot
And confirm the status of SELinux.
$ getenforce

Step 2: Install EPEL Repository
EPEL is a repository from the Fedora Project that provides a set of high-quality packages for RedHat Enterprise Linux and other RHEL-based distributions.
$ sudo yum install https://dl.fedoraproject.org/pub/epel/epel-release-latest-8.noarch.rpm
OR
$ sudo yum install epel-release

Step 3: Add the Kernel Parameters
Before we install LXD, some additional parameters are required. Therefore switch to root user:
$ su -
And add the parameters as follows.
$ grubby --args="user_namespace.enable=1" --update-kernel="$(grubby --default-kernel)"
$ grubby --args="namespace.unpriv_enable=1" --update-kernel="$(grubby --default-kernel)"
$ echo "user.max_user_namespaces=3883" | sudo tee -a /etc/sysctl.d/99-userns.conf

Once the parameters are in place, then proceed and enable Snap.
Step 4: Install and Enable Snap
The simplest way to install LXD on RHEL 8 is to install it as a snap package. But first, let us install snap as follows.
$ sudo dnf install snapd
This will install snapd daemon or service alongside other Python dependencies as shown.
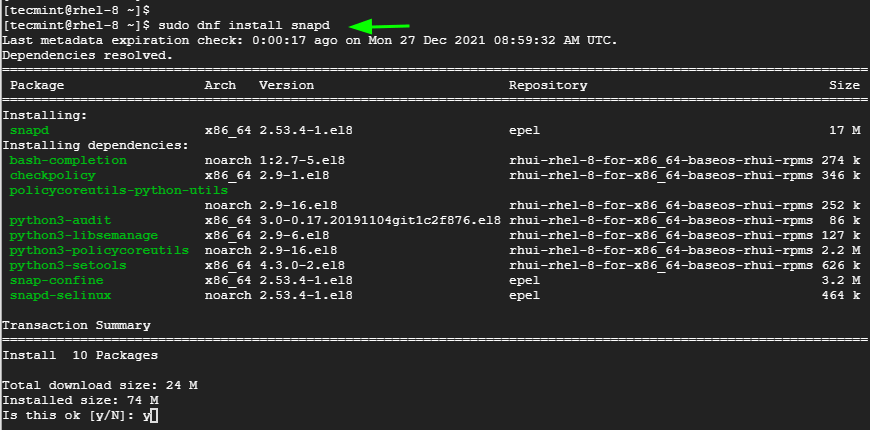
With snap installed, proceed and enable the main snap communication socket.
$ sudo systemctl enable --now snapd.socket
In addition, enable classic support by creating a symlink from /var/lib/snapd/snap to /snap.
$ sudo ln -s /var/lib/snapd/snap /snap
To update the snap paths, restart your system.
$ sudo reboot
Step 5: Install LXD Containerization Manager
There are two ways of installing LXD from a snap. You can install the latest version of LXD as shown.
$ sudo snap install —-classic lxd

Alternatively, you can install the latest stable LTS version as follows:
$ sudo snap install lxd --channel=4.0/stable
To be able to execute lxc commands without switching to sudo user, add the currently logged-in user to the lxd group.
$ sudo usermod -aG lxd $USER
Verify that the user has been added to the lxd group by listing all the groups the user belongs to.
$ groups tecmint

Next, run the newgrp command as follows.
$ newgrp lxd
The command changes the current group ID during a login session. It sets the current group ID to the named group which is lxd.
Step 6: Initializing LXD Environment
Before we begin creating and managing LXD containers, we need to initialize the LXD environment by running the command.
$ lxc init
What follows is a series of prompts that will allow you to set up your environment. The defaults will work just fine, but feel free to specify your own preferences.
We have created a storage pool called tec-pool with the lvm option as backend.

To verify the LXD environment you have just configured, there are a number of commands you can use. For example, to display the default LXD profile execute:
$ lxc profile show default
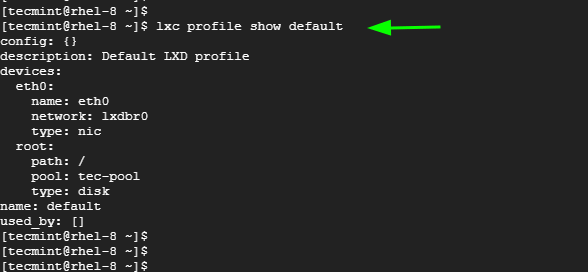
To display the network adapters and the IPv4 and IPv6 addresses, run:
$ lxc network list

You can further narrow it and display finer information about the lxdbr0 interface as follows.
$ lxc network show lxdbr0
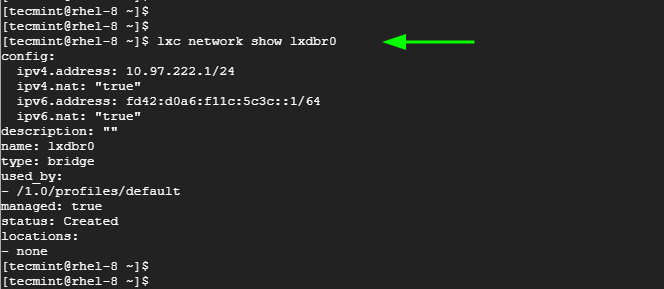
You can also verify the storage pool.
$ lxc storage list

You can further get intricate details about the storage pool.
$ lxc storage show tec-pool
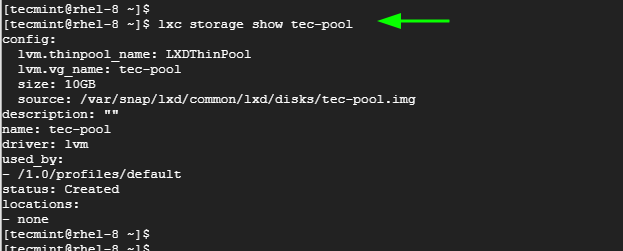
To list running lxc containers, run the command:
$ lxc list
At the moment, we do not have any running containers yet. So you will get an empty table with only the column labels.

Step 7: Listing Prebuilt LXC Container Images
Just like Docker, the LXC platform provides a repository of pre-built images that you can create containers from. To list all the prebuilt images for all operating systems including virtual machines, run the command:
$ lxc image list images:
This populates a huge list of container images and virtual machines for all the operating systems. To narrow down to a specific Linux distribution, use the syntax:
$ lxc image list images: grep -i os-type
For example, to search for available images for Rocky Linux, run the command:
$ lxc image list images: grep -i rocky

If you are searching for Debian images, run the command:
$ lxc image list images: grep -i debian

Step 8: Launching LXC Containers
To launch lxc containers, use the syntax:
$ lxc launch images:{distro}/{version}/{arch} {container-name-here}
Here, we will launch 2 containers: tec-container1 from Debian 10 and tec-container2 from Rocky Linux 8.
$ lxc launch images:debian/10/amd64 tec-container1
$ lxc launch images:rockylinux/8/amd64 tec-container2

To list the lxc containers, execute the command:
$ lxc list
The output displays a host of information about the containers. This includes the name of the containers, the state – whether running or stopped – IPv4 and IPv6 addresses, type (whether a container or virtual machine), and a number of snapshots.

To list running containers only, run the command:
$ lxc list | grep -i running
Likewise, for stopped containers, execute:
$ lxc list | grep -i stopped

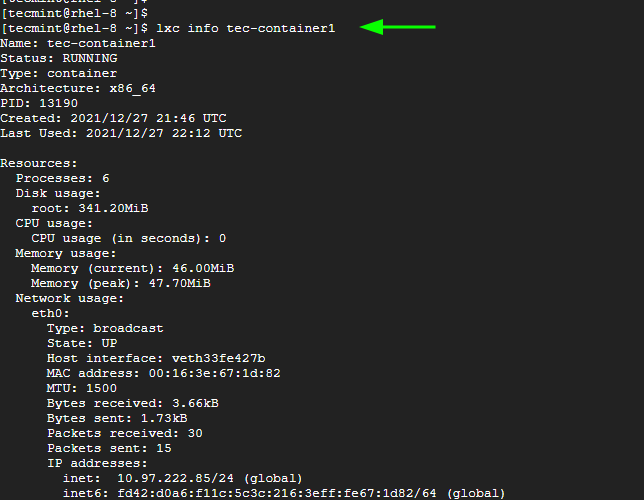
You can probe for a container’s information and metrics such as running processes, CPU & memory utilization, and bandwidth to mention a few using the command:
$ lxc info tec-container1
Step 9: Gain Shell Access to an LXC Container
You can gain bash access to a container using the syntax:
$ lxc exec container-name name-of-the-shell
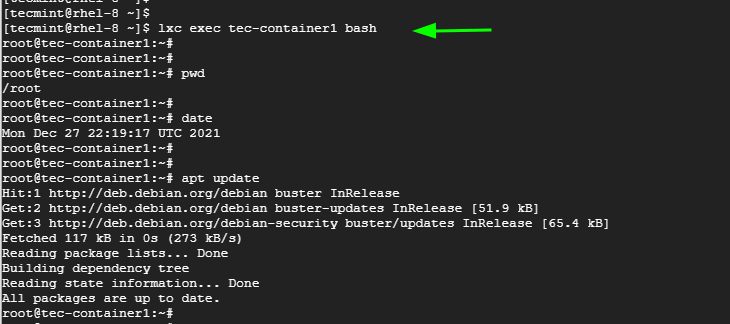
To gain shell access to tec-container1, we will run the command:
$ lxc exec tec-container1 bash
Once you have gained shell access, you can start interacting with the container as a root user by running common shell commands including updating the system as shown:
$ apt update
To exit from the container, run the command:
$ exit
Alternatively, you can execute the commands directly on the container without accessing the shell using the following format:
$ lxc exec container-name command
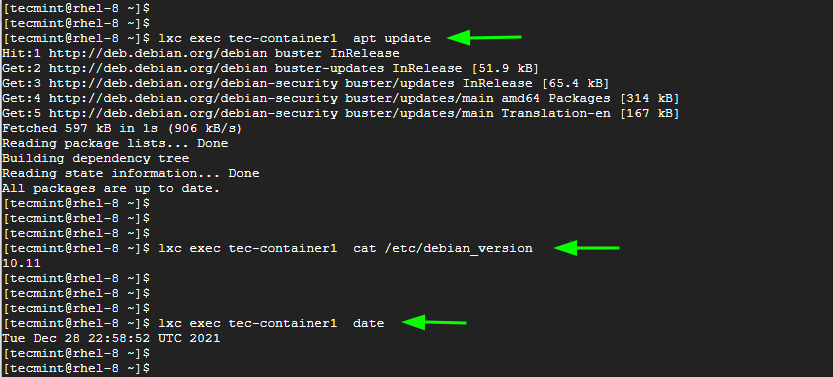
For example, you can run the following commands that will update the package lists, check the version of OS running on the Debian container and check the date.
$ lxc exec tec-container1 apt update
$ lxc exec tec-container1 cat /etc/debian_version
$ lxc exec tec-container1 date
Step 10: Pull / Push a File(s) to an LXC Container
Another operation you can carry out is to transfer files to and from the container. To demonstrate this, we will create a new directory in the LXD container and navigate into it.
# mkdir data && cd data
Next, we will create a sample file and add some data. To do so we will create a sample file with vim editor
# vim file1.txt
Next, we will type some sample text and save the file.
Hello World, Welcome to LXD containers.
To pull the file from the container to the local host system, we will use the syntax:
$ lxc file pull {container-name}/{path/to/file} {/path/to/local/dest}
In this case, the command will be:
$ lxc file pull tec-container2/root/data/file1.txt /home/tecmint

To push or copy a file from the local directory to the container use the syntax:
$ lxc file push {/path/to/file} {container-nane} /path/to/dest/dir/
In this case, we have a sample file in the home directory called file2.txt being copied to the /root/data/ path in the tec-container2 container.
$ lxc file push /home/tecmint/file2.txt tec-container2/root/data/
To confirm the existence of the file in the container, we will run:
$ lxc exec tec-container2 ls /root/data

Step 11: Stop / Start / Restart and Delete LXC Containers
With the lxc command-line utility you can perform container management tasks such as stopping, starting, restarting and deleting containers.
To stop an lxc container, use the syntax:
$ lxc stop container-name
For example, to stop tec-container1, we will run the command:
$ lxc stop tec-container1

To start the lxc container, use the syntax:
$ lxc start container-name
For example, to start tec-container1, we will execute:
$ lxc start tec-container1

To restart both lxc containers, we will run the command:
$ lxc restart tec-container1
$ lxc restart tec-container2

To delete an lxc container, you must, first, stop the container and thereafter delete it. For example, to delete, we will run the commands:
$ lxc stop tec-container1
$ lxc delete tec-container1
Alternatively, you can combine these two commands as shown.
$ lxc stop tec-container1 && lxc delete tec-container1

Step 12: Get Help on LXC Command-line Options
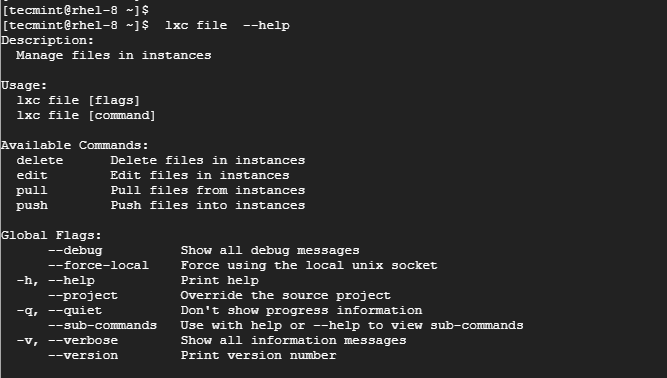
To get help on other command options provided by LXC, simply run the command:
$ lxc --help
OR
$ lxc command --help e.g
$ lxc file --help
Conclusion
That was a deep dive into LXD containers and how you can create and manage them using the lxc command-line utility tool. We trust that you found this guide helpful.



Actually, I checked, and I did have to install lxc-extra in order to get everything shown in this tutorial to work!
I cannot address Ales’s comment. But the dependencies between Linux software is highly complex, if they are easy for you to untangle, the more power to you. As far as Alberto’s comment goes, I might have installed lxc-extra but I don’t recall.
Certainly it couldn’t hurt to do so. Maybe some day in the near future for CentOS, lxd will be as easy to install as lxc is, as shown in this article. As I say in mt previous comment, on Debian family, lxd is a very simple installation, and useful too in order to sandbox machines.
For what is libvirt installed when you use lxc-* commands only?
Hi Matei Cezar,
Your Information was Great, so thanks for sharing it with us; but I have some issues on Red Hat 7.4 distribution with the lxc-ls command, when I try to perform the command it display: command not found… it seems the distribution that I use need to install a extra package to solve this; so it will be helpful that you can recommend to users to add the package: sudo yum install -y lxc-extra since this use python3.
Regards.
Excellent article! Much thanks! At this time, 12/5/2017, installation of lxd on CentOS 7.4 is not reliably achievable by an ordinary Linux user. But lxc is, exactly as shown so well here by Mr. Cezar.
Personally, I’m not too sure what lxd gets you anyway, above and beyond lxc. I have lxd installed on Linux Mint 18.2, and there is a pretty easy path to installation on Debian-family systems. Not so on the RHEL-family.
I cannot speak towards installing either lxc/lxd on the Slackware/OpenSuse family.
Very nice article, After installation I found, lxc-ls command was not found. I find out that, lxc-ls is part of the lxc-extra package. So I have installed it : yum install lxc-extra
Regards,
Srini
A very well written article. I don’t understand Hickmen criticism.
How do we install LXD?
This topic covers LXC containers, so, installing LXD should be the subject for a different topic. Still, to answer your question, the answer is:
sudo apt-get install lxd
But, again, this in not enough to cover a LXD topic.
A little proof reading would be nice. Either English is not your first language or you simply don’t care enough in order to conjugate a proper sentence. For example “allowing you to run multiple isolated distributions the same time.” should be “allowing you to run multiple isolated distributions at the same time.” And again “The difference between LXC and KVM virtualization is that LXC doesn’t emulates hardware” should be “The difference between LXC and KVM virtualization is that LXC doesn’t emulate hardware”. Pay attention or don’t torture people with having the read your broken speech more than once to figure out what your trying to say.
@Dick,
Instead of finding those silly mistakes in the article, why not you appreciate the hard work put by the author? If you don’t appreciate someone’s work, then you don’t have any rights to insult someone..
@Dick: “…figure out what your trying to say.” should be “…figure out what you’re trying to say.” I guess we all have problems with the English language!!
Salut Matei,
Could I ask you something in private, regarding a collaboration?
If yes, how can I contact you?
@Cristian,
You can contact [email protected] for any queries..
I think it would be nice to tell people how to configure static IP addresses for their containers.
whats about backing up vm ‘s , is there any backup solution in build or we must use third party software.
You can use lxc snapshots in order to backup lxc containers.
it maybe a good idea to include those detail on this guide about how to setup the network and such.
It does not use any network by default. You must manually define the network.
What network topology does the containers use by default? (NAT, Bridge,…)