On March 7, 2016, Microsoft announced the introduction of the MS SQL server in Linux systems. The goal was to deliver more flexibility for users and to do away with vendor lock-in with the aim of accelerating the adoption of the SQL database server. If you didn’t know already, MS SQL is a relational database server developed by Microsoft.
The current stable version is MS SQL 2019, which was released back in November 2019. The SQL Server is supported on RHEL, SUSE, Ubuntu, and Docker image.
In this guide, we will walk you through the installation of Microsoft SQL Server on RHEL, CentOS, Rocky Linux, and AlmaLinux.
Prerequisites
You must have an RHEL-based Linux distribution with at least 2 GB of memory and 10 GB of hard disk space.
Step 1: Add the Microsoft SQL Server Repository
The first step is to configure a Microsoft SQL Server repository. The repository retrieves the mssql-server, database engine packages, and other SQL server packages.
There are 2 broad categories of repositories: Cumulative and GDR.
- Cumulative Updates – The Cumulative Updates (CU) repository comprises the packages for base SQL server release, enhancements, and bug fixes since the release. These are specific to a release (for example SQL Server 2019) and are released on specific cycles.
- GDR: This repository only contains security updates and critical bug fixes which will also be included in the next MS SQL Server release.
To add the repositories, run the command:
$ sudo curl https://packages.microsoft.com/config/rhel/8/mssql-server-2019.repo -o /etc/yum.repos.d/mssql-server-2019.repo
$ sudo curl https://packages.microsoft.com/config/rhel/8/prod.repo -o /etc/yum.repos.d/msprod.repo

Step 2: Install Microsoft SQL Server and Tools
Once the repository is added, install Microsoft SQL Server using the DNF package manager as provided.
$ sudo dnf install mssql-server

Thereafter, install Microsoft SQL server command-line tools.
$ sudo dnf install mssql-tools unixODBC-devel
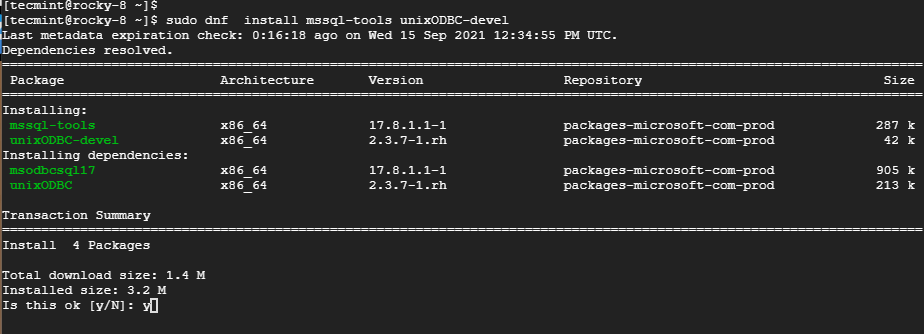
Along the way, Accept the license Terms by typing ‘YES’.
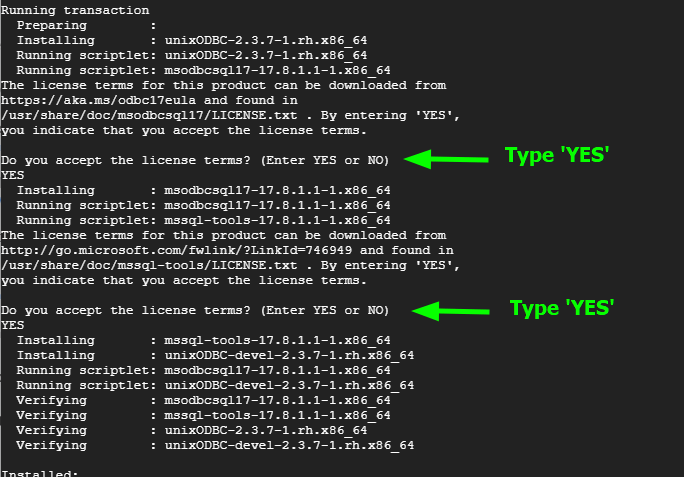
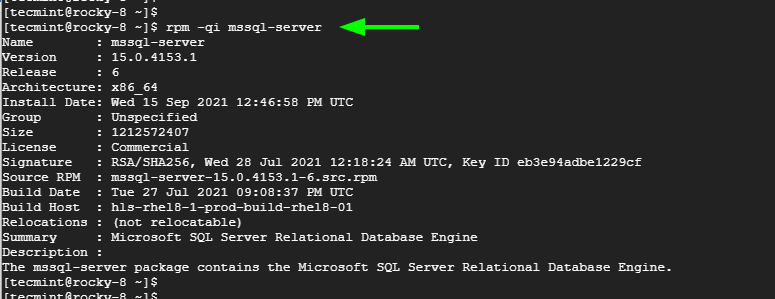
When the installation is done, confirm that the Microsoft SQL Server is installed using the rpm command:
$ rpm -qi mssql-server
The output provides a wealth of information including the version, Release, and architecture among other details.
Step 3: Initialize MS SQL Database Engine in Linux
So far, we have installed Microsoft SQL Server and all the essential command-line tools. We need to start the database engine before we log in and begin interacting with it.
$ sudo /opt/mssql/bin/mssql-conf setup
You will be required to select an edition of SQL Server. For convenience, select the second option [ 2 ] which provides a Developer Edtion which is free but without production rights.
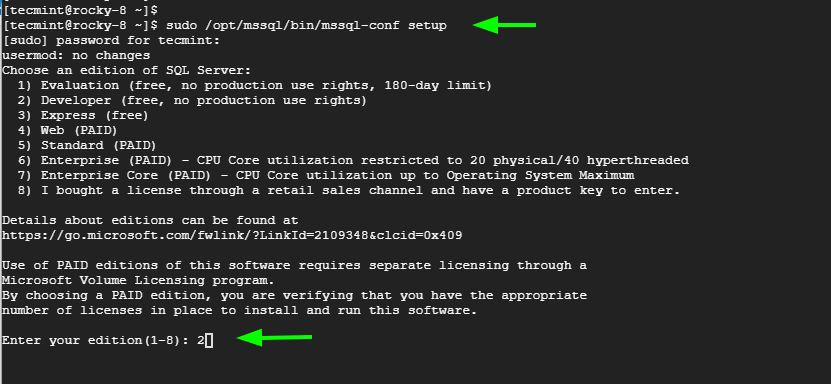
Thereafter, accept the license Terms and specify the Administrator password.

The setup will complete successfully and the SQL server will be started.

To verify the running status of the MS SQL server, run the command:
$ sudo systemctl status mssql-server.service

You can enable it to start on boot time as follows.
$ sudo systemctl enable mssql-server.service
Thereafter, export the path /opt/mssql/bin/ as demonstrated.
$ echo 'export PATH=$PATH:/opt/mssql/bin:/opt/mssql-tools/bin' | sudo tee /etc/profile.d/mssql.sh
Then activate the /etc/profile.d/mssql.sh file.
$ source /etc/profile.d/mssql.sh
MS SQL listens on port 1433 by default. To allows external users access to the server, we need to open this port across the firewall.
$ sudo firewall-cmd --add-port=1433/tcp  --permanent
$ sudo firewall-cmd --reload
Perfect! Let us now access and test the server.
Step 4: Login and Test MS SQL server in Linux
Before testing, make sure to check the version of MS SQL installed, use the sqlcmd utility to perform an SQL query
$ sqlcmd -S localhost -U SA -Q 'select @@VERSION'
Authenticate and hit ENTER. You should get the output shown.

To exit invoke the command.
$ exit
Once again login and run the following command:
$ sqlcmd -S localhost -U SA
Authenticate with your password and hit ENTER. You can list the names of the users in the table which stores users’ credentials.
1> SELECT name FROM sys.sysusers;
2> GO
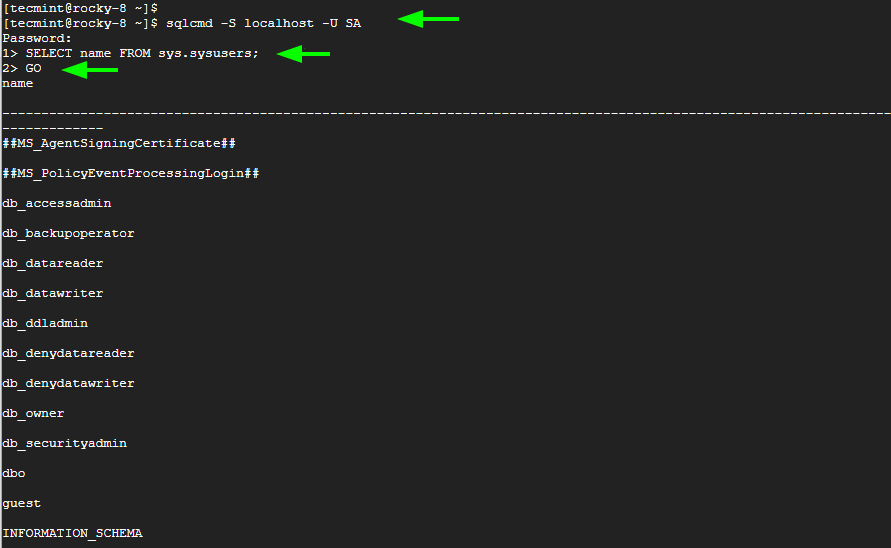
To create a database and list all the databases run the commands.
CREATE DATABASE tecmint_db;
SELECT name FROM sys.databases;
GO

You can drop a database by running:
DROP DATABASE tecmint_db;
GO
The commands delete or drop the entire database.
Conclusion
That’s it. We have successfully installed the MS SQL server on RHEL, CentOS, Rocky Linux, and AlmaLinux. and tested a few commands.




While it is nice to know how to do all of this by hand, it seems more complicated for RHEL/CentOS/Rocky/Alma systems vs just using Ansible. With the Ansible collection for Microsoft SQL Server, you just
dnf install ansible-collection-microsoft-sqlon a system based on RHEL 8.5.then create a mssql.yml file and you can deploy a SQL Server in under a minute. Plus it handles advanced tuning and securing the environment with TLS encryption as well.