MySQL is one of the oldest and most reliable open-source relational database management systems which is trusted and used by millions of users on a daily basis.
Since Fedora has recently announced their new version of the flagship distribution, we are going to cover how you can easily install MySQL 8 in Fedora 39, Fedora 38, and Fedora 37.
Throughout this tutorial, we are going to utilize the default Fedora repositories so we can make this installation process as simple as it can be.
Important: MySQL and MariaDB packages provide similar files and will conflict with each other. For this reason, you should only install MySQL or MariaDB but not both.
Installing MySQL in Fedora Linux
Before installing any package to your system, updating your repositories and applying updates (if any) ensures a robust experience. We are going to update repositories by the given dnf command:
$ sudo dnf update
Once the repositories are updated, we can proceed to the installation part. As we are going to utilize the default repository, it saves us from more complex steps. As we want to have the most recent version of MySQL, we are going to use the community version.
To install MySQL, utilize the given command:
$ sudo dnf install community-mysql-server -y
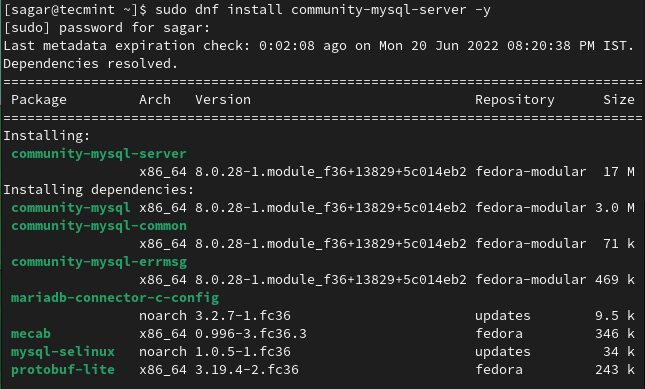
As we are using dnf, it will automatically handle all the dependencies and will give us a hassle-free experience.
Starting MySQL in Fedora Linux
Just installing MySQL won’t get your job done. Before going any further, we are required to enable MySQL service as it will be in an inactive state after installation.
To check the current status of the MySQL service, utilize the given command:
$ systemctl status mysqld

We will be using the following command to start the MySQL service:
$ sudo systemctl start mysqld
Now, let’s cross-check whether we have successfully started MySQL by using the given command:
$ systemctl status mysqld
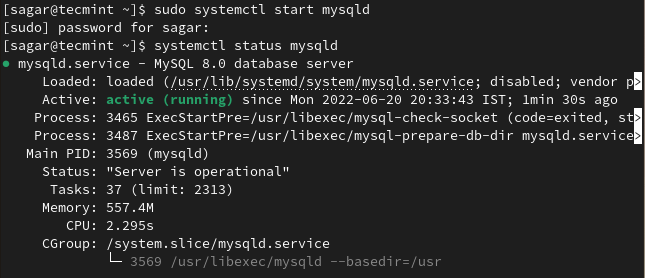
As you can see, MySQL is running in an active state.
Similarly, if you want to start MySQL at each boot, you can easily do that by using the given command:
$ sudo systemctl enable mysqld
Securing MySQL in Fedora Linux
The default installation of MySQL is weak by modern standards of security and can easily be manipulated by hackers. There are multiple ways to secure your MySQL, but the simplest yet most effective is to use a secure script.
We can easily start the securing script by the following command:
$ sudo mysql_secure_installation
For most users, this script will work fine but if it asks you for the password, you can retrieve a temporary password from mysqld.log at /var/log/ by the given command:
$ sudo grep 'temporary password' /var/log/mysqld.log
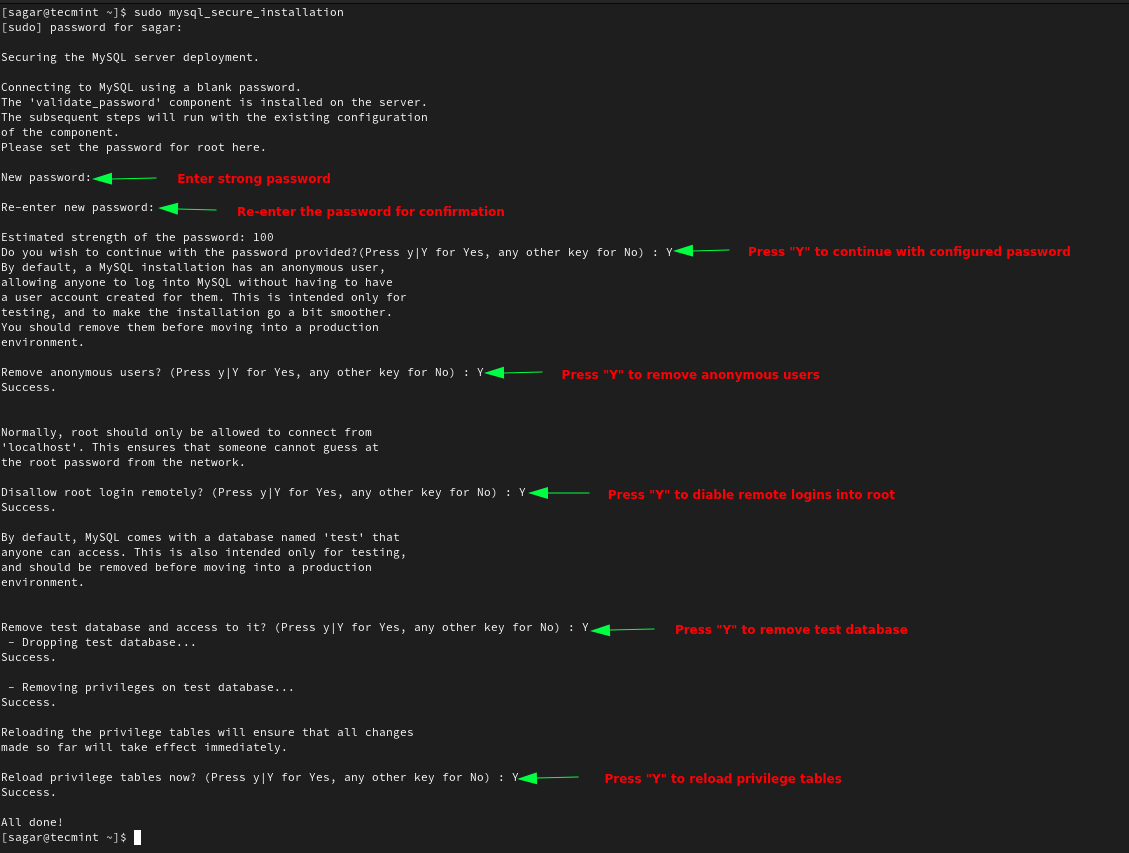
The secure script will ask you the following:
- Setting up a root password
- Removing anonymous users
- Disable root access via remote
- Removing test database
- Reloading root privileges
Connecting to MySQL in Fedora Linux
Once we are done with securing the script, we can easily connect to the MySQL server by the given command:
$ sudo mysql -u root -p
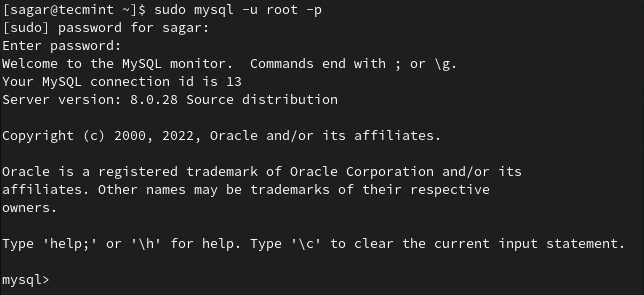
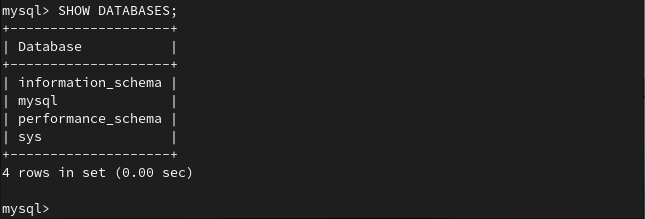
Once we are into MySQL, we can list databases by using the following:
mysql> SHOW DATABASES;
Updating MySQL in Fedora Linux
Despite the fact that we have just finished the installation recently, we can utilize the following command to update MySQL products:
$ sudo dnf update mysql-server

This was our take on how you can easily install MySQL 8 on Fedora in the easiest way possible. But if you still have any issues with installation, feel free to ask in the comments section.



I have done the dnf update, and then when installing with
sudo dnf install community-mysql-server -yit gives the following error:The article does NOT indicate the use case when MaríaDB has been installed, nor what to do to uninstall it.
@Federico,
It seems you’re encountering a package conflict issue between the mariadb-server-utils package version 10.5.22-1.fc38.x86_64 and the community-mysql-server package, which is version 8.0.32-1.fc38.x86_64 in your Fedora system.
To fix the package conflict error between mariadb-server-utils and community-mysql-server, you’ll need to make a decision on which database server you want to use (MariaDB or MySQL) and resolve the conflict accordingly.
If you want to keep MariaDB and remove MySQL (community-mysql-server), you can run the following command:
If you want to keep MySQL and remove MariaDB (mariadb-server-utils), you can run:
After removing the unwanted database server, you can then update or install the chosen one. For example, if you decided to use MariaDB, you can update it with:
If you decided to use MySQL, you can update it with:
Finally, verify that the chosen database server is installed and running as expected.
Remember to back up any important data before making these changes, as altering your database server could affect your system’s functionality.
Installing is not an issue, but actually connecting to a MySQL database is a different story, nor matter what you do, you will always get “Access denied for user@localhost using password (YES)“…
@Andre,
You need to allow user to access the database on MySQL with these commands.
Nice easy solution, Ravi! Thank you!
Super helpful article!! Made installation of MySQL a snap on my Fedora 36 virtual server running in Virtual Box.
Very helpful article on installing MySQL.