You must have probably installed Fedora 40 Server Edition on your machine and you are eager and looking forward to setting up a web server to run websites and web applications. Look no further, because we shall do all that here, with simple and easy steps that you will appreciate at the end.
In this how-to guide, we shall run through the different steps of how you can install the LEMP stack on your Fedora 40 web server. Similar to the LAMP stack, but under LEMP, we use the Nginx web server.
Step 1: Updating System Packages
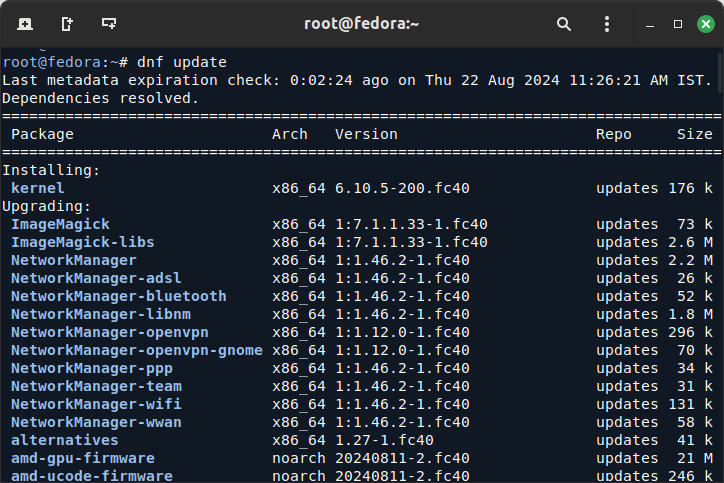
You can get started by updating your system packages as follows:
dnf update
When that is done, proceed to install the composite LEMP packages.
Step 2: Install the Nginx Web Server
Nginx is an alternative to Apache web server, it is lightweight and consumes fewer system resources hence its high performance, stability, and flexibility in enterprise production environments.
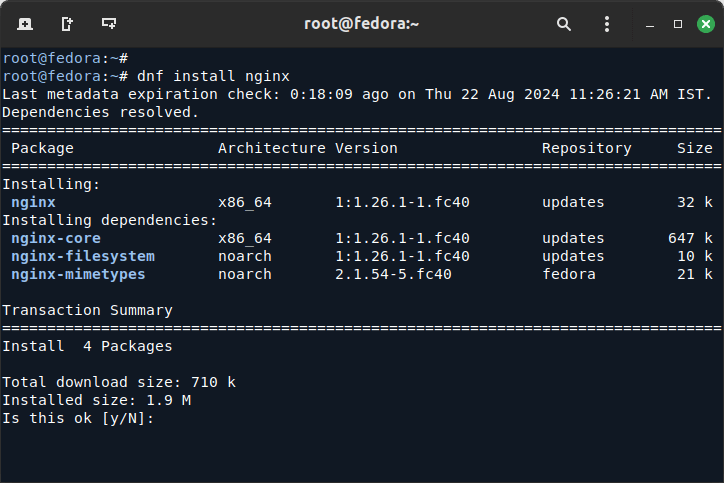
To install Nginx on Fedora 40, issue the command below:
dnf install nginx
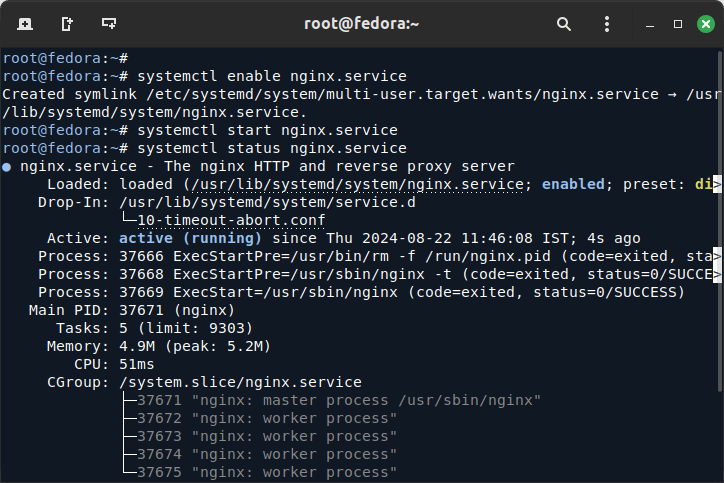
Once the installation is complete, you need to manage the Nginx service on your system. First, you need to set it to start automatically at boot time by running the command below:
systemctl enable nginx.service
Then start the service as follows:
systemctl start nginx.service
Next, check to see that the Nginx server is running, you can issue the command below to do that:
systemctl status nginx.service
To view your Nginx web server over HTTP/HTTPS protocol, you need to allow access to it through the system firewall.
To do so, run the following commands:
firewall-cmd --permanent --add-service=http
firewall-cmd --permanent --add-service=https
Then reload the system firewall configurations to effect the above changes as follows:
systemctl reload firewalld
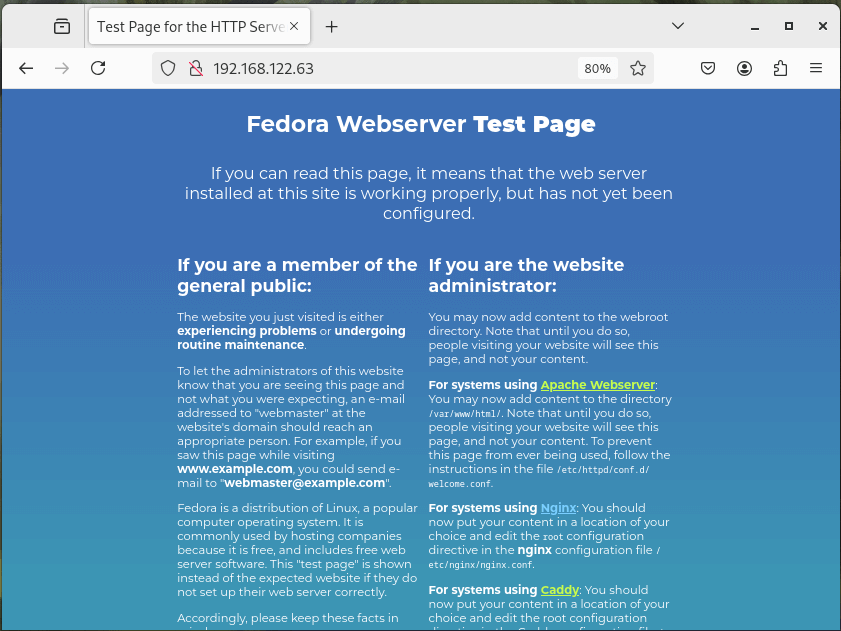
One more important thing to do under Nginx installation is to check whether the Nginx installation index page can load in your web browser, therefore open your web browser and enter the URL:
http://server-ip-address
You should be able to view this page below:
Step 3: Install MariaDB Server
MariaDB is a fork of the most famous MySQL relational database server, to install MariaDB on the Fedora server, issue the command below:
dnf install mariadb-server

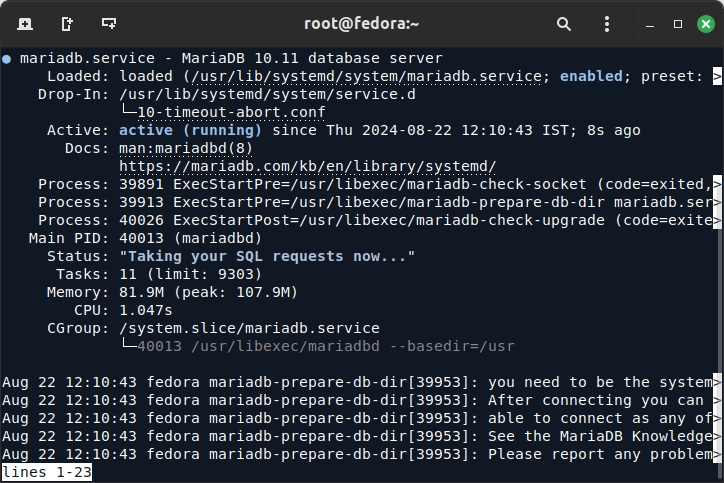
After completing the MariaDB installation, you need to enable, start, and verify the service by running the following series of commands.
systemctl enable mariadb.service
systemctl start mariadb.service
systemctl status mariadb.service
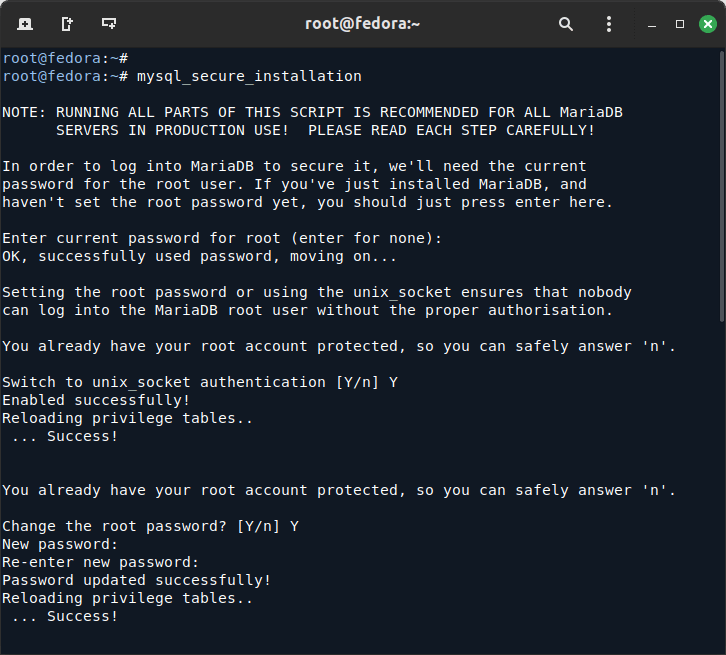
Now it’s time to secure your MariaDB installation using the following command:
mysql_secure_installation
After executing the above command, you will be asked a few questions as follows:
Step 4: Install PHP and Modules
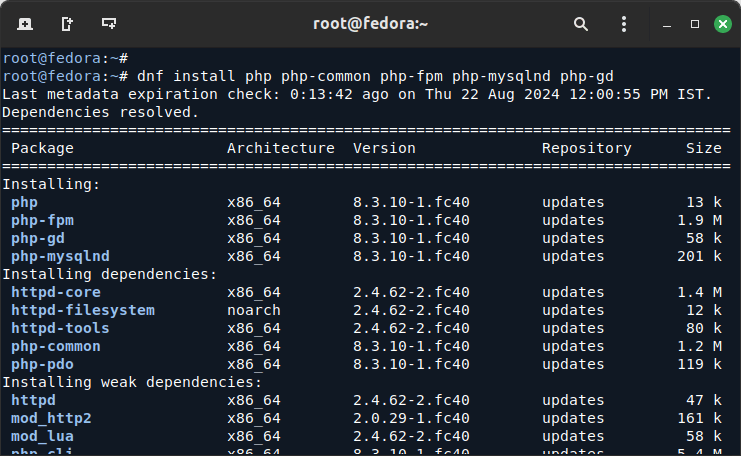
To install PHP on Fedora along with its modules, use the command below:
dnf install php php-common php-fpm php-mysqlnd php-gd
Now that PHP and some PHP modules have been installed, you need to configure PHP so that you can run PHP files.
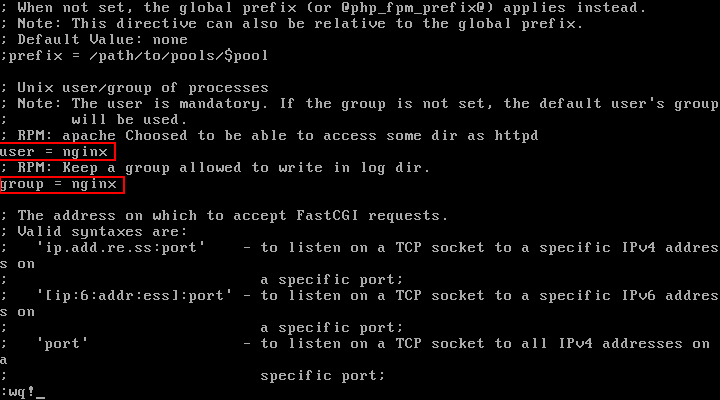
By default, PHP-FPM is configured to be used with an Apache web server, but in our case here, we are using a Nginx web server. Therefore we need to change that setting in the steps below:
Using your favorite editor, open the file /etc/php-fpm.d/www.conf as follows:
vi /etc/php-fpm.d/www.conf
Then change the values of the user and group from apache to nginx in the following lines:
; RPM: apache Choosed to be able to access some dir as httpd
user = nginx
; RPM: Keep a group allowed to write in log dir.
group = nginx
Then restart the PHP-FPM and Nginx web server to effect the changes above:
systemctl restart php-fpm.service
systemctl restart nginx.service
After that, confirm that they are running by issuing the commands below:
systemctl status php-fpm.service
systemctl status nginx.service
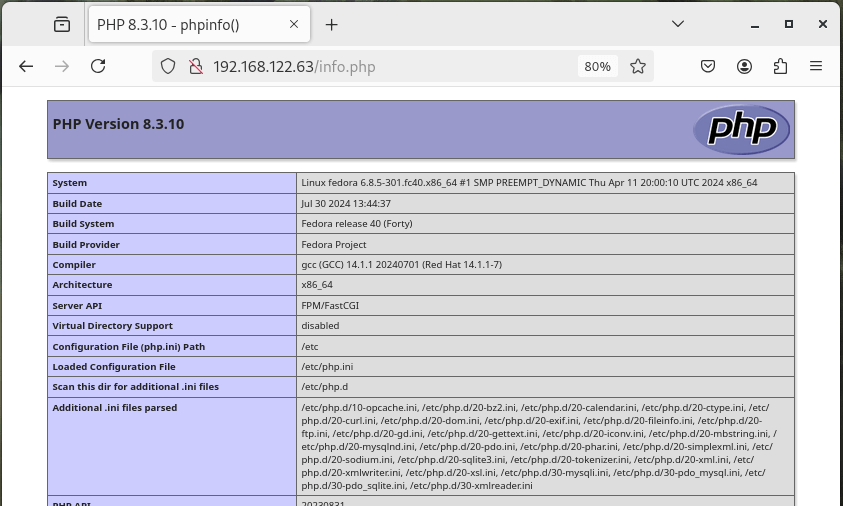
Now you can test it all, using your favorite editor, create a file called info.php in your Nginx root directory as follows:
vi /usr/share/nginx/html/info.php
Add the following lines in the file, save it, and exit.
<?php
phpinfo()
?>
Then open your web browser and enter the following URL to verify the PHP information:
http://server-ip-address/info.php
At this point, you must have successfully installed and configured the LEMP stack on your Fedora 40 server.
Step 5: Hosting a Sample Website using Nginx
To host a sample website using Nginx, you need to create a directory that will hold your website files with appropriate permissions to access the directory.
sudo mkdir -p /usr/share/nginx/html/mywebsite
sudo chown -R nginx:nginx /usr/share/nginx/html/mywebsite
Next, create a simple HTML file to serve as your website’s homepage.
sudo vi /usr/share/nginx/html/mywebsite/index.html
Add the following sample HTML content:
<!DOCTYPE html>
<html lang="en">
<head>
<meta charset="UTF-8">
<meta name="viewport" content="width=device-width, initial-scale=1.0">
<title>My Sample Website</title>
</head>
<body>
<header>
<h1>Welcome to My Sample Website</h1>
</header>
<main>
<p>This is a simple website hosted on Nginx using Fedora 40.</p>
</main>
<footer>
<p>© 2024 My Sample Website</p>
</footer>
</body>
</html>
Save the file and exit the editor.
Step 6: Configure Nginx to Serve the Website
Now you need to create a new Nginx server block configuration file for your website.
sudo vi /etc/nginx/conf.d/mywebsite.conf
Add the following configuration (replace your_server_ip with your actual server’s IP address or domain name):
server {
    listen 80;
    server_name your_server_ip;  # Replace with your server's IP address or domain name

    root /usr/share/nginx/html/mywebsite;  # Document root
    index index.html;

    location / {
        try_files $uri $uri/ =404;
    }

    location ~ \.php$ {
        include fastcgi_params;
        fastcgi_pass unix:/run/php-fpm/www.sock;
        fastcgi_index index.php;
        fastcgi_param SCRIPT_FILENAME $document_root$fastcgi_script_name;
    }
}
Before reloading Nginx, it’s a good practice to test the configuration for syntax errors:
sudo nginx -t
If the test is successful, you can reload Nginx to apply the new configuration:
sudo systemctl reload nginx
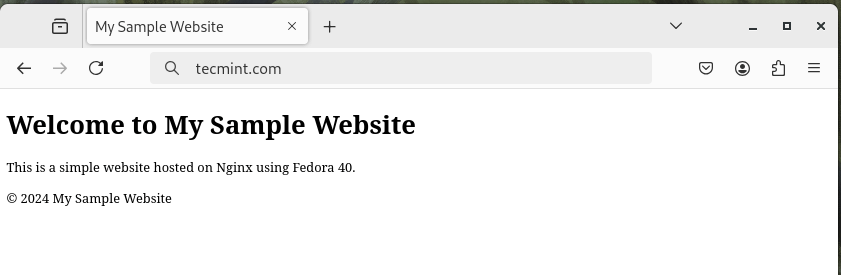
Now that everything is set up, you can access your website by navigating to the following URL
http://your_server_ip
OR
http://domain.com
You should see the homepage of your sample website displaying the message “Welcome to My Sample Website“.
Step 7: Enable HTTPS on Website for Nginx
To set up SSL for your sample website hosted on Nginx with the document root /usr/share/nginx/html/mywebsite, you can use Certbot to obtain a free SSL certificate from Let’s Encrypt.
sudo dnf install certbot python3-certbot-nginx -y
Next, run the following command to obtain and install the SSL certificate:
sudo certbot --nginx
Certbot will automatically configure your Nginx settings to use the new SSL certificate in your existing server block configuration.
Once Certbot has completed the installation, you can verify that SSL is working correctly by navigating to https://yourdomain.com.
In a few cases, some of you must have encountered errors or want more explanation concerning an issue of concern, you can leave a comment in the comment section below and we shall find solutions together.


Hi,
really nice info but it’s not include how to link the Nginx with php-fpm and which configuration I need to do to get the service work probably as you knew the php-fpm is work as independent service
@Mozuffer Mohamed Hago
Sorry about that, here i only pointed out setting PHP FPM to work with Nginx instead of Apache2
Here is a detailed guide from the Nginx website that explains how to connect Nginx with PHP FPM:
https://www.nginx.com/resources/wiki/start/topics/examples/phpfcgi/#
What if you want to use /home/username/www ?
@kimmono,
You mean Apache document root path? if yes, you can replace
/var/www/htmlwith/home/username/wwwinhttpd.conffile.