A LEMP stack is made up of Nginx (pronounced Engine X), MySQL/MariaDB and PHP/Python packages installed on a Linux system, and configured to work together as a system for hosting websites and applications and more. In this guide, we will show how to install LEMP and the latest phpMyAdmin in Ubuntu 18.04.
Read Also: Install Apache, MariaDB, PHP and PhpMyAdmin in Ubuntu 18.04
PhpMyAdmin is a free, open source, popular and intuitive web-based application for administering MySQL and MariaDB database, which supports a wide range of operations.
It has a multitude of features for simply managing your databases from a web interface. It allows you to import and export data in various formats, manage multiple servers, build complex queries using Query-by-example (QBE), create graphics of your database layout in various formats, and so much more.
Requirements:
- Minimal Ubuntu 18.04 server Installation.
- Access to server via a SSH session.
- Root access or use sudo command to run all commands.
In this article, we will explain how to install LEMP stack with PhpMyAdmin in Ubuntu 18.04.
Step 1: Install Nginx Web Server on Ubuntu 18.04
1. First start by updating your software packages and then install Nginx, an open source, fast and high-performance web server, load balancer as well as reverse proxy with an easy to understand configuration language.
$ sudo apt update
$ sudo apt install nginx
2. Once you have installed it, the Nginx service should start automatically and will be enabled to start at boot time, you can check if it’s up and running.
$ sudo systemctl status nginx
3. If you have a firewall enabled and running on your system, you should open the ports 80 (HTTP) and 443 (HTTPS) to allow client requests to Nginx web server, and reload the firewall rules.
$ sudo ufw allow 80/tcp
$ sudo ufw allow 443/tcp
$ sudo ufw reload
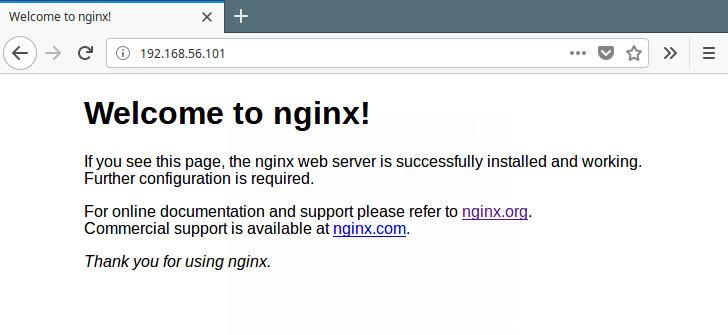
4. Next, test if the Nginx package was successfully installed and is working fine, type this URL in your web browser.
http://domain_name/
OR
http://SERVER_IP/
If you see the Nginx default web page, it means your installation is working fine.
Step 2: Install MariaDB on Ubuntu 18.04
5. Next install MariaDB database management system.
$ sudo apt install mariadb-server mariadb-client
6. After MariaDB installation, the service should start automatically and you can verify it using following command.
$ sudo systemctl status mysql
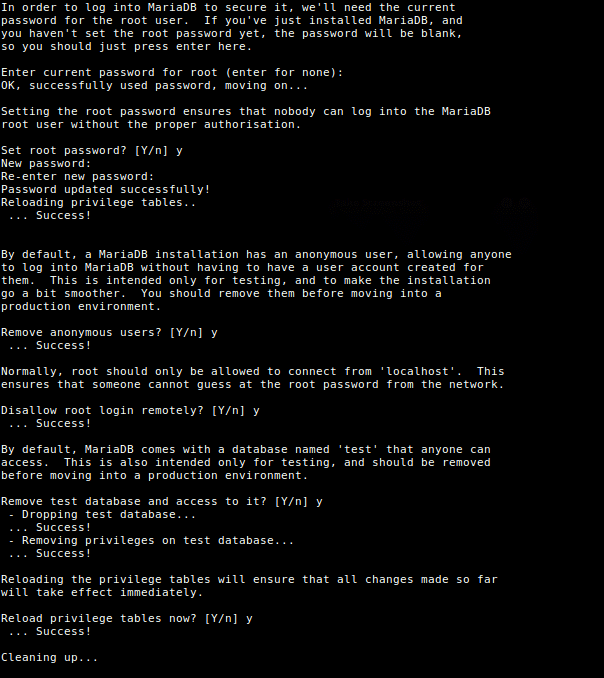
7. Next, secure your MariaDB installation by running the security script that comes with the package.
$ sudo mysql_secure_installation
Then enter yes/y to the following security questions:
- Set root password? [Y/n]:
y - Remove anonymous users? (Press y|Y for Yes, any other key for No) :
y - Disallow root login remotely? (Press y|Y for Yes, any other key for No) :
y - Remove test database and access to it? (Press y|Y for Yes, any other key for No) :
y - Reload privilege tables now? (Press y|Y for Yes, any other key for No) :
y
Step 3: Install PHP on Ubuntu 18.04
8. PHP is a popular server side scripting language used to generate dynamic content on websites. You can install PHP, PHP-FPM and other modules for web development using following command (the default version in the Ubuntu repos is PHP 7.2).
$ sudo apt install php php-fpm php-common php-mysql php-gd php-cli
9. After PHP installation, the PHP7.2-FPM service should also start automatically, you can verify the service using the following command.
$ sudo systemctl status php7.2-fpm
10. Next, configure PHP-FPM properly to serve PHP based web applications or sites, in the configuration file /etc/php/7.2/fpm/php.ini.
$ sudo vim /etc/php/7.2/fpm/php.ini
Search for the ;cgi.fix_pathinfo=1 and change it to the following.
cgi.fix_pathinfo=0
11. Then configure PHP-FPM to process PHP scripts in Nginx default server block configuration file (/etc/nginx/sites-available/default).
$ sudo vim /etc/nginx/sites-available/default
Uncomment the configuration section below to pass PHP scripts to FastCGI server.
location ~ \.php$ {
            include snippets/fastcgi-php.conf;
        	fastcgi_pass unix:/var/run/php/php7.2-fpm.sock;
}
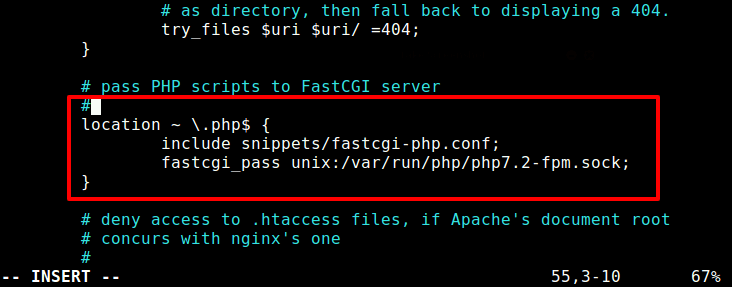
After making changes, restart the php7.2-fpm and nginx services to apply the recent changes.
$ sudo systemctl restart php7.2-fpm
$ sudo systemctl restart nginx
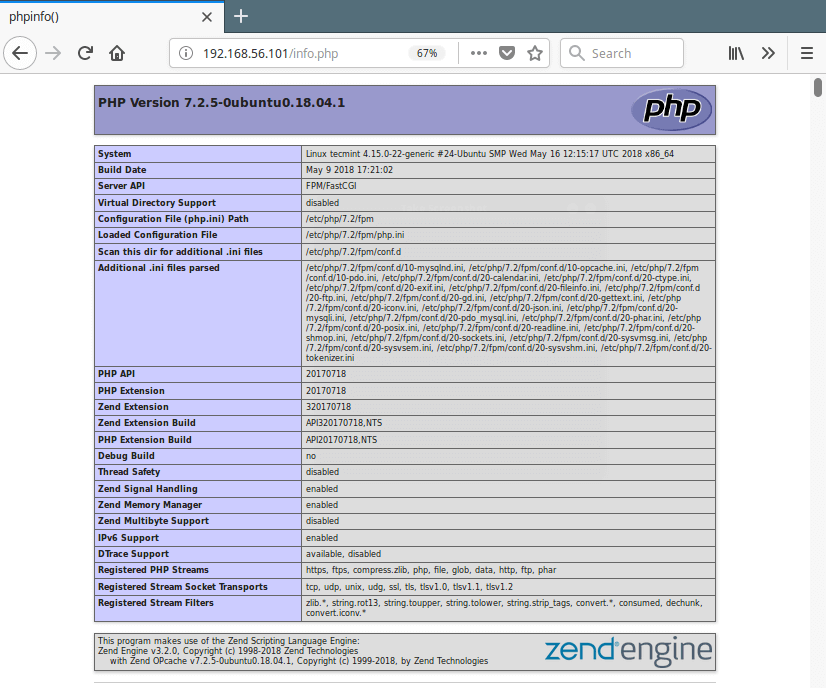
12. Now you can test your PHP setup by creating a simple info.php page in your web server document root, with this single command.
$ echo "<?php phpinfo(); ?>" | sudo tee /var/www/html/info.php
13. Next, open a web browser, and enter any of the following URL to view the php information page.
http://domain_name/info.php
OR
http://SERVER_IP/info.php
Step 4: Install PhpMyAdmin on Ubuntu 18.04
14. At last install PhpMyAdmin for administrating MySQL/MariaDB databases from the comfort of a web browser.
$ sudo apt install phpmyadmin
During the package installation process, you will be asked to choose the web server that should be automatically configured to run phpMyAdmin. Nginx is not in the list of web servers, simply press TAB key and press Enter.
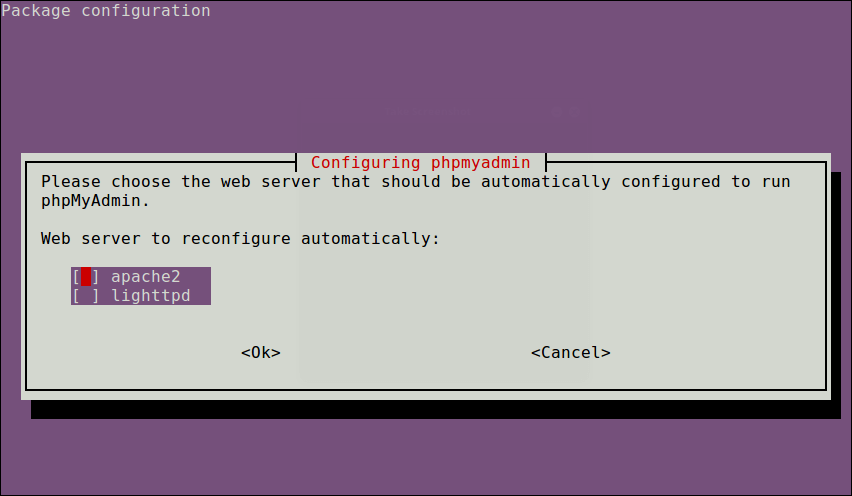
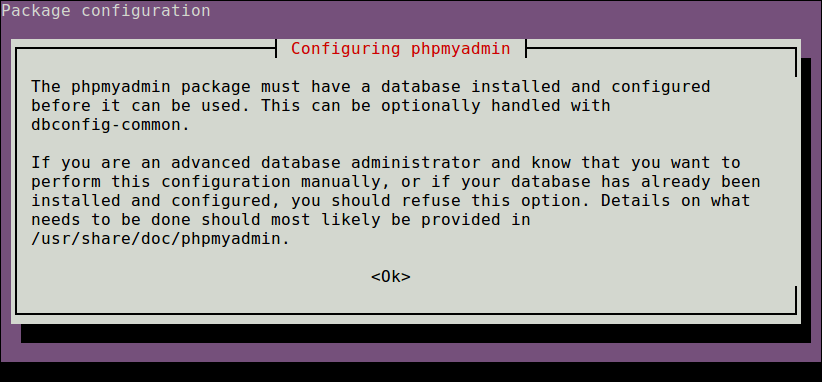
15. Next, enter the password for the MySQL to create a database for phpmyadmin.
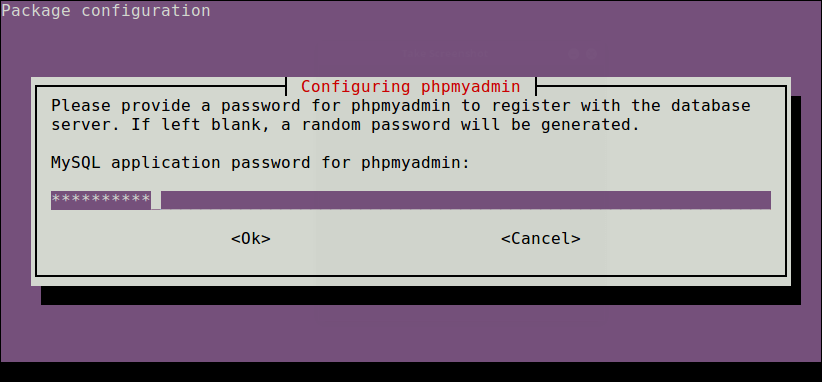
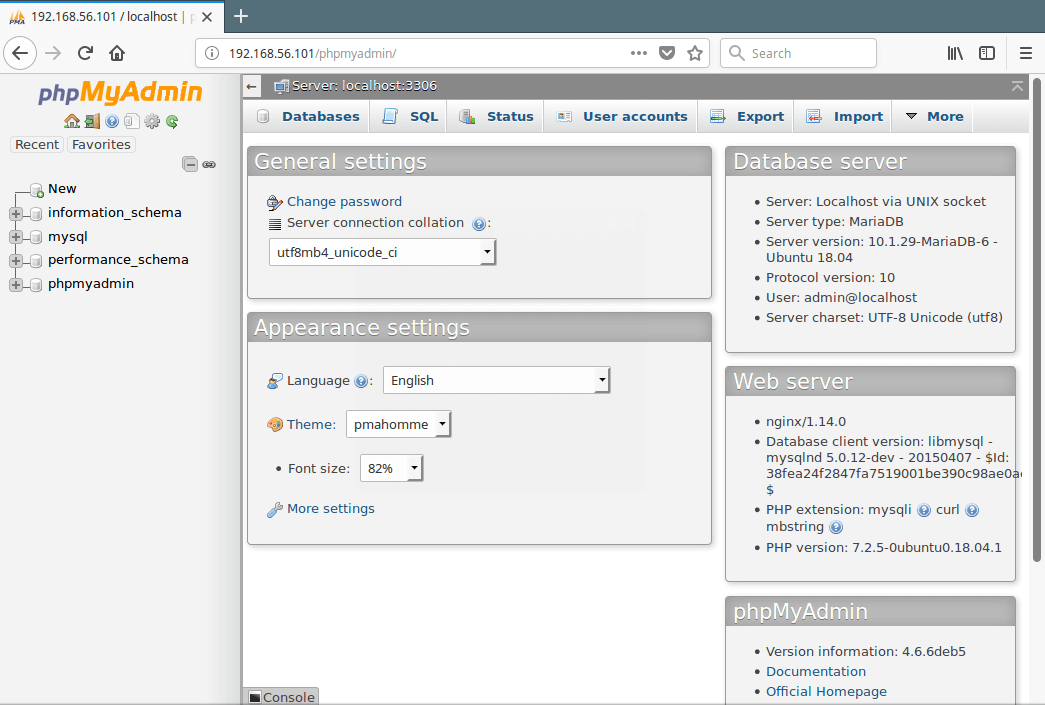
16. At this point the phpmyadmin installation process should be complete. You can access the phpMyAdmin interface in your browser by creating the following symlink.
$ sudo ln -s /usr/share/phpmyadmin /var/www/html/phpmyadmin
Because the phpmyadmin index file is index.php, also ensure that you have added it to the list of index files, in your default server block configuration file /etc/nginx/sites-available/default, as shown in the following screenshot.
index index.php index.html index.htm index.nginx-debian.html;

17. Next, set the appropriate permissions on the phpmyadmin root directory to prevent access denied errors.
$ sudo chmod 775 -R /usr/share/phpmyadmin/
$ sudo chown root:nginx -R /usr/share/phpmyadmin/
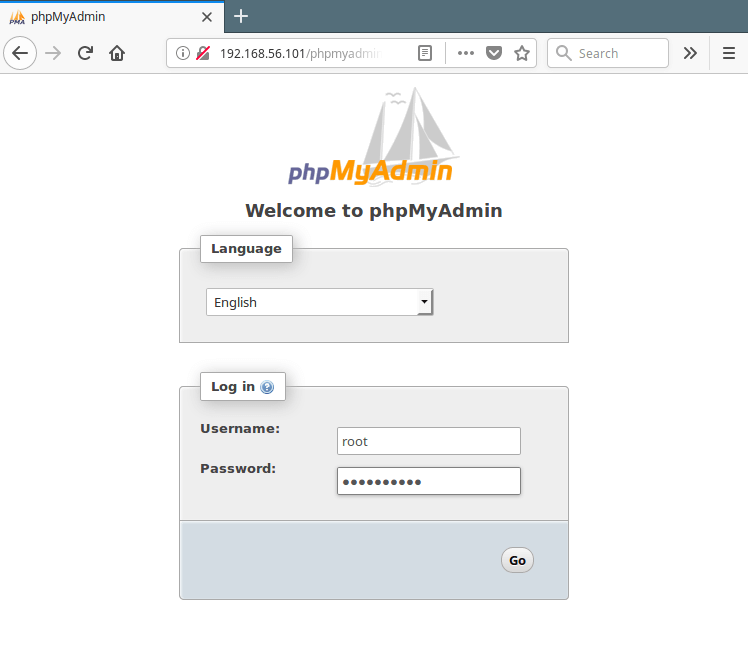
18. Now, from a web browser, type the following URL to access PhpMyAdmin.
http://domain_name/phpmyadmin
OR
http://SERVER_IP/phpmyadmin
Then authenticate in the phpMyAdmin using your MySQL/MariaDB root username and password, and enjoy.
Note: If the root login fails (because it requires sudo starting from MySQL 5.7), you may need to create a new admin user account to access the mariadb shell using the root account from a terminal.
$ sudo mysql -u root -p
MariaDB [(none)]> CREATE USER 'admin'@'localhost' IDENTIFIED BY '=@!#254tecmint';
MariaDB [(none)]> GRANT ALL PRIVILEGES ON *.* TO 'admin'@'localhost' WITH GRANT OPTION;
MariaDB [(none)]> FLUSH PRIVILEGES;
Now use new credentials to login again into PhpMyAdmin to administer your MySQL databases.
To secure your PhpMyAdmin web interface, check this article: 4 Useful Tips to Secure PhpMyAdmin Web Interface.
That’s it! In this article, we have explained how to setup LEMP stack with the latest PhpMyAdmin in Ubuntu 18.04. If you have any queries, let us know via the feedback form below.



When I am trying to access –
http://127.0.0.1/phpmyadmin/.Getting – 403 Forbidden
Please suggest how I can fix it?
Man, you deserve a medal!
I had trouble with other PHP versions. php-gettext too, what came from php7.0-fpm, so I removed all versions of PHP and your dependencies and reinstall PHP version 7.2 and php7.2-fpm, works fine.
TIPS TO REINSTALL ALL PHP AND PHPMYAMIN:
OK, now install php and php-fpm with version 7.2:
No need restart, but you can.
NOTE: Don’t forget to modify version to 7.2 in archive : /etc/nginx/sites-available/default.
CORRECTING:
apt-get autoremove --purge php*Hi Guys,
The same problem with 502 Bad Gateway.
I have changed to 7.4, so:
Also, I have uncommented this section in default server block file:
location ~ \.php$ {
            include snippets/fastcgi-php.conf;
        	fastcgi_pass unix:/var/run/php/php7.4-fpm.sock;
}
What I need to do? Many thanks!
You have forgotten to mention about creating nginx user/group which doesn’t create by apt so it will be much better if you add this command line to your nginx installation part of your document :
sudo adduser --system --no-create-home --shell /bin/false --group --disabled-login nginx(note: my code example is trimmed by this forum, I mean when I write – – system it posts as – system, so if you need it correct spelling I may mail to you )
Thanks, man, really helpful and I have a small doubt, I have a site which is using apache2, MySQL can I migrate apache2 to Nginx and also MySQL to MariaDB without any data loss.
@Subin,
Yes, you can switch from Apache to Nginx and from MySQL to MariaDB without loosing any data.. Just remove the Apache, and install Nginx and point the Nginx DocumentRoot to your website directory. Similarly, take a dump of all databases from MySQL, remove it and install MariaDB and import all databases that’s it!
Thank you very much
Good tutorial, man!
But, I needed to reload again at the end of everything, for phpmyadmin to work fine.
(Using Kubuntu 18.04 LTS)
At first 16. (why two point 16?) there is a typo:
should be:
@Davide,
Thanks for pointing out the typo, corrected in the article..:)
Good tutorial!
When you create a link there is a slash missing…
On my computer the nginx is running as www-data so the chown command had to be modified
Same here on a Ubuntu 18.04 server, however even after running the chown as root:www-data I still get an access denied on phpmyadmin. No clue why..
It seems to be something wrong with this tutorial…
1. In Step 3 #8 installing php will pull in apache as a dependency and replace nginx with apache. I had to install only php-fpm for this to not happen.
2. In Step 3 #12 and #13 i get error “502 Bad Gateway” when opening info.php (also tried with apache, same error). I’m able to open http://SERVER_IP but I get the error when opening http://SERVER_IP/info.php
I’m stuck, help please?
@Kent879
You encountering a “502 Bad Gateway” error because Nginx is proxying requests to a nonexistent upstream server or endpoint. Ensure that PHP-FPM service is running, check its status using following command.
In case it is not up and running, start it.
Also make sure that you have uncommented this section in your default server block file:
location ~ \.php$ { include snippets/fastcgi-php.conf; fastcgi_pass unix:/var/run/php/php7.2-fpm.sock; #take note of this line, it should indicate PHP7.2 }Cool tutorial, very helpful, but vim instead of nano? I guess vim-users don’t need a tutorial :p
@Olivia
We are glad that you found this tutorial helpful, many thanks for the feedback.