Rust (commonly known as Rust-Lang) is a relatively new, open-source practical systems programming language that runs extremely fast, prevents segfaults, and guarantees thread safety. It is a safe and concurrent language developed by Mozilla and backed by LLVM.
It supports zero-cost abstractions, move semantics, guaranteed memory safety, threads without data races, trait-based generics, and pattern matching. It also supports type inference, minimal runtime as well as efficient C bindings.
Rust can run on a great number of platforms and is being used in production by companies/organizations such as Dropbox, CoreOS, NPM, and many more.
In this article, we will show how to install Rust programming language in Linux and set up your system to get started with writing programs with Rust.
Install Rust Programming Language in Linux
To install Rust, use the following official method of installing Rust via the installer-script, which requires a curl command-line downloader as shown.
$ sudo apt-get install curl  [On Debian/Ubuntu]
# yum install install curl   [On CentOS/RHEL]
# dnf install curl           [On Fedora]
Then install Rust by running the following command in your terminal, and following the onscreen instructions. Note that rust is actually installed as well as managed by the rustup tool.
$ curl --proto '=https' --tlsv1.2 -sSf https://sh.rustup.rs | sh
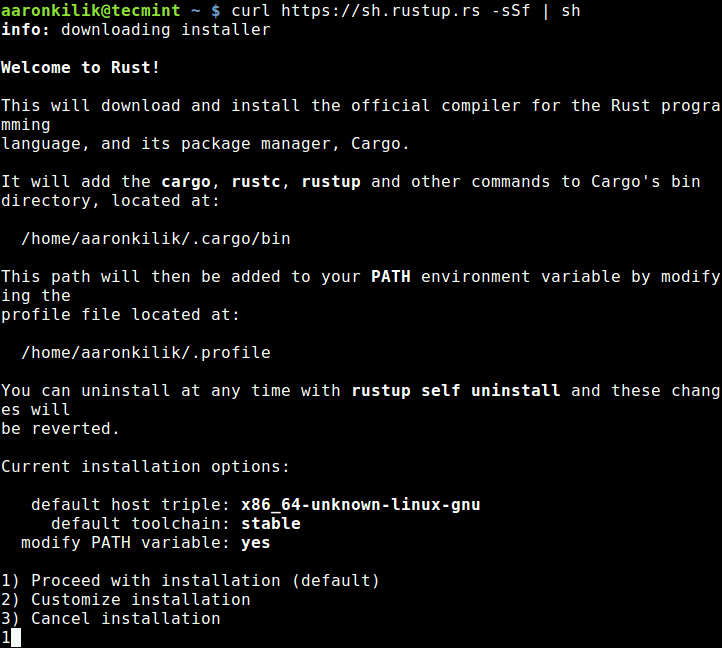
Once the Rust installation is complete, the Cargo’s bin directory (~/.cargo/bin – where all tools are installed) will be added to your PATH environment variable, in ~/.profile.
During the installation rustup will attempt to add the cargo’s bin directory to your PATH; if this fails for one reason or another, do it manually to get started with using rust.
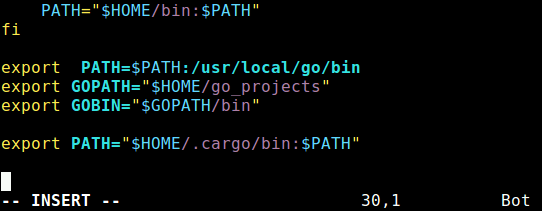
Next, source the ~/.profile file to use the modified PATH and configure your current shell to work with the rust environment by running these Linux commands.
$ source ~/.profile
$ source ~/.cargo/env
Finally, verify the version of rust installed on your system by running the following command.
$ rustc --version

Test Rust Programming Language in Linux
Now that you have rust installed on your system, you can test it by creating your first rust program as follows. Begin by creating a directory where your program files will reside.
$ mkdir myprog
$ cd myprog
Create a file called test.rs, copy and paste the following lines of code to the file.
fn main() {
    println!("Hello World, it’s TecMint.com – Best Linux HowTos, Guides on the Internet!");
}
Then run the following command which will create an executable called test in the current directory.
$ rustc test.rs
Finally, execute test as shown.
$ ./test

Important: You should take note of these points about rust releases:
- Rust has a 6-week rapid release process, be sure to get many builds of rust available at any time.
- Secondly, all these builds are managed by rustup, in a consistent manner on every supported platform, enabling installation of rust from the beta and nightly release channels, and support for additional cross-compilation targets.
Uninstall Rust on Linux
If at any point you would like to uninstall Rust, you can:
# rustup self uninstall
In this article, we have explained how to install and use Rust programming language in Linux. Try it out and give us your feedback or share any queries via the comment form below.


In the explanation above you indicate:
Should not this be:
Otherwise, I liked the instructions.
@Jimmy,
Yes, you are right it should be
rustc test.rs, corrected in the article…It seems that your PATH is related to Go, Lang,
@sedlav
Check the last export line in the screenshot.
Thank you for your insight, got mine installed on Linux Ubuntu 19.04.
Hello,
You mean:
Best regards,
@frt
Many thanks for the correction.