PXE or Preboot eXecution Environment is a server-client mechanism which instructs a client machine to boot form network.
In this guide we’ll show how to install Ubuntu Server via a PXE server with local HTTP sources mirrored from Ubuntu server ISO image via Apache web server. The PXE server used in this tutorial is Dnsmasq Server.
Requirements:
- Ubuntu Server 16.04 or 17.04 Installation
- A network interface configured with Static IP address
- Ubuntu Server 16.04 or 17.04 ISO image
Step 1: Install and Configure DNSMASQ Server
1. In order to setup the PXE server, on the first step login with the root account or an account with root privileges and install Dnsmasq package in Ubuntu by issuing the following command.
# apt install dnsmasq
2. Next, backup dnsmasq main configuration file and then start editing the file with the following configurations.
# mv /etc/dnsmasq.conf /etc/dnsmasq.conf.backup
# nano /etc/dnsmasq.conf
Add the following configuration to dnsmasq.conf file.
interface=ens33,lo
bind-interfaces
domain=mypxe.local

dhcp-range=ens33,192.168.1.230,192.168.1.253,255.255.255.0,1h
dhcp-option=3,192.168.1.1
dhcp-option=6,192.168.1.1
dhcp-option=6,8.8.8.8
server=8.8.4.4
dhcp-option=28,10.0.0.255
dhcp-option=42,0.0.0.0

dhcp-boot=pxelinux.0,pxeserver,192.168.1.14

pxe-prompt="Press F8 for menu.", 2
pxe-service=x86PC, "Install Ubuntu 16.04 from network server 192.168.1.14", pxelinux
enable-tftp
tftp-root=/srv/tftp
On the above configuration file replace the following lines accordingly.
- interface Replace with your own machine network interface.
- domain – Replace it with your domain name.
- dhcp-range – Define your own network range for DHCP to allocate IPs to this network segment and how long should an IP address for a client should be granted.
- dhcp-option=3 – Your Gateway IP.
- dhcp-option=6 DNS Server IPs – several DNS IPs can be defined.
- server – DNS forwarder IPs Address.
- dhcp-option=28 – Your network broadcast address.
- dhcp-option=42 – NTP server – use 0.0.0.0 Address is for self-reference.
- dhcp-boot – the pxe boot file and the IP address of the PXE server (here pxelinux.0 and IP address of the same machine).
- pxe-prompt – Uses can hit F8 key to enter PXE menu or wait 2 seconds before automatically switching to PXE menu.
- pxe=service – Use x86PC for 32-bit/64-bit architectures and enter a menu description prompt under string quotes. Other values types can be: PC98, IA64_EFI, Alpha, Arc_x86, Intel_Lean_Client, IA32_EFI, BC_EFI, Xscale_EFI and X86-64_EFI.
- enable-tftp – Enables the build-in TFTP server.
- tftp-root – the system path for net boot files.
3. Also, after you’ve finished editing the dnsmasq configuration file, create the directory for the PXE netboot files by issuing the below command and restart dnsmasq daemon to apply changes. Check dnsmasq service status to see if it has been started.
# mkdir /srv/tftp
# systemctl restart dnsmasq.service
# systemctl status dnsmasq.service
Step 2: Install TFTP Netboot Files
4. On the next step grab the latest version of Ubuntu server ISO image for 64-bit architecture by issuing the following command.
# wget http://releases.ubuntu.com/16.04/ubuntu-16.04.3-server-amd64.iso
5. After Ubuntu server ISO has been downloaded, mount the image in /mnt directory and list the mounted directory content by running the below commands.
# mount -o loop ubuntu-16.04.3-desktop-amd64.iso /mnt/
# ls /mnt/

6. Next, copy the netboot files from Ubuntu mounted tree to tftp system path by issuing the below command. Also, list tftp system path to see the copied files.
# cp -rf /mnt/install/netboot/* /srv/tftp/
# ls /srv/tftp/

Step 3: Prepare Local Installation Source Files
7. The local network installation sources for Ubuntu server will be provided via HTTP protocol. First, install, start and enable Apache web server by issuing the following commands.
# apt install apache2
# systemctl start apache2
# systemctl status apache2
# systemctl enable apache2
8. Then, copy the content of the mounted Ubuntu DVD to Apache web server web root path by executing the below commands. List the content of Apache web root path to check if Ubuntu ISO mounted tree has been completely copied.
# cp -rf /mnt/* /var/www/html/
# ls /var/www/html/
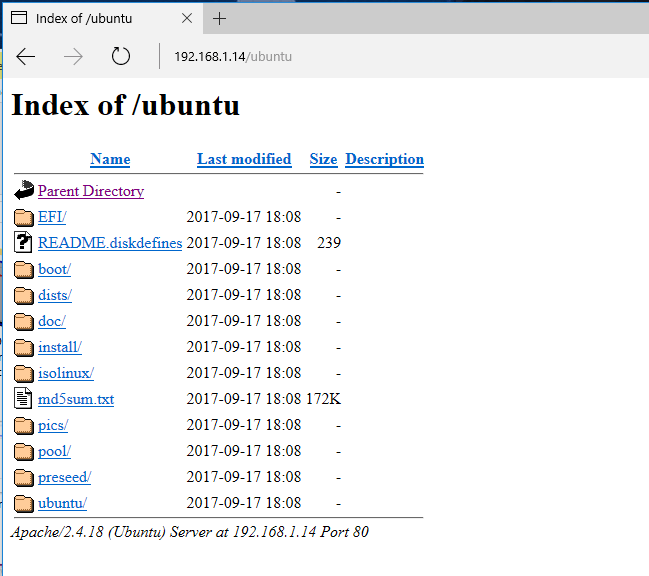
9. Next, open HTTP port in firewall and navigate to your machine IP address via a browser (http://192.168.1.14/ubuntu) in order to test if you can reach sources via HTTP protocol.
# ufw allow http
Step 4: Setup PXE Server Configuration File
10. In order to be able to pivot the rootfs via PXE and local sources, Ubuntu needs to be instructed via a preseed file. Create the following local-sources.seed file in your web server document root path with the following content.
# nano /var/www/html/ubuntu/preseed/local-sources.seed
Add following line to local-sources.seed file.
d-i live-installer/net-image string http://192.168.1.14/ubuntu/install/filesystem.squashfs
Here, make sure you replace the IP address accordingly. It should be the IP address where web resources are located. In this guide the web sources, the PXE server and TFTP server are hosted on the same system. In a crowded network you might want to run PXE, TFTP and web services on separate machines in order to improve PXE network speed.
11. A PXE Server reads and executes configuration files located in pxelinux.cfg TFTP root directory in this order: GUID files, MAC files and default file.
The directory pxelinux.cfg is already created and populated with the required PXE configuration files because we’ve earlier copied the netboot files from Ubuntu mounted ISO image.
In order to add the above preseed statement file to Ubuntu installation label in PXE configuration file, open the following file for editing by issuing the below command.
# nano /srv/tftp/ubuntu-installer/amd64/boot-screens/txt.cfg
In Ubuntu PXE txt.cfg configuration file replace the following line as illustrated in the below excerpt.
append auto=true url=http://192.168.1.14/ubuntu/preseed/local-sources.seed vga=788 initrd=ubuntu-installer/amd64/initrd.gz --- quiet
The /srv/tftp/ubuntu-installer/amd64/boot-screens/txt.cfg file should have the following global content:
default install
label install
	menu label ^Install Ubuntu 16.04 with Local Sources
	menu default
	kernel ubuntu-installer/amd64/linux
	append auto=true url=http://192.168.1.14/ubuntu/preseed/local-sources.seed vga=788 initrd=ubuntu-installer/amd64/initrd.gz --- quiet
label cli
	menu label ^Command-line install
	kernel ubuntu-installer/amd64/linux
	append tasks=standard pkgsel/language-pack-patterns= pkgsel/install-language-support=false vga=788 initrd=ubuntu-installer/amd64/initrd.gz --- quiet
12. In case you want to add the preseed url statement to Ubuntu Rescue menu, open the below file and make sure you update the content as illustrated in the below example.
# nano /srv/tftp/ubuntu-installer/amd64/boot-screens/rqtxt.cfg
Add the followng configuration to rqtxt.cfg file.
label rescue
	menu label ^Rescue mode
	kernel ubuntu-installer/amd64/linux
	append auto=true url=http://192.168.1.14/ubuntu/preseed/local-sources.seed vga=788 initrd=ubuntu-installer/amd64/initrd.gz rescue/enable=true --- quiet
The important line you should update is url=http://192.168.1.14/ubuntu/preseed/local-sources.seed which specifies the URL address where the pressed file is located in your network.
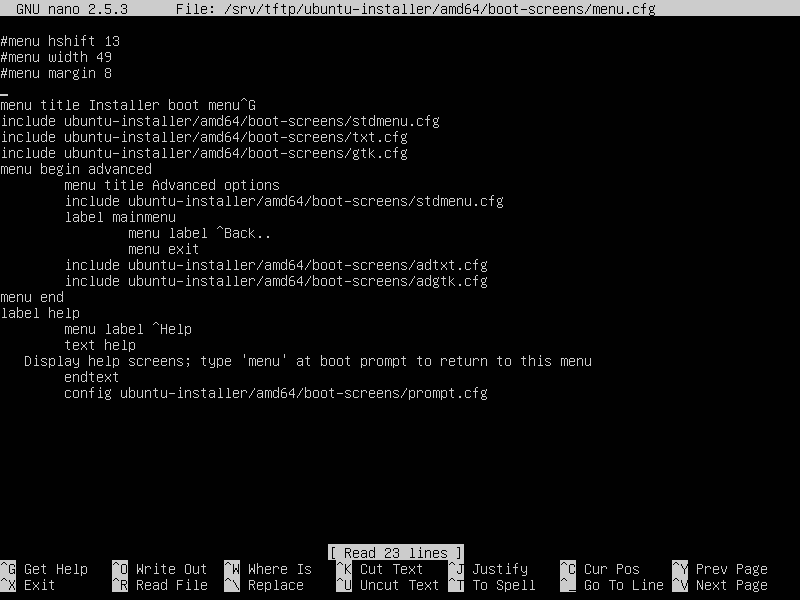
13. Finally, open Ubuntu pxe menu.cfg file and comment the first three lines in order to expand the PXE boot screen as illustrated in the below screenshot.
# nano /srv/tftp/ubuntu-installer/amd64/boot-screens/menu.cfg
Comment these three following lines.
#menu hshift 13
#menu width 49
#menu margin 8
Step 5: Open Firewall Ports in Ubuntu
14. Execute netstat command with root privileges to identify dnsmasq, tftp and web open ports in listening state on your server as illustrated in the below excerpt.
# netstat -tulpn
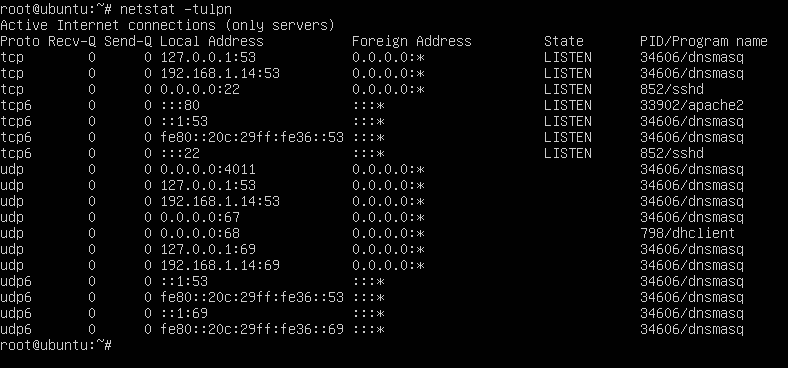
15. After you’ve identified all required ports, issue the below commands to open the ports in ufw firewall.
# ufw allow 53/tcp
# ufw allow 53/udp
# ufw allow 67/udp
# ufw allow 69/udp
# ufw allow 4011/udp
Step 6: Install Ubuntu with Local Sources via PXE
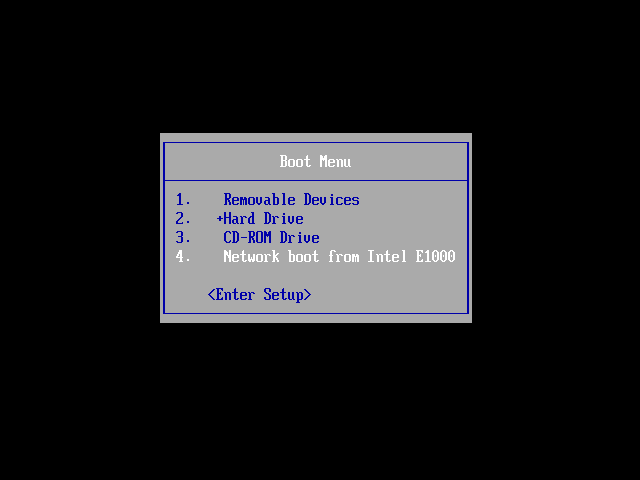
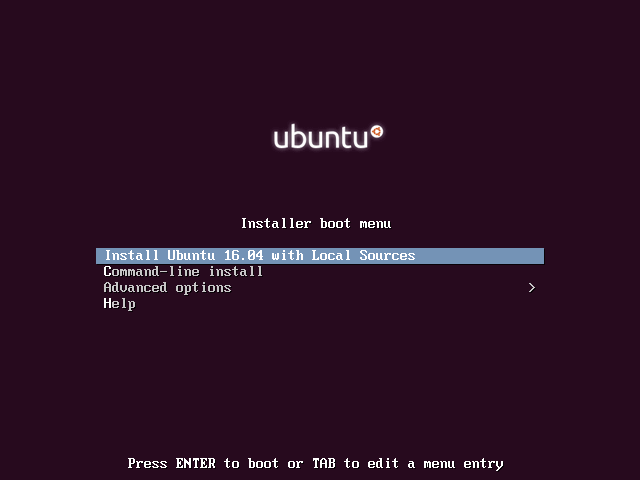
16. To install Ubuntu server via PXE and use the local network installation sources, reboot your machine client, instruct the BIOS to boot from network and at the first PXE menu screen choose the first option as illustrated in the below images.

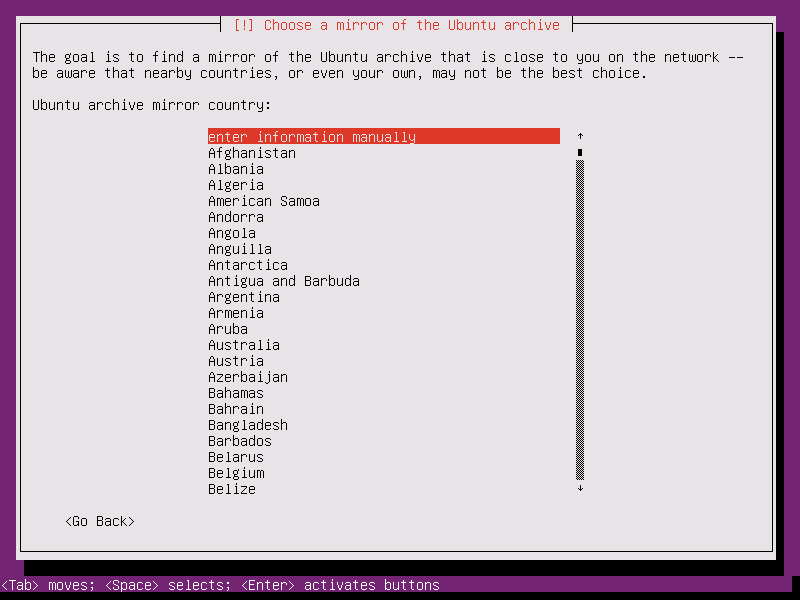
17. The installation procedure should be performed as usual. When the installer reaches the Ubuntu archive mirror country setup, use the up keyboard arrow to move to the first option, which says: enter information manually.
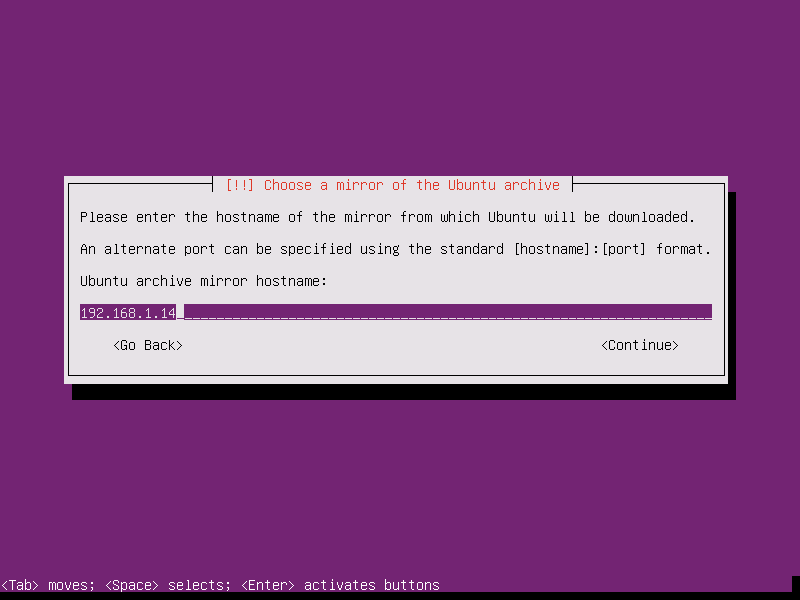
18. Press [enter] key to update this option, delete the mirror string and add the IP address of the web server mirror sources and press enter to continue as illustrated in the below image.
http://192.168.1.14
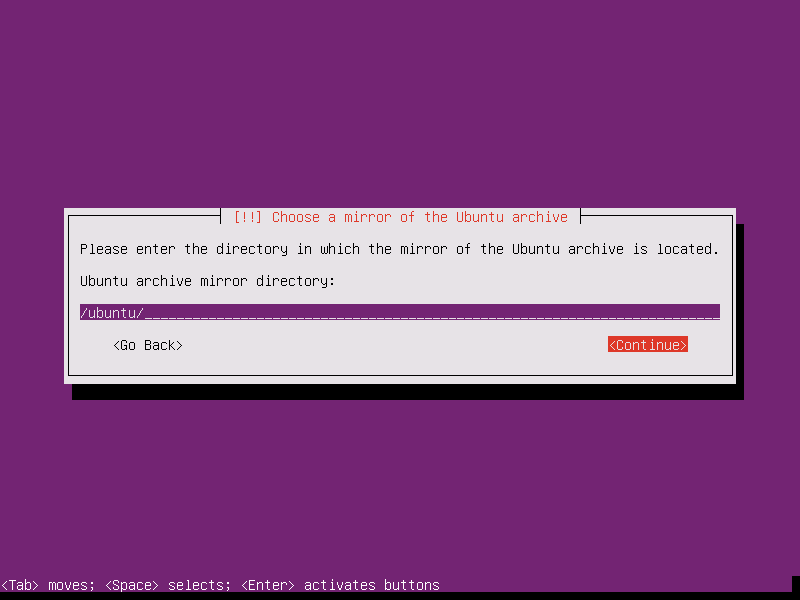
19. On the next screen, add your mirror archive directory as shown below and press enter key to continue with the installation process and usually.
/ubuntu
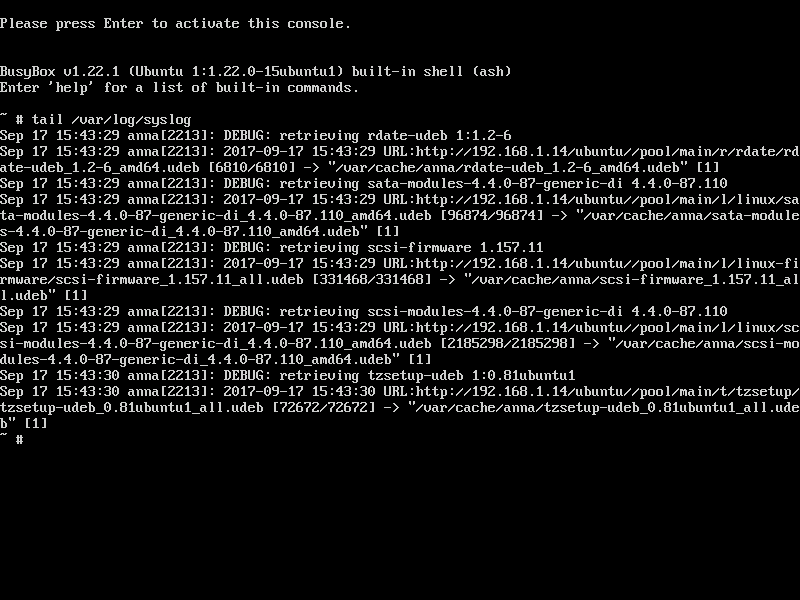
20. In case you want to see information about what packages are downloaded from your network local mirror, press [CTRL+ALT+F2] keys in order to change machine virtual console and issue the following command.
# tail –f /var/log/syslog
21. After the installation of the Ubuntu server finishes, login to the newly installed system and run the following command with root privileges in order to update the repositories packages from local network sources to official Ubuntu mirrors.
The mirrors needs to be changed in order to update the system using the internet repositories.
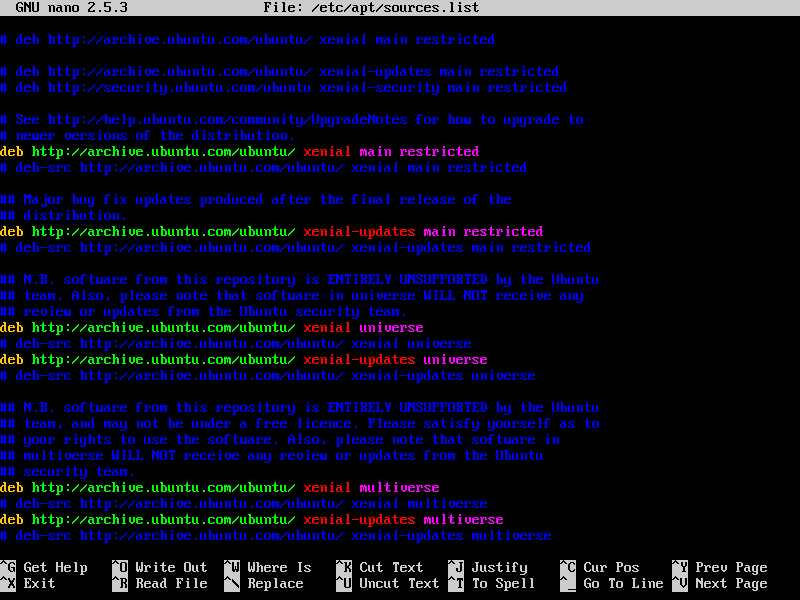
$ sudo sed –i.bak ‘s/192.168.1.14/archive.ubuntu.com/g’ /etc/apt/sources.list
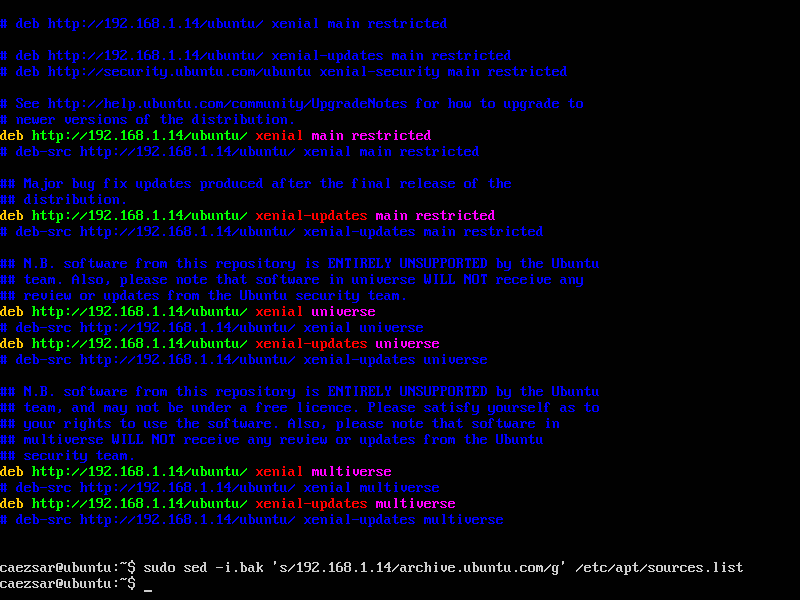
Assure you replace the IP address according to the IP address of your own web local sources.
That’s all! You can now update your Ubuntu server system and install all required software. Installing Ubuntu via PXE and a local network source mirror can improve the installation speed and can save internet bandwidth and costs in case of deploying a large number of servers in a short period of time at your premises.




After this it would be great if we can setup unattended installation (no manual input required). What would be the steps for that?
ubuntu 18.04 has no filesystem.squashfs. iso is different. Is there anyone know how to boot 18.04?
I found filesystem.squashfs from casper directory
Great article although if you want to install Ubuntu desktop you will be needed:
1. Find netboot files/folders for your distro and then create folder under “install” called “netboot” which is mentioned in article.
2. Play with directory names, which is in my case called as “ubuntu_i” instead of “ubuntu_installer” and the same with “boot_screen“
I want to install ubuntu Desktop via PXE . can i do this.
Hello Sir,
I am using your tutorial to made a pxe server but I found something really confusing as you download the server ISO and mount the desktop ISO how these possible,I am bit confuse about it, please provide me the solution for these.
Hi/Salut Matei,
You are over reacting. I want to say that is very important to write from the beginning what are minimal conditions to use this setup. And I think first at the blocking conditions (like PXE bugs, BIOS bugs
Also it would be very useful for your readers (me included here), to show some use case like this: this tutorial can be use if you have a lab network when you need to install/reinstall for many times the ubuntu OS.
And the last thing, if I want to install a new Ubuntu OS, I use Clonezilla or Urbackup who are faster and simple compared with PXE.
Have a nice day!
If PXE installation has no use to you, than don’t use it. Install Ubuntu via classical method. Simply as that!
Hi,
Why I should install Ubuntu/whatever via PXE? And if my host can not use PXE (some mother boards have bugs related with pxe). And if I already have a dhcp in use ? I am sure that you need to put this observations on the required things.