When you first install a virtual machine with a GUI on VirtualBox, the screen size is usually scaled-down and the user experience is usually quite bland. To improve the appearance and functionality of a virtual machine, VirtualBox provides a set of software packages and drivers known as VirtualBox guest additions in the form of an ISO image known as VBoxGuestAdditions.iso. The image is then mounted onto the guest system and the guest additions are thereafter installed.
The VirtualBox guest additions enable the functionalities listed below:
- Improved the graphical display/appearance.
- Mouse pointer integration between the host and guest machine.
- Shared folders between the host and guest system.
- Copy & paste and cut & paste functionality between the host and the guest system.
Requirements
VirtualBox guest additions can be installed on both Linux and Windows systems. In this guide, we will walk you through the installation of VirtualBox guest additions on CentOS 8.
Step 1: Installing EPEL on CentOS 8
To start off, begin by installing the EPEL repository, in short for Extra Packages for Enterprise Linux, which is a repository that provides extra open-source software packages for RedHat flavors such as CentOS and Fedora.
To install the EPEL repository on CentOS 8, run the following dnf command on the terminal.
$ sudo dnf install epel-release
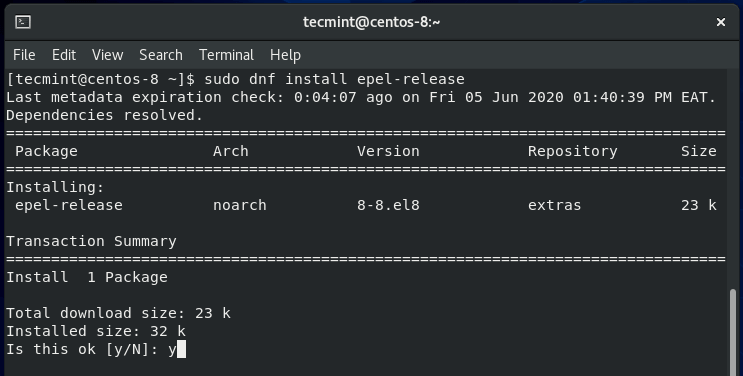
Once installed, confirm the version installed by running the command.
$ rpm -q epel-release

Step 2: Installing Kernel Headers and Build Tools
With the EPEL repository installed, proceed and install the kernel headers and build tools required to install the guest additions as shown.
$ sudo dnf install gcc make perl kernel-devel kernel-headers bzip2 dkms
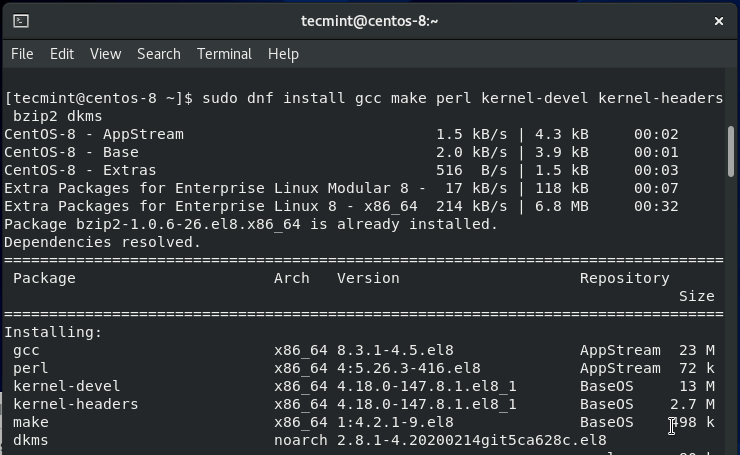
Once installed, confirm that the version of kernel-devel corresponds to the version of your Linux kernel by running these commands:
$ rpm -q kernel-devel
$ uname -r

The output clearly indicates a conflict between the two versions. The kernel-devel version is 4.18.0-147.8.1.el8_1.x86_64 whilst the Linux kernel version is 4.18.0-80.el8.x86_64.
To resolve the issue, update the Linux kernel by running the command:
$ sudo dnf update kernel-*
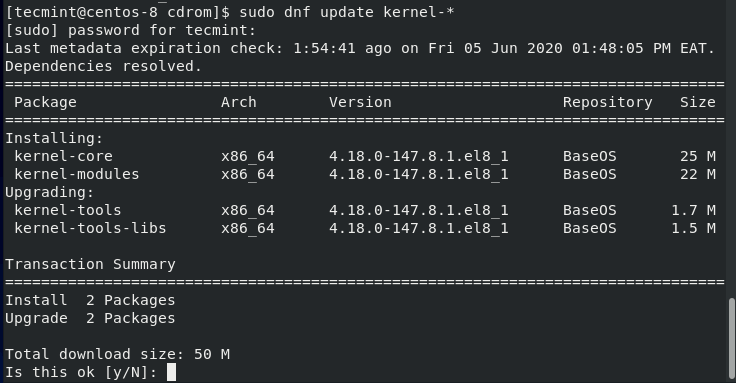
Once prompted, press 'Y' and hit ENTER to continue with the update. When the update the complete, reboot your CentOS 8 system.
$ sudo reboot
During the reboot, be sure to boot into the latest kernel entry that corresponds to the kernel-devel version. This is usually the first entry as you can see.
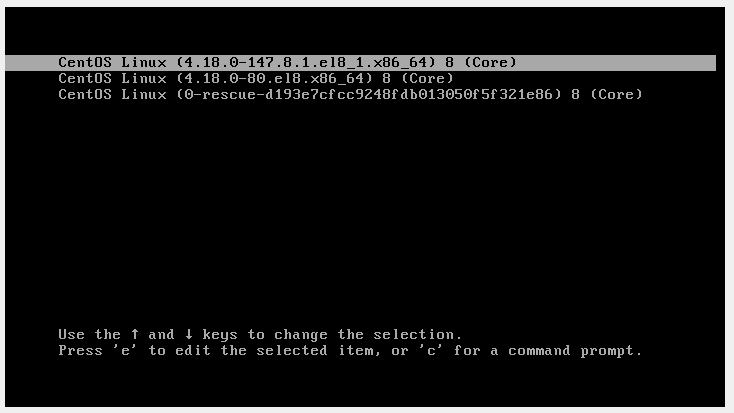
Once the system is done with booting, log in and once again confirm that the kernel-devel version now matches the version of the Linux kernel.
$ rpm -q kernel-devel
$ uname -r

The two versions are now in sync. Great! Now you can go ahead and install VirtualBox guest additions.
Step 3: Install VirtualBox Guest Additions in CentOS 8
There are two ways to install guest additions, and we will cover both ways here:
Install VirtualBox Guest Additions Graphically
To install the VirtualBox guest additions, Head out to the menu bar and click Devices –> Insert Guest Additions CD image.
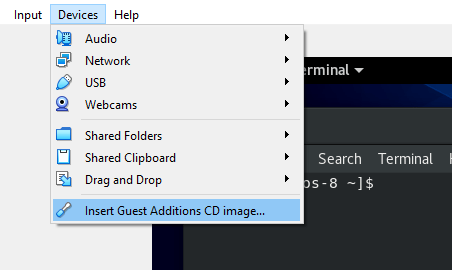
A pop will appear as shown. From here, you can take two approaches:
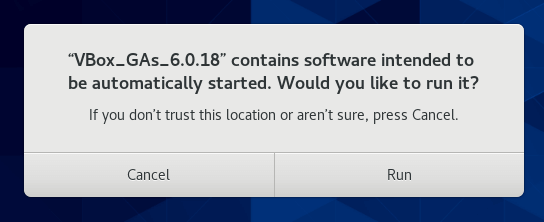
You can hit ‘Run‘ and later authenticate when prompted. Thereafter, you will see some verbose output on the terminal. Once the installation is done, reboot the system and boot into a full-screen.
Install VirtualBox Guest Additions Manually
The second option is to install a command-line. To achieve this, choose ‘Cancel’ option and thereafter, open your terminal and create a mount point for the guest additions ISO image.
$ sudo mkdir -p /mnt/cdrom
Next, mount the ISO image on the mount point.
$ sudo mount /dev/cdrom /mnt/cdrom
Then finally navigate to the mount location and run the VirtualBox installer script.
$ cd /mnt/cdrom
$ sudo ./VBoxLinuxAdditions.run
Once the script is done running, you will immediately observe the screen panning to full size. If this doesn’t happen in your case, reboot your system and finally boot into your full-screen CentOS 8 virtual machine :-)
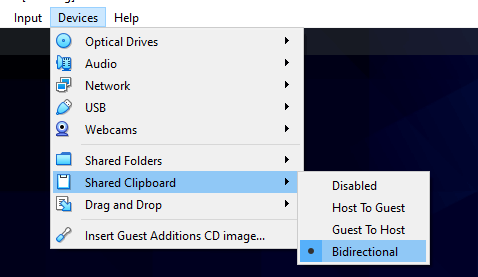
To enable mouse pointer integration, navigate to ‘Shared Clipboard‘ –> ‘Bidirectional‘. This enables you to copy and paste content between the host and guest system.
We hope this article has been helpful to you, If you encounter any challenges, please reach out to us. Thank you.


Just came here to say when no other solutions were working and I was frustrated and about to give up, found your steps that actually worked.
I appreciate your time and effort to put this together and helping internet strangers.
Thank you so much for your uplifting and positive feedback. I’m glad that you found this guide useful. Keep it Tecmint.
James, thank you very much. For me, all the steps worked like magic. I was having problems to have the Guest Additions installed in the CentOS 8 machine.
You are very welcome, Leonardo. Keep it Tecmint.
Thanks for this tutorial however in my case all the steps went alright until I rebooted the centos8 guest.
on startup, I lost the login box to the GUI. it was just a blank area with a mouse pointer
Before rebooting, run the command below.
Where userName is the account name in Linux.
This will add the user to the appropriate group to allow them to share a folder between the host and the guest operating systems
Thanks for your input, allow me to confirm this.