In this tutorial, I will walk you through the simple and easy-to-follow steps of installing Ubuntu 16.10 codenamed “Yakkety Yak” on your machine. It comes with multiple bug fixes and new features to offer users a great computing experience with latest and exciting technologies.
It will be supported for a short time of about 9 months until July 2017 and a few of the major new features in Ubuntu 16.10 include:
- Linux kernel 4.8
- GPG binary is now provided by gnupg2, more specifically
- An updated LibreOfiice 5.2
- The update manager now reveals changelog entries for PPAs
- All GNOME apps have been updated to version 3.2, with many apps updated to 3.22
- systemd is now used for user sessions
- Nautilus file manager has as well been updated to 3.20 and many more…
For users who do not want to go through the hustle of a fresh installation, you can follow this upgrade guide to upgrade from Ubuntu 16.04 to 16.10.
Installation of Ubuntu 16.10 Desktop
Before you go any further, you need to download the Ubuntu 16.10 desktop ISO from the links below.
- Download Ubuntu 16.10 – 32-bit : ubuntu-16.10-desktop-i386.iso
- Download Ubuntu 16.10 – 64-bit : ubuntu-16.10-desktop-amd64.iso
Note: In this guide, I will use Ubuntu 16.10 64-bit desktop edition, however, the instructions work for 32-bit edition as well.
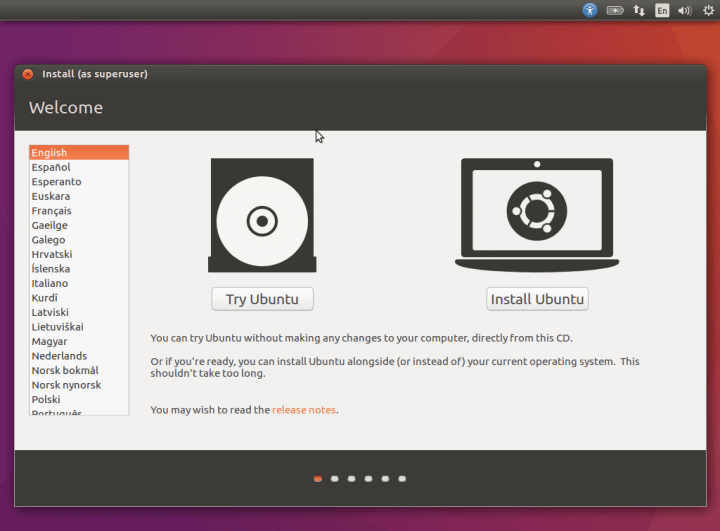
1. After downloading ISO file, make a bootable DVD or USB device and insert the bootable media in a functioning port, then boot from it. You should be able to see the welcome screen below after the booting into the DVD/USB disk.
If you wish to try Ubuntu 16.10 before installing, click on the “Try Ubuntu”, otherwise click on “Install Ubuntu” to continue with this installation guide.
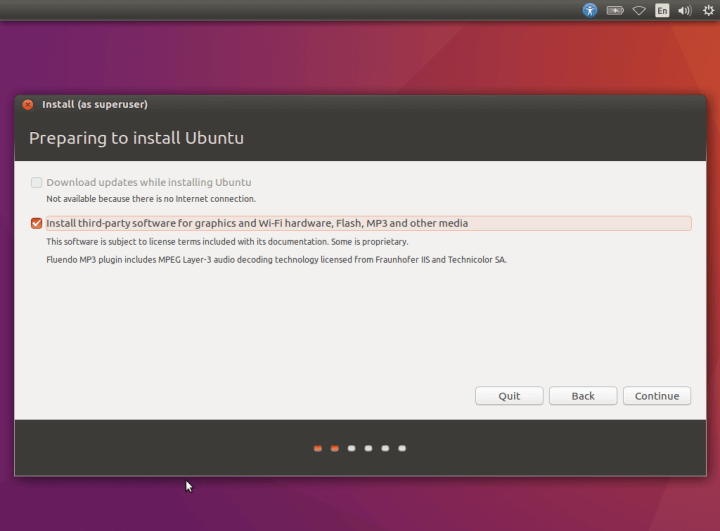
2. Prepare to install the operating system by checking “Install third-party software for graphics and Wi-Fi hardware, Flash, MP3 and other media” option.
Assuming that your system is connected to the Internet, the option to download updates while running the installation will be enabled, you can as well check “Download updates while installing Ubuntu”.
Afterwards, click on the Continue button.
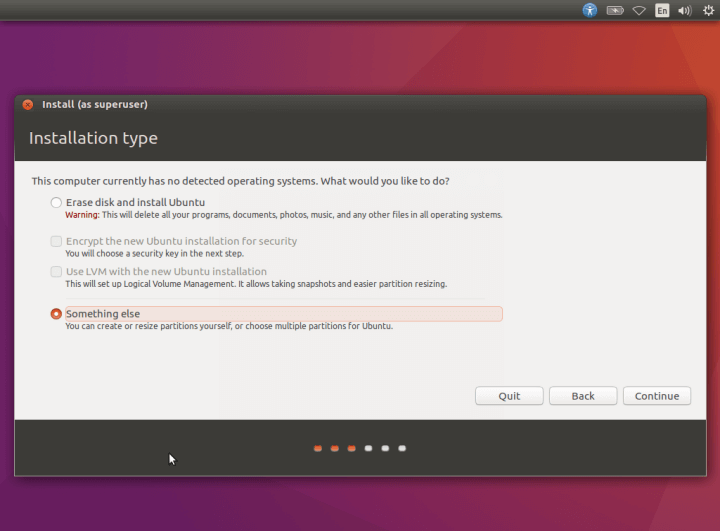
3. Choose the installation type from the interface below by selecting “Something else”. This will enable you to create or resize partitions yourself or even choose multiple partitions for installing Ubuntu. Then click Continue.
4. If you have one disk, it will be selected by default, however, if there are many disks on your machine, click on the one you want to create partitions on.
In the image below, there is a single disk /dev/sda. We will use this disk to create partitions, so click on “New Partition Table..” button to create new empty partition.
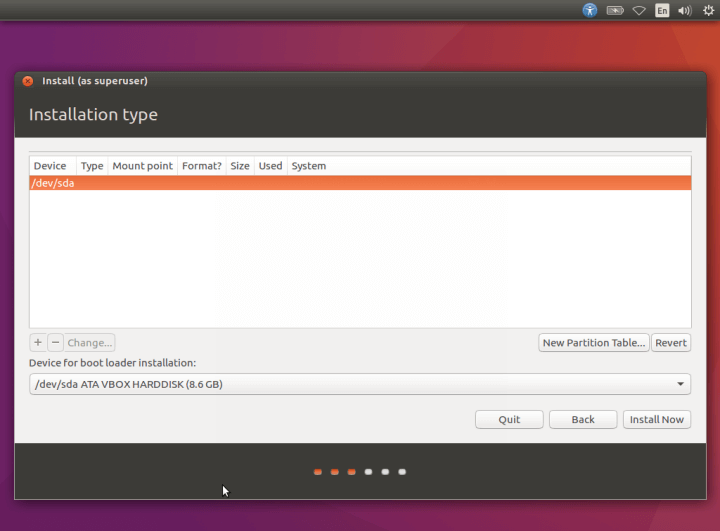
From the next interface, click on Continue to confirm creation of new empty partition.
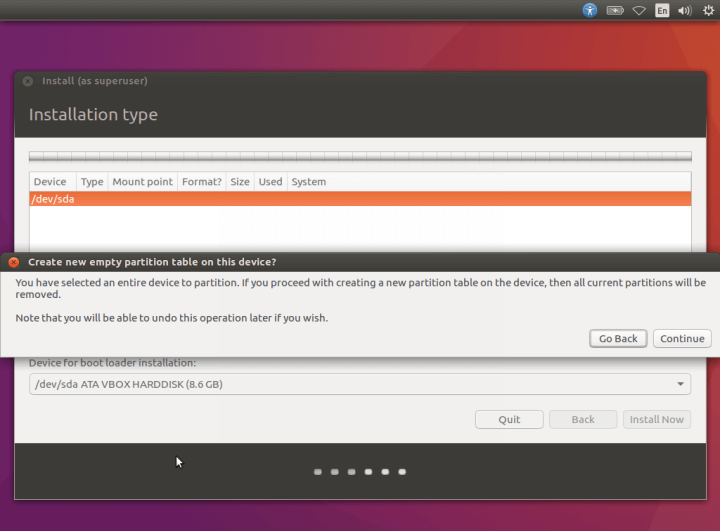
5. Now its time to create new partitions, select a new empty space and click on the (+) sign to create the / partition.
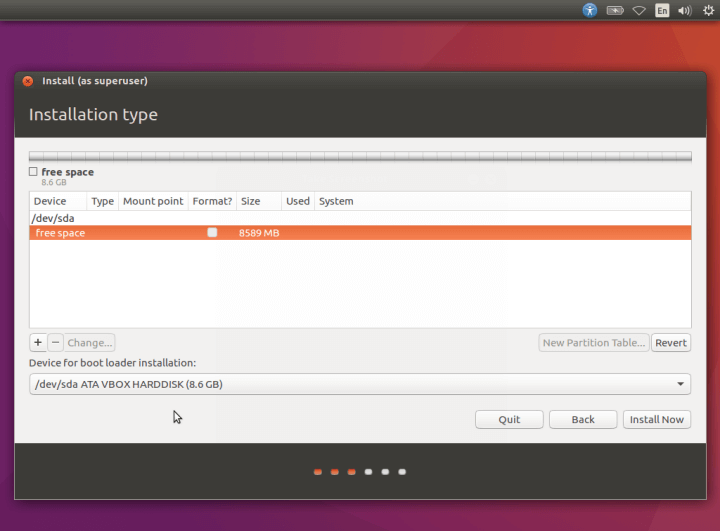
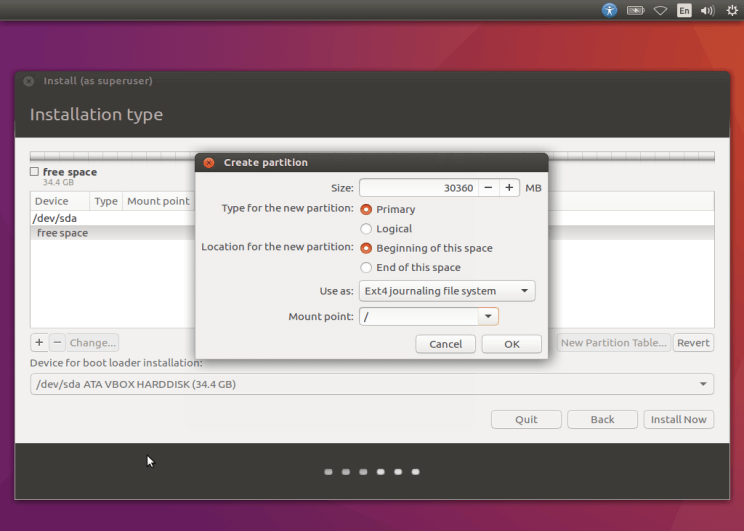
Now use the following values for root partition.
- Size: enter an appropriate size
- Type of new partition: Primary
- Location of new partition: Beginning of this space
- Use as: Ext4 journaling file system
- Mount point: /
After that click OK to effect the changes.
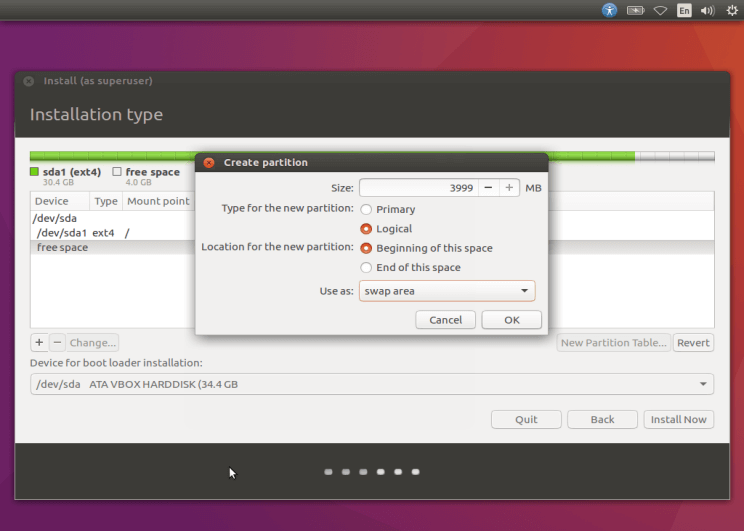
6. Next create a swap partition, which is used to temporarily holding data that is not being actively used by the system, when your system is running out of RAM.
Click on the (+) once more to create the swap partition, enter the values below.
- Size: enter an appropriate size(twice as size of RAM)
- Type of new partition: Logical
- Location of new partition: Beginning of this space
- Use as: swap area
Then click OK to create swap space.
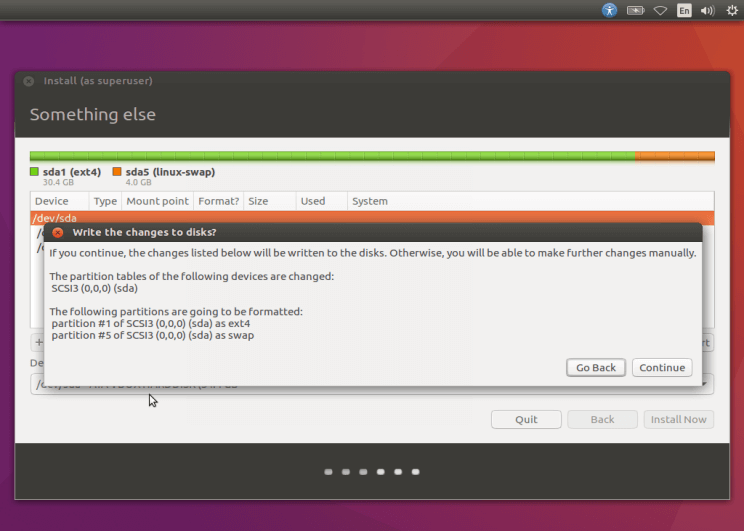
7. After creating all the necessary partitions, you need to write all the changes above to the disk by clicking Continue to confirm and proceed to the next step.
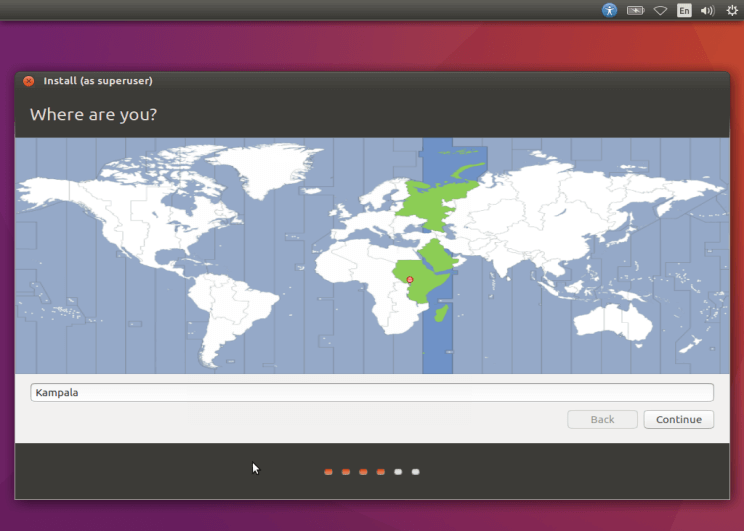
8. Select your time zone from the next screen and click Continue to advance.
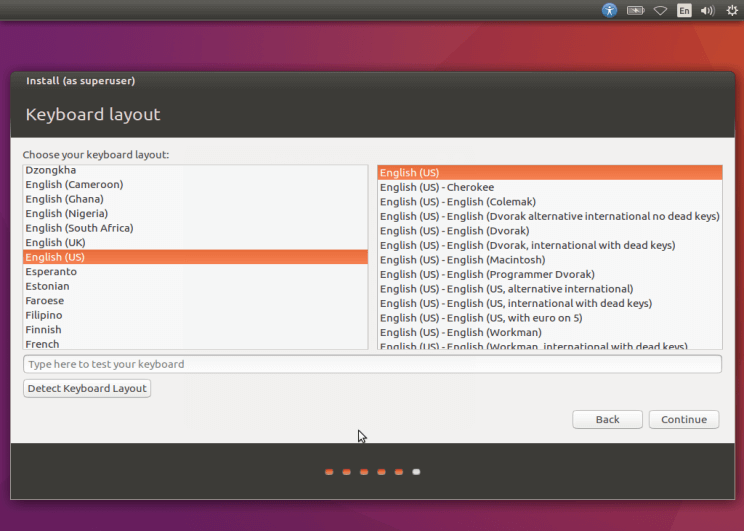
9. Choose your default keyboard layout and afterwards Continue to proceed to the next stage.
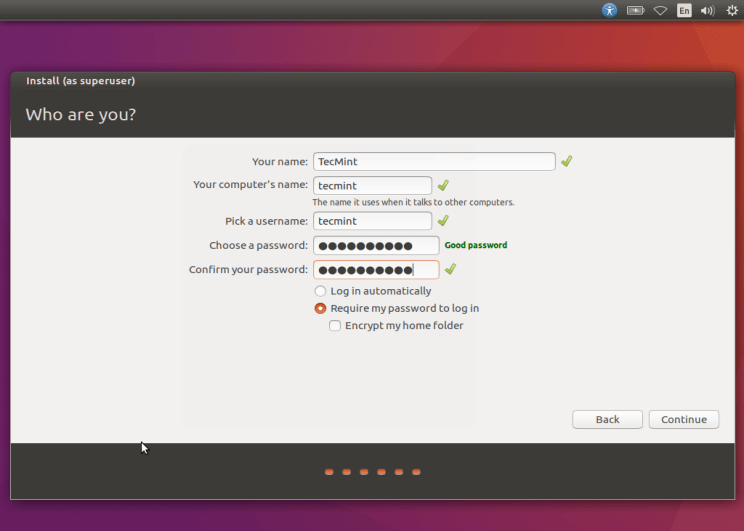
10. Create default system user with suitable values in the spaces provided for your name, computer’s name, username, and also choose a good and secure password.
To use the password for logging in, make sure you select “Require my password to log in”. You can as well encrypt your home directory to enable additional private data protection services by checking the “Encrypt my home folder” option.
When that is done, click Continue to install the Ubuntu files on your system.
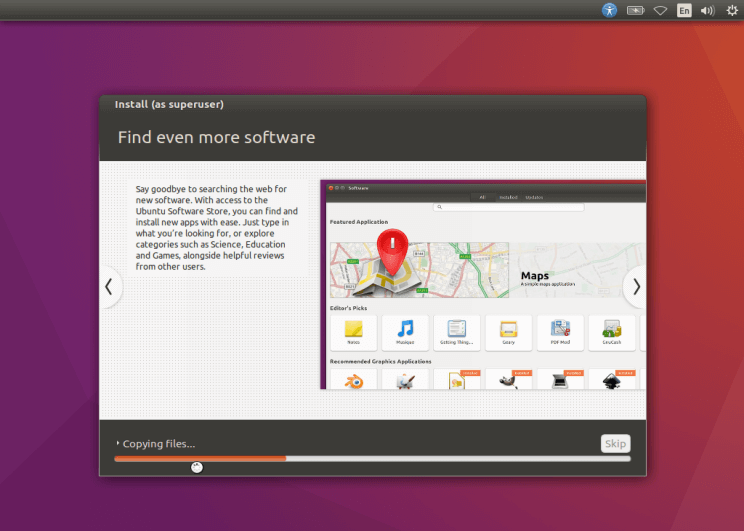
11. In the next screen, files being copied to the root partition during the installation process.
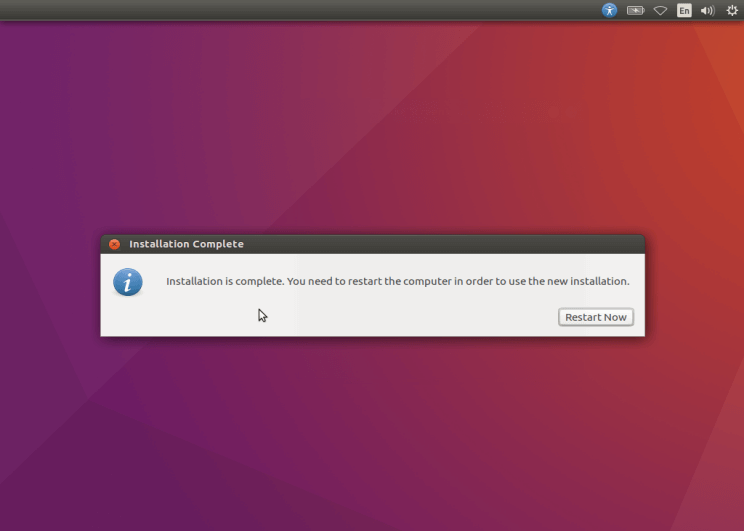
Wait for a few minutes, when the installation is complete you will see the message below, click on the “Restart Now” button to restart your system and boot into Ubuntu 16.10 desktop edition.
That’s it! You have now successfully installed Ubuntu 16.10 desktop version on your machine, I believe these instructions are easy to follow and also hope everything went just fine.
In case you encountered any issues a long the way, you can get in touch via the opinion form below for any questions or feedback you may want to give us.



The system did not boot after reinstalling the ubuntu.
@sultan
Did you install a boot loader? If yes, did you install it in the correct device?