The Fedora Project released Fedora 23 Server edition on 11.03.2015 and it comes with some cool new features that will make you easily manage your server.
What’s New in Fedora 23 Server
Here are some of the changes in Fedora 23 Server:
- RoleKit – a programmatic interface made for easier deployment
- CockPit – Graphical user interface for remote server administration
- SSLv3 and RC4 are disabled by default
- Perl 5.22 installed by default
- Python 3 has replaced python 2
- Unicode 8.0 support
- DNF System Upgrades
We’ve already covered a series of articles on Fedora 23 Workstation which you may like to go through:
- Installation of Fedora 23 Workstation Guide
- Upgrade From Fedora 22 to Fedora 23
- 24 Things to Do After Fedora 23 Installation
In this tutorial we are going to show you how to install Fedora 23 Server on your system. Before we start you will need to make sure that your system meets the minimum requirements:
Requirements
- CPU: 1 GHz (or faster)
- RAM: 1 GB
- Disk Space: 10 GB of unallocated space
- Graphical install requires minimum resolution of 800×600
First Download the Fedora 23 Server Edition for your system architecture (32-bit or 64-bit) using following links.
Download Fedora 23 Server Live Image
- Fedora-Server-DVD-i386-23.iso – Size 2.1GB
- Fedora-Server-DVD-x86_64-23.iso – Size 2.0GB
Download Fedora 23 Server Netinstall Image
- Fedora-Server-netinst-i386-23.iso – Size 4580MB
- Fedora-Server-netinst-x86_64-23.iso – Size 415MB
Installation of Fedora 23 Server
1. First Prepare a bootable USB flash drive using Unetbootin tool or you can use Brasero – no instructions really needed here.
2. Once you have prepared your bootable media, place it in the appropriate port/device and boot from it. You should see the initial install screen:
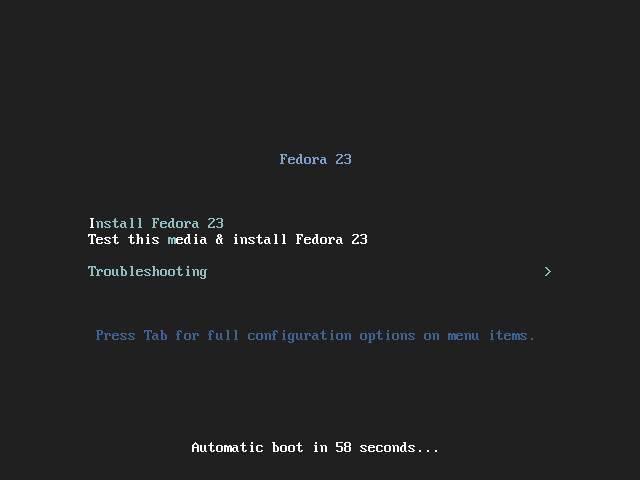
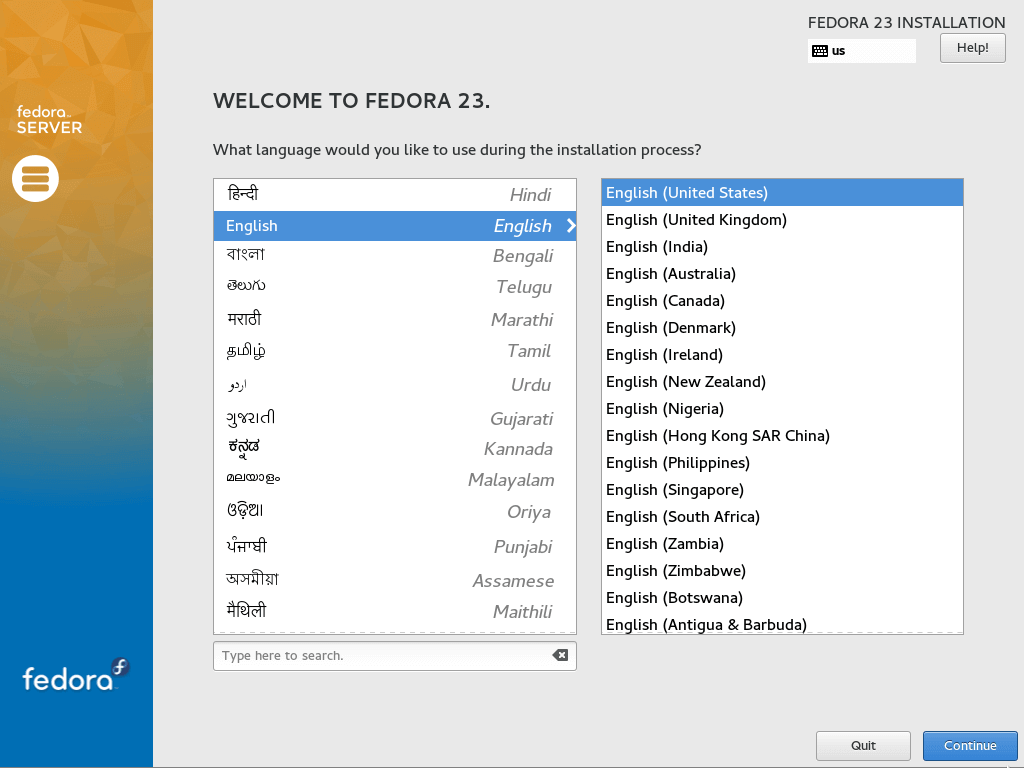
3. Select the install option and wait for the installer to take you to the next screen. You will be provided with the option to choose installation language. Select the preferred one and continue:
4. Now you will be taken to the the “Installation Summary” screen. Remember this one, as we are going to come back here few times during the installation:
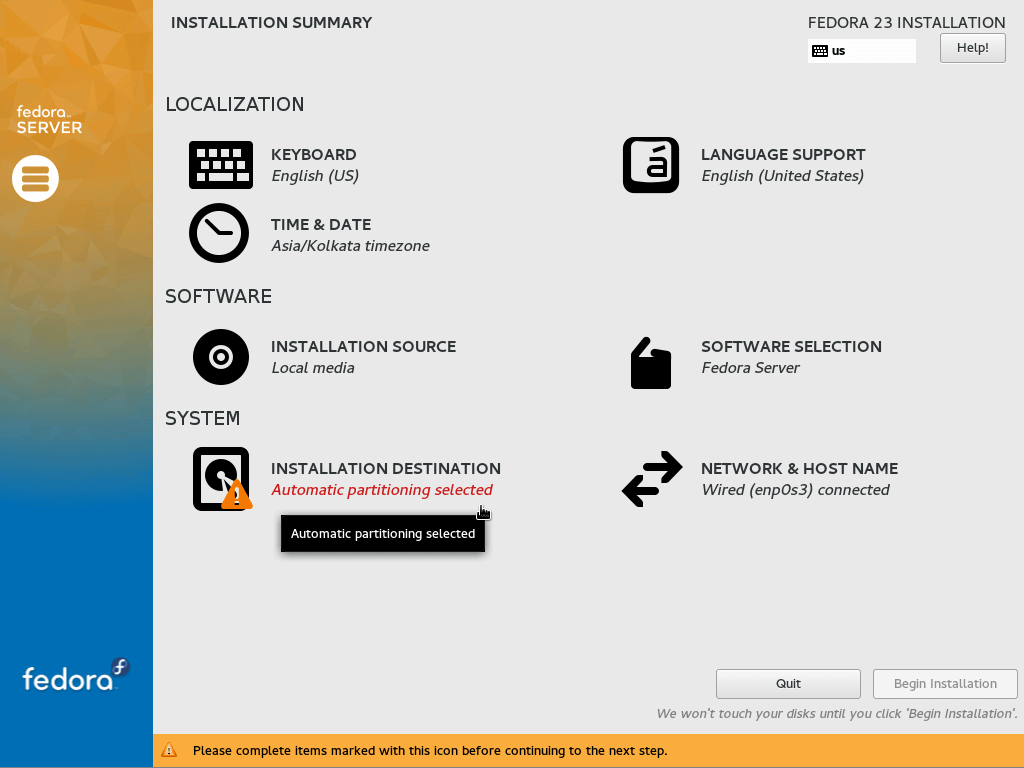
The options here are:
- Keyboard
- Language Support
- Time & Date
- Installation Source
- Software Selection
- Installation Destination
- Network & Hostname
We will stop on each one of these options so you can configure each setting as needed.
Configure Keyboard
5. In this section, you can select the available keyboard layouts for your server. Click the plus "+" sign to add more:
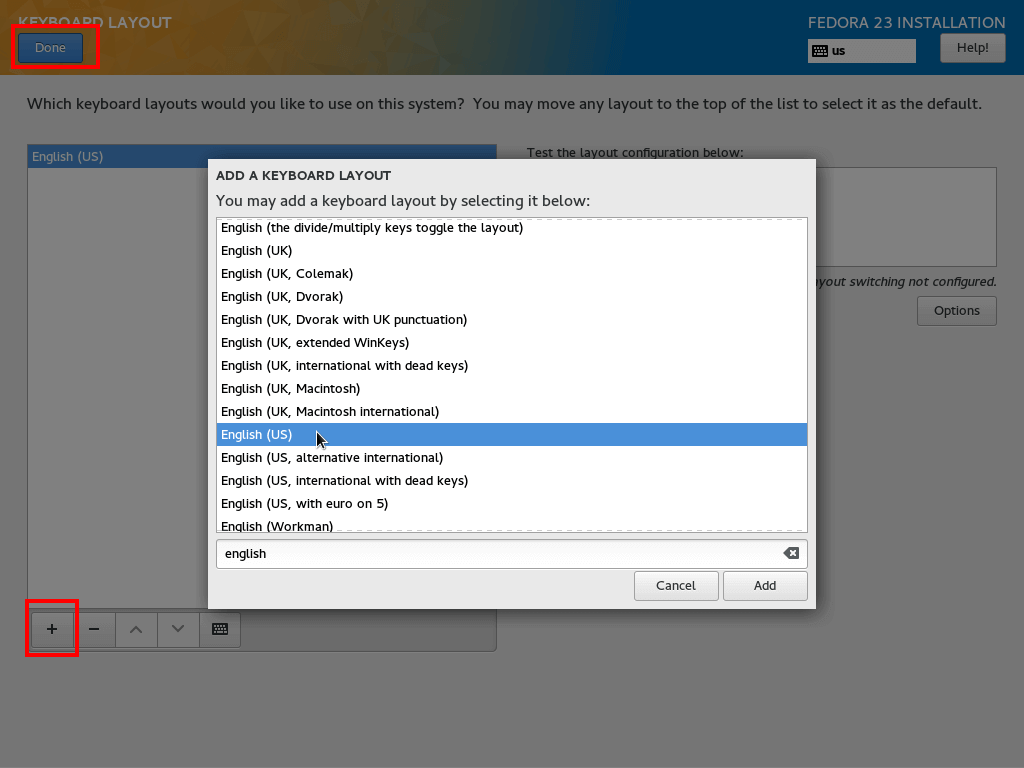
When you have made your choice, click “Done” in the upper left corner, so you can get back to the “Installation Summary” screen.
Set Language Support
6. The next thing you can configure is the language support for your Fedora server. If you need any additional languages for your Fedora server, you can select them here:
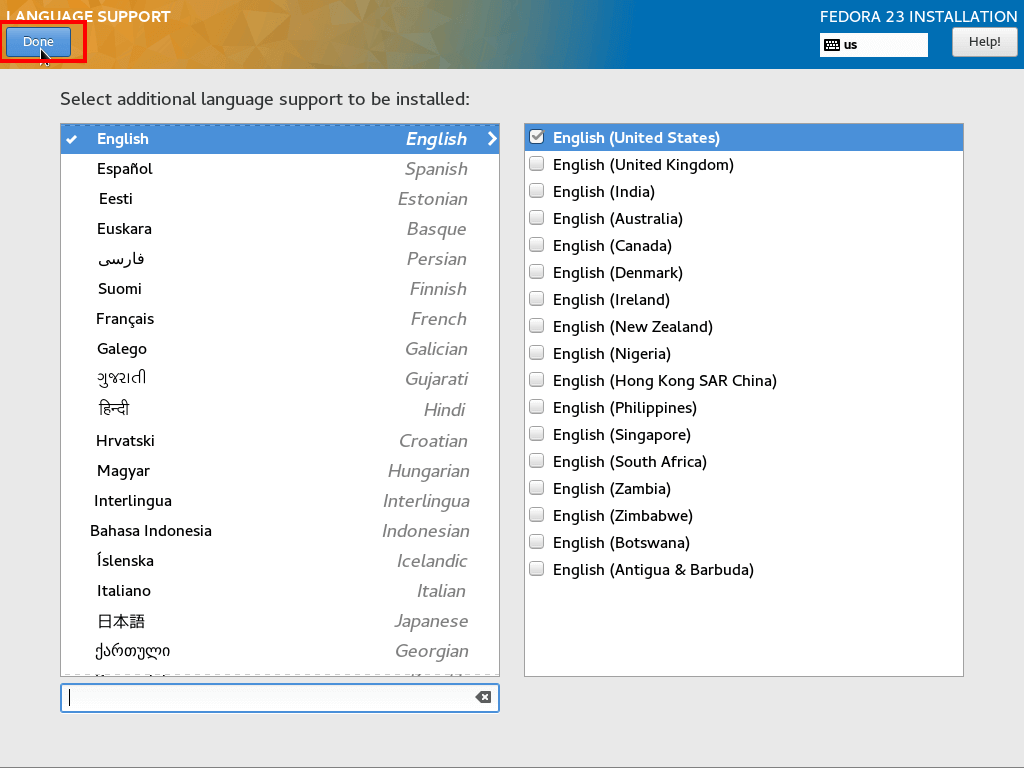
When you have selected the required languages, press the blue “Done” button at the top left corner.
Set Date & Time
7. Here you can setup the time settings for your server by selecting the appropriate time zone on the map or from the drop down menu:
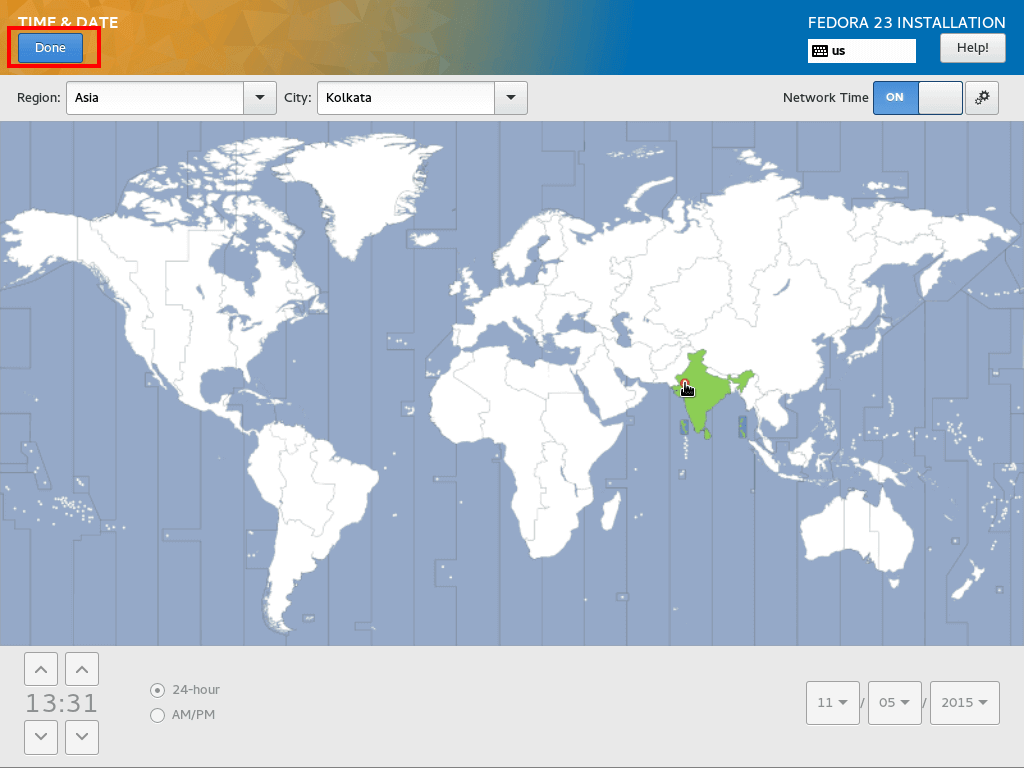
Again, one you have selected the appropriate time settings, click the “Done” button.
Select Installation Source
8. The installation source detects the media from which you are installing the operating system. If you want to change the installation source from network destination here is where you can do it.
You also have the option to choose to apply updates during installation instead of using the packages provided on your source image:
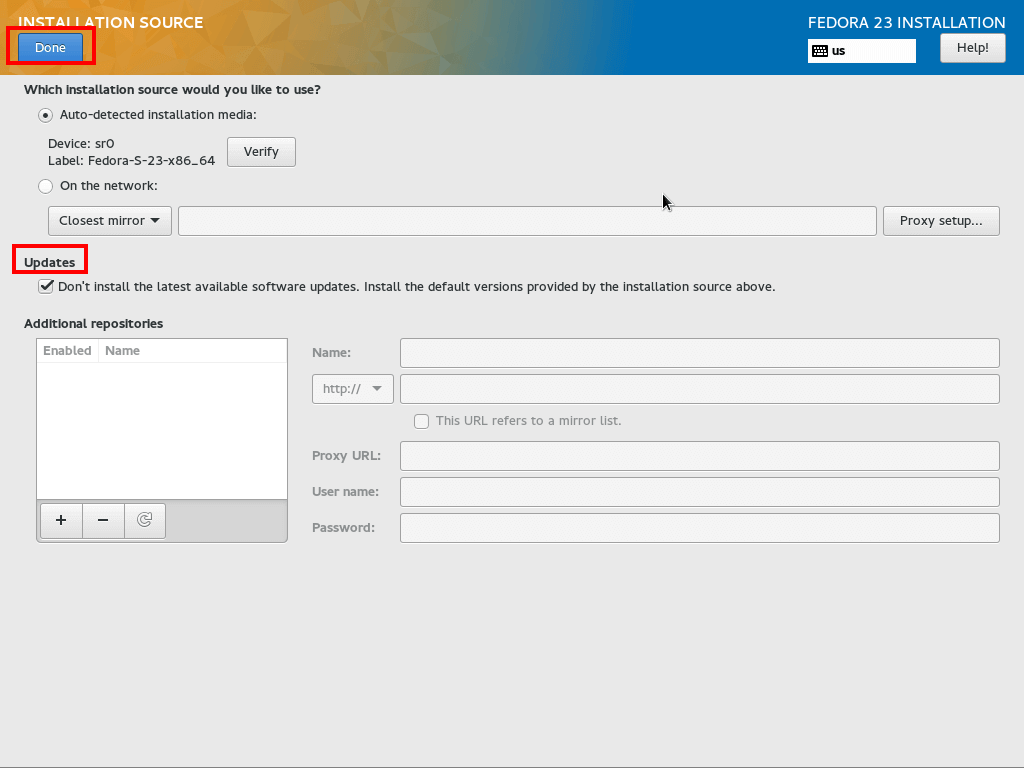
You should not need to change anything in here as all updates can be applied after the installation is completed. Click the “Done” button when ready.
Software Selection
9. This section allows you to choose which software to be pre-installed on your server when it first boots. There are 4 predefined options here:
- Minimal install – minimum amount of software – configure everything yourself. This is the preferred option by advanced users
- Fedora Server – an integrated and easier to manage server
- Web Server – includes set of tools required to manage a web server
- Infrastructure Server – this setup is mainly for maintaining network infrastructure services
The choice here is strongly individual and depends on the project for which you need your server. When you select your type of server (on the left), you can click the software which you wish to have pre-installed (windows on the right):
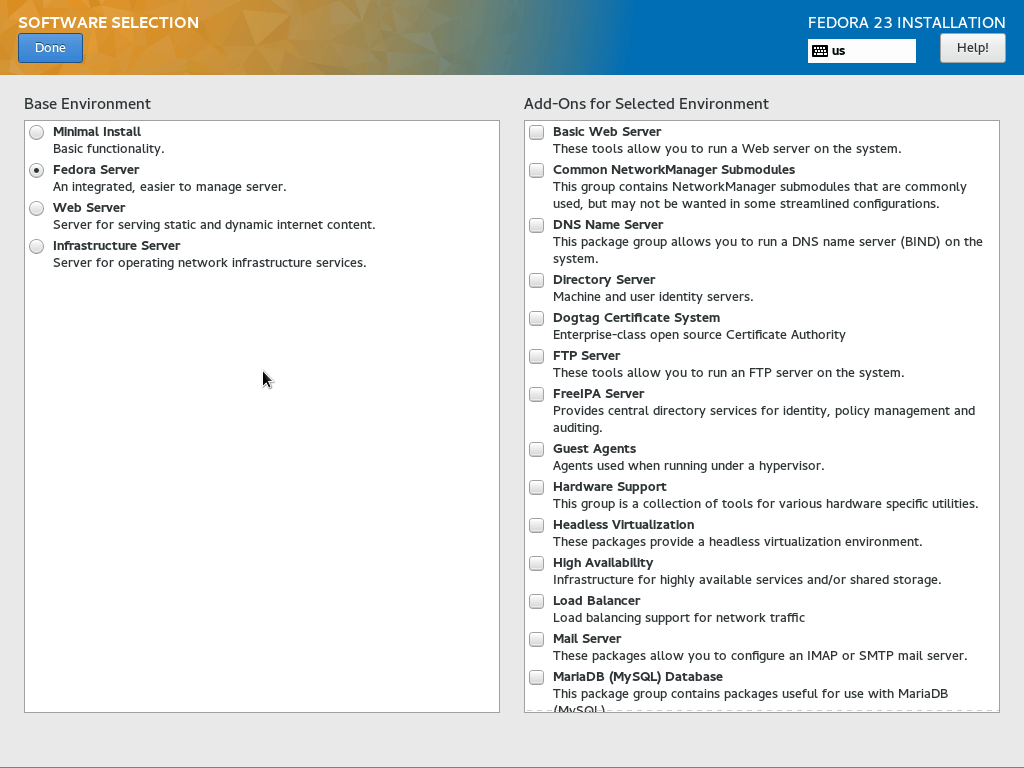
In most common cases, you will want to have the following selected:
- Common Network Manager Submodules
- FTP server
- Hardware support
- MariaDB (MySQL) Database
- System Tools
Of course, feel free to select the software packages you need. Even if you miss one, you can always install more software when the install is complete.
When you have made your choice, click the blue “Done” button so you can go to the “Installation Summary” window once more.
Configure Installation Destination
10. This is one of the most important parts. You will configure your server’s storage partitions. Click on the “Installation Destination” option and select the disk on which you wish to install Fedora 23 Server. After that select “I will configure partitioning“:
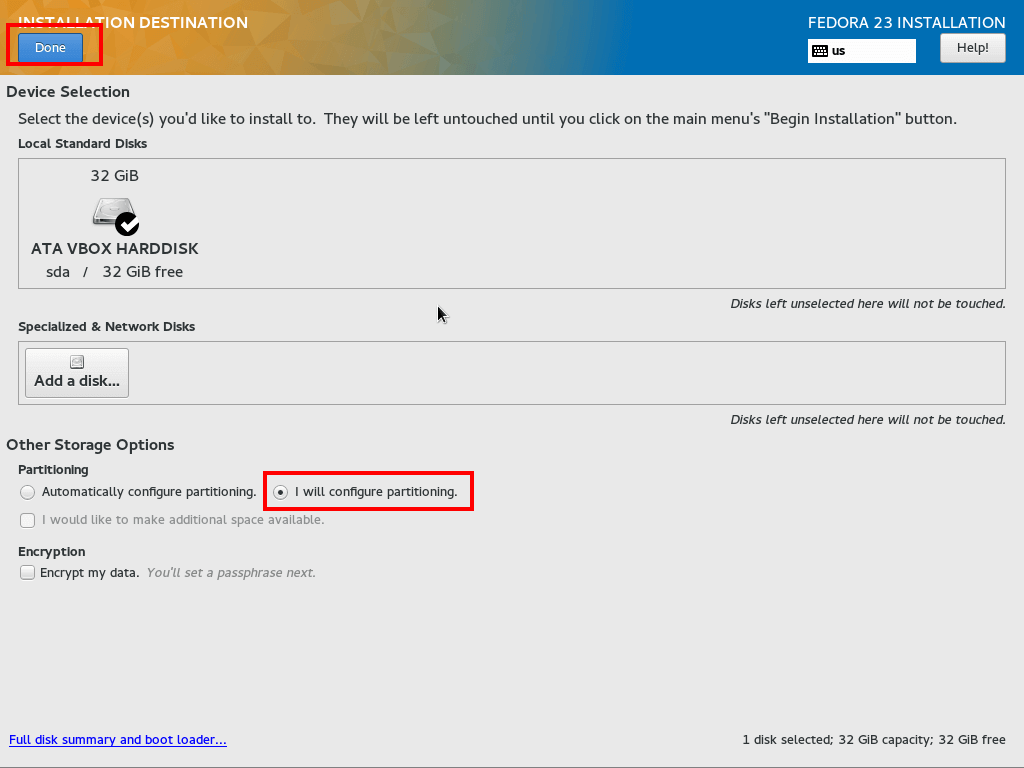
Click the blue “Done” button in the top left corner so you can configure your server’s disk partitions.
11. In the next window select “standard partition” from the drop down menu and then click the plus "+" sign to create your first disk partition.
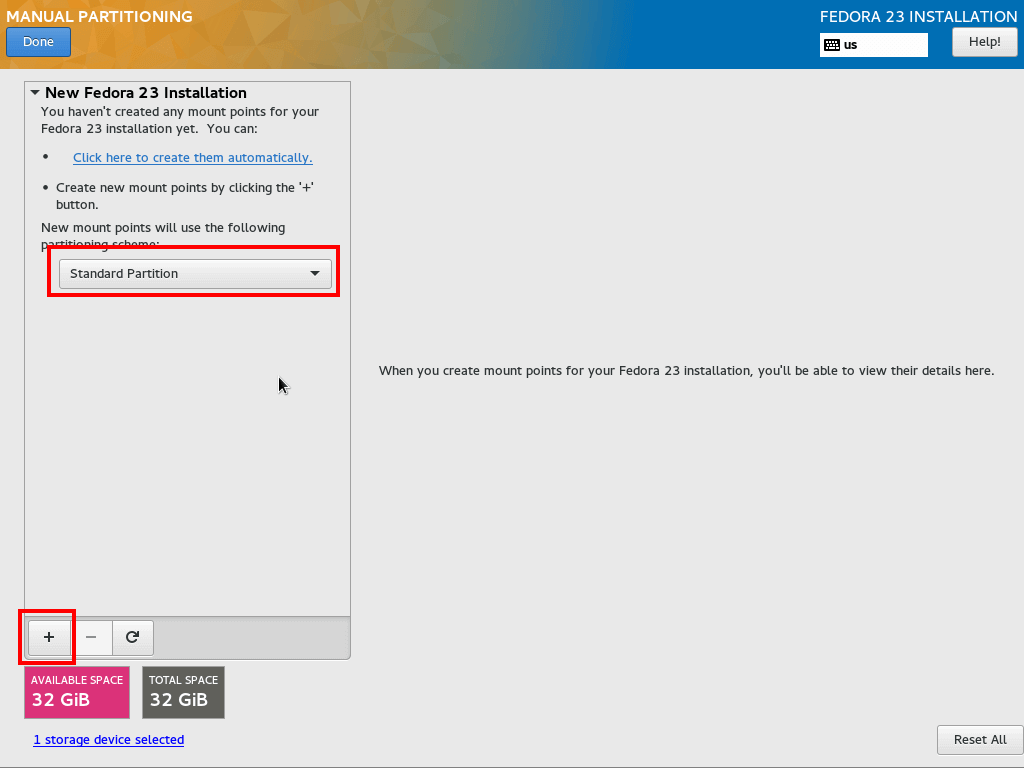
12. A smaller window will appear and you will need to setup the “Mount Point” and “Desired Capacity” of the partition. Here is what you will need to choose here:
- Mount Point: /
- Desired Capacity: 10 GB
Give the root partition more space if you plan on installing lot’s of software.
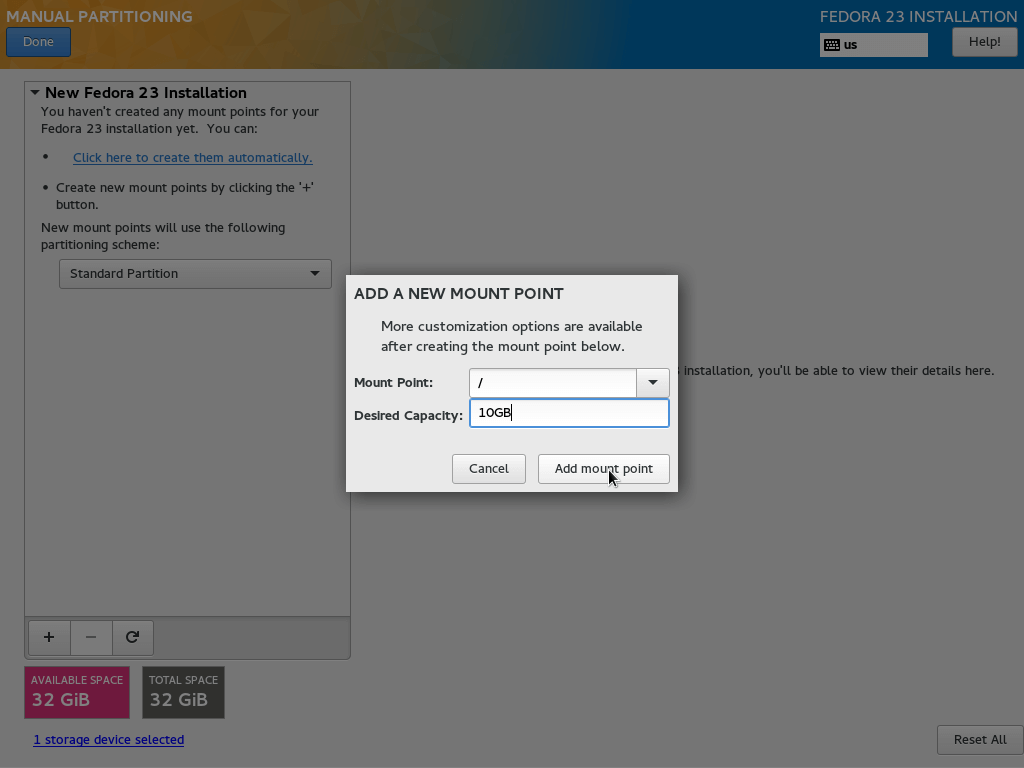
When the partition is created, under “File System” make sure that “ext4” is selected:
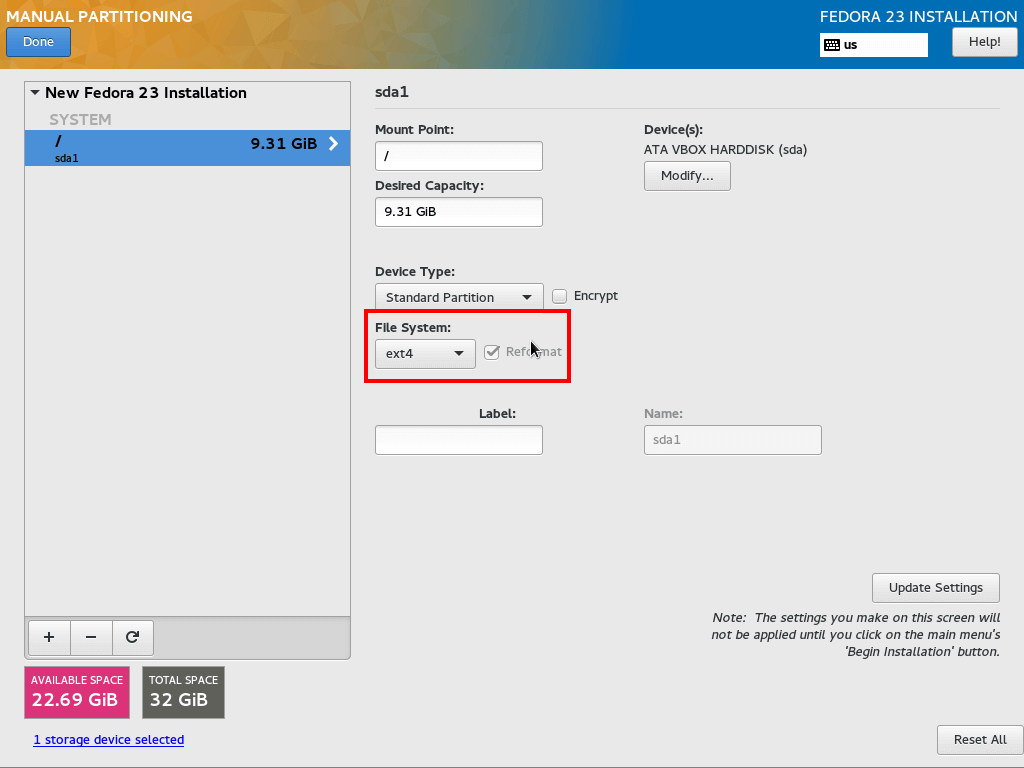
13. Now we will proceed and add some swap memory for our server. The swap memory is used when your server goes out of physical memory. When this happens, the system will temporary read from the “swap” memory which is a small part of your disk space.
Note that the swap memory is considerably slower than physical memory, so you don’t want to use swap too often. Usually the amount of swap should be double the size of your RAM. For systems with more memory you can give it 1-2 GB of space.
To add “swap” memory, click the plus "+" sign again and in the new window, using the drop down menu select “swap”. In my case I will give it 2 GB of space:
- Mount Point: Swap
- Desired capacity: 2 GB
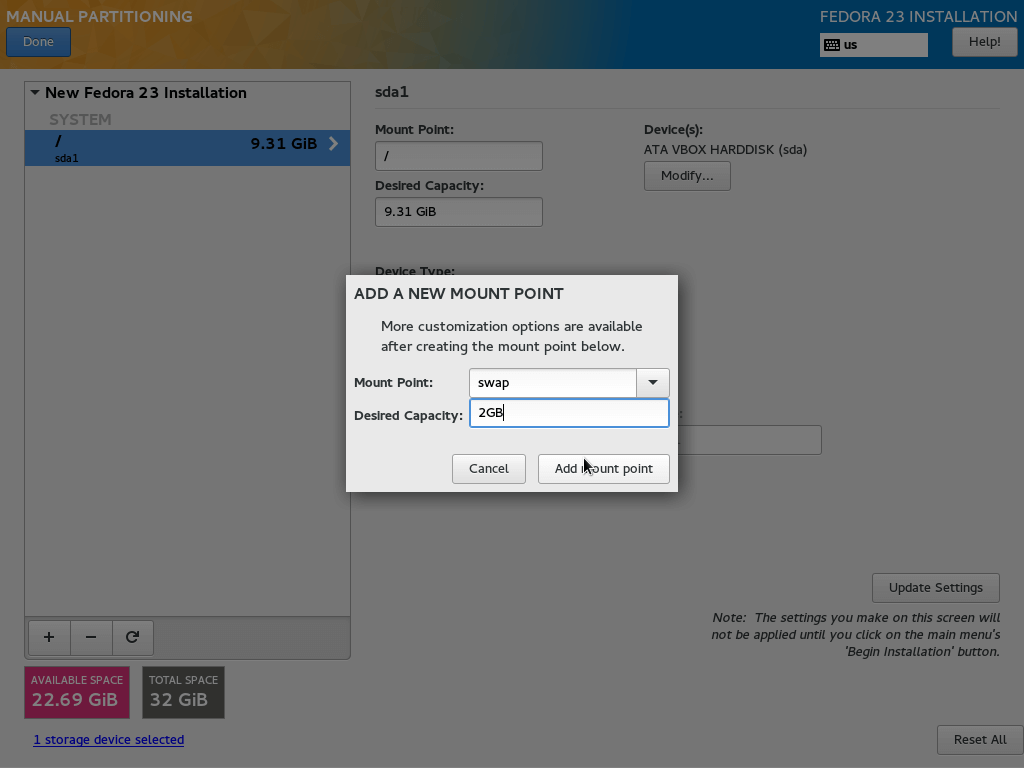
14. Finally, we will create our "/home" partition, which will store all our users data. To create this partition click the "+" button again and from the drop down menu select “/home”. For “Desired capacity” leave empty to use the remaining space.
- Mount Point: /home
- Desired Capacity: leave empty
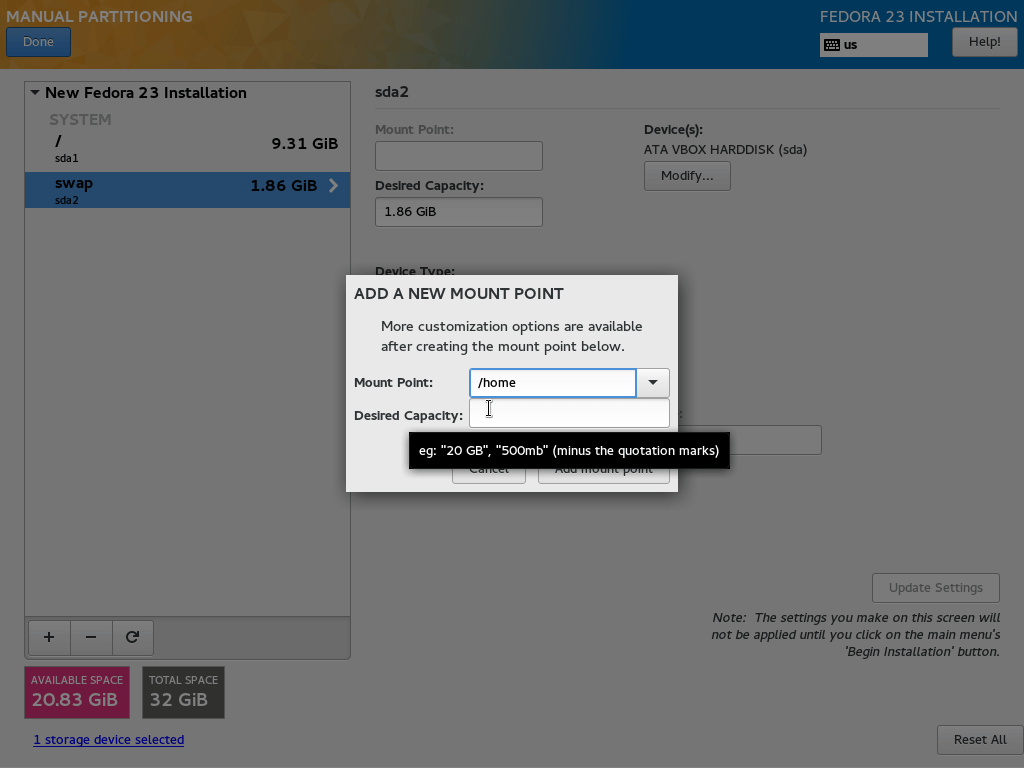
Just in case, make sure that the “File System” is set to “ext4” just as you did for the root partition.
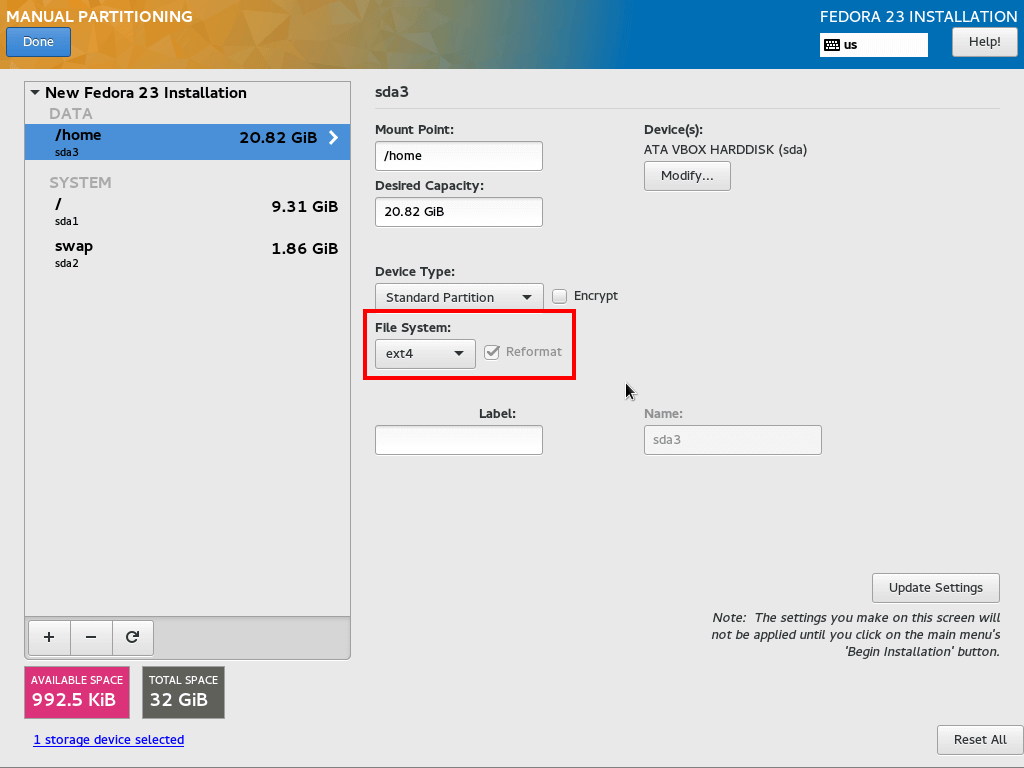
When you are ready, click the blue “Done” button. You will be provided with list of changes that will be performed on the disk:
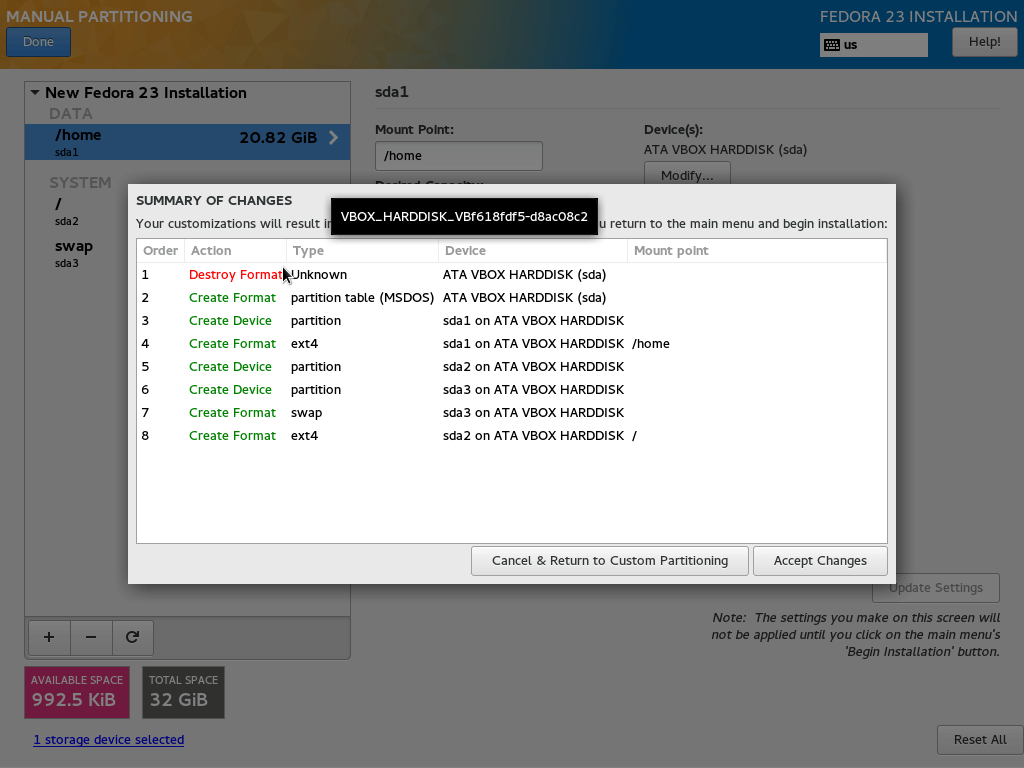
If everything looks good, click the “Accept Changes” button and you will be taken to the “Installation Summary” screen once more.
Configure Network & Hostname
15. In this section, you can configure the network settings and hostname for your server. To change the host name for your server, simply enter the desired name next to “Host Name:“:
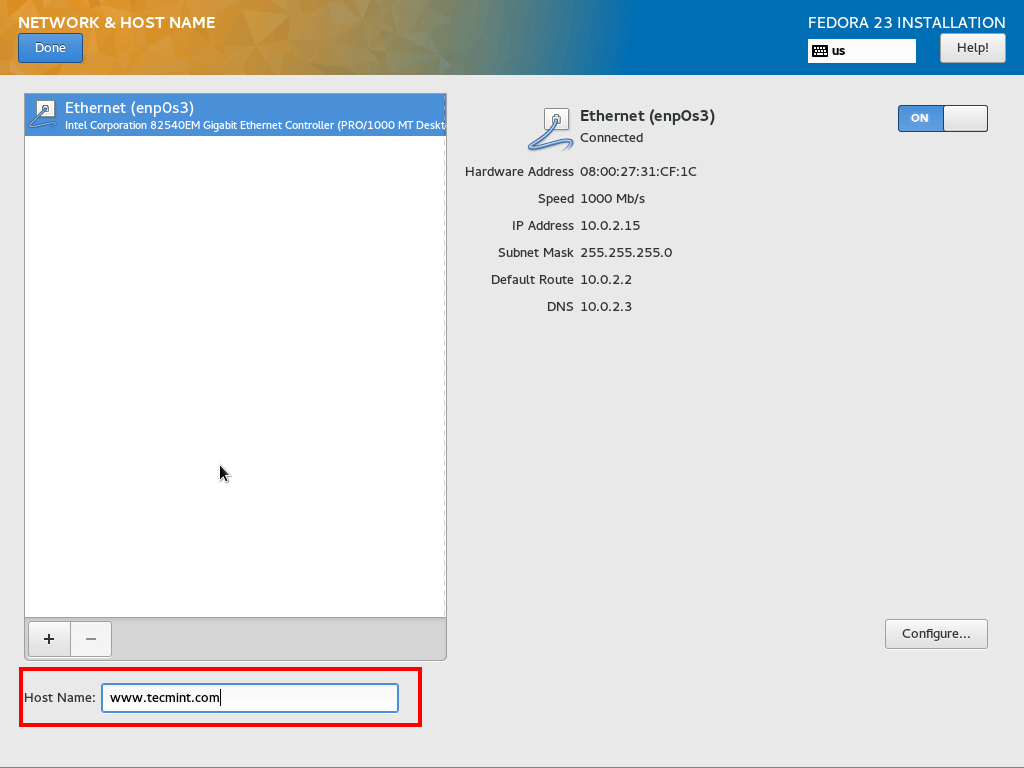
16. To configure the network settings for your server, click the “Configure” button on the right. Usually servers are meant to be accessed from the same IP address over and over again and it’s a good practice to set them with a static IP address. That way your server will be accessed from the same address each time.
Now in the new window do the following:
- Selection IPv4 Settings
- Next to “Method” select “Manual“
- Click the “Add” button
- Enter your IP settings provided by your ISP. In my case I am using a home router and I have applied an IP address from within the network range that the router uses
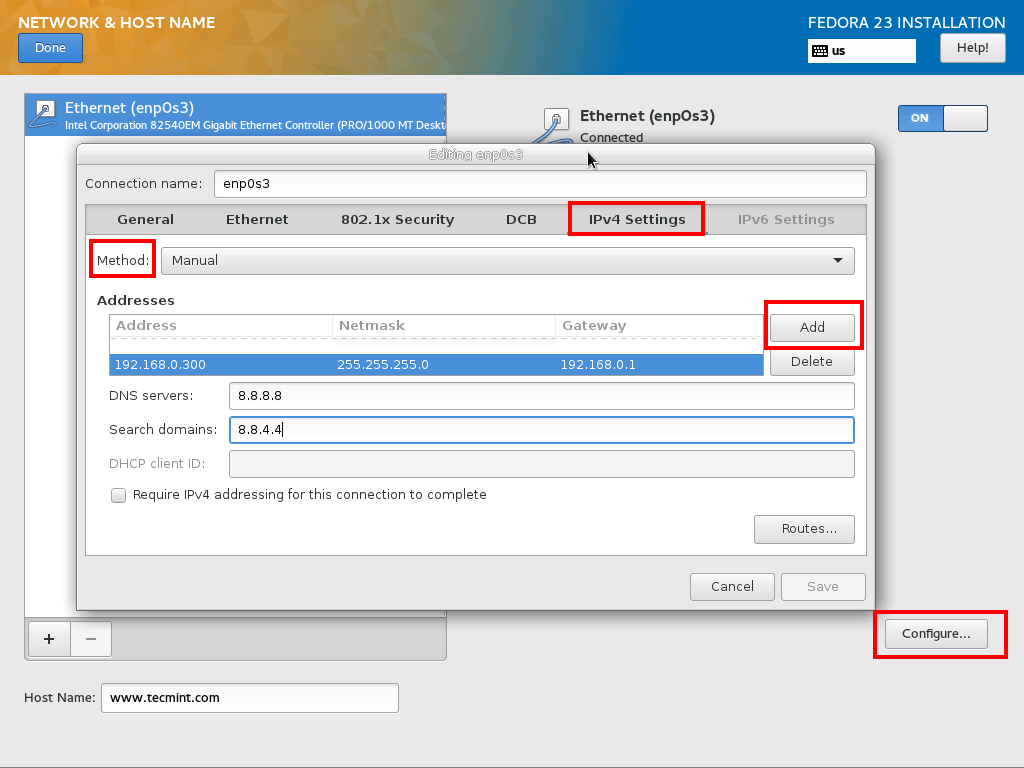
Finally save the changes and click on the “Done” button once again.
Begin Installation
17. Finally you can click on the “Begin Installation” button in the bottom right:
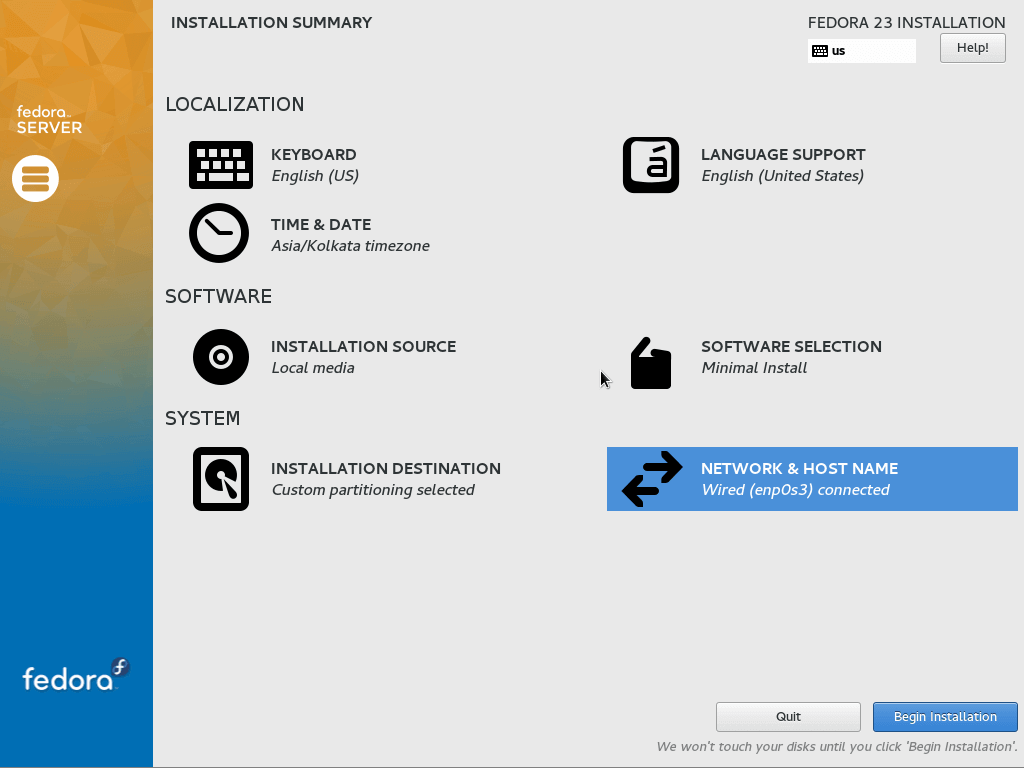
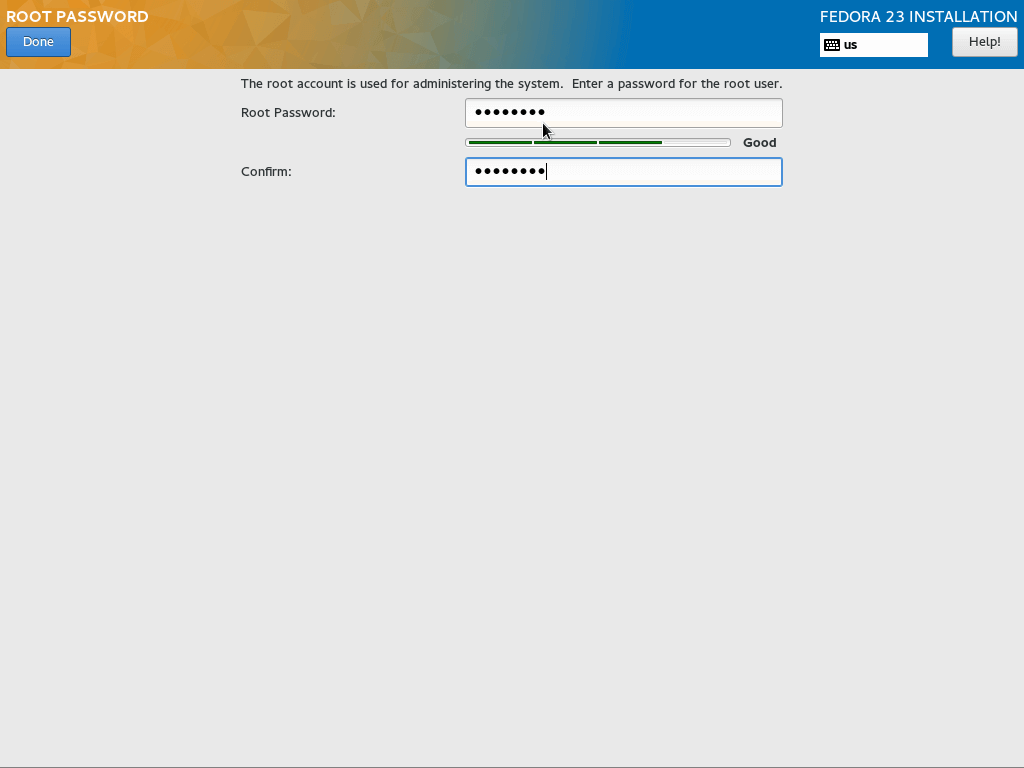
18. While the installation continues, you must configure your root user’s password and create additional user account which is optional.
To configure the root user’s password, click on “ROOT PASSWORD” and setup a strong password for this user:
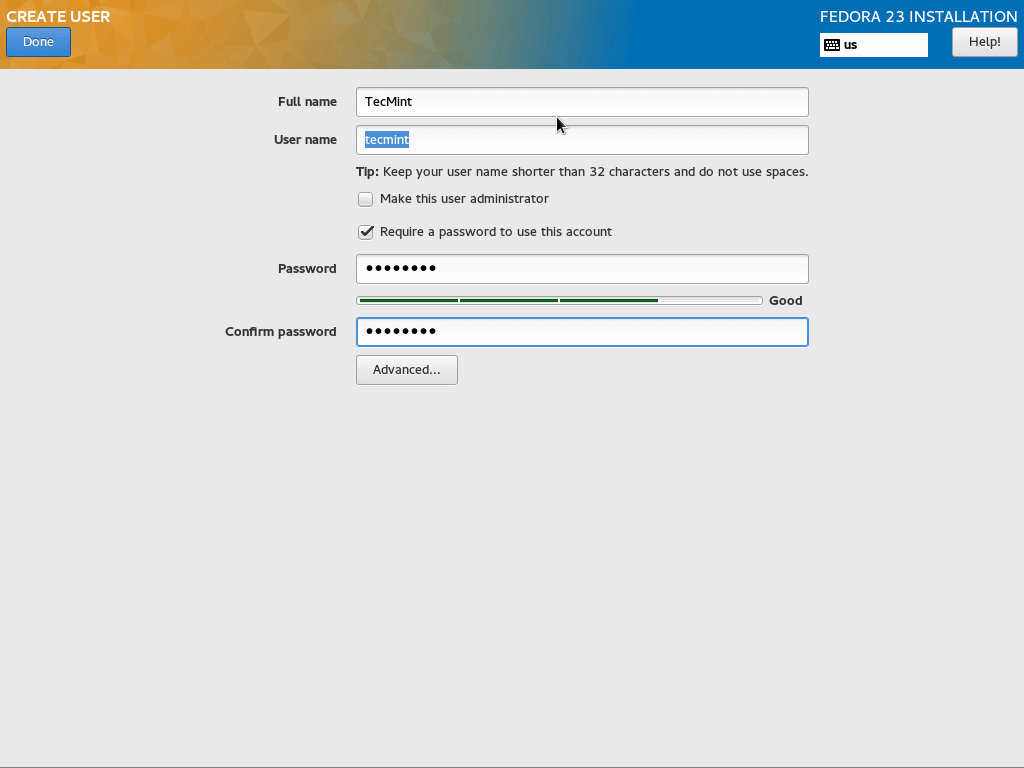
19. Next you can create additional user account for your new server. Simply fill in it’s real name, username and password:
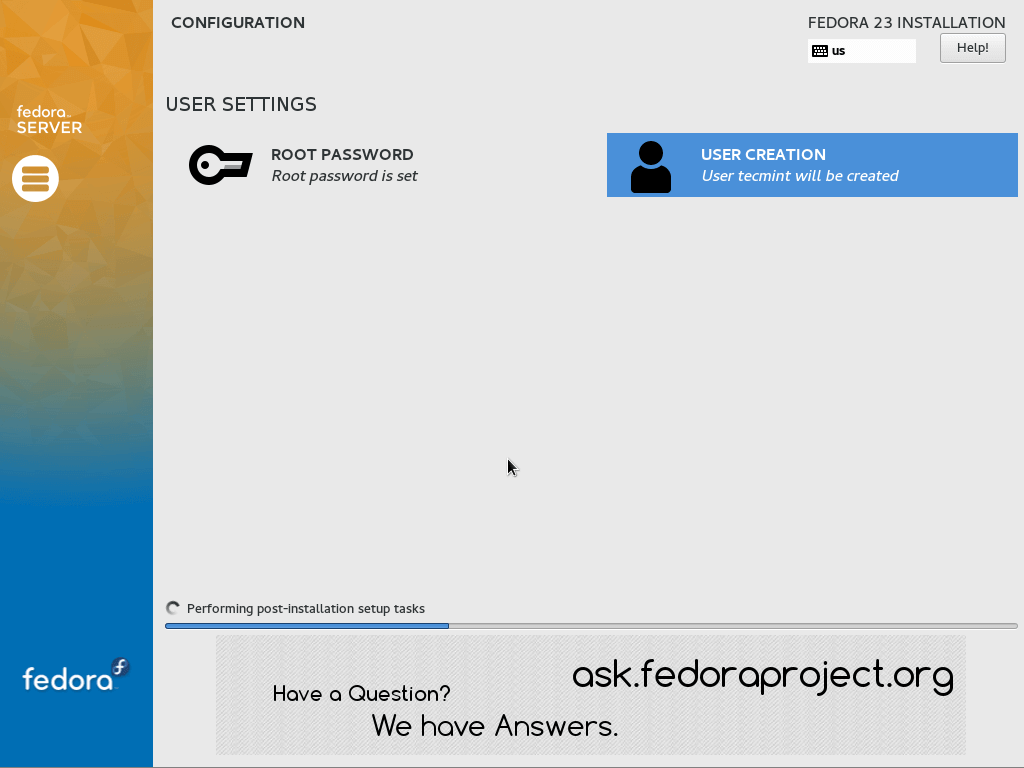
20. Now all is left to do is wait for the installation to finish:
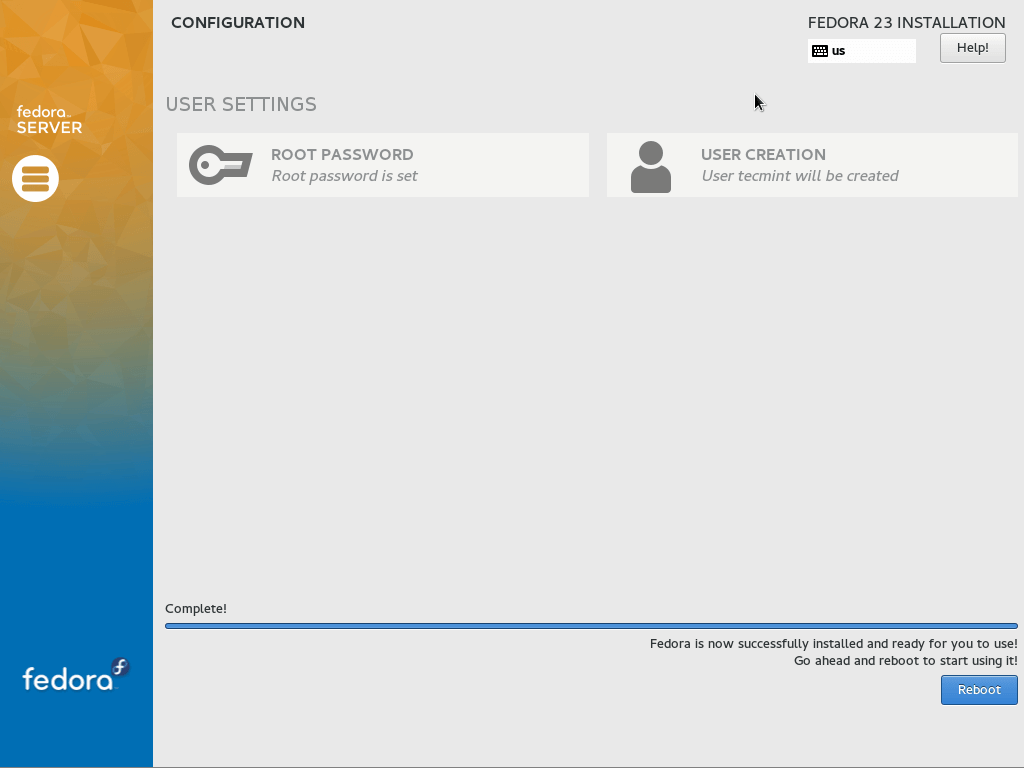
21. One the installation is complete, click the reboot button that will appear in the bottom right. You can now eject the installation media and boot to your new Fedora server.
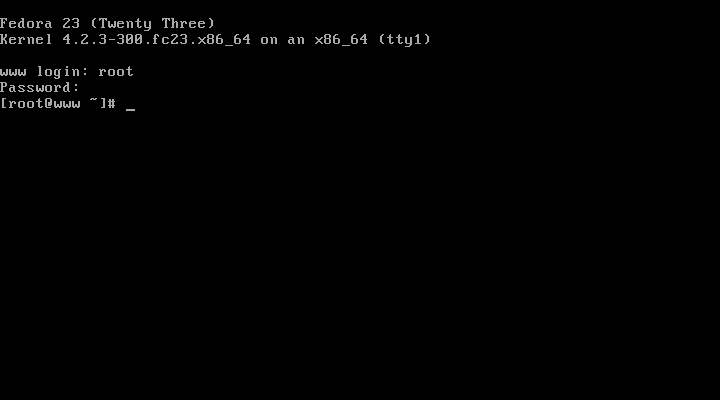
22. You can now access your server with the “root” user you have configured and have full access to your server.
Fedora 23 Server Administration with Cockpit
23. For new administrators the Fedora Project added an easy to use control panel called “Cockpit”. It allows you to manage your server’s services through browser.
To install cockpit on your server run the following set of commands as root:
# dnf install cockpit
# systemctl enable cockpit.socket
# systemctl start cockpit
# firewall-cmd --add-service=cockpit
24. Finally, you can access cockpit in your browsers on the following URL:
http://your-ip-address:9090
Note that you may see an SSL warning, you can safely ignore that and proceed to the page:
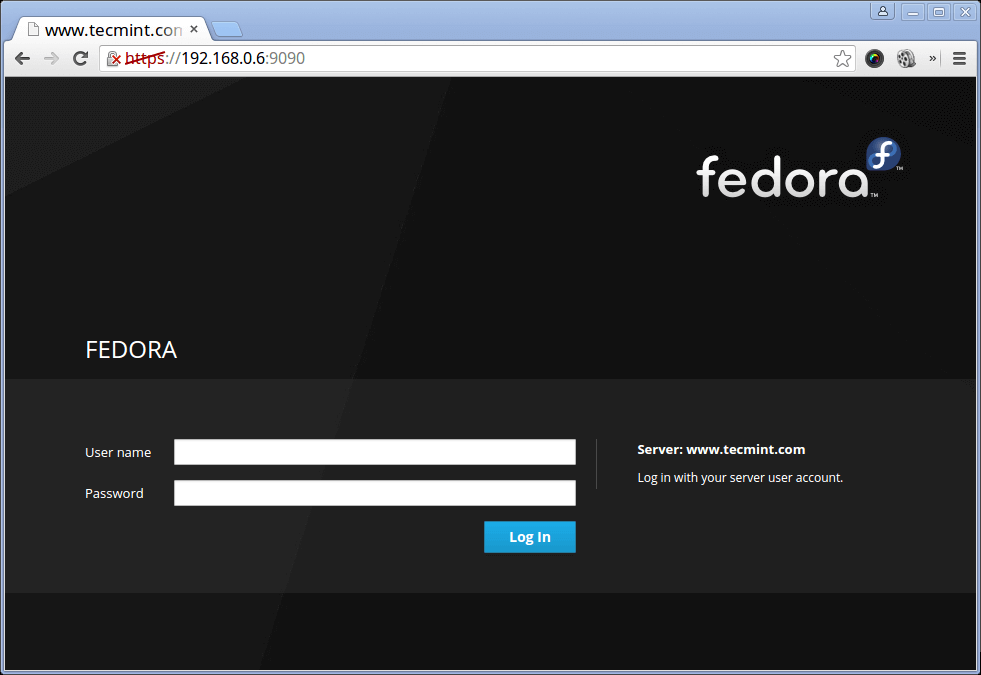
To authenticate, please use:
- Username: root
- Password: the root password for your server
You can use the different sections of this control panel to:
- Check system load
- Enable/disable/stop/start/restart services
- Review logs
- See disk usage and I/O operations
- Review network stats
- Manage accounts
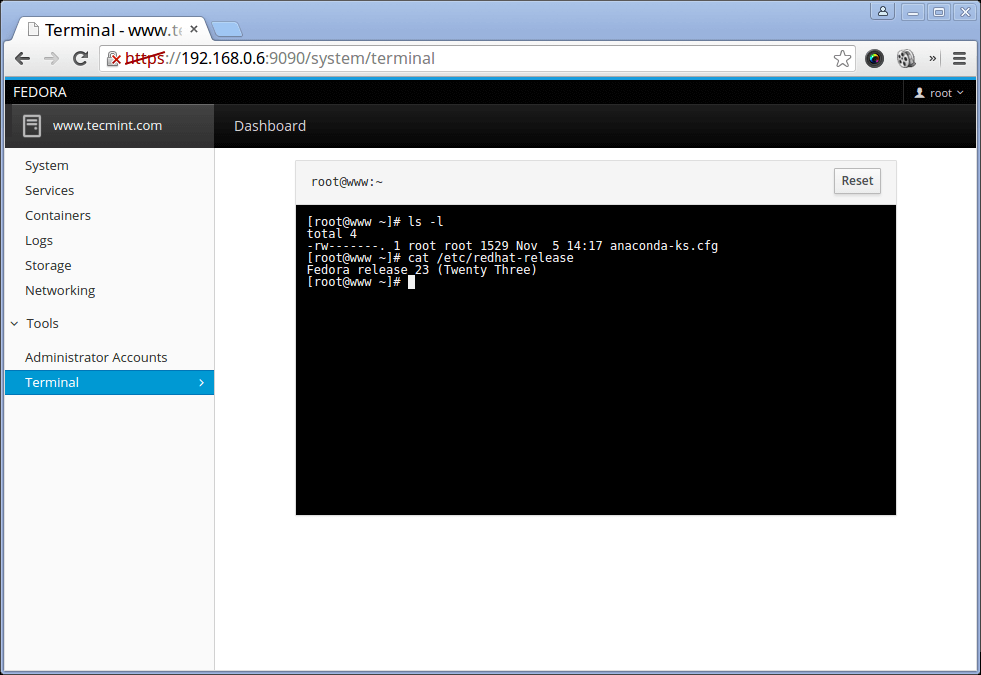
- Use web terminal
Check System Load
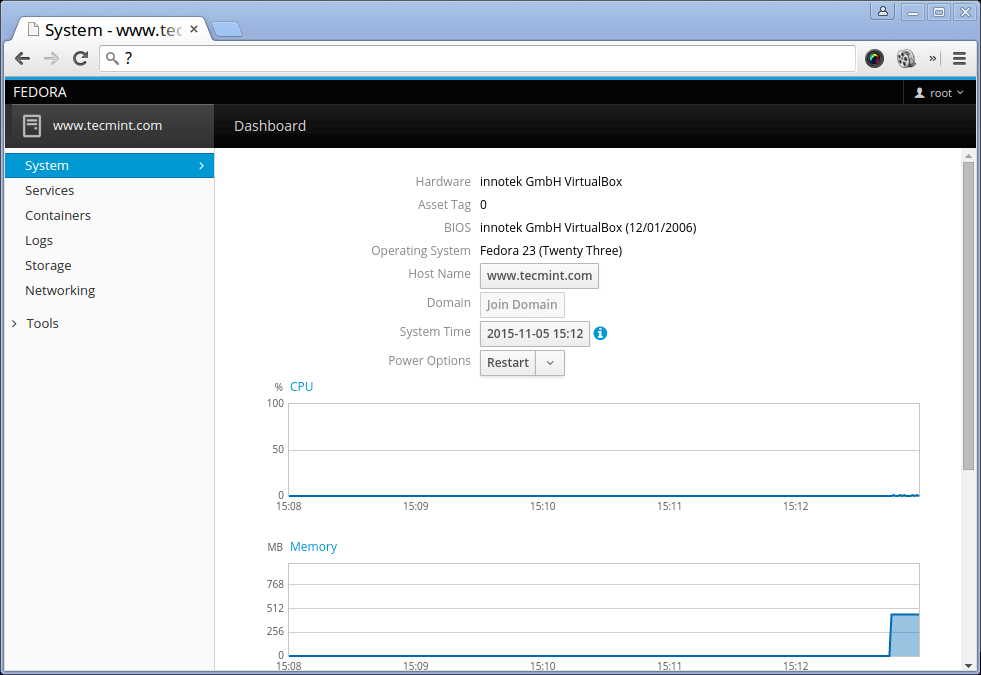
Monitor System Services
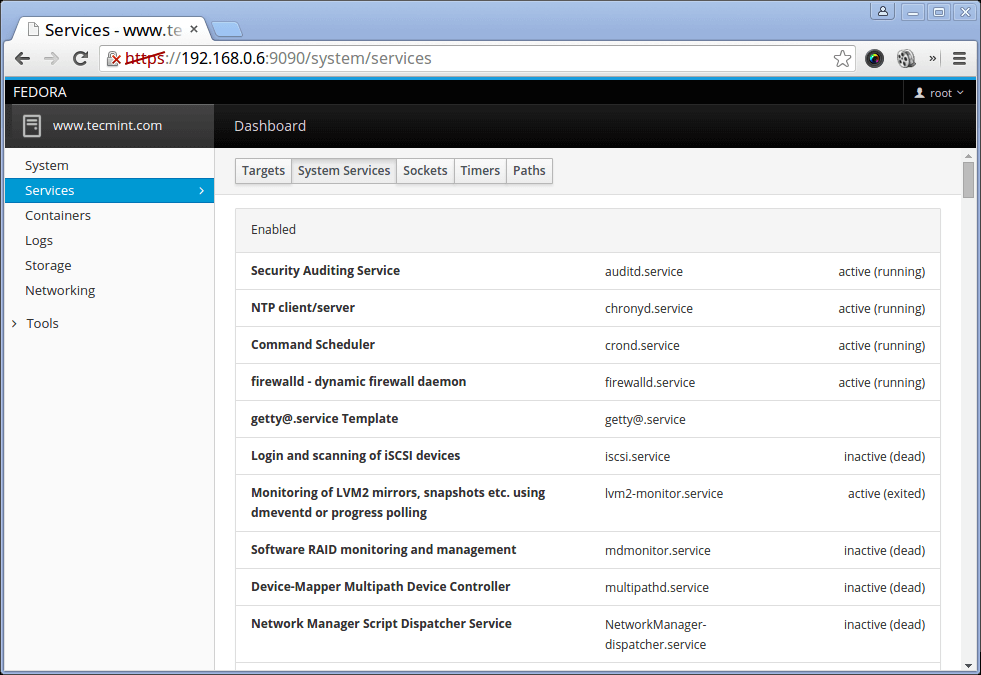
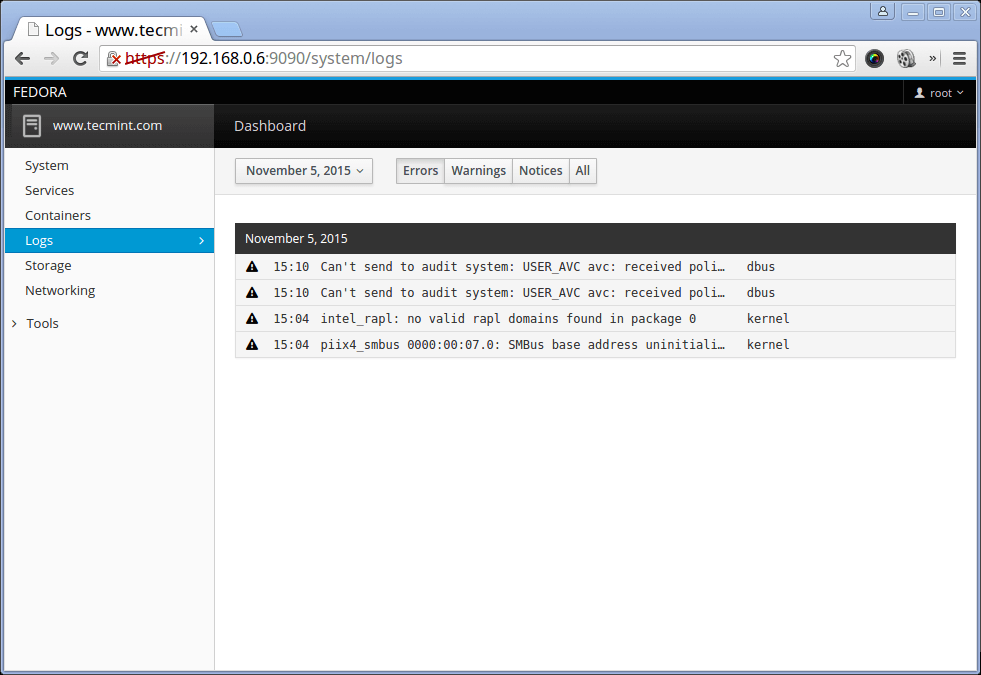
Monitor System Logs
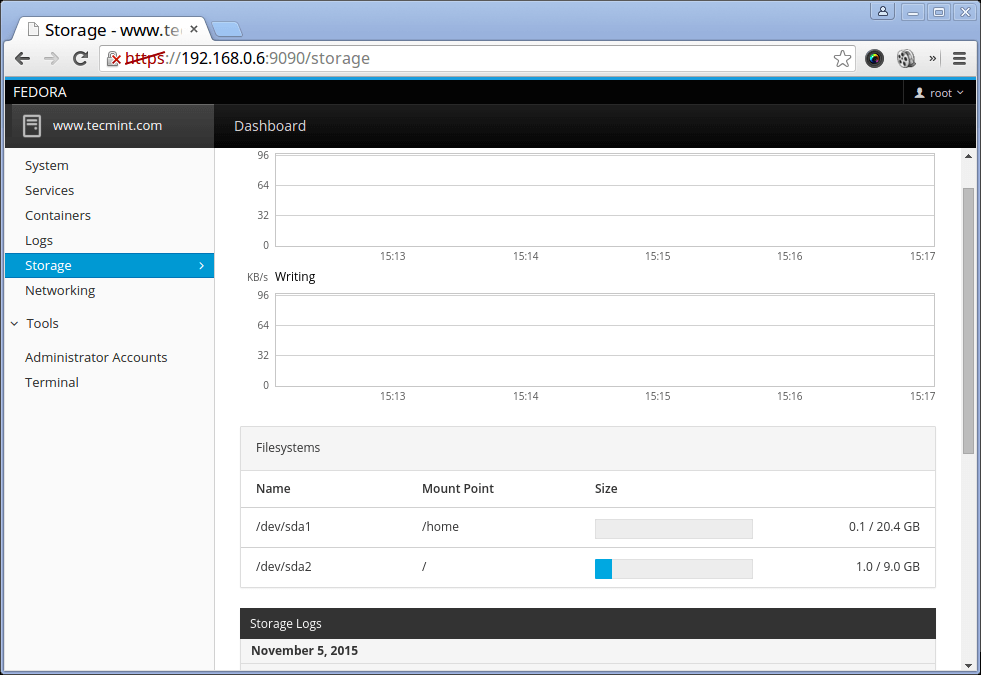
Monitor Disk I/O Rate
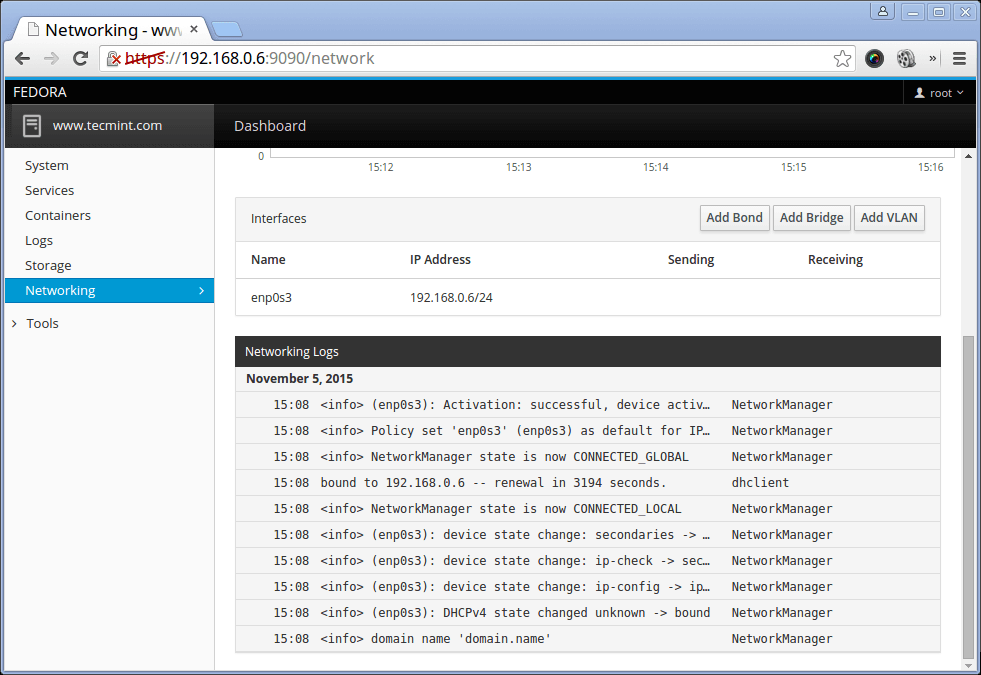
Monitor Network Usage
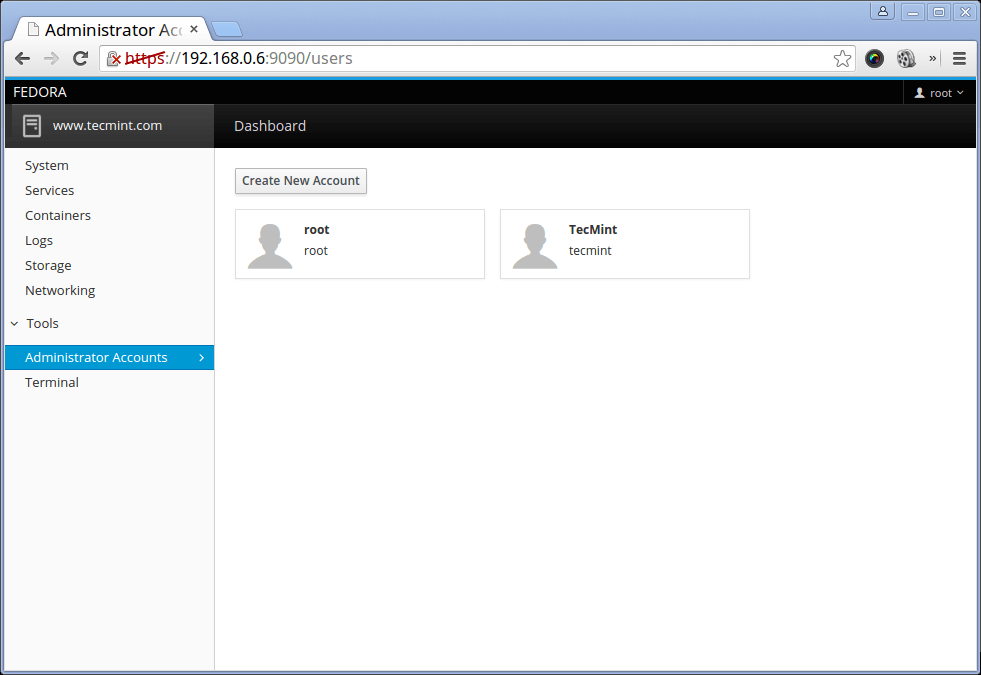
Manage System Accounts
Use Web Terminal
Conclusion
Your Fedora 23 server installation is now complete and you can start managing your server. You definitely have all the tools required to do so. However if you have any questions or comments, please do not hesitate to submit them in the comment section below.






Can I use fedora server as SND? My aim is to have like a software router of some sort.
How can i install VPN on Fedora server? Do i need to install something for the same? My server is not connected with internet so can i download any vpn separate and then install on server?
Please guide.
@Ravi,
Follow our guide below to setup OpenVPN on Fedora server..
https://www.tecmint.com/setup-openvpn-server-with-linux-and-windows-clients-in-centos-rhel/
Works perfectly! Thank you, Ravi.
Hi,
during my install of Fedora23 as a virtual machine in VMware vSphere, step 9 “Software Selection”, did not come up. My question now is how I can install a GUI. For a while I’m using the cockpit with no problems. Could you please tell me the right command?
Thank you,
Patrick
@Patrick,
With the help of following commands you can easily install GUI environment in Fedora 23 Server as shown.
Thanks, that’s useful… but after doing this (confirmed it’s installed: run the command again and get a message ‘already installed, skipping’) the gui doesn’t start – still have CLI login after startup. How to make it start, preferably automatically?
@Chris,
Follow these instruction to login into default Graphical Interface.
1. Open /etc/inittab file:
2. Change the numeral 3 to 5 and save the file.
Reboot the system and your system will restart and present a graphical login.
How do you add a graphical login for server (for all users)?
I believe your screen capture for the DNS entry is wrong. You show 8.8.4.4 as a domain.
Hi, I enjoyed your tutorial, but came unstuck after a reboot.
You need to add
firewall-cmd –permanent –add-service=cockpit
as well as
firewall-cmd –add-service=cockpit
in order for the firewall change to survive a reboot.
Cheers.
@Randy,
Thanks for the tip, hope it will help other fellow readers…
I am a first use of Linux fedora server 23.but I can not go next option of or 22image label that means root system.please help me
i installed fedora 23 on a virtual box where guest os is windows , after installation completed successfully on virtual box ,on the terminal it provided with a url where i can access the fedora 23 console.
i tried to access fedora console from my windows machine using the url provided by server i was not able to access it , how do i access fedora console from my windows machine when fedora 23 is up and running on Virtual box?
Thank you for your help in advance
@Suresh,
Both Windows and Fedora 23 on same network with communication with each other? have you opened port for fedora console? to access Cockpit Fedora console from windows machine, both machine must be on same network and should ping each other..
Hello, awesome post.
When I try to start a docker container i get the message –
Error attaching: configured logging reader does not support reading
disconnected
any ideas
thanks a bunch!
I am getting the same error. Please tell me if you fix it.
Hello,
Could you please submit your question in our discussion forum at http://linuxsay.com . Please provide more details about the container you are trying to start and the kernel you are using.