Ubuntu Server 16.04, also named Xenial Xerus, has been released by Canonical and it’s now ready for installation.
The details about this new LTS version can be found on the previous article: How to upgrade Ubuntu 15.10 to 16.04.
This topic will guide you on how you can install Ubuntu 16.04 Server Edition with Long Time Support on your machine.
If you’re looking for Desktop Edition, read our previous article: Installation of Ubuntu 16.04 Desktop
Requirements
Install Ubuntu 16.04 Server Edition
1. On the first step visit the above link and download the latest version of Ubuntu Server ISO image on your computer.
Once the image download completes, burn it to a CD or create a bootable USB disk using Unbootin (for BIOS machines) or Rufus (for UEFI machines).
2. Place the bootable media intro the appropriate drive, start-up the machine and instruct the BIOS/UEFI by pressing a special function key (F2, F11, F12) to boot-up from the inserted USB/CD drive.
In a few seconds you will be presented with the first screen of Ubuntu installer. Select your language to perform the installation and hit Enter key to move to the next screen.
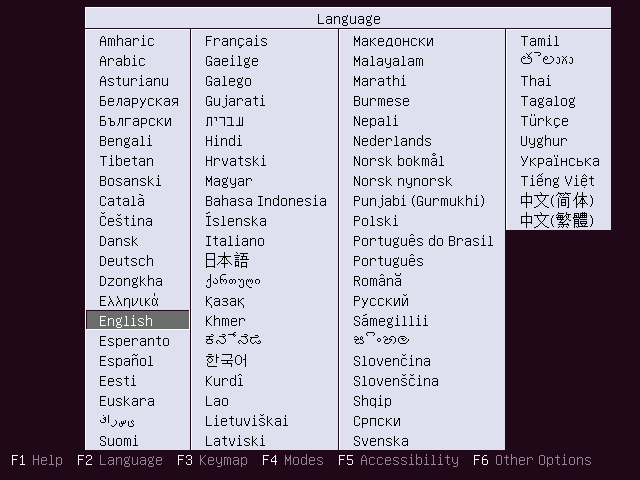
3. Next, select the first option, Install Ubuntu Server and press Enter key to continue.

4. Select the language you with to install the system and press Enter again to continue further.
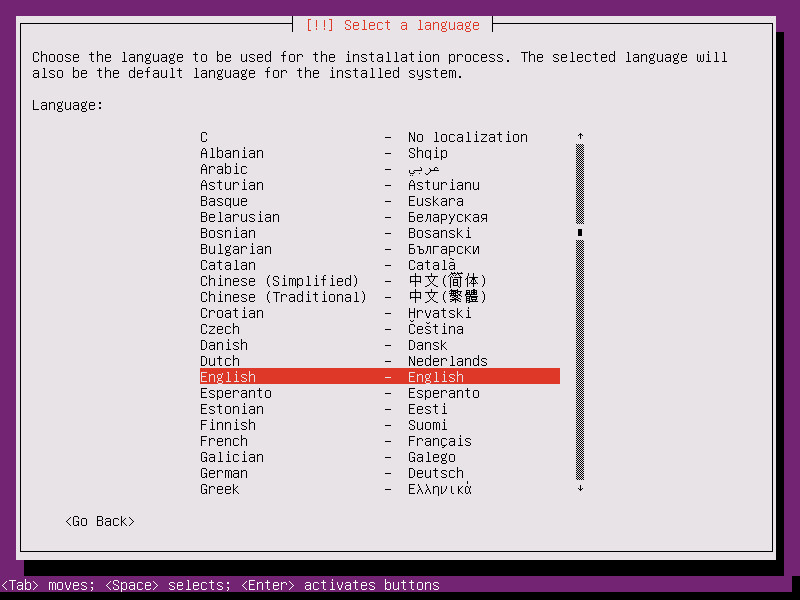
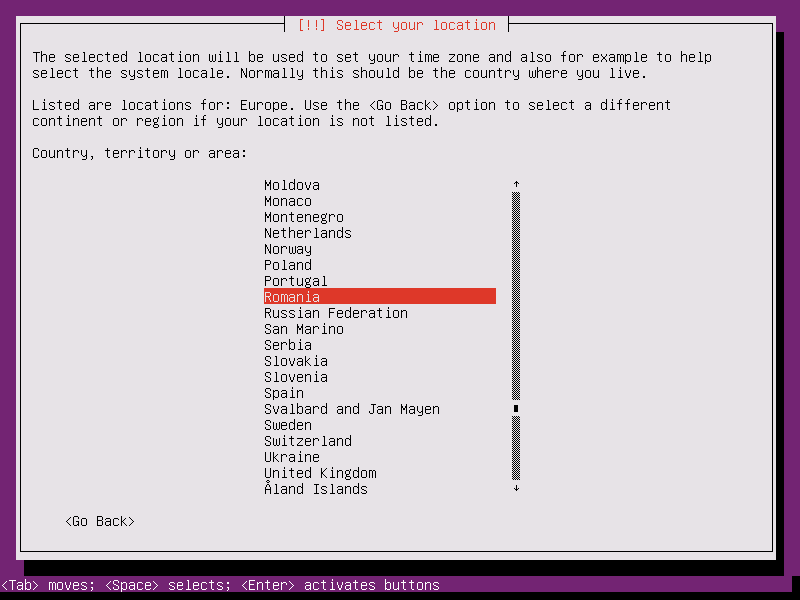
5. On the next series of screen choose your physical location from the presented list. If your location is different than the ones offered on the first screen, select other and hit Enter key, then select the location based on your continent and country. This location will be also used by the timezone system variable. Use the below screenshots as a guide.
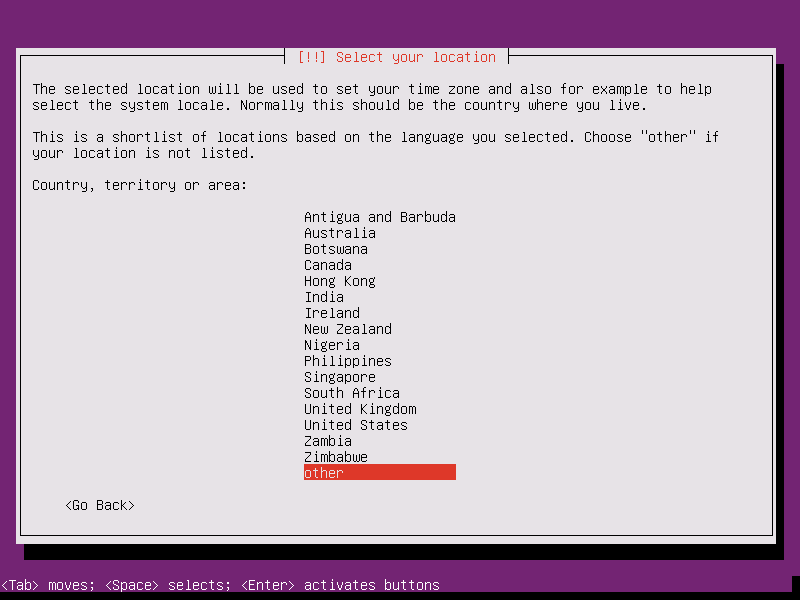
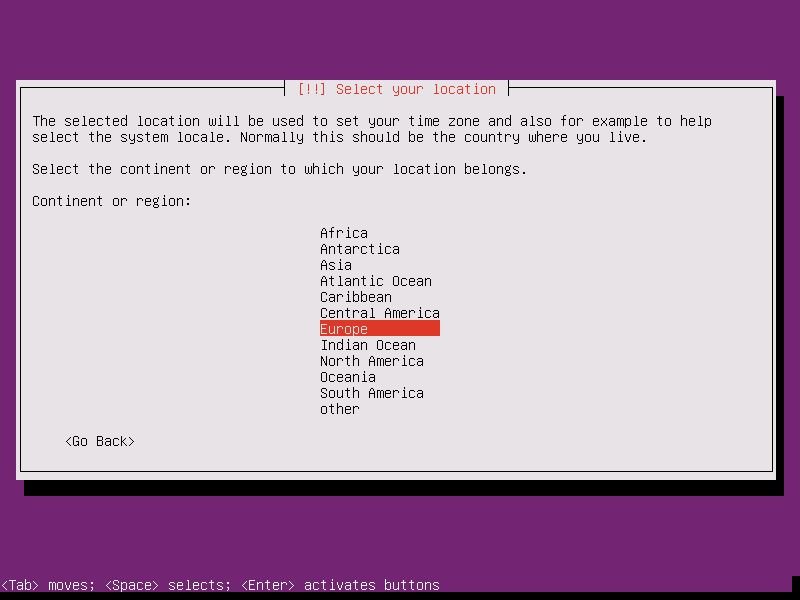
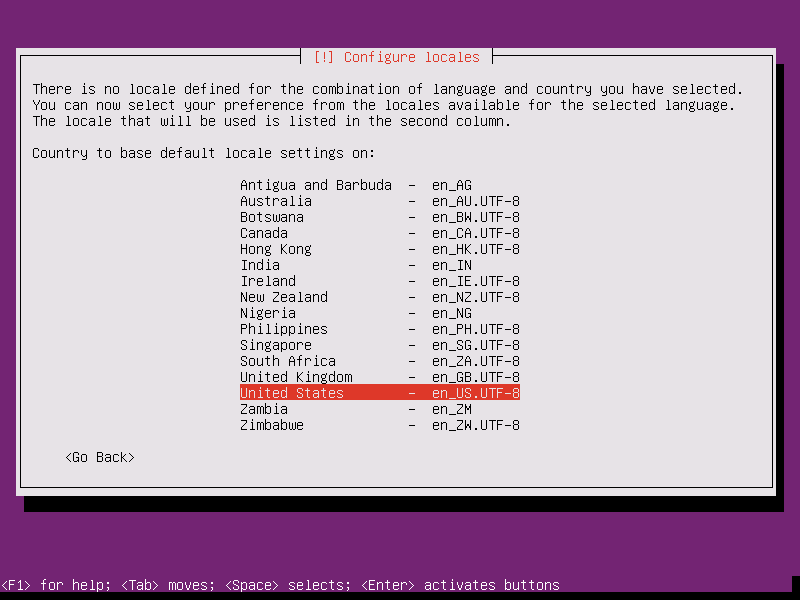
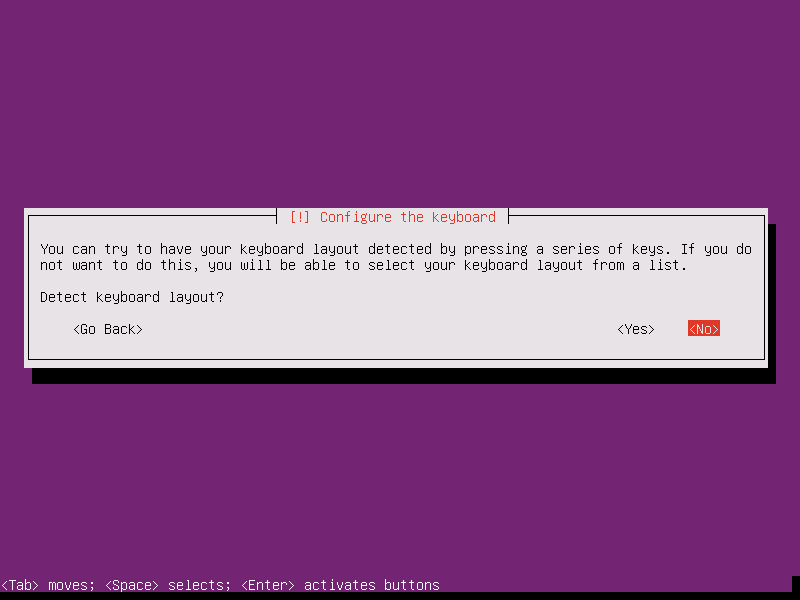
6. Assign the locales and keyboard settings for your system as illustrated below and hit Enter to continue the installation setup.
7. The installer will load a series of additional components required for the next steps and will automatically configure your network settings in case you have a DHCP server on the LAN.
Because this installation is intended for a server it’s a good idea to setup a static IP address for your network interface.
To do this you can interrupt the automatic network configuration process by pressing on Cancel or once the installer reaches hostname phase you can hit on Go Back and choose to Configure network manually.
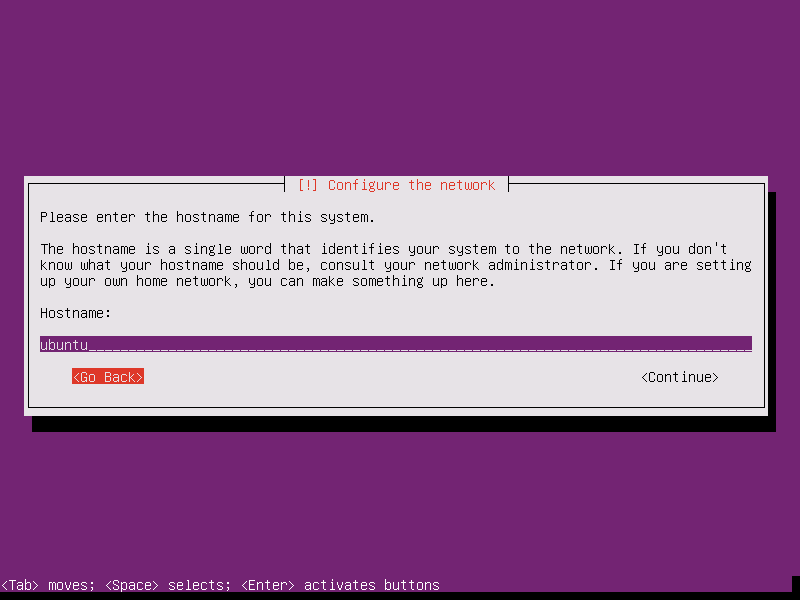
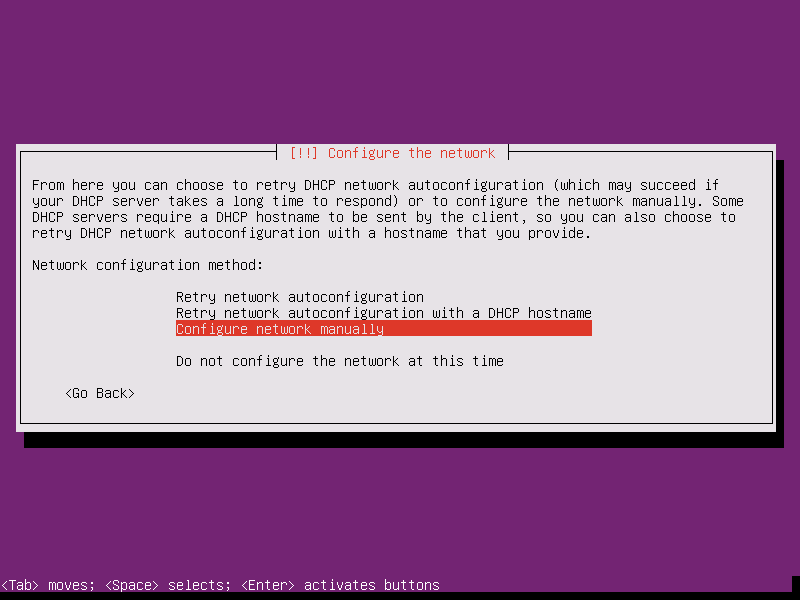
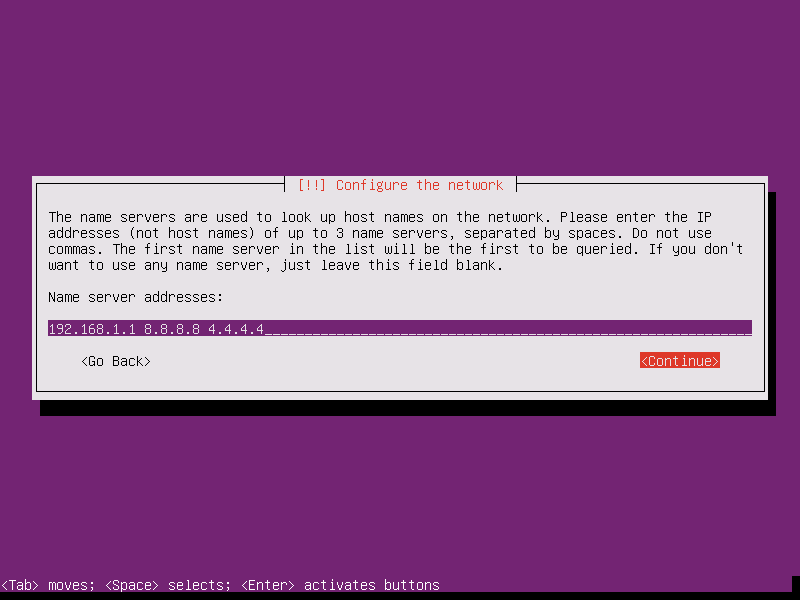
8. Enter your network settings accordingly (IP Address, netmask, gateway and at least two DNS nameservers) as illustrated on the below images.
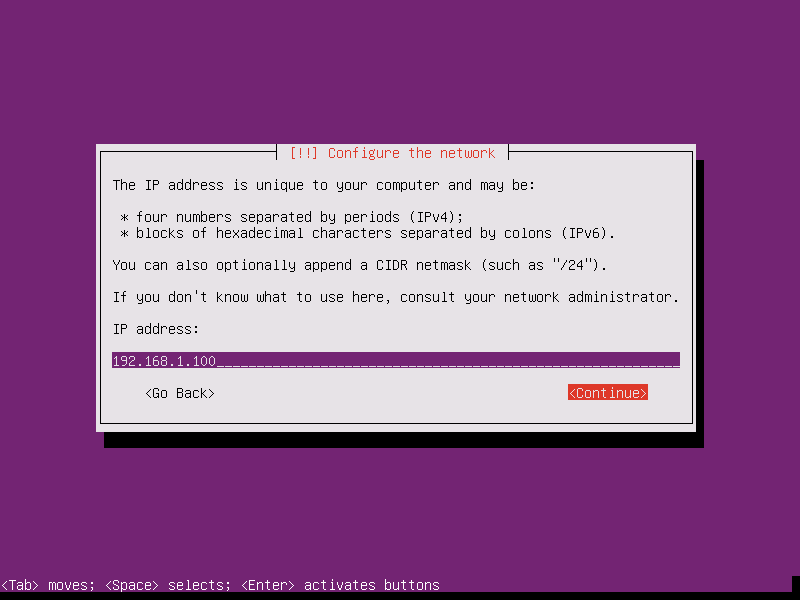
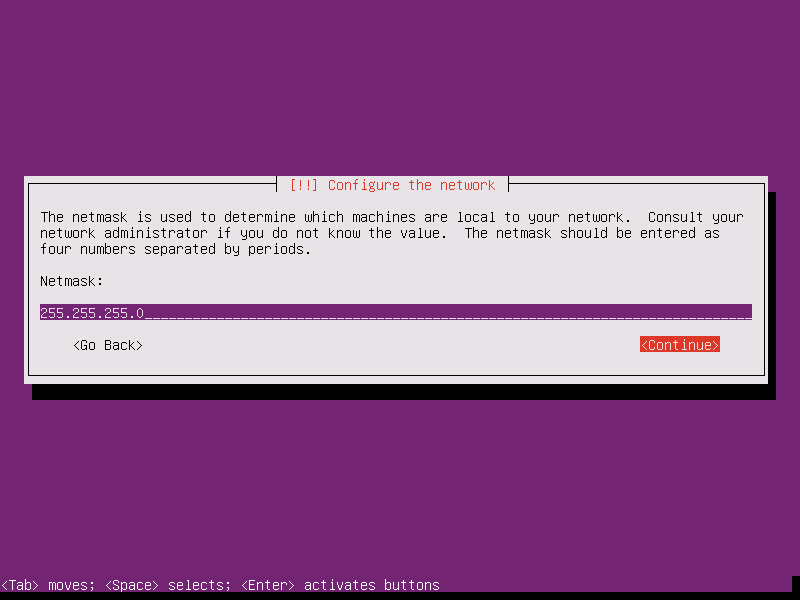
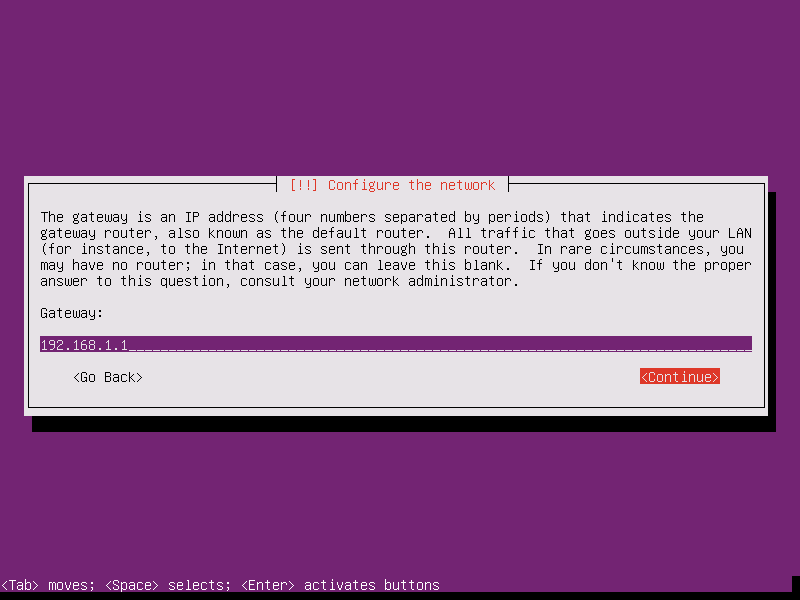
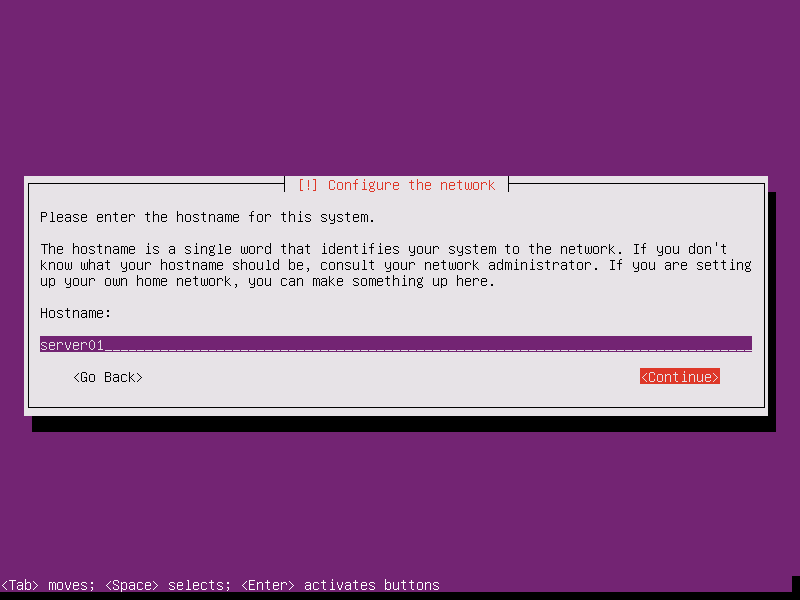
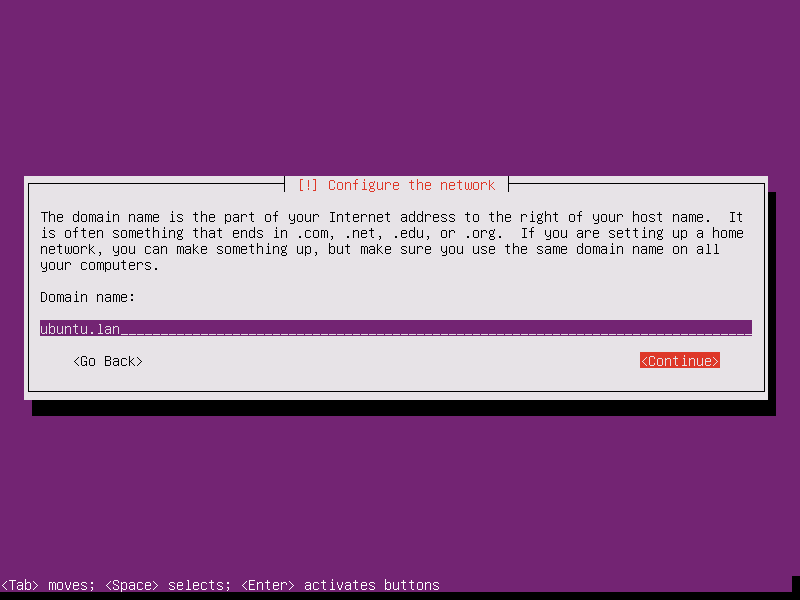
9. On the next step setup a descriptive hostname for your machine and a domain (not necessary required) and hit on Continue to move to the next screen. This step concludes the network settings.



Thanks for tutorial, Thank you for your help.
Hello,
Can you show how to split a disk into separate partitions for home, tmp, srv, var?
Thank you for your help.