This guide will describe how to integrate a VMware ESXI host into a Samba4 Active Directory Domain Controller in order to authenticate in VMware vSphere Hypervisors across network infrastructure with accounts provided by a single centralized database.
Requirements
Step 1: Configure VMware ESXI Network for Samba4 AD DC
1. Preliminary steps before joining a VMware ESXI to a Samba4 require that the hypervisor has the proper Samba4 AD IP addresses configured in order to query the domain via DNS service.
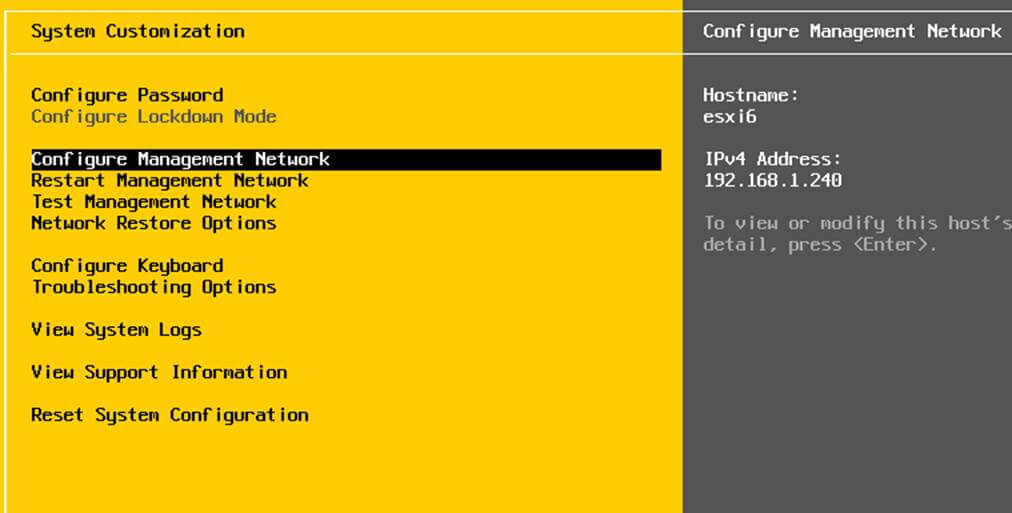
To accomplish this step from VMware ESXI direct console, reboot the hypervisor, press F2 to open the direct console (also called DCUI) and authenticate with the root credentials assigned for the host.
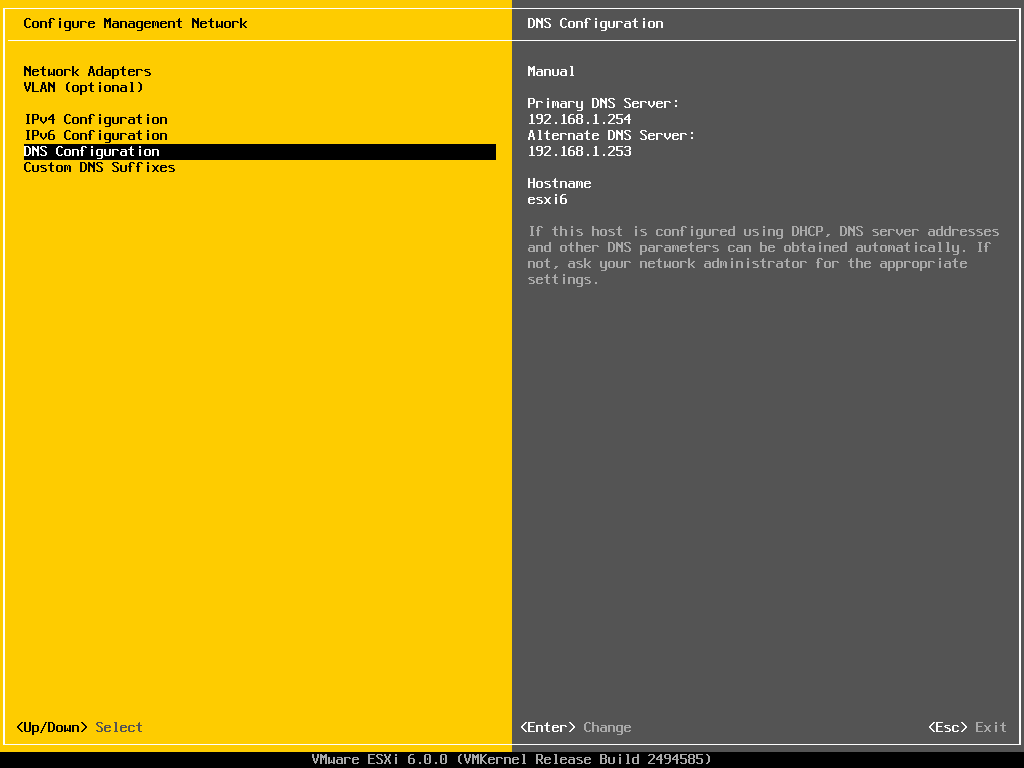
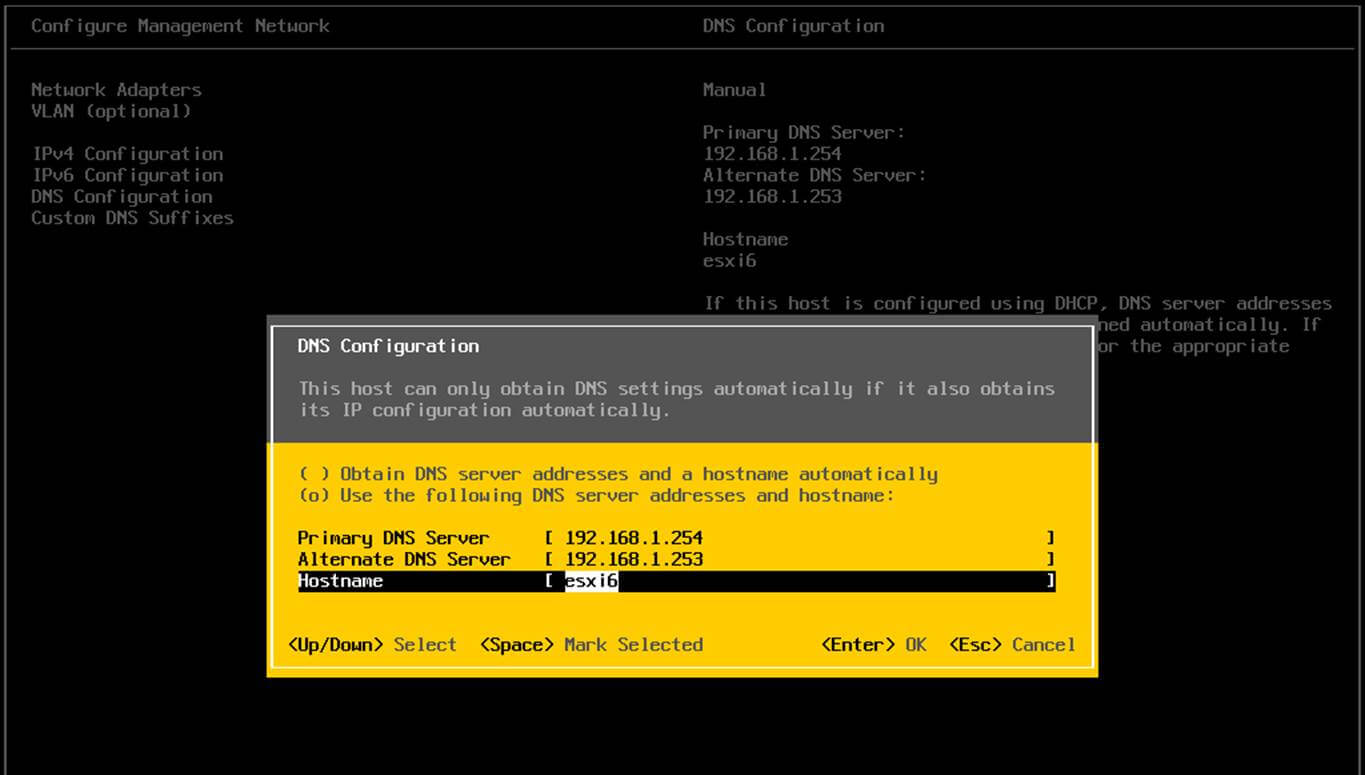
Then, using the keyboard arrows navigate to Configure Management Network -> DNS Configuration and add the IP addresses of your Samba4 Domain Controllers in Primary and Alternate DNS Server fields.
Also, configure the hostname for the hypervisor with a descriptive name and press [Enter] to apply changes. Use the below screenshots as a guide.
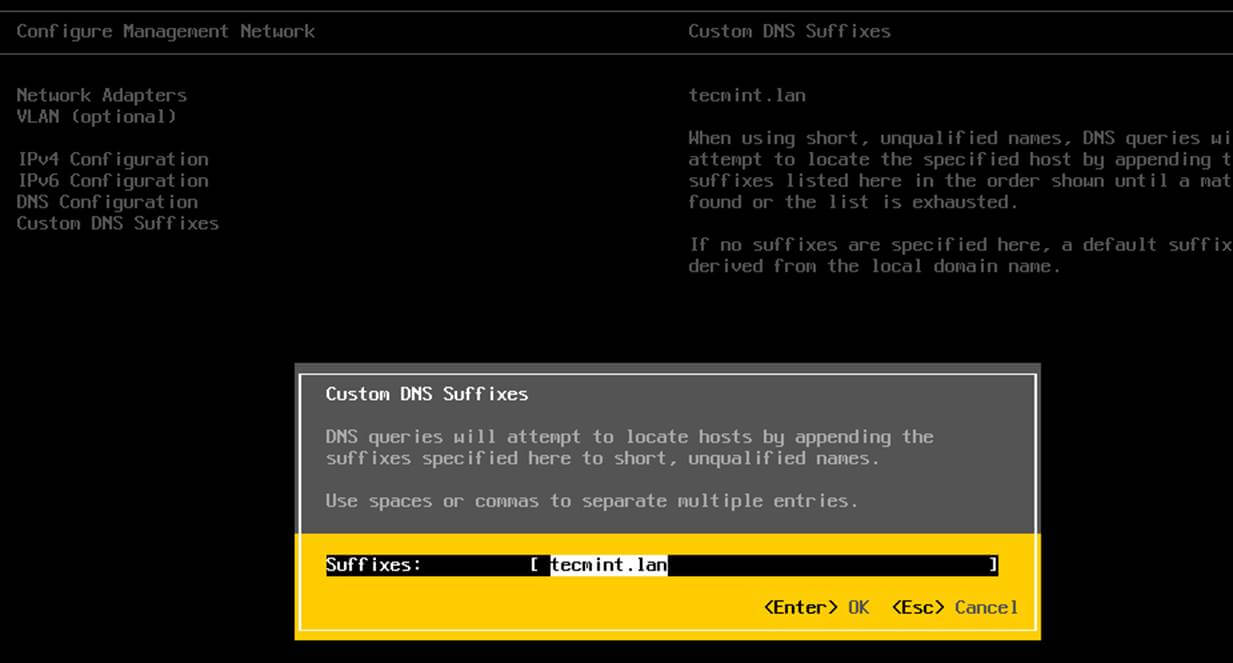
2. Next, go to Custom DNS Suffixes, add the name of your domain and press [Enter] key to write changes and return to main menu.
Then, go to Restart Management Network and press [Enter] key restart the network service in order to apply all changes made so far.
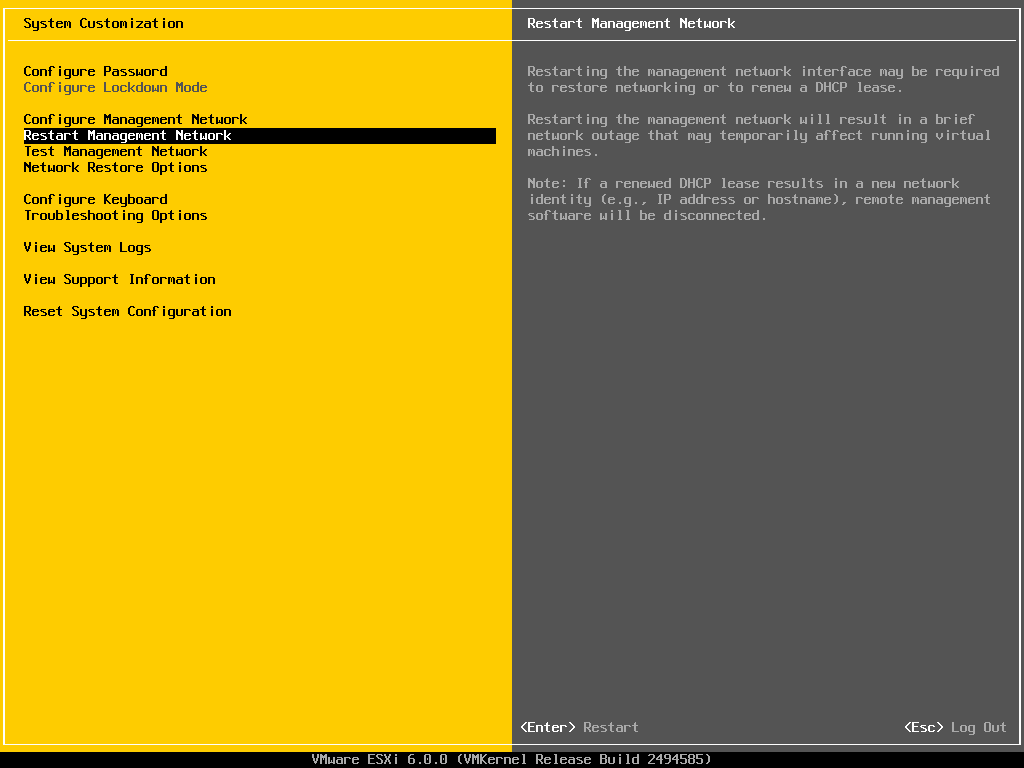
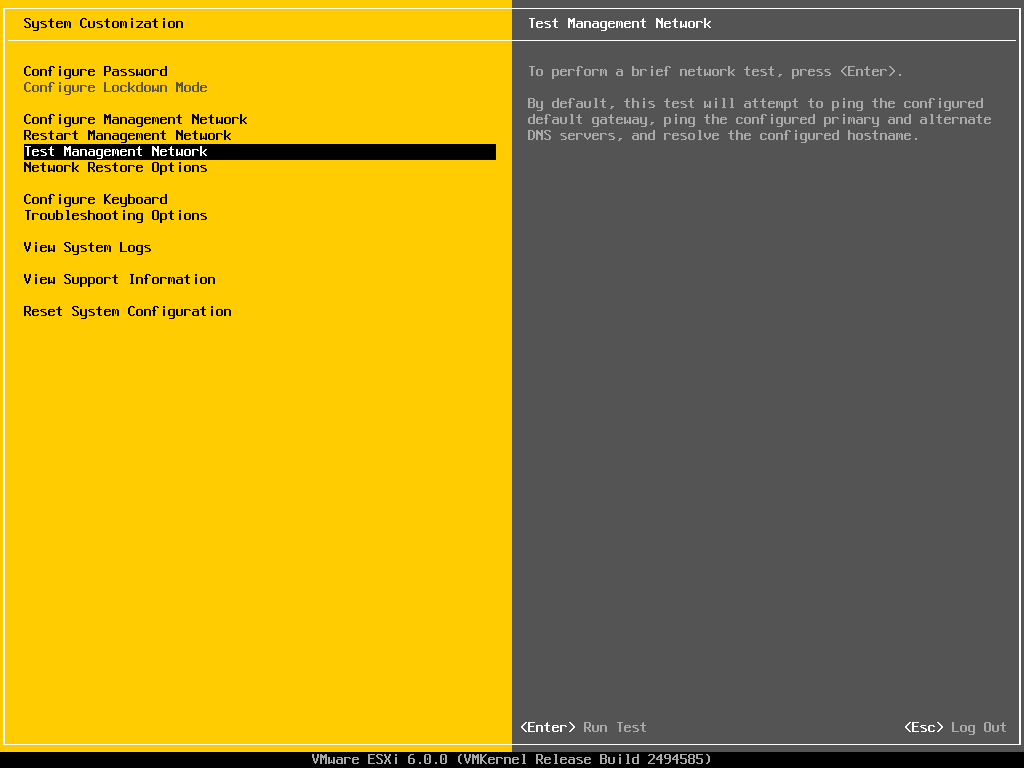
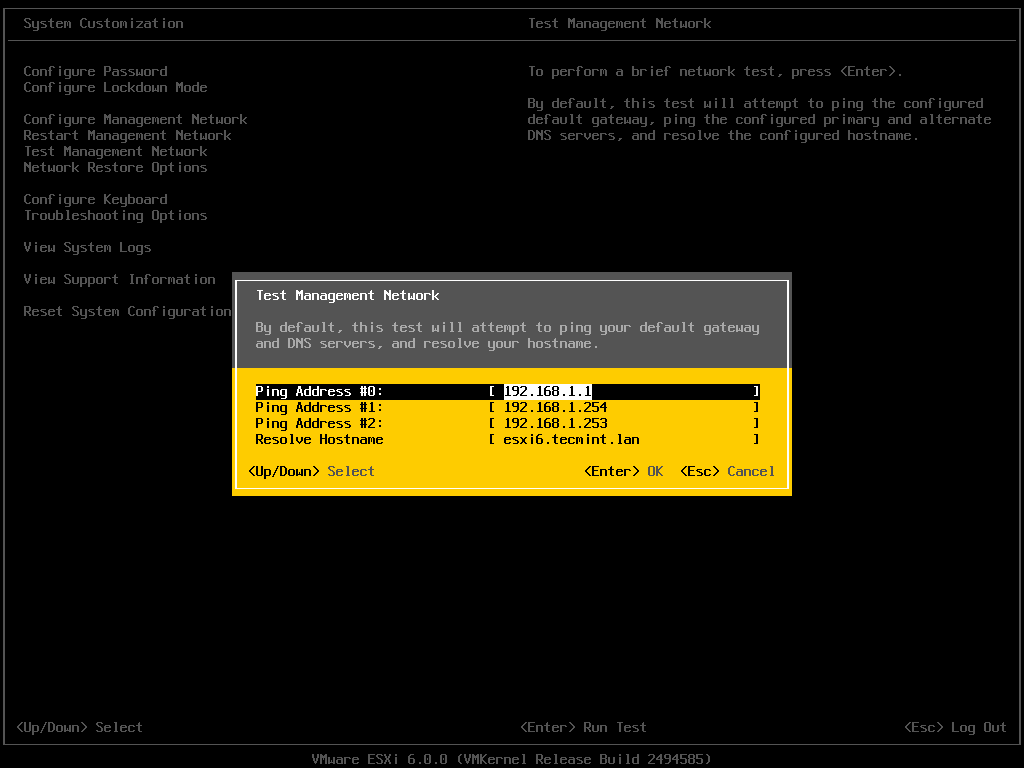
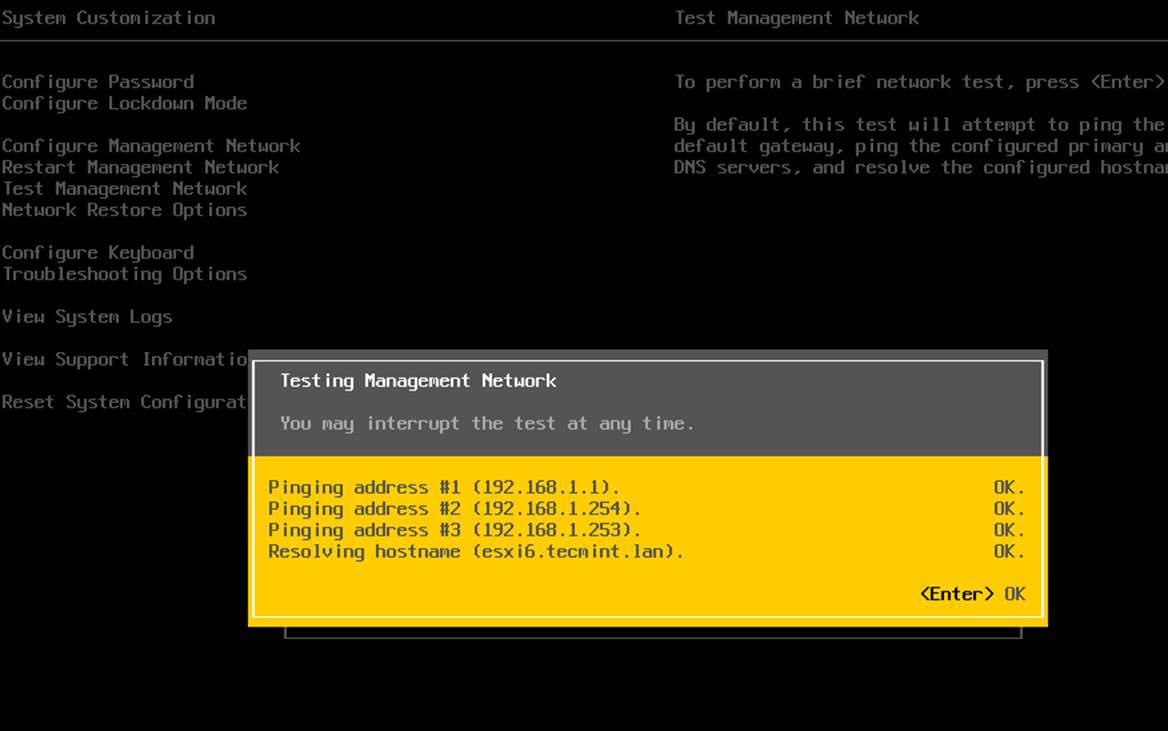
3. Finally, make sure that gateway and Samba DNS IPs are reachable from the hypervisor and test if the DNS resolution works as expected by selecting Test Management Network from the menu.
Step 2: Join VMware ESXI to Samba4 AD DC
4. All the steps performed from now on will be made through the VMware vSphere Client. Open VMware vSphere Client and login to your hypervisor IP address with the default root account credentials or with other account with root privileges on the hypervisor if that’s the case.
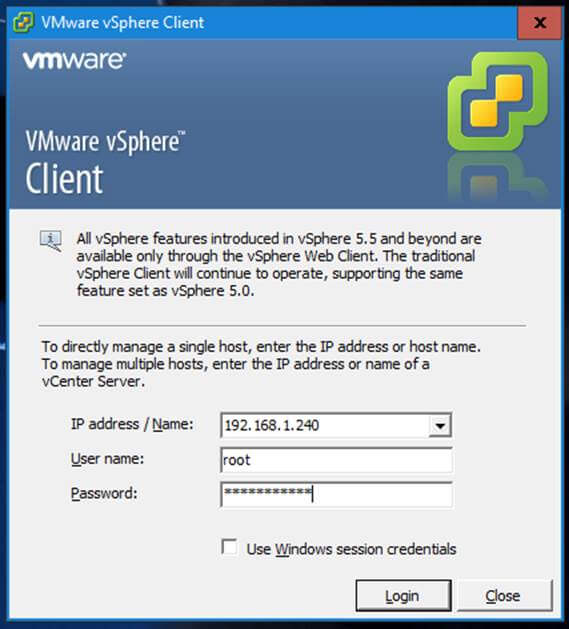
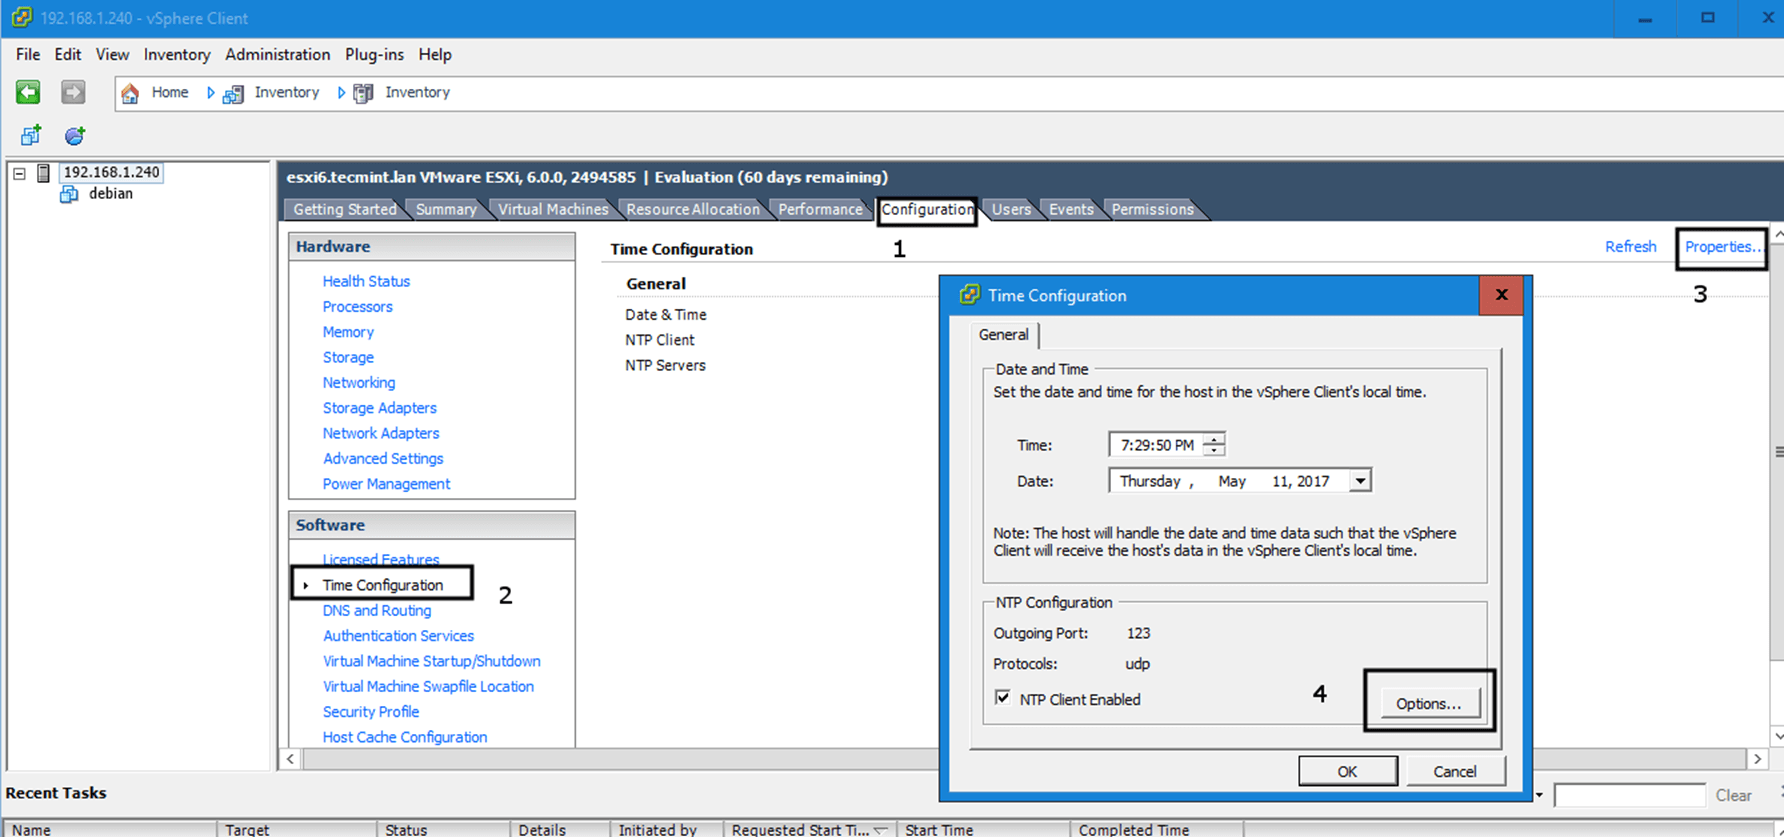
5. Once you’ve entered the vSphere console, before actually joining to the domain, make sure that the hypervisor’s time is in sync with Samba domain controllers.
To accomplish this, navigate to the upper menu and hit on Configuration tab. Then, go to left box Software -> Time Configuration and hit Properties button from upper right plane and the Time Configuration window should open as illustrated below.
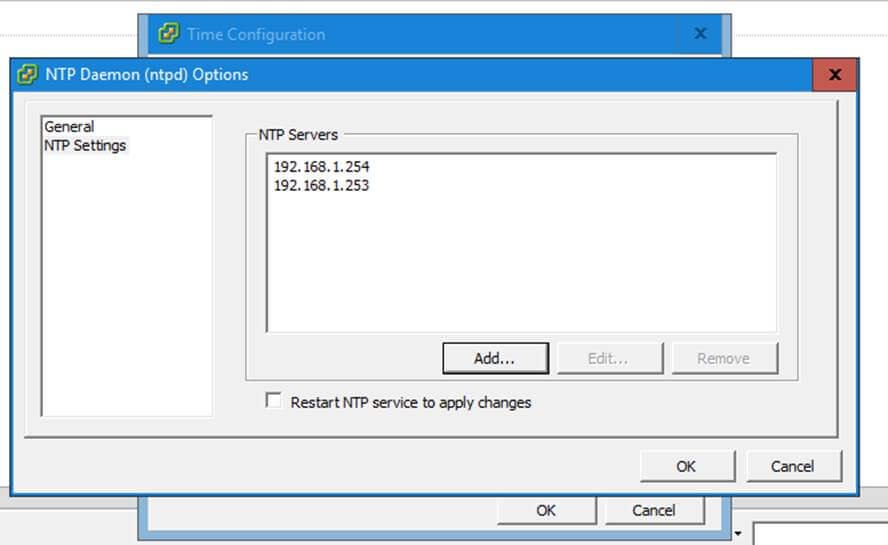
6. On Time Configuration window hit on Options button, navigate to NTP Settings and add the IP addresses of your domain time providers (usually the IP addresses of your Samba domain controllers).
Then go to General menu and start the NTP daemon and choose to start and stop the NTP service with the hypervisor as illustrated below. Press OK button to apply changes and close both windows.
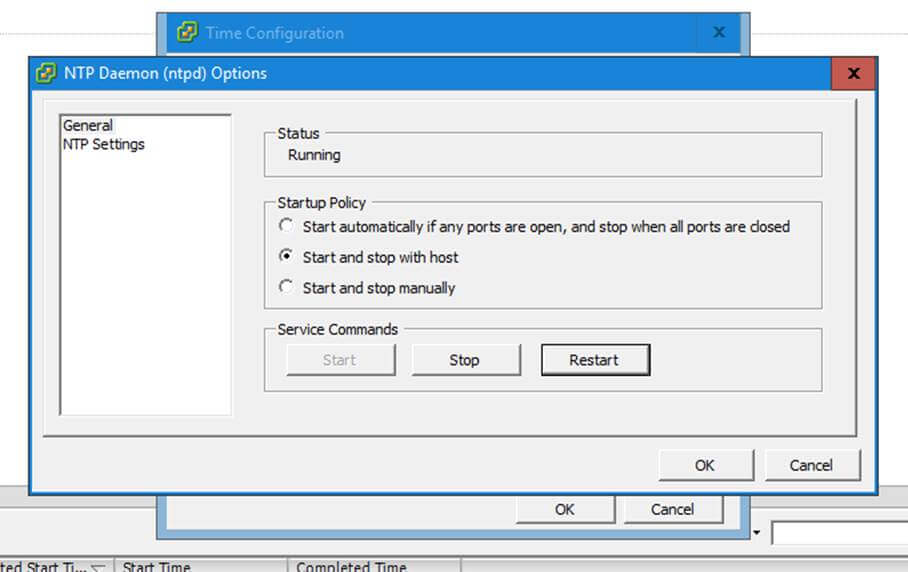
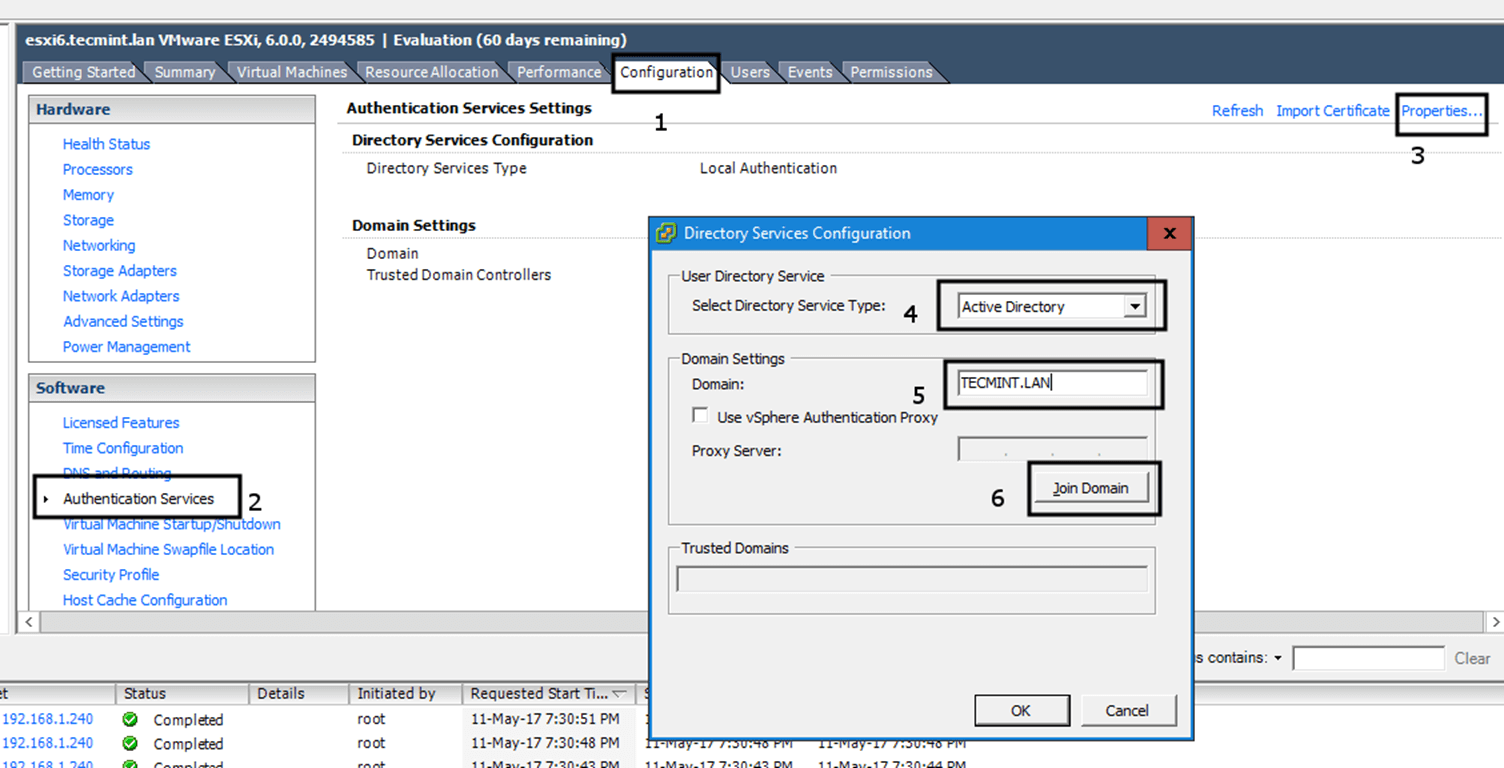
7. Now you can join VMware ESXI hypervisor to Samba domain. Open Directory Services Configuration window by hitting on Configuration -> Authentication Services –> Properties.
From the window prompt select Active Directory as Directory Service Type, write the name of your domain with uppercase click on Join Domain button to perform the domain binding.
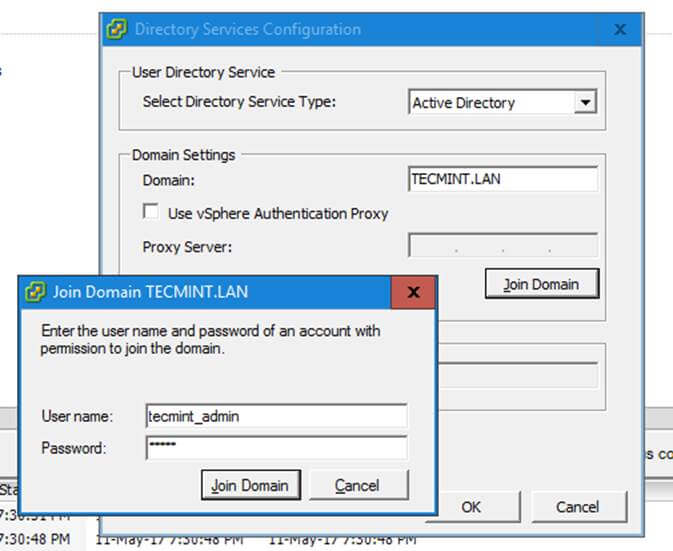
On the new prompt you will be asked to add the credentials of a domain account with elevated privileges to perform the joining. Add the username and password of a domain account with administrative privileges and hit Join Domain button to integrate into the realm and OK button to close the window.
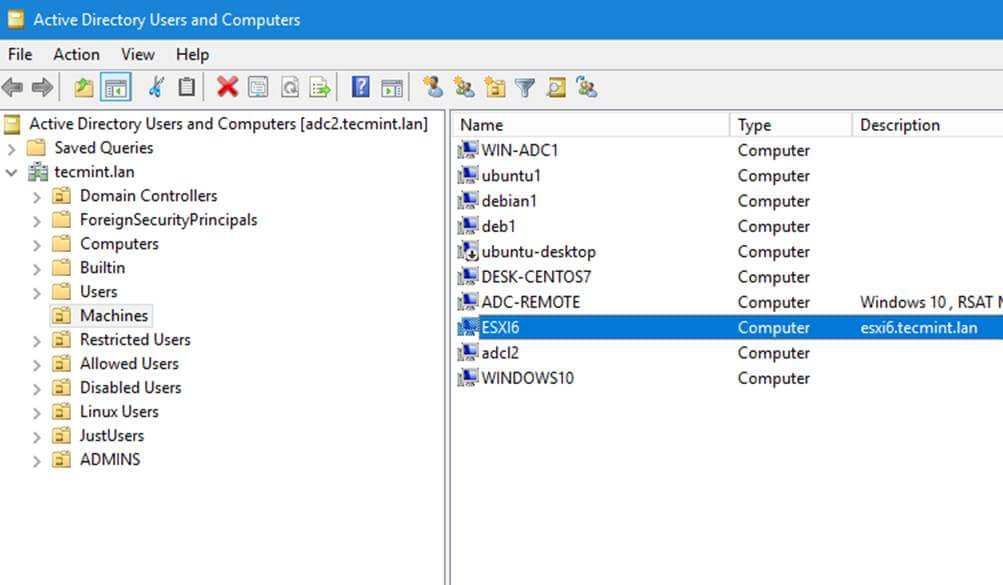
8. In order to verify if the ESXI hypervisor has been integrated to Samba4 AD DC, open AD Users and Computers from a Windows machine with RSAT tools installed and navigate to your domain Computers container.
The hostname of VMware ESXI machine should be listed on the right plane as illustrated below.
Step 3: Assign Permissions for Domain Accounts to ESXI Hypervisor
9. In order to manipulate different aspects and services of the VMware hypervisor you might want to assign certain permissions and roles for domain accounts in VMware ESXI host.
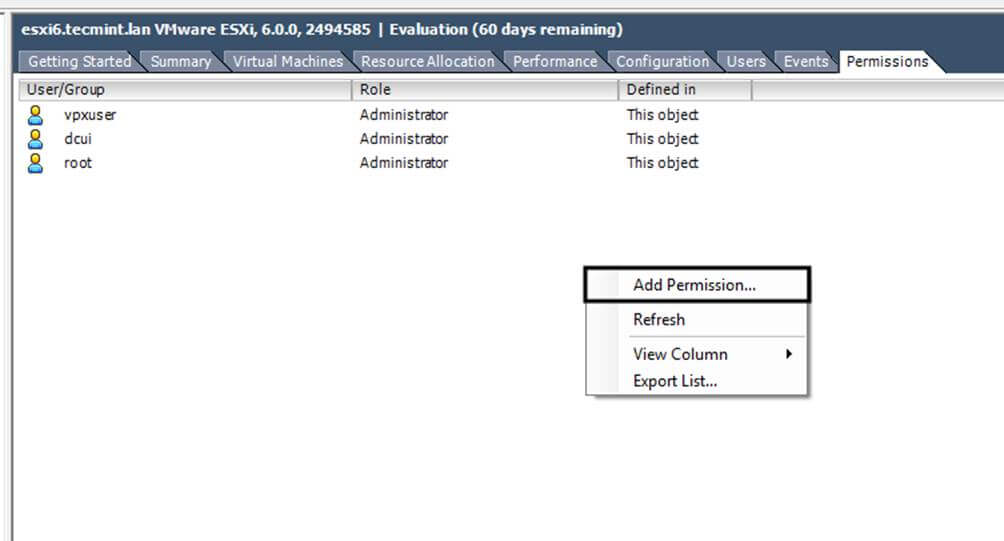
To add permissions hit on upper Permissions tab, right-click anywhere in the permissions plane and choose Add Permission from the menu.
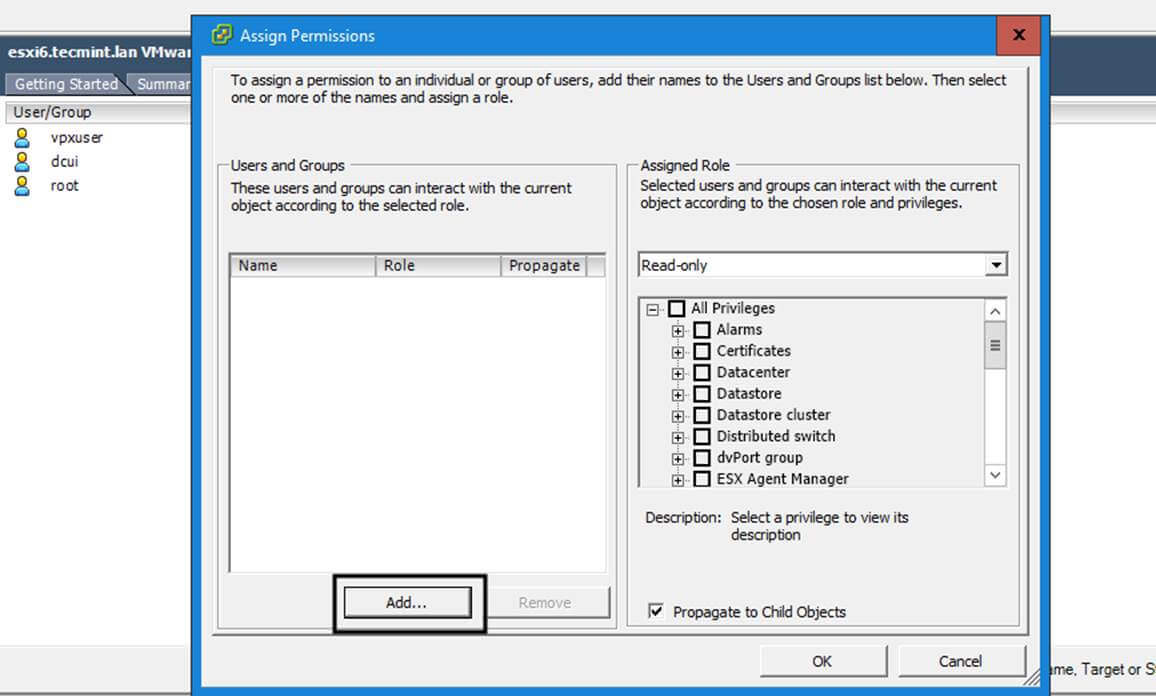
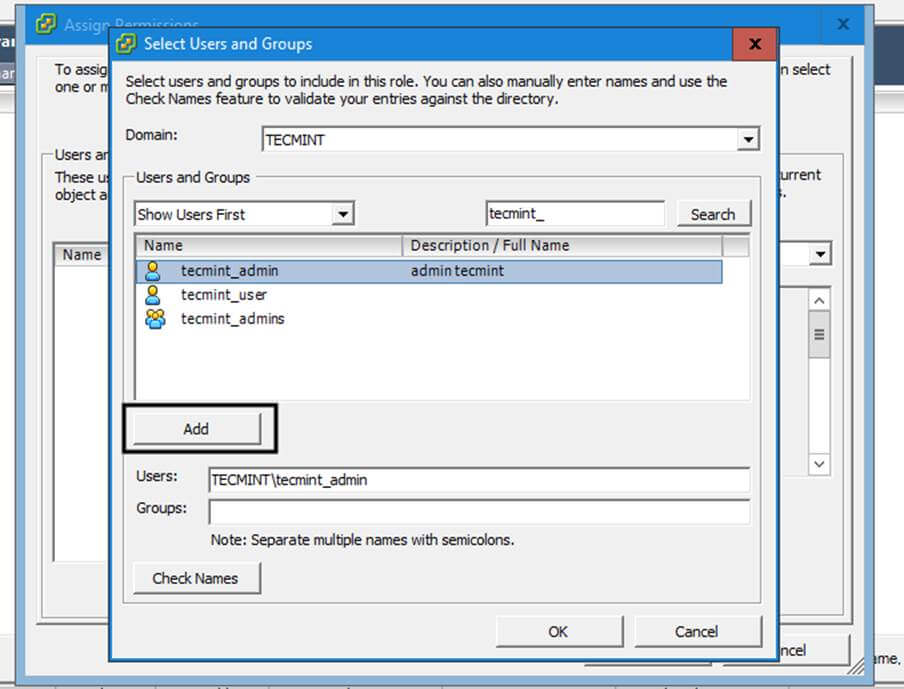
10. In the Assign Permissions window hit on the below left Add button, select your domain and type the name of a domain account in search filed.
Choose the proper username from the list and hit Add button to add the account. Repeat the step if you want to add other domain users or groups. When you finish adding the domain users hit OK button to close the window and return previous setting.
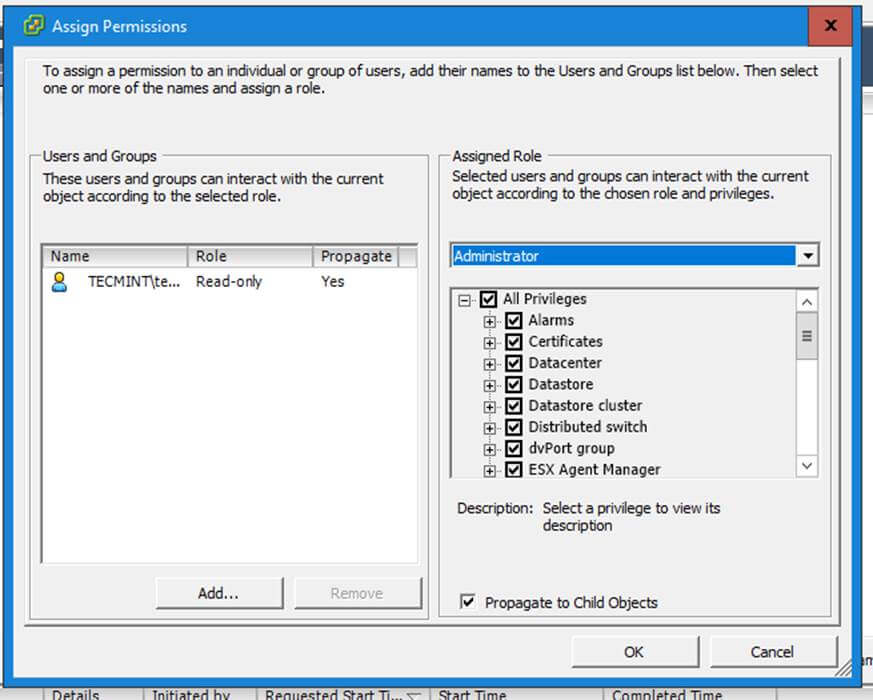
11. To assign a role for a domain account, select the desired name from the left plane and choose a predefined role, such as Read-only or Administrator from the right plane.
Check the proper privileges you want to grant for this user and hit OK when you finish in order to reflect changes.
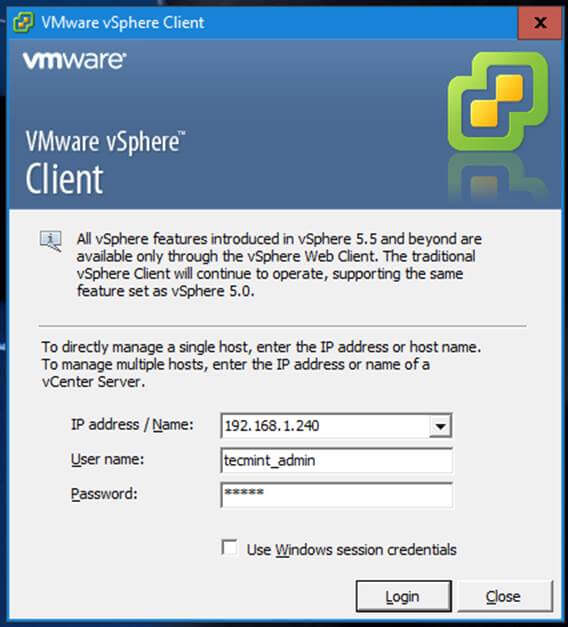
12. That’s all! The authentication process in VMware ESXI hypervisor from VSphere Client with a Samba domain account is pretty straightforward now.
Just add the username and the password of a domain account in the login screen as shown in the below picture. Depending on level of permissions grated for the domain account you should be able to manage the hypervisor completely or just some parts of it.
Although this tutorial mainly included only the steps required to join a VMware ESXI hypervisor into a Samba4 AD DC, the same procedure as described in this tutorial applies for integrating a VMware ESXI host into a Microsoft Windows Server 2012/2016 realm.




This actually doesn’t work on esxi 6.5 and above since the C# (desktop) client doesn’t work and you’re forced to perform all actions via web. I’ve run into errors due to SMB V1 being disabled on my home network (duh, WannaCry…). Evidently you CAN enable SMB V2 but you have to purchase the license for VCSA. Any ways you know around that?