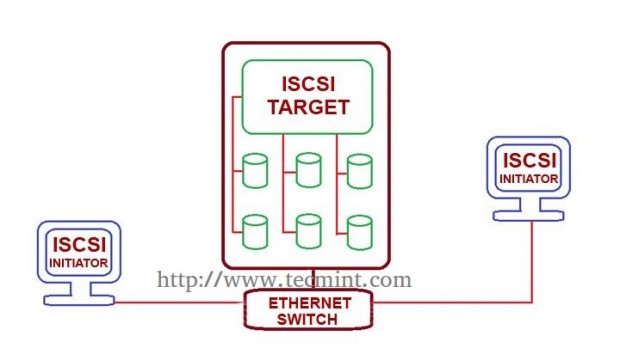
iSCSI Initiator are the clients which use to authenticated with iSCSI target servers to access the LUNs shared from target server. We can deploy any kind of Operating systems in those locally mounted Disks, just a single package need to be install to get authenticate with target server.
Features
- Can handle any kind of file systems in locally mounted Disk.
- No need of restating the system after partition using fdisk.
Requirements
- Create Centralized Secure Storage using iSCSI Target – Part 1
- Create LUN’s using LVM in Target Server – Part 2
My Client Setup for Initiator
- Operating System – CentOS release 6.5 (Final)
- iSCSI Target IP – 192.168.0.50
- Ports Used : TCP 3260
Warning: Never stop the service while LUNs Mounted in Client machines (Initiator).
Initiator Client Setup
1. In Client side, we need to install the package ‘iSCSI-initiator-utils‘, search for the package using following command.
# yum search iscsi
Sample Output
============================= N/S Matched: iscsi ================================
iscsi-initiator-utils.x86_64 : iSCSI daemon and utility programs
iscsi-initiator-utils-devel.x86_64 : Development files for iscsi-initiator-utils
2. Once you locate the package, just install the initiator package using yum command as shown.
# yum install iscsi-initiator-utils.x86_64
3. After installing the package, we need to discover the share from Target server. The client side commands little hard to remember, so we can use man page to get the list of commands which required to run.
# man iscsiadm
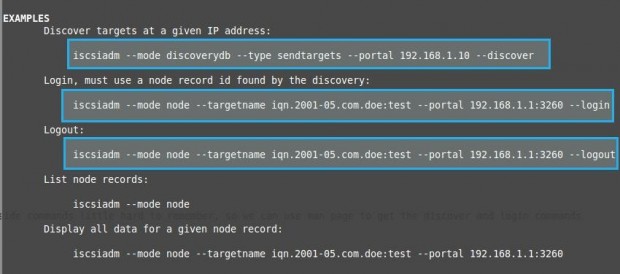
4. Press SHIFT+G to Navigate to the Bottom of the man page and scroll little up to get the login example commands. We need to replace our Target servers IP address in below command Discover the Target.
# iscsiadm --mode discoverydb --type sendtargets --portal 192.168.0.200 --discover
5. Here we got the iSCSI (iqn) qualified name from above command execution.
192.168.0.200:3260,1 iqn.2014-07.com.tecmint:tgt1

6. To log-in use the below command to attach the LUN to our local System, this will authenticate with target server and allow us to log-in into LUN.
# iscsiadm --mode node --targetname iqn.2014-07.com.tecmint:tgt1 --portal 192.168.0.200:3260 --login

Note: Use the login command and replace login with logout at end of command.
# iscsiadm --mode node --targetname iqn.2014-07.com.tecmint:tgt1 --portal 192.168.0.200:3260 --logout

7. After login to the LUN, list the records of Node using.
# iscsiadm --mode node

8. Display all data of a particular node.
# iscsiadm --mode node --targetname iqn.2014-07.com.tecmint:tgt1 --portal 192.168.0.200:3260
Sample Output
# BEGIN RECORD 6.2.0-873.10.el6
node.name = iqn.2014-07.com.tecmint:tgt1
node.tpgt = 1
node.startup = automatic
node.leading_login = No
iface.hwaddress = <empty>
iface.ipaddress = <empty>
iface.iscsi_ifacename = default
iface.net_ifacename = <empty>
iface.transport_name = tcp
iface.initiatorname = <empty>
iface.bootproto = <empty>
iface.subnet_mask = <empty>
iface.gateway = <empty>
iface.ipv6_autocfg = <empty>
iface.linklocal_autocfg = <empty>
....
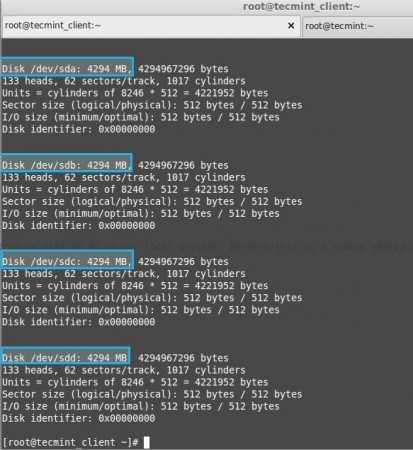
9. Then list the drive using, fdisk will list every authenticated disks.
# fdisk -l /dev/sda
10. Run fdisk to create a new partition.
# fdisk -cu /dev/sda
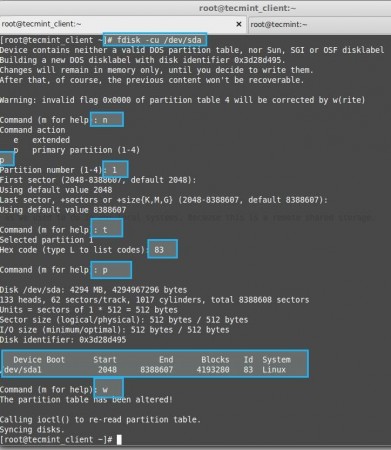
Note: After Creating a Partition using fdisk, we don’t need to reboot, as we used to do in our local systems, Because this is a remote shared storage mounted locally.
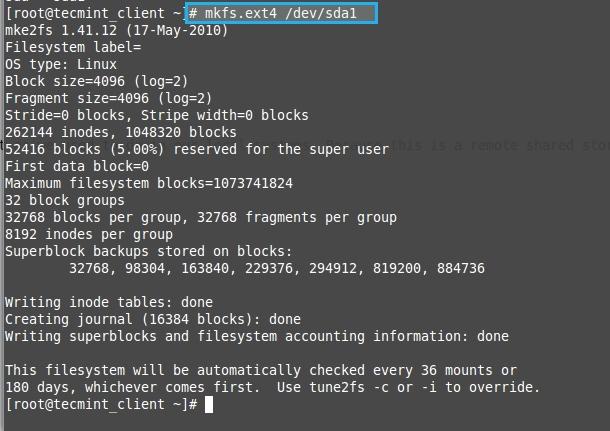
11. Format the newly created partition.
# mkfs.ext4 /dev/sda1
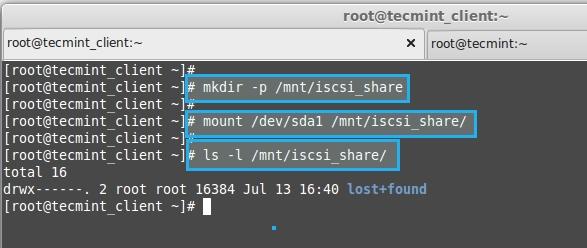
12. Create a Directory and mount the formatted partition.
# mkdir /mnt/iscsi_share
# mount /dev/sda1 /mnt/iscsi_share/
# ls -l /mnt/iscsi_share/
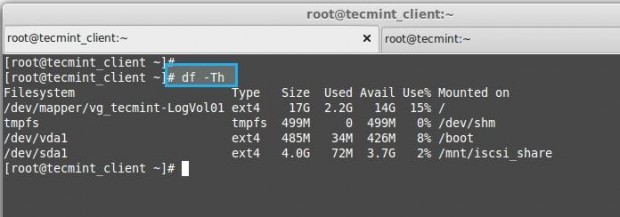
13. List the Mount Points.
# df -Th
- -T – Prints files system types.
- -h – Prints in human readable format eg : Megabyte or Gigabyte.
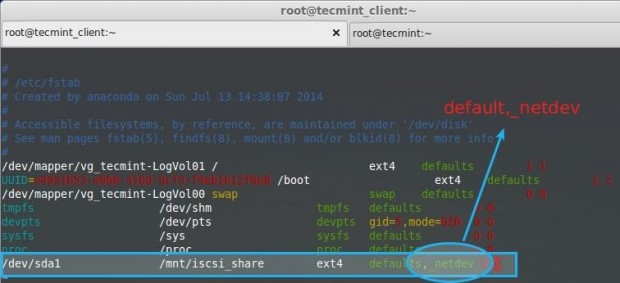
14. If we need to permanently mount the Drive use fstab entry.
# vim /etc/fstab
15.Append the following Entry in fstab.
/dev/sda1 /mnt/iscsi_share/ ext4 defaults,_netdev 0 0
Note: Use _netdev in fstab, as this is a network device.
16. Finally check whether our fstab entry have any error.
# mount -av
- -a – all mount point
- -v – Verbose
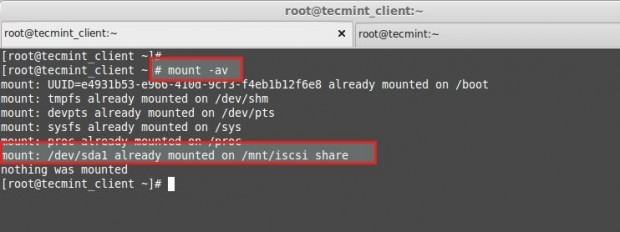
We have Completed Our client side configuration Successfully. Start to use the drive as we use our local system disk.


