Log.io is a small simple but effective application build on top of Node.js and Socket.io, which allows to monitor Linux servers log files in real time through web interface screen widgets.
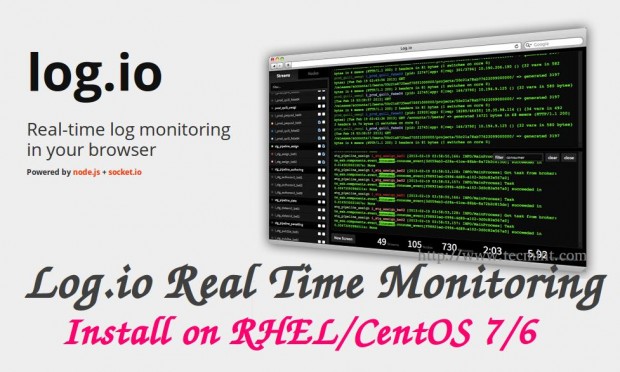
This tutorial will guide you on how you can install and monitor any local log files in real time with Log.io installed on RHEL/CentOS 7/6.x by configuring Log.io harvester file to monitor any local changes to log files.
Step 1: Add Epel Repositories
1. CentOS Epel repositories provides the binary packages for Node.js and NPM – Node Packaged Modules. Install Epel repositories by issuing the following command.
On RHEL/CentOS 7
# yum install http://fedora.mirrors.telekom.ro/pub/epel/7/x86_64/e/epel-release-7-2.noarch.rpm
On RHEL/CentOS 6
--------------------- On RHEL/CentOS 6.x - 32 Bit ---------------------
# yum install http://fedora.mirrors.telekom.ro/pub/epel/6/i386/epel-release-6-8.noarch.rpm

--------------------- On RHEL/CentOS 6.x - 64 Bit ---------------------
# yum install http://fedora.mirrors.telekom.ro/pub/epel/6/x86_64/epel-release-6-8.noarch.rpm
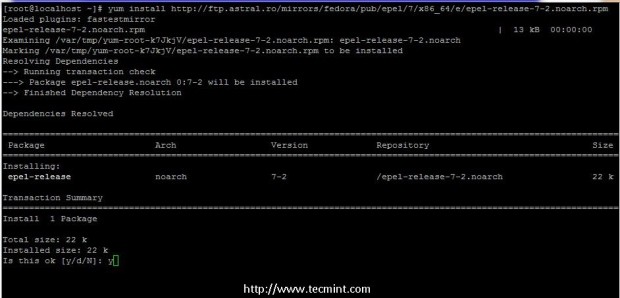
2. After you added Epel Repos on your system, do a system upgrade by running the following command.
# yum update
Step 2: Install Node.js and NPM Packages
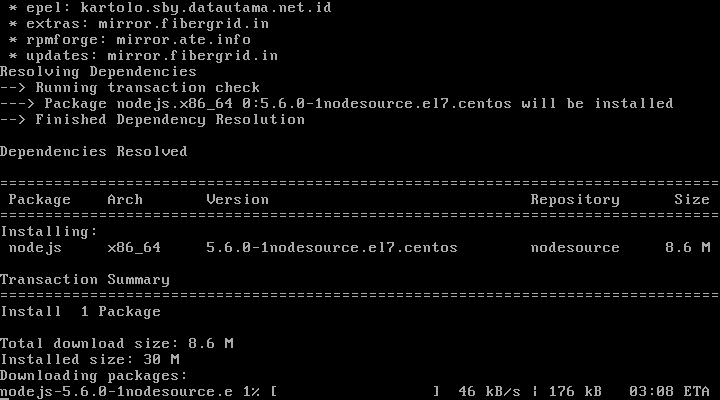
3. Node.js is a Javascript server-side programming platform which allows you to create network applications with backend functionality. NPM (Node Package Manager) is practically the package manager for Node.js. So, on the next step go ahead and install Node.js and NMP binaries on your system through YUM package manager by issuing the following commands.
# curl --silent --location https://rpm.nodesource.com/setup_5.x | bash -
# yum install -y nodejs
Step 3: Install and Configure Log.io Application
4. Log.io application must be installed on your system through NPM by specifying a valid local system user, through which the installation must take place. While you can use any valid system user to install Log.io, I personally recommend installing the application through root user or other system user with root privileges.
The reason for using this approach is that Log.io must have access to read locally log files and a user with non-privileges root privileges usually can’t access and read some important log files.
So, login with root account and install Log.io application through root account by issuing the following command (if you use other user replace root account with your system user accordingly).
# npm install -g log.io --user “root”
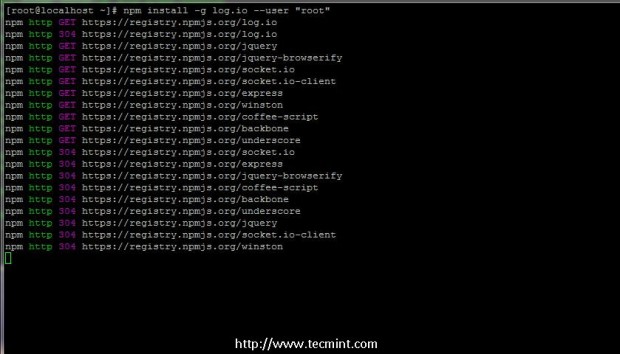
5. After the application has been installed change your working directory to Log.io folder, which is hidden, and do a directory listing to visualize folder content in order to configure the application further.
# pwd  		[Make sure you are on the right path]
# cd .log.io/
# ls
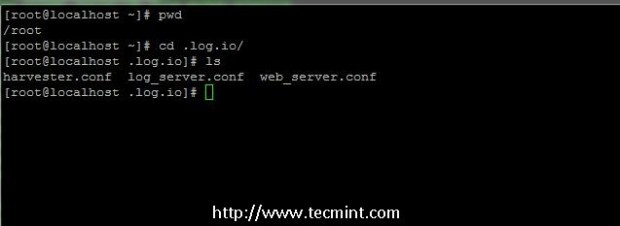
6. Now it’s time to configure Log.io to monitor local log files in real time. Let’s get an inside on how Log.io works.
- The harvester file watches for changes in the specified local log files declared in its configuration and sends its output via socket.io TCP
protocol which further send the messages to Log.io local server or any other remote server declared with its IP Address ( 0.0.0.0 address specified on harvesters broadcasts to all log.io listening servers) – file harvester.conf - Log.io server binds on all network interfaces (if not specified otherwise in log_server.conf file) and waits for messages from locally or remote harvesters nodes and sends their output to log.io Web server (0.0.0.0 means that it waits for messages from any local or remote harvesters) file log_server.conf
- Log.io Web server binds on all network interfaces, listens for web clients connections on port 28778 and processes and outputs the messages that it receives internally from log.io server – file web_server.conf
First open harvester.conf file for editing, which by default only monitors Apache log files, and replace nodeName statement to match your hostname and define the logStreams statements with what internal log files you want to monitor (in this case I’m monitoring multiple log files such as audit, messages and secure logs). Use the below file excerpt as a guide.
# nano harvester.conf
Harvester file excerpt.
exports.config = {
  nodeName: "pxe-server",
  logStreams: {

audit: [
      "/var/log/audit/audit.log"
    ],

messages: [
      "/var/log/messages"
    ],

secure: [
      "/var/log/secure"
    ]

},
  server: {
    host: '0.0.0.0',
    port: 28777
  }
}
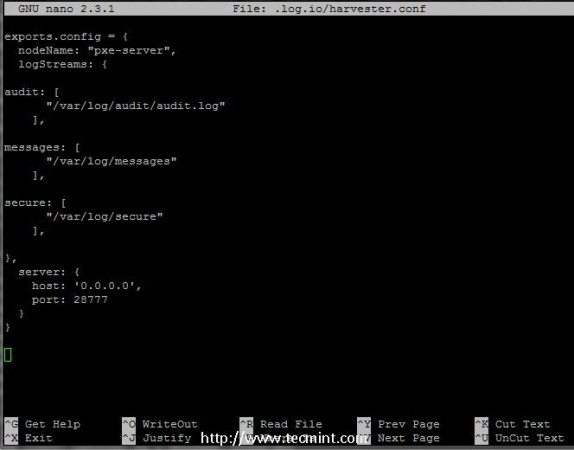
Also if you don’t need harvester output to be sent to a remote Log.io server change the line host on server statement to only send its output locally by modifying 0.0.0.0 address with loopback address (127.0.0.1).
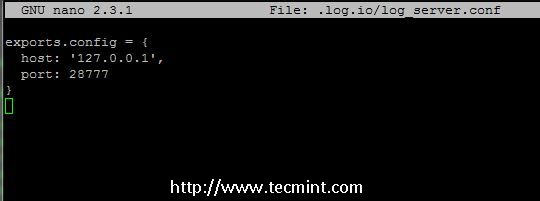
7. For security reasons, if you are not expecting remote harvesters output to your local Log.io server open log_server.conf file and replace 0.0.0.0 address with loopback address (127.0.0.1).
# nano log_server.conf
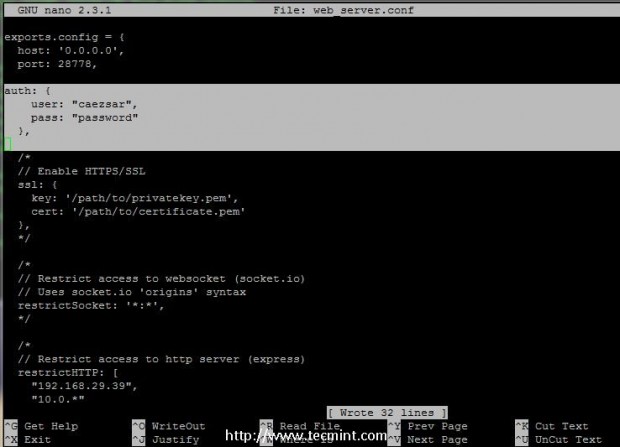
8. Other security features such as credentials login, HTTPS or restriction based on IPs to Log.io web server can be applied on web server-side. For this tutorial I will only use as a security measure just credential login.
So, open web_server.conf file, uncomment the entire auth statement by deleting all slashes and asterisks and replace user and pass directives accordingly as suggested on the bottom screenshot.
# nano web_server.conf
Step 4: Add Firewall Rule and Start Log.io Application
9. In order to gain web access to Log.io server add a rule on RHEL/CentOS 7 Firewall to open TCP 28778 port by issuing the following command.
# firewall-cmd --add-port=28778/tcp --permanent
# firewall-cmd --reload
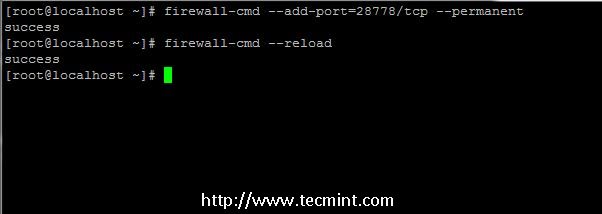
Note: RHEL/CentOS 6.x users can open port 28778 on iptable firewall.
Step 5: Start Log.io Application and enter Web Interface
10. In order to start Log.io log monitoring application assure that your current working directory is root’s home .log.io and use the following commands in the following order to start application.
------------ First start server, put it in background and press Enter key ------------
# log.io-server &

------------ Start log harvester in background ------------
# log.io-harvester &
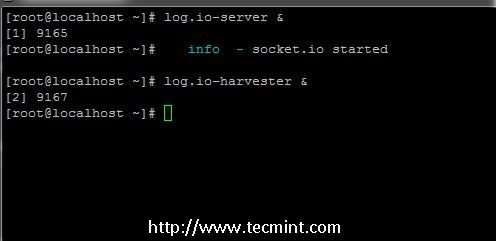
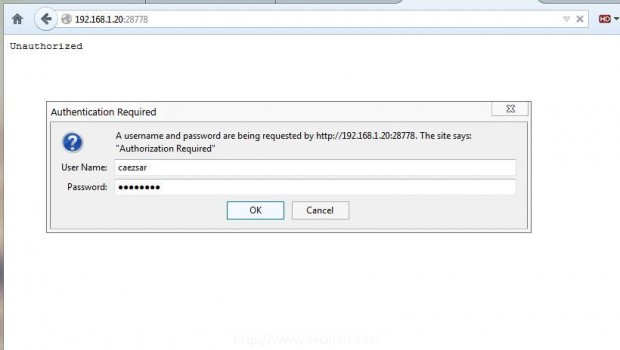
11. After the server has been started open a browser, enter your servers IP followed by 28778 port number using HTTP protocol on URL address and a prompt demanding your login credentials should appear.
Enter your user and password configured on step 8 to proceed further and Log.io application should now be visible on your browser presenting monitored log files in real time.
http://192.168.1.20:28778
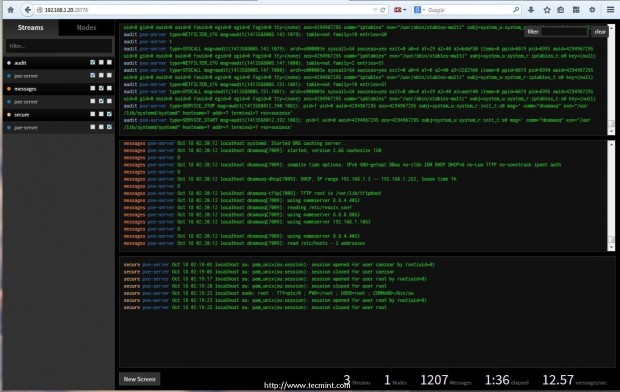
On Web interface add new screens and organize your streams or nodes accordingly.
12. To stop Log.io application run the following command.
# pkill node
Step 6: Create Log.io Manage Script
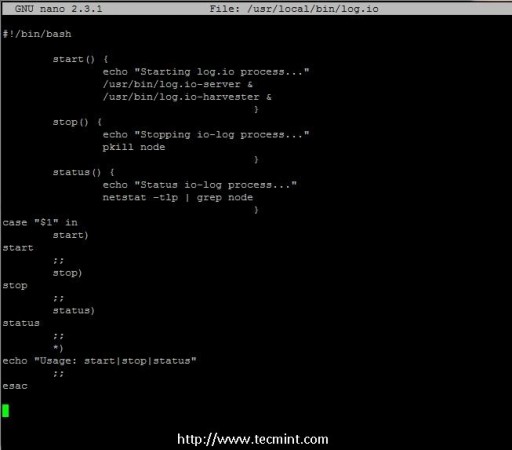
13. In order to use a command that manages Log.io application with three switches ( start, stop and status) create the following script named log.io on /usr/local/bin executable directory and append execution permissions to this script.
# nano /usr/local/bin/log.io
# chmod +x /usr/local/bin/log.io
Add the following excerpt to this script file.
#!/bin/bash

                start() {
                echo "Starting log.io process..."
                /usr/bin/log.io-server &
                /usr/bin/log.io-harvester &
                                         }

                stop() {
                echo "Stopping io-log process..."
                pkill node
                                         }

                status() {
                echo "Status io-log process..."
                netstat -tlp | grep node
                                         }

case "$1" in
                start)
start
        ;;
                stop)
stop
        ;;
                status)
status
                ;;
                *)
echo "Usage: start|stop|status"
        ;;
Esac
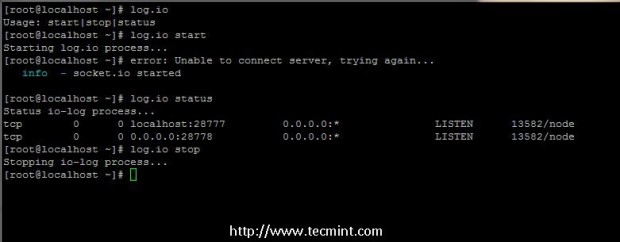
14. To start, stop or view Log.io status login with root account (or the user that Log.io app has been installed) and just run the following commands to easily manage the application.
# log.io start
# log.io status
# log.io stop
That’s all! In my opinion Log.io is an excellent and effective web application to monitor local or remote servers log files is real time and get an outlook on what is going internally in the systems and especially to debug server problems when systems tend to become unresponsive or crashes, without the need to use a console.


Hey, thanks for the great article!
Hi Ravi,
I would like to Monitor the server Logs more than 10 VM’S at single server, is it possible if possible please suggest to me.
Of course it’s possible. But instead of Log.io configure rsyslog daemon to send messages to a central log server or use a more specialized solution such as Kibana and Logstash.
Hi Matei Cezar,
Could you please give document link for that one.
You can find more info here: https://www.elastic.co/learn
how can i install it on my centos 6.7 server and zpanel already installed on it.
Great one as usaul Tecmint thx heaps
make: Entering directory `/usr/lib/node_modules/log.io/node_modules/jquery/node_modules/contextify/build’
CXX(target) Release/obj.target/contextify/src/contextify.o
In file included from ../src/contextify.cc:3:
../node_modules/nan/nan.h:328: error: ‘REPLACE_INVALID_UTF8’ is not a member of ‘v8::String’
make: *** [Release/obj.target/contextify/src/contextify.o] Error 1
make: Leaving directory `/usr/lib/node_modules/log.io/node_modules/jquery/node_modules/contextify/build’
I have the same issue in CentOS 7.
I believe log.io cannot be installed on CentOS 7 this way.
@Alma,
Sorry for the trouble, we’ve updated the article with new instructions to new install latest NodeJS so that the Log.io will install smoothly without any errors. Please check and update us..
The installation steps won’t work on CentOS 7, because it is try to use a really old version on NodeJS.
To do it properly (to install NodeJS v 5.x):
$ sudo curl -sL https://rpm.nodesource.com/setup_5.x | sudo bash –
$ sudo yum install -y nodejs
$ sudo npm install -g log.io –user “root”
@Zoltan,
Thanks a ton for providing the latest instructions about installing most recent version of NodeJS, as per your suggestion we’ve included the instructions to install latest NodeJS..
echo “Usage: start|stop|status”
;;
Esac
// esac, not Esac (as is on your screenshot)
And – thanks, very useful tool :-)
Hi !
I repeat the Konrad message: “Great job! Beer for you”
Thanks !
Thanks for the new tool as this is the first time I hear about it. In my company we use only the software Anturis to do all kinds of monitoring – the whole IT infrastructure of the company. It is working perfectly right now, but who knows in the future?
Hi
thanks for the tutorial.
i have configured same like above. and i got the web page. but it’s not showing realtime logs. I need to wait for a long to get the log displayed on the page
hoe to fix this issue>?
This is really awesome example and great use of Node js, i was looking for something like this …. Really appreciate your efforts to bring this here
Great job! Beer for you :)