This tutorial will demonstrate how you can access and manage your Zentyal Server Development Edition as a Primary Domain Controller from a Windows Based System using remote software on a Windows Computer.
Zentyal PDC (Primary Domain Controller) almost perfectly imitates a basic Windows Active Directory, which means you can set up users and groups, file sharing, add new domains or new records in your DNS server, and set up Group Policy Setting for all users and computers that are actually integrated into Active Directory.
Making very easy for you to manage security for a large number of accounts and computers while doing this with just one basic license for a Windows Computer (you will never have to buy or touch a Windows Server license).
Requirements:
- Previous Zentyal installation and configuration as a PDC – Part 1, with a domain name ( in this case is a fictional one, only used on my local network for the sake of example.
- A Windows 10 computer will be integrated into Zentyal PDC and will act as a Remote System for this domain.
- Remote Server Administration Tool for Windows 10.
- Putty Remote Client.
- WinSCP Remote Client.
Step 1: Integrate Windows System in PDC Domain
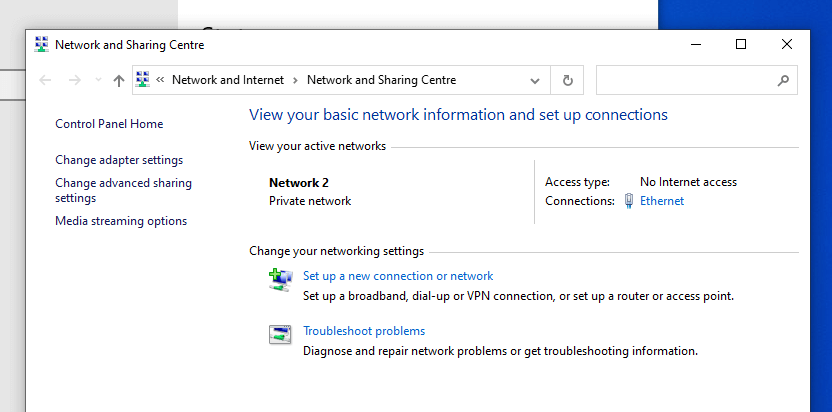
1. Logon with administrator local account and go to the left side on the taskbar and click right on the network icon, then Open Network and Sharing Center and click on Ethernet.
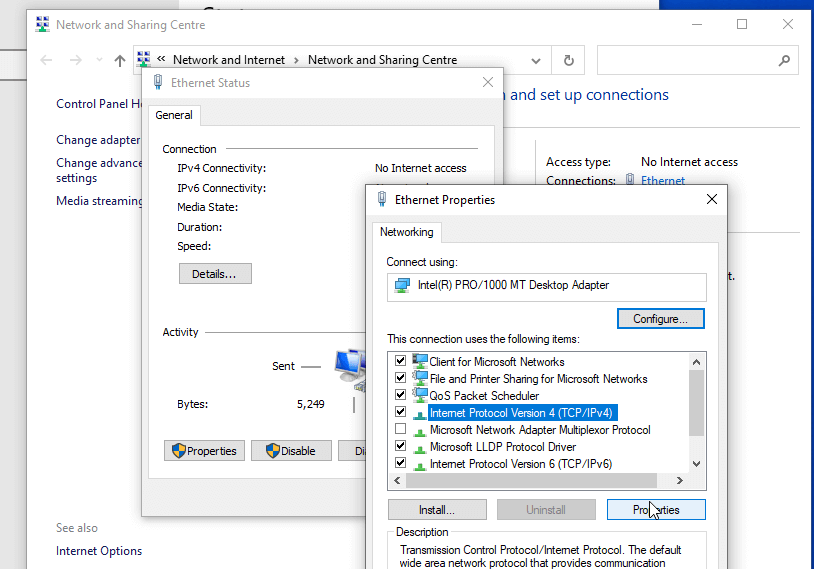
2. Go to adapter Properties and select IPv4 and then select Properties.
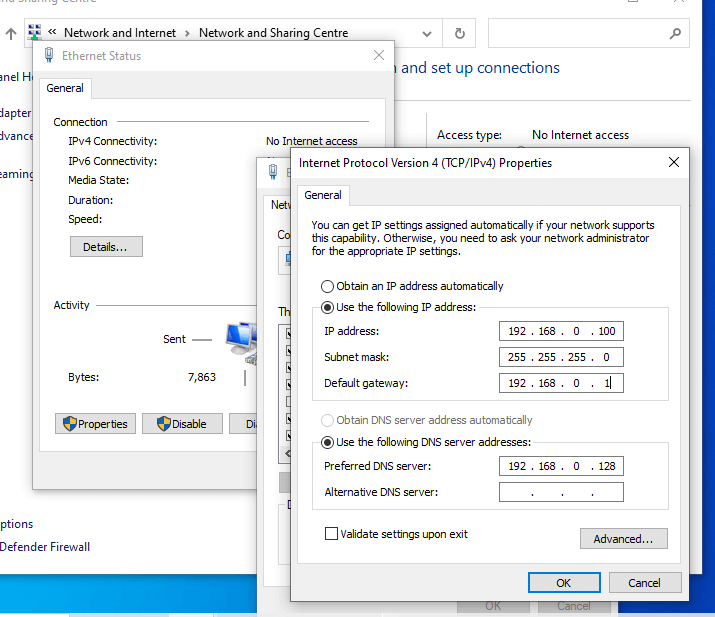
3. Setup your own network connections address, netmask, gateway, and DNS ( Make sure that your first DNS here is the Zentyal PDC IP address).
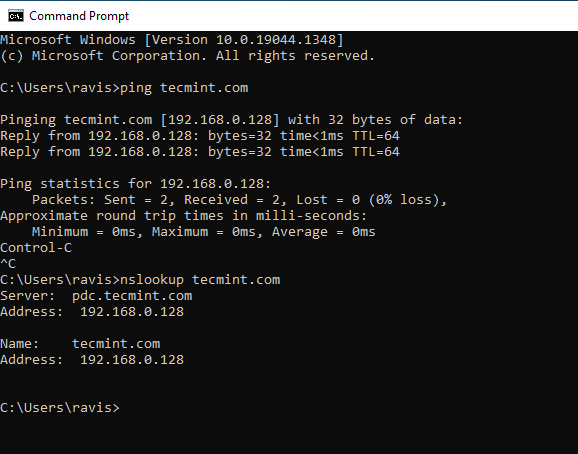
4. Click OK and the Close on all windows. Now it’s time to see if the network configurations are the correct ones and everything works fine. Right-click on Start -> Command Prompt and try to ping your domain.
Warn!!: If you cannot see the correct IP address of Zentyal PDC. Open a Command Prompt(Admin) and enter the following command.
ipconfig/flushdns
And then try to ping “tecmint.com“. You should also try the “nslookup” command to see the domain IP address.
5. Now open the “This PC” shortcut and go to System Properties -> Computer Name -> Change.
Enter a Computer Name ( try something more descriptive like WIN10_REMOTE_PDC) and your domain name in the Member of Domain field, hit Enter, enter your Administrator username and password ( In this case on my previous tutorial I have set up on Zentyal PDC the user “ravi” with administrator powers).
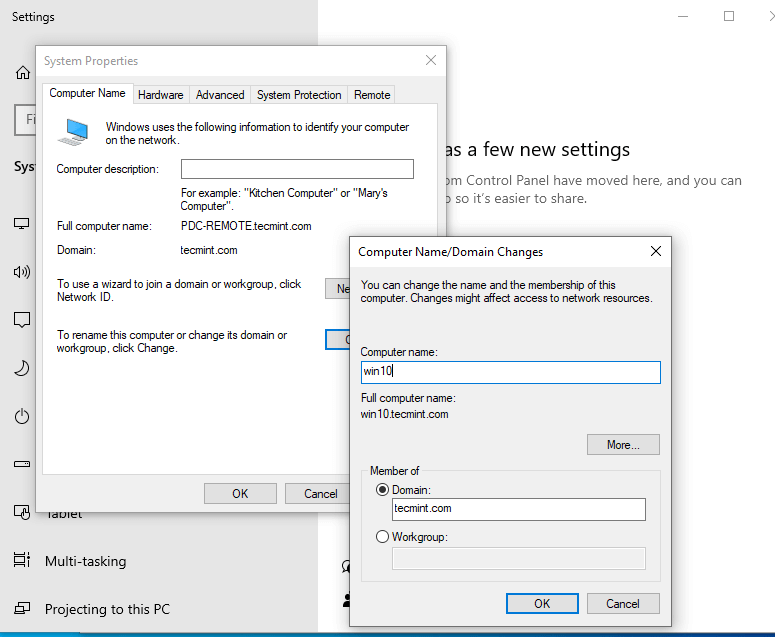
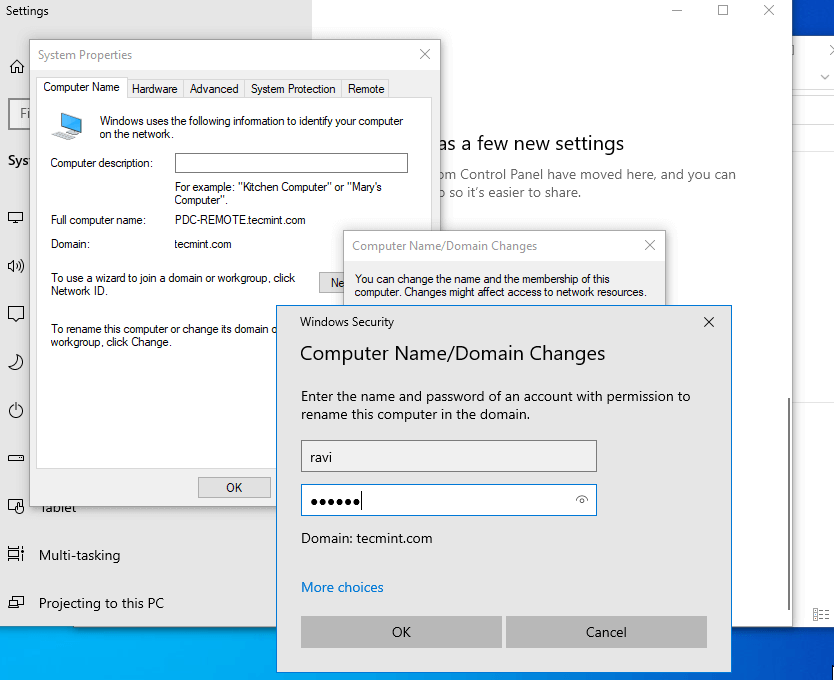
6. After your credentials are verified by Samba on Zentyal Server you will be prompted with a success notify, then reboot your system to be able to join and logon on to a domain.
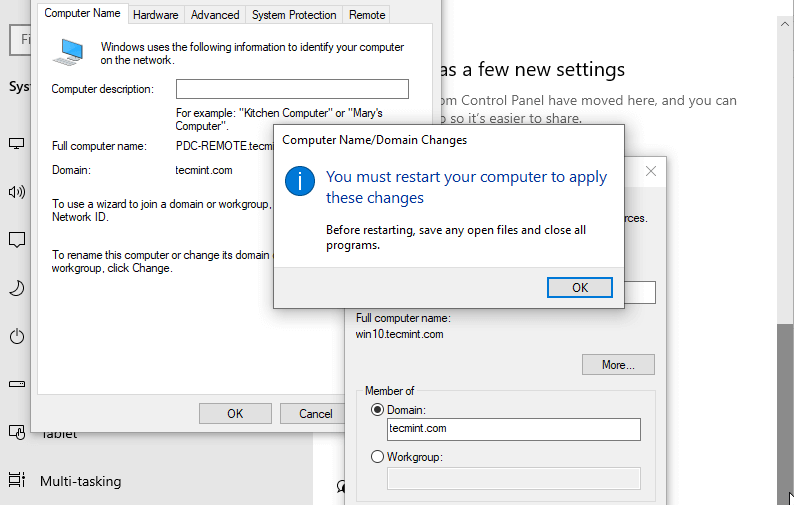
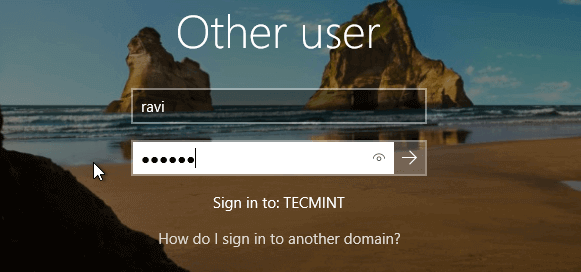
7. After reboot on prompt enter: domain_name\Administrator username and password.
Step 2: Manage Remote Zentyal PDC from Windows System
Now that everything is correct and working is time to install the software needed to remote access Zentyal PDC Samba Server.
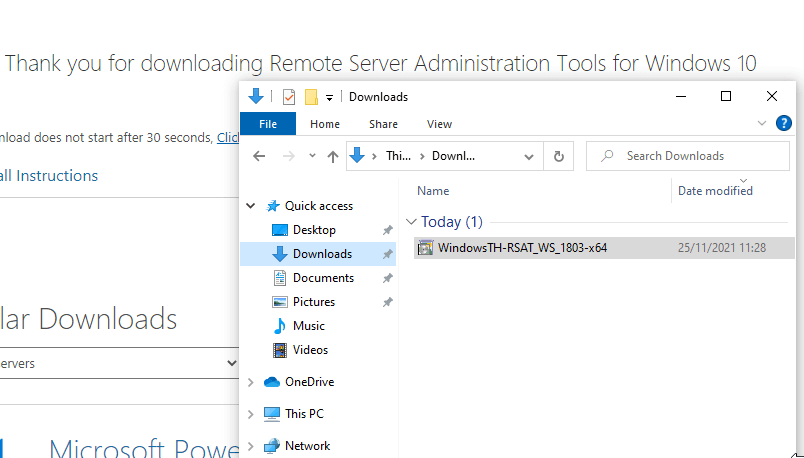
8. Open a browser and go to Remote Server Administration Tool for Windows 10 and download Windows flavor (x64 or x86) drivers, save it to your computer and run it.
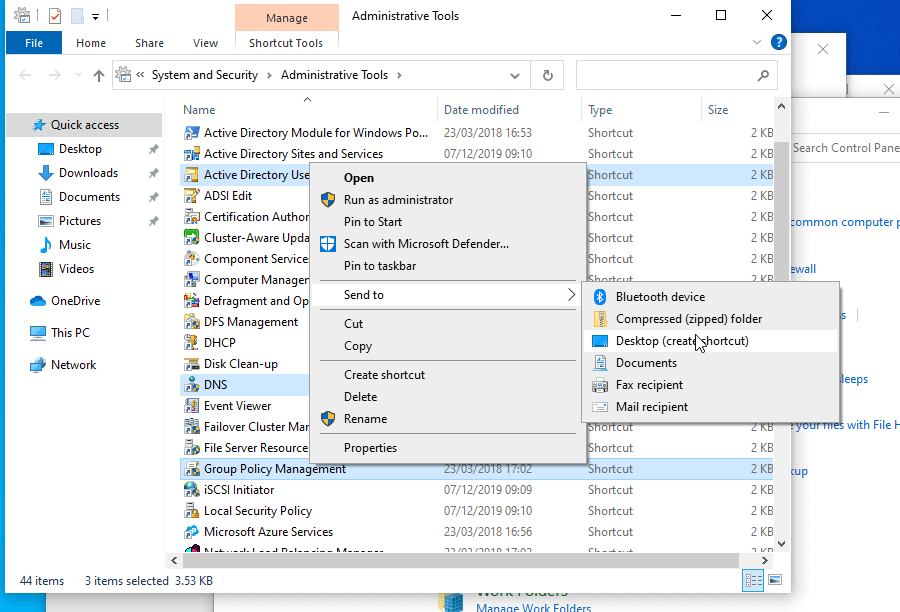
9. After this piece of software is installed reboot and then go to Control Panel –> System and Security –> Administrative Tools and select Active Directory Users and Computers, Group Policy Management, and DNS and Send all three as a shortcut to Desktop.
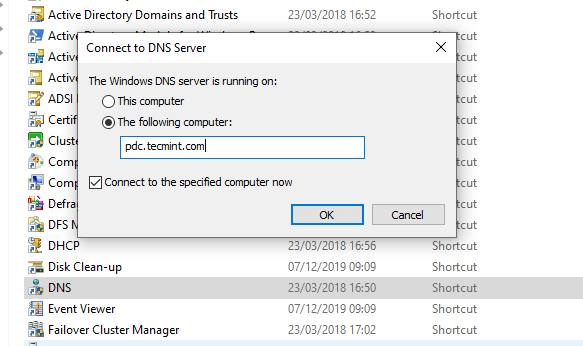
10. Now let’s try a remote connection to the DNS server over Zentyal PDC and add a CNAME for zentyal. Open DNS and enter FQDN (fully qualified domain name) for the Zentyal PDC server as in the screenshot below.
11. Go to your PDC FQDN, select your domain name, and add New Host.
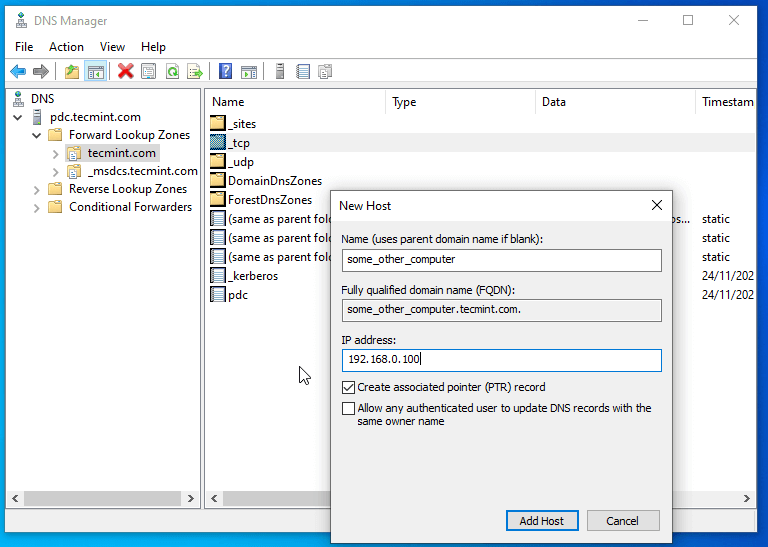
12. Go and add a new CNAME and then try ping your new alias.
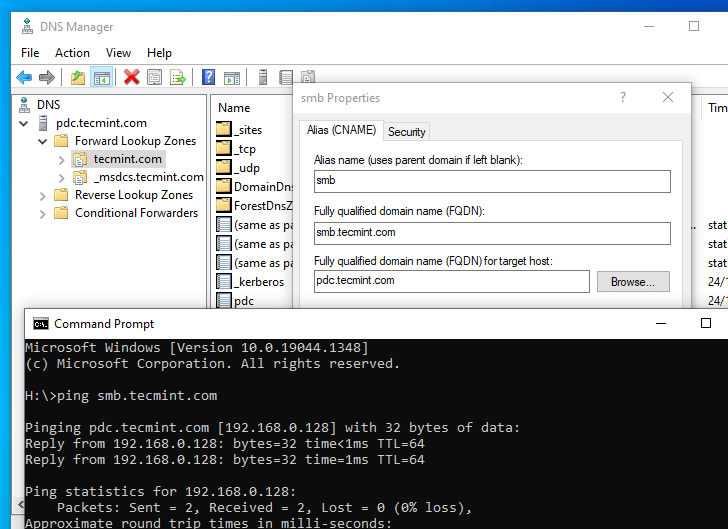
13. As you can see the result the CNAME smb for pdc.mydomain.com has been successfully added to Zentyal Server and is completely functional.
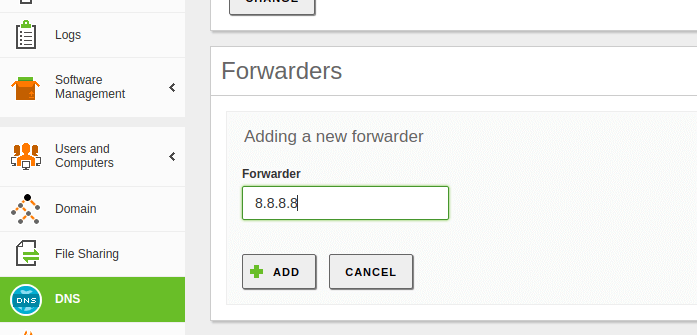
Now open a browser and point your domain name address of PDC server address ( https://192.168.0.128:8443 ) then go to DNS Module and add new forwarders ( I choose my default gateway and a Google Public DNS, you choose what better suits your needs).
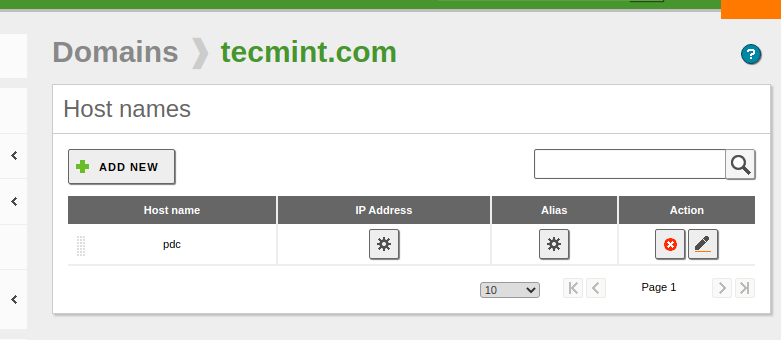
14. Then add a new alias for your domain, this time added from Zentyal Web Interface. Click on Alias, Add New, enter alias name (CNAME) end then hit ADD.
15. Hit on Save Changes for the new setting to apply and go back to Windows 10 DNS and check if the record has been updated.
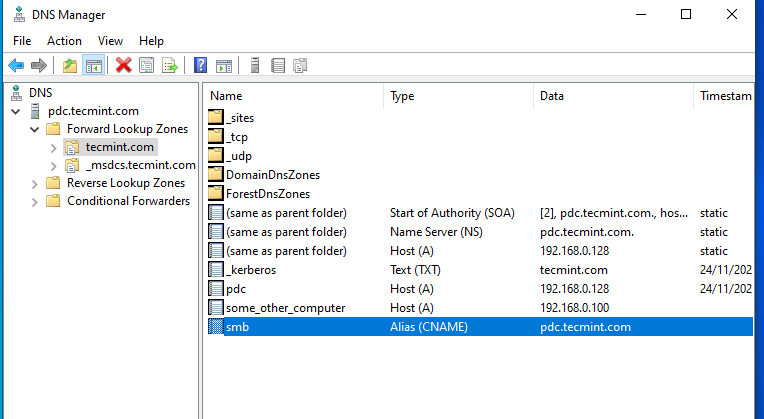
16. Zentyal DNS Server and DNS Remote Software are fully operational from both sides so we can now add as many records as we need to our DNS server.
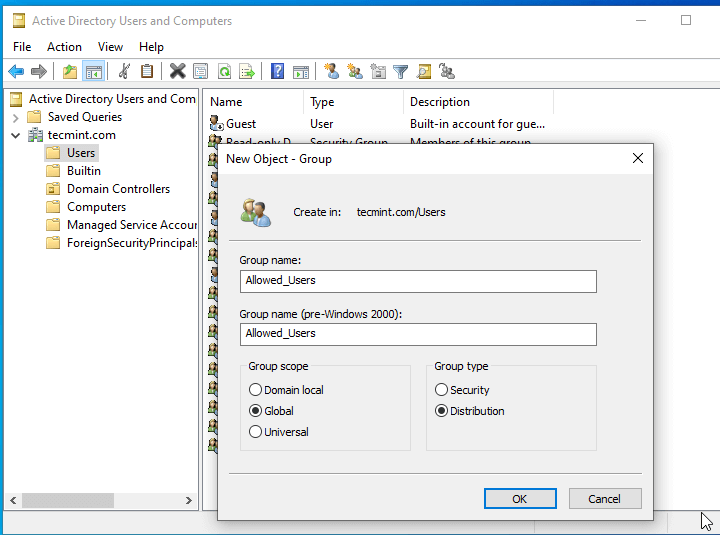
Now is time to play with Users and Groups, Open Active Directory Users and Computers, navigate to your domain name, select Users and add a New Group.
Enter your Group Name and select Distribution in Group Type ( selecting Security will allow Administrative rights and we don’t want this for our user) and Global in Group Scope and hit OK.
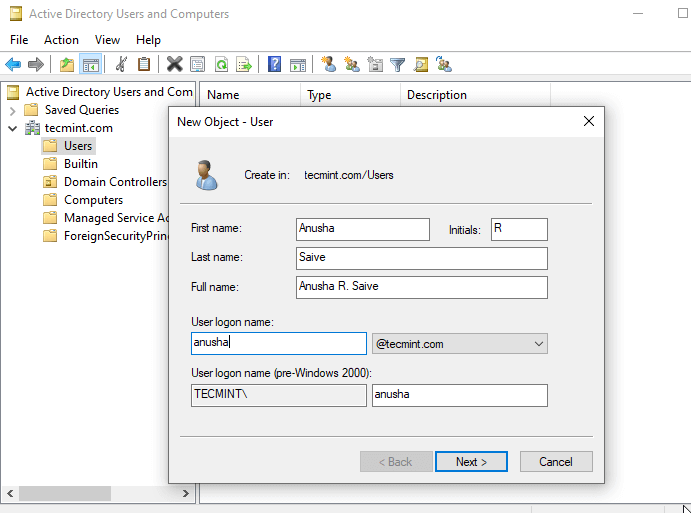
17. Then navigate to Users and Add a New User, complete the required fields, set up a password for this user – even force the user to change the password on the next login.
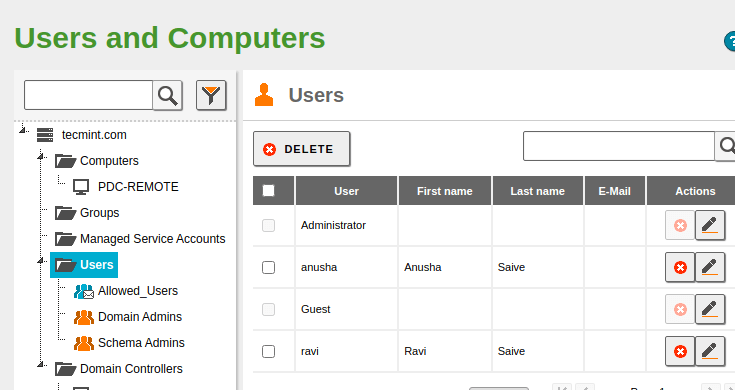
18. Now back to Users and Computers Module –> Manage. We can see that our anusha has been created on the Zentyal PDC server and we can now integrate him into one of our Groups. Let’s say Allowed_Users Group.
19. Now let’s try to add a New User from Zentyal Web Interface. Select Users, go to the green "+" button, select User again and enter your credentials for this new user.
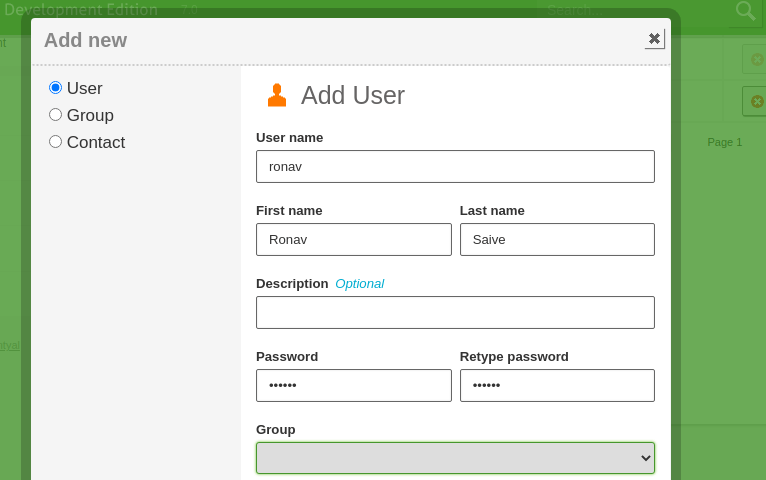
After the user is created you can integrate him into a group (optional).
20. And now go back to Windows Active Directory Users and Computers and verify if the new ronav is a member of Allowed_Users Group.

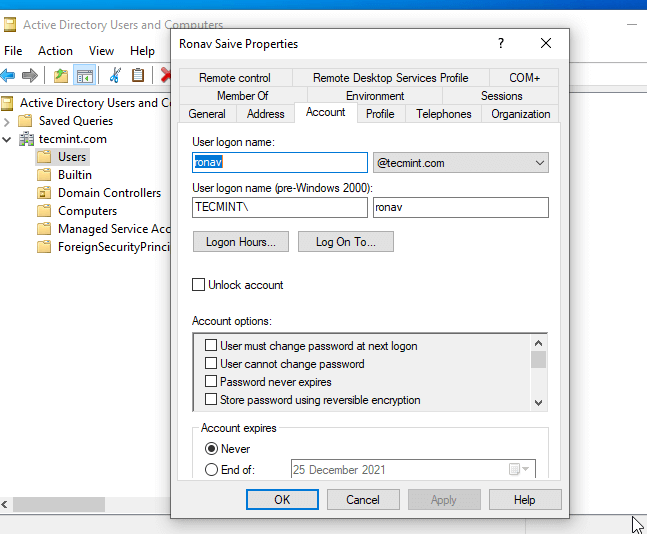
21. You also have a lot of tweaks for setting users like in a real Windows Server (change passwords on logon, enter a telephone number, address, change profile path, etc ).
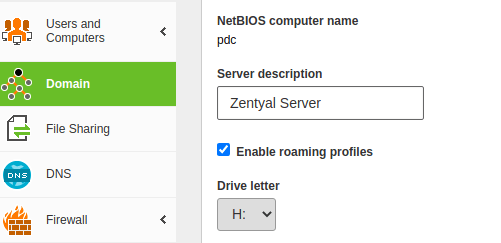
22. As the last configuration for this tutorial go to Domain Module on Zentyal Server and check “Enable roaming profiles” for your users to have access to documents and settings, have the same desktop experience to any computer they logon on your domain.
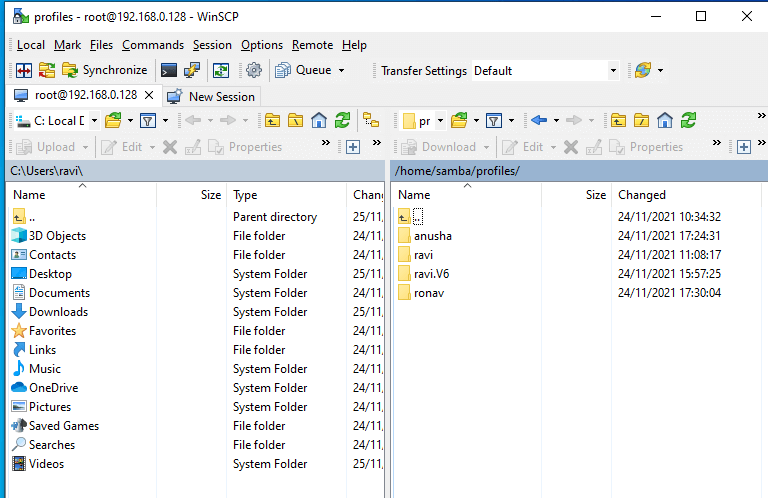
23. The server keeps roaming profiles under the “/home/samba/profiles” path so you can navigate to this path for remote administration by using a command-line program like Putty or WinSCP.
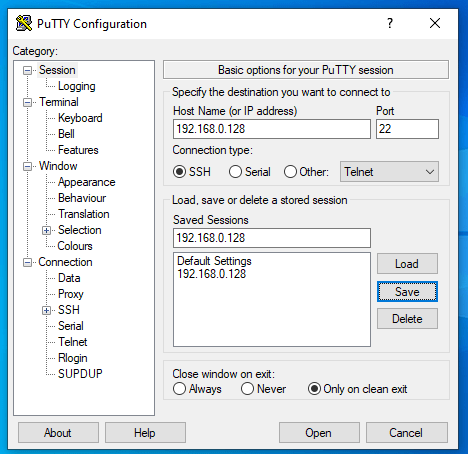
24. By default Zentyal uses sudo for root privilege security. So if you want to enable a root account on the server download and install Putty on your Windows system and connect through SSH using the server’s IP address or domain name.
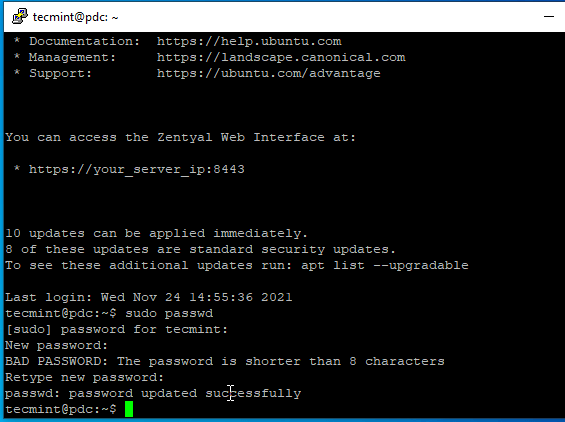
To enable root account to connect through ssh with username and password created on system installation and then type next command “sudo passwd“, enter and confirm password (this will help you later for complete administrative tasks on a Graphical User Interface connecting through WinSCP.
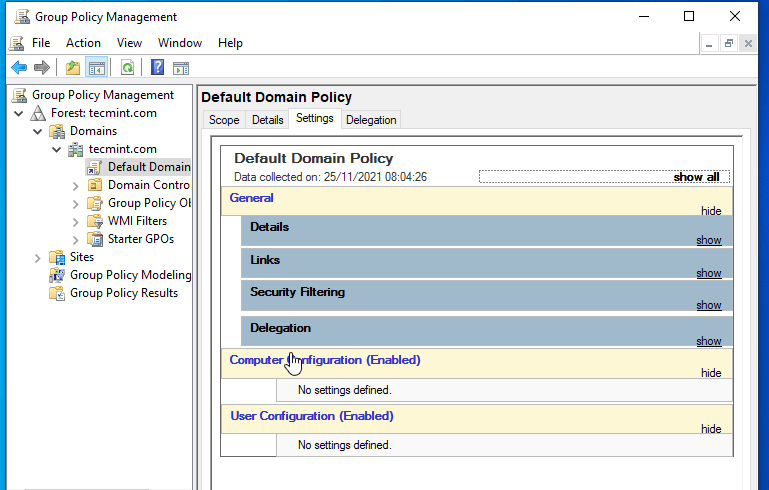
25. To set up Group Policy on Users and Computers just click on the Group Policy Management shortcut that earlier was created on Desktop.
Now you have full remote administrative access to your Zentyal PDC services: DNS, Active Directory, Users and Groups, Group Policy, Local system access through command line or GUI, and remote web access through https protocol from a Windows-based system.
Post Scriptum
This experiment was done using a local private network with internet access through NAT, the domain name has been chosen randomly (any resemblance with a registered domain is Purely Coincidental) and the node machines were installed using virtualization software such as VirtualBox.


Thanks for this really great tutorial.
I’ve been using this for almost 2 months now but just recently I am not able to edit or add users in Active Directory Users and Computers.
Whenever I do right click to any user then go to properties, all I got is “This user is a member of the following COM+ partition set.
I can add and edit users in zentyal though.
I hope you can help me..
Cheers!
Verify time settings on both systems. If time difference between systems is greater than 5 min you might experience odd problems. Also, leave the realm, reboot and join the domain again.
Wonderful and a very simple and descriptive guide. Helped a lot and worked as a charm for me. I just wonder if using this kind of setup in a commercial environment would invite Microsoft license trouble to me????
Expert’s opinions please
Thank you
Thanks for giving me this wonderful information, although i have 1 problem, i can’t find groups folder in Active Directory User and Computer, but when i tried to search the group name from menu find , i can find the group i want. Please, need your help. I’m using Administrative tools in windows 7 32 bit
Go to Active Directory Users and Groups > View. > Advance Features .
Ur problem is now solved :)
Hello there!
Fantastic tutorial. Thank you !
I have the same problem as the user above:
CNAME the smb done with Microsoft RSAT not see Zentyal web interface
CNAME made the samba GUI shown .
DNS interface of RSAT can see both …
Think r be any order (kind of rebuild) to push the graphical interface made RSAT recognize something that is there ?
I installed server is 3.5
And the operating system that I put RSAT is Windows 7 Enterprise
Thank you !
Hi! Thanks for great tutorial!
Just wondering – why i can’t see CNAME in web GUI which was added from Microsoft RSAT?
@Matei Cezar
Hi, I’m quite new to server stuff and trying to learn something for fun. Just wanted to thank you for these amazing how-to’s you’ve created for us noobs to figure out.
Absolutely phenomenal work. Thank you.
@Chris: Try update time settings using the following command on Zentyal PDC:
sudo ntpdate -ud your_domain.tld
I can’t login window 8.1 pro to domain zentyal 3.4( community). My message is user or password is wrong. pls help me fix it.
It is an issue I am having also. I log in with local admin and correct the system time. I have noticed the system time is not kept up to date properly. I am looking on a solution on how to fix it at my church.
Hi Mate,
I have installed zentyal server in my office its is working fine but there are few updates showing in the dashboard page should i install the updates on the live zentyal server.
Please help
@Gary Schiltz :Zentyal Web Interface it has limitations on configuring Active Directory ( you cant edit GPO, you cant add reverse DNS zones and many more , so yes…Microsoft RSAT offers extended capabilities over Zentyal Web Admin Tool ( way more )!
I really appreciate these Zentyal how-to’s – they should pay you :-) Actually, this series may just push me over into Zentyal territory – I’ve been debating with myself about whether to use Zentyl or ClearOS.
I’m new to Active Directory administration, and have a question: is there any reason to use Microsoft’s Remote Administration Tools, rather than Zentyal’s web GUI interface? Do you show this just to prove that Zentyal can be truly a replacement for a Microsoft Server OS, or are there (important?) capabilities that only Microsoft’s tools offer?
Only Windows 8 can be joined to a Zentyal domain or also Win7 ? Both of them can do it.
I dit it.
You can join in Zentyal 3.4 PDC all Windows related OS ( Windows XP , 7 . 8 , 8.1 , even Windows Server 2003/2008/2012 also ) and you can surley join Linux related distributions like Ubuntu , CentOS or other ) . Soon I will publish a tutorial on how to join Ubuntu 13.10 and Centos 6.5 in Zentyal 3.4 PDC so stay tunned .
As with GPO on all Windows related OS the compatibility is very good ….I had no probles in this matter so far ….I think that is the same like GPO compatibility on Windows 2003 Server Edition .
Only Windows 8 can be joined to a Zentyal domain or also Win7 ? How good is the GPO compatibility with Win7/8/8.1 ?