This article is an extension of my previous PXE Boot Environment Setup on RHEL/CentOS 7 and it’s focused on how you can perform Automatic Installations of RHEL/CentOS 7, without the need for user intervention, on headless machines using a Kickstart file read from a local FTP server.
The environment preparation for this kind of installation has already been processed on the previous tutorial regarding PXE Server setup, the only key missing, a Kickstart file, will be discussed further on this tutorial.
The simplest way to create a customize Kickstart file that you can use it further for multiple installations is to manually perform an installation of RHEL/CentOS 7 and copy, after installation process finishes, the file named anaconda-ks.cfg, that resides in /root path, to an accessible network location, and specify the initrd boot parameter inst.ks=protocol://path/to/kickstart.fileto PXE Menu Configuration File.
Requirements
This tutorial, and the Kickstart file configuration, only covers the Minimal Installation of RHEL/CentOS 7 without a Graphical Installation, basically the Kikstart file resulted from the previous Minimal Installation procedure of RHEL/CentOS 7.
If you need a Kickstart file that covers GUI Installation and a specific partition table, I suggest that you first perform a customizable
Graphical Installation of RHEL/CentOS 7 in a virtualized environment and use that resulted Kickstart file for future GUI installations.
Step 1: Create and Copy Kiskstart File to FTP Server Path
1. On the first step go to your PXE machine /root directory and copy the file named anaconda-ks.cfg to Vsftpd default server path (/var/ftp/pub) – also the path for RHEL/CentOS 7 Local Mirror Installation Source configured on PXE network Boot Server – Step 6 (refer PXE Server setup article above).
# cp anaconda-ks.cfg  /var/ftp/pub/
# chmod 755 /var/ftp/pub/anaconda-ks.cfg
2. After the file has been copied, open it with your favorite text editor and make the following minimal changes.
# nano /var/ftp/pub/anaconda-ks.cfg
- Replace –url filed with your network installation source location: Ex: –url=ftp://192.168.1.25/pub/
- Replace network –bootproto with dhcp in case you have manually configured network interfaces on installation process.
An excerpt on how a Kickstart file might look like is presented below.
#version=RHEL7
# System authorization information
auth --enableshadow --passalgo=sha512

# Use network installation
url --url="ftp://192.168.1.25/pub/"
# Run the Setup Agent on first boot
firstboot --enable
ignoredisk --only-use=sda
# Keyboard layouts
keyboard --vckeymap=us --xlayouts='us'
# System language
lang en_US.UTF-8

# Network information
network  --bootproto=dhcp --device=eno16777736 --ipv6=auto --activate
network  --hostname=localhost.localdomain
# Root password
rootpw --iscrypted $6$RMPTNRo5P7zulbAR$ueRnuz70DX2Z8Pb2oCgfXv4qXOjkdZlaMnC.CoLheFrUF4BEjRIX8rF.2QpPmj2F0a7iOBM3tUL3tyZNKsDp50
# System services
services --enabled="chronyd"
# System timezone
timezone Europe/Bucharest --isUtc
# System bootloader configuration
bootloader --location=mbr --boot-drive=sda
# Partition clearing information
clearpart --none --initlabel
# Disk partitioning information
part pv.20 --fstype="lvmpv" --ondisk=sda --size=19979
part /boot --fstype="xfs" --ondisk=sda --size=500
volgroup centos --pesize=4096 pv.20
logvol /  --fstype="xfs" --grow --maxsize=51200 --size=1024 --name=root --vgname=centos
logvol swap  --fstype="swap" --size=2048 --name=swap01 --vgname=centos

%packages
@compat-libraries
@core
wget
net-tools
chrony

%end
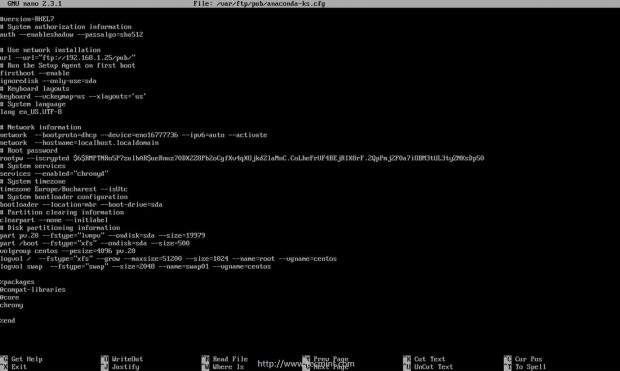
For more advanced Kickstart file options and syntax feel free to read RHEL 7 Kickstart Documentation.
3. Before attempting to use this file for installations procedures, it is important that you verify the file using ksvalidator command included on Pykickstart package, especially if manual customizations had been performed. Install Pykickstart package and verify your Kickstart file by issuing the following commands.
# yum install pykickstart
# ksvalidator /var/ftp/pub/anaconda-ks.cfg


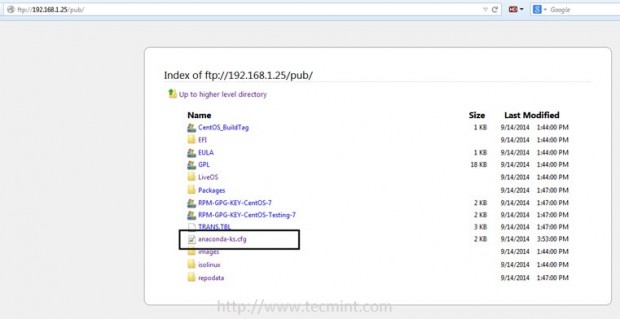
4. The last verification is to assure that Kickstart file is accessible from your specified network location – in this case FTP Local Mirror Installation Source defined by following URL Address.
ftp://192.168.1.25/pub/
Step 2: Add Kikstart Installation Label to PXE Server Configuration
5. In order to access Automatic Installation of RHEL/CentOS 7 option from PXE Menu add the following label to PXE default file configuration.
# nano /var/lib/tftpboot/pxelinux.cfg/default
PXE Menu Label excerpt.
For RHEL 7
label 5
menu label ^5) Install RHEL 7 x64 with Local Repo using Kickstart
kernel vmlinuz
append initrd=initrd.img inst.ks=ftp://192.168.1.25/pub/anaconda-ks.cfg inst.vnc inst.vncpassword=password
For CentOS 7
label 5
menu label ^5) Install CentOS 7 x64 with Local Repo using Kickstart
kernel vmlinuz
append initrd=initrd.img inst.ks=ftp://192.168.1.25/pub/anaconda-ks.cfg inst.vnc inst.vncpassword=password
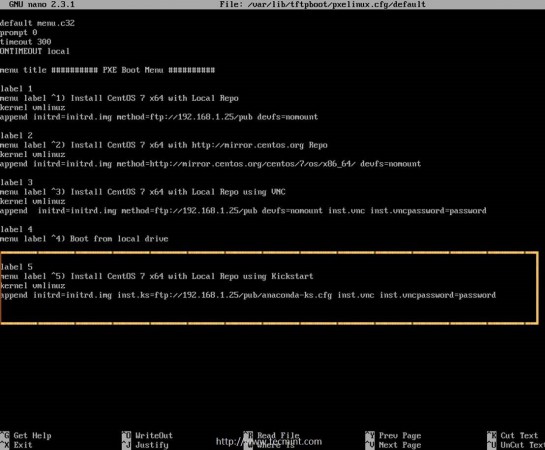
As you can see from this example the automatically installation can be supervised via VNC with password (replace VNC password accordingly) and the Kickstart file is located locally on PXE server and is specified by the initrd boot parameter inst.ks= FTP network location (replace protocol and network location accordingly if you are using other installation methods such as HTTP, HTTPS, NFS or remote Installation Sources and Kickstart files).
Step 3: Configure Clients to Automatically Install RHEL/CentOS 7 using Kickstart
6. To automatically install RHEL/CentOS 7 and supervise the entire installation process, especially on headless servers, instruct your client machine from BIOS
to boot from network, wait a few seconds then press F8 and Enter keys, then select Kickstart option from PXE menu.
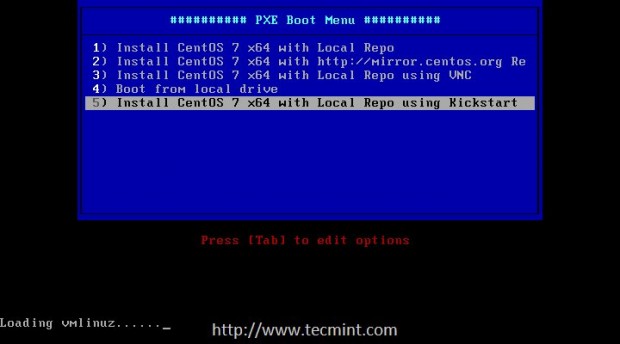
7. After the kernel and ramdisk loads and detects the Kickstart file, the installation process automatically starts without any intervention from user side needed. If you want to watch the installation process connect with a VNC client from a different computer using the address that the installer provides you and enjoy the view.

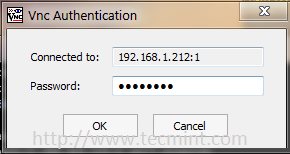
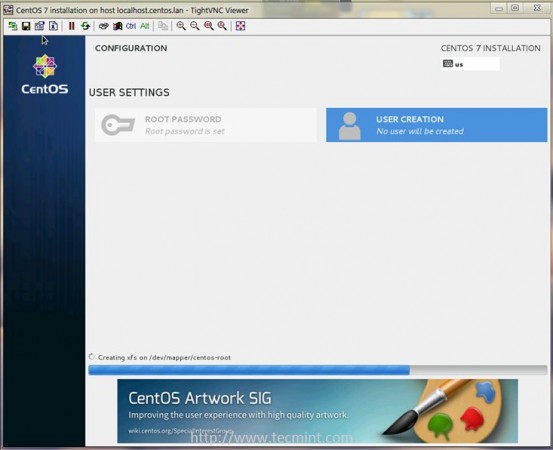
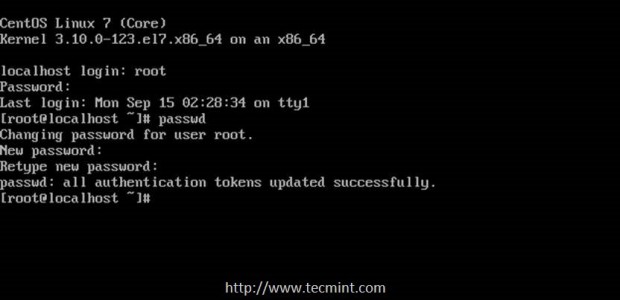
8. After the installation process finishes login to the newly installed system with root account and the password used on previous installation (the
one that you copied the Kickstart file) and change your client root password by running passwd command.
That’s all! Automatic Kickstart installations offer a great deal of benefits for system administrators in environments that they have to perform system installations on multiple machines the same time, in a short period of time, without the need to manually interfere with the installation process.

Hello, I have followed all the steps from the last tutorial, and this one, the kickstart option (5) is not clickable for some reason, nothing happens when I press ENTER, the rest of the menu is normally clickable. I need your help, please.
Great article ! One thing : please note that according to your requirements (Setup a PXE Network Boot Server on RHEL/CentOS 7) the Step 2 and chapter 5 should be corrected with this :
menu label ^5) Install CentOS 7 x64 with Local Repo using Kickstart
kernel centos7/vmlinuz
append initrd=centos7/initrd.img inst.ks=ftp://192.168.1.25/pub/anaconda-ks.cfg inst.vnc inst.vncpassword=password
(centos7 subfolder has been missed in kernel and append ^^)
Thanks
Hello, I did this and my install continues to pause at the for me to confirm that there will be no user created and to confirm the EULA. I’ve added the line eula –accepted to my KS file but it still stops and asks me to finish configuration. Is there a way to get it to just continue past that screen?
Thanks
On Centos7 I was unable to see my anaconda-ks.cfg file in the pub directory via browsing FTP. I could see it in the directory with ls however.
Ended up having to add “setsebool allow_ftpd_full_access=1” which allowed it to be visible.
Found that via google search here: http://stackoverflow.com/questions/30655173/cant-display-files-from-a-vsftpd-server-on-centos-6
hi can you please tell me how i accept License auto during kickstart installation as it asked while installation.
You wont need to worry about this if you use a kickstart file form a previous installation. The License terms are accepted automatically.
Still, if you should now this parameter for manually created kickstart files:
eula Accepted
i have configured RHEL kickstart and from same server i want to installed cent os from same ftp server, is this possible
can i installed cent os from RHEL 6 kick start server. i want to keep both images in /pub (RHEL and Cent os ) is this possible, or i need to configure
individual kick-start server for different os
Ah, for those who are using iptables.. don’t forget to allow the broadcast request ! I enabled iptable logging in my rsyslog then I saw something like this every time I tried a PXE boot :
Aug 14 19:12:05 tabasco kernel: iptables denied: IN=em1 OUT= MAC=ff:ff:ff:ff:ff:ff:a4:ba:db:e9:4d:55:08:00 SRC=0.0.0.0 DST=255.255.255.255 LEN=576 TOS=0x00 PREC=0x00 TTL=20 ID =1 PROTO=UDP SPT=68 DPT=67 LEN=556
Aug 14 19:34:12 tabasco kernel: iptables denied: IN=em3 OUT= MAC=ff:ff:ff:ff:ff:ff:a4:ba:db:e9:4d:55:08:00 SRC=0.0.0.0 DST=255.255.255.255 LEN=576 TOS=0x00 PREC=0x00 TTL=20 ID=3 PROTO=UDP SPT=68 DPT=67 LEN=556
So I had to add this to my /etc/sysconfig/iptables, and restarted iptables:
-A INPUT -s 0.0.0.0 -p udp –sport 68 -d 255.255.255.255 –dport 67 -j ACCEPT
-A OUTPUT -s 0.0.0.0 -p udp –sport 67 -d 255.255.255.255 –dport 68 -j ACCEPT
Does this need any setsebool commands to relax selinux with ftp or anonymous logins ??
Hi,
How to Automated Installations RHEL with graphical desktop mode through PXE Kickstart.
@Ketan,
The guide already showing the GUI installation through PXE Kickstart….
HI Ravi ,
PXE & Kickstart both of any different auto installation
You don’t actually need FAI to automate the install of Debian-based or Debian-derived distros. Ubuntu, Debian, Kali Linux, etc. all support pre-seed files. FAI is a great tool no question but not strictly necessary. You can get by with just preseeds, TFTP, and DHCP and a network bootstrap like iPXE or pxelinux. FAI is kind of a wrapper/abstraction layer between the complexities of deriving your own preseed semantics and intelligence. Hand-coding preseed files for diverse deployments and ongoing management/maintenance of those files is onerous but for occasional one-off type stuff it’s fine.
When you want to try scale deployments enterprise tools like FAI, Cobbler (on the RHEL/CentOS side), Satellite, and several similar solutions all permit large-scale management of server deployments, be they virtual or physical.
HI..
i have one query for unattanded installation different Linux Distrubution .
this is only explained for Redhat based system like centos and fedora etc . can we install debian based system using kick start .??
Debian also supports a fully automated installation, using the solution at http://fai-project.org/.
The setup of the PXE server would be the same, but instead of creating a Kickstart file and a YUM repository, you would create a Debian mirror and an answer file, as described at http://fai-project.org/fai-guide/.