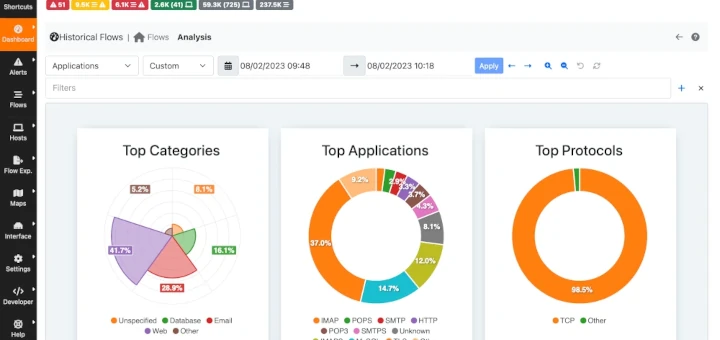
If you’re a Linux user and want to monitor your network traffic, you’ve probably heard of ntopng, which is a powerful, web-based tool that helps you keep track of network usage, analyze traffic, and even boost security by detecting suspicious activity.
In this post, we’ll walk through how to install and use ntopng to monitor your network in a simple and beginner-friendly way.
What is ntopng?
ntopng (short for next-generation ntop) is an open-source network traffic monitoring tool that provides a user-friendly web interface to monitor network activity in real-time.
It offers insights into which devices are using your network, how much data they’re consuming, and which websites or services are generating traffic.
It’s great for:
- Monitoring network usage.
- Tracking bandwidth consumption.
- Detecting security threats.
- Visualizing network traffic in real-time.
Now, let’s dive into the installation and usage of ntopng!
Installing ntopng Network Traffic Monitoring in Linux
Before installing ntop packages, you need to add the official ntop package repository to the following supported distributions as shown.
Install ntop in Ubuntu and Debian
To add and install the ntop program in Ubuntu, run:
Ubuntu 24.04 LTS:
sudo apt-get install software-properties-common wget
sudo add-apt-repository universe
wget https://packages.ntop.org/apt-stable/24.04/all/apt-ntop-stable.deb
sudo apt install ./apt-ntop-stable.deb
sudo apt-get clean all
sudo apt-get update
sudo apt-get install pfring-dkms nprobe ntopng n2disk cento
Ubuntu 22.04 LTS:
sudo apt-get install software-properties-common wget
sudo add-apt-repository universe
wget https://packages.ntop.org/apt-stable/22.04/all/apt-ntop-stable.deb
sudo apt install ./apt-ntop-stable.deb
sudo apt-get clean all
sudo apt-get update
sudo apt-get install pfring-dkms nprobe ntopng n2disk cento
On Debian systems, make sure to edit /etc/apt/sources.list and add “contrib” at the end of each line that begins with deb and deb-src. Then, type in your shell:
Debian 11 (Bullseye):
wget https://packages.ntop.org/apt-stable/bullseye/all/apt-ntop-stable.deb
sudo apt install ./apt-ntop-stable.deb
sudo apt-get clean all
sudo apt-get update
sudo apt-get install pfring-dkms nprobe ntopng n2disk cento
Debian 10 (Buster):
wget https://packages.ntop.org/apt-stable/buster/all/apt-ntop-stable.deb
sudo apt install ./apt-ntop-stable.deb
sudo apt-get clean all
sudo apt-get update
sudo apt-get install pfring-dkms nprobe ntopng n2disk cento
Install ntop in CentOS/RedHat
To add and install the ntop program in RHEL-based distributions, run:
Rocky/AlmaLinux 9:
curl https://packages.ntop.org/centos-stable/ntop.repo > /etc/yum.repos.d/ntop.repo
dnf config-manager --set-enabled crb powertools
dnf install epel-release
yum clean all
yum update
yum install pfring-dkms n2disk nprobe ntopng cento ntap
CentOS/RedHat 8:
curl https://packages.ntop.org/centos-stable/ntop.repo > /etc/yum.repos.d/ntop.repo
yum install epel-release
rpm -ivh http://rpms.remirepo.net/enterprise/remi-release-8.rpm
yum install dnf-plugins-core
dnf config-manager --set-enabled powertools
dnf config-manager --set-enabled remi
yum clean all
yum update
yum install pfring-dkms n2disk nprobe ntopng cento ntap
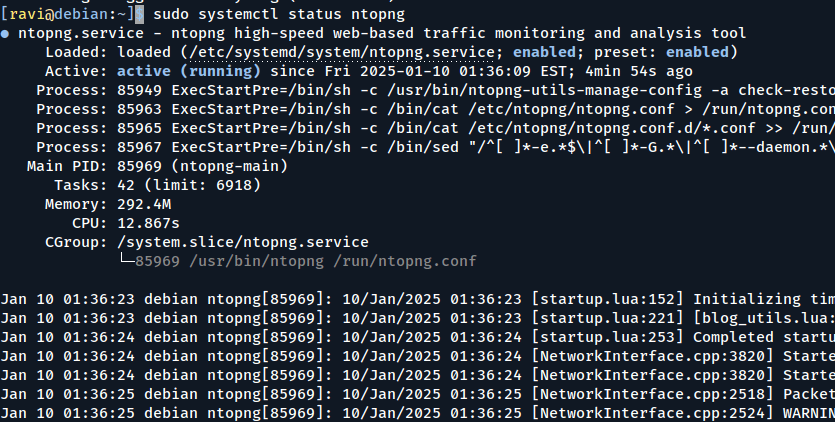
Once ntop is installed, you need to start the ntopng service and make sure to start it automatically every time your system boots.
sudo systemctl start ntopng
sudo systemctl enable ntopng
sudo systemctl status ntopng
Access the ntopng Web Interface
Once ntopng is installed and running, you can access it through your web browser by going to the IP address of your server.
http://your-server-ip:3000
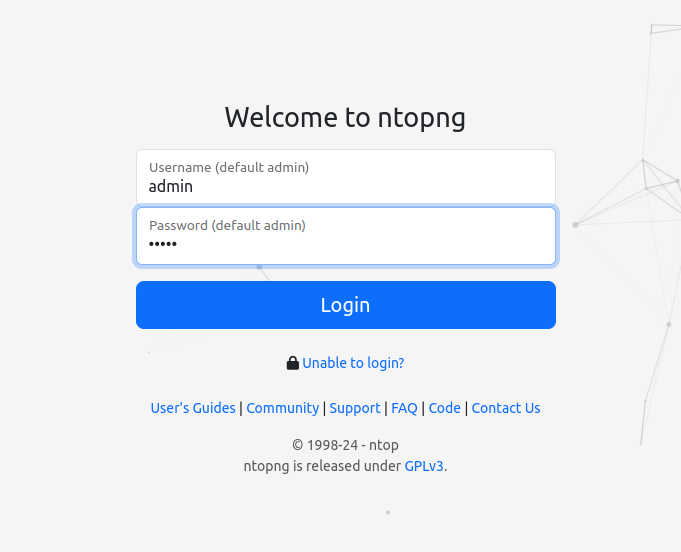
When you first access the web interface, you’ll be prompted to log in, use the default login credentials:
Username: admin
Password: admin
After logging in, you’ll be able to see the main dashboard, which gives you an overview of your real-time network usage, including total bandwidth, the number of active hosts, and the top talkers (devices generating the most traffic).
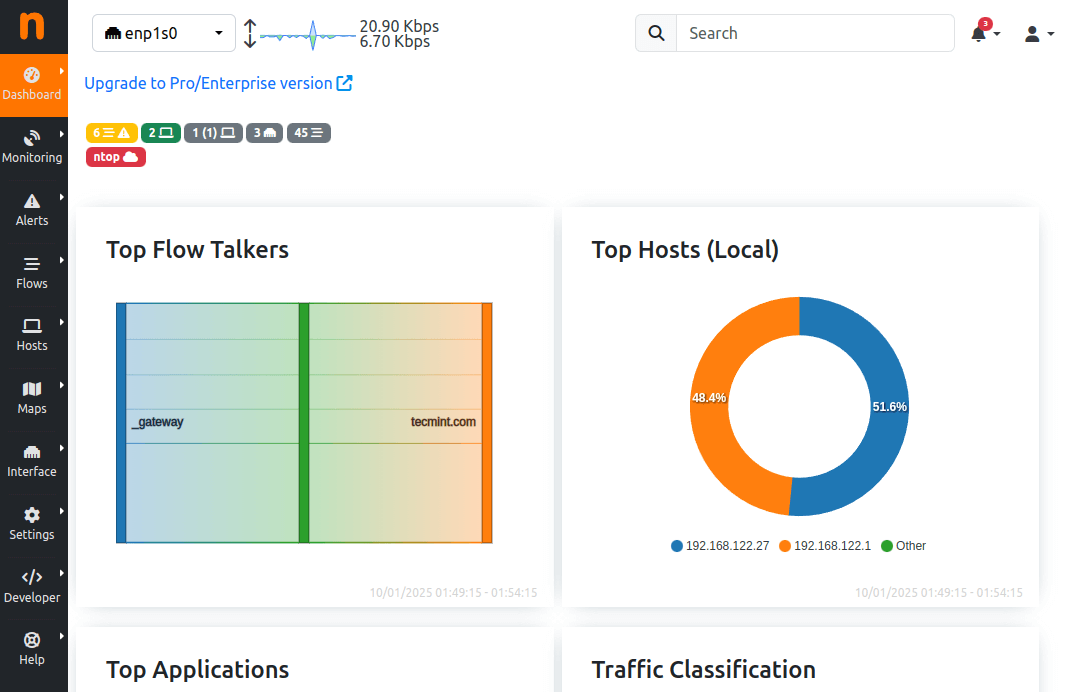
Now that you’ve accessed the ntopng dashboard, let’s take a look at how you can monitor your network traffic in real time.
- View Host Traffic – To see which devices are using the most bandwidth, go to the “Hosts” section. Here, you’ll find a list of devices on your network, including their IP addresses, the amount of data they’ve transferred, and the protocols they’re using.
- Monitor Traffic by Protocol – You can also monitor traffic based on specific protocols like HTTP, FTP, or DNS, which helps you understand which types of traffic are consuming the most bandwidth.
- Track Application Traffic – It also shows you which applications are generating the most traffic. For example, you can see if a specific app (like a video streaming service or file-sharing program) is using a lot of bandwidth.
To protect your data, it’s a good idea to enable SSL encryption for the web interface, which will ensure that the traffic between your browser and the ntopng server is encrypted.
Make sure that your firewall is properly configured to only allow access to the ntopng web interface from trusted IP addresses.
Conclusion
ntopng is a fantastic tool for monitoring network traffic and improving security on your Linux system. It’s easy to install, user-friendly, and offers powerful features like real-time traffic analysis, host monitoring, and security alerts.


