Port Knocking is a nifty technique of controlling access to a port by only allowing legitimate users access to the service running on a server. It works in such a way that when the right sequence of connection attempts is made, the firewall gladly opens the port that was closed.
The logic behind port knocking is to safeguard your Linux system from automated port scanners which prowl for open ports. In this guide, we examine how you can install port knocking and how you can configure it to secure SSH service. For demonstration purposes, we will use Ubuntu 18.04.
Step 1: Install and Configure knockd
To get started, log in to your Linux system and install the knockd daemon as shown.
$ sudo apt install knockd
Once installed, open the knockd.conf configuration with your preferred text editor. Here, we are using the vim command-line text editor.
$ sudo vim /etc/knockd.conf
The default configuration file appears as follows.
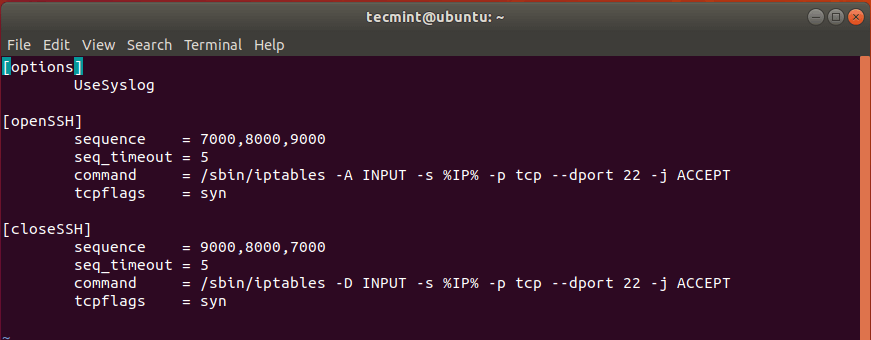
Under the [openSSH] section, we need to change the default knocking sequence – 7000,8000,9000 – to something else. This is because these values are already known and can compromise the security of your system.
For testing purposes, we have set the values to 10005, 10006, 10007. This is the sequence that will be used to open the SSH port from a client system.
In the third line – beginning with command, change -A to -I just after the /sbin/iptables command and before INPUT.
And lastly, under the [closeSSH] section, again, change the default sequence to your preferred choice. This is the sequence that will be used to close the SSH connection once the user is done and logs out of the server.
Here’s our complete configuration.
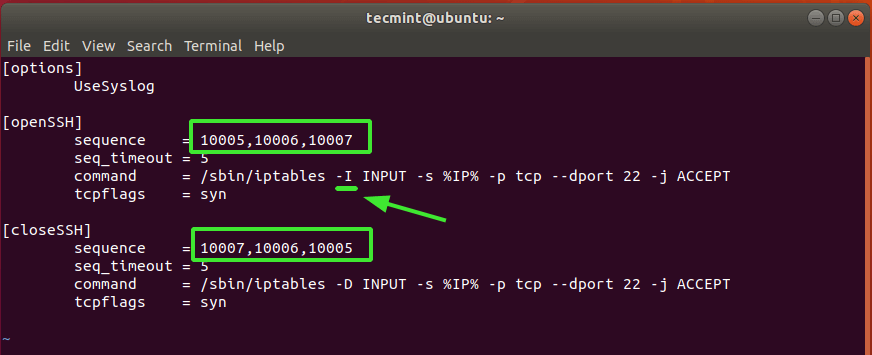
Once you are done, save the changes and exit.
Another configuration we need to modify is the /etc/default/knockd. Once again, open it using your text editor.
$ sudo vim /etc/default/knockd

Locate the line START_KNOCKD=0. Uncomment it and set the value to 1.
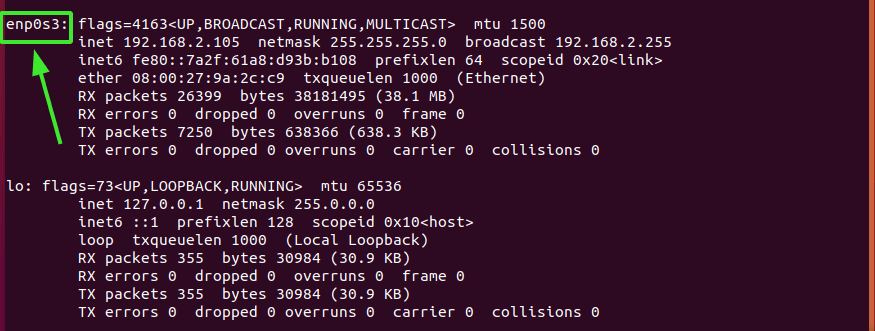
Next, head over to the line KNOCKD_OPTS=”-i eth1” Uncomment it and replace the default eth1 value with the active network interface of your system. To check your network interface simply run the ip addr or the ifconfig command.
For our system, enp0s3 is the active network card.
The complete configuration is as shown.

Save the changes and exit.
Then start and enable knockd daemon as shown.
$ sudo systemctl start knockd
$ sudo systemctl enable knockd
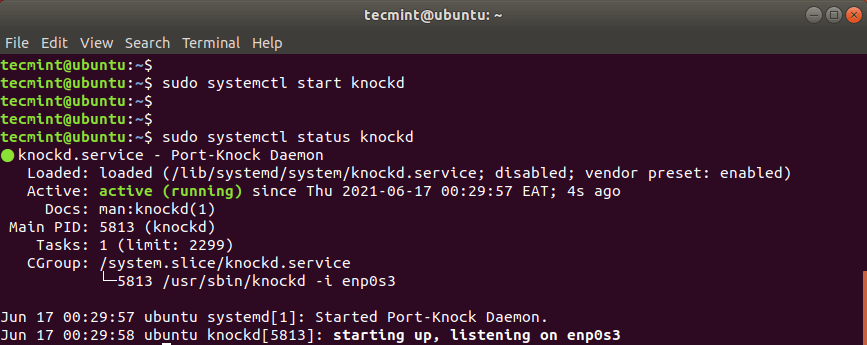
To check the status of knockd daemon, run the command:
$ sudo systemctl status knockd
Step 2: Close SSH Port 22 On Firewall
Since the objective of the knockd service is to either grant or deny access to ssh service, we are going to close the ssh port on the firewall. But first, let’s check the status of the UFW firewall.
$ sudo ufw status numbered
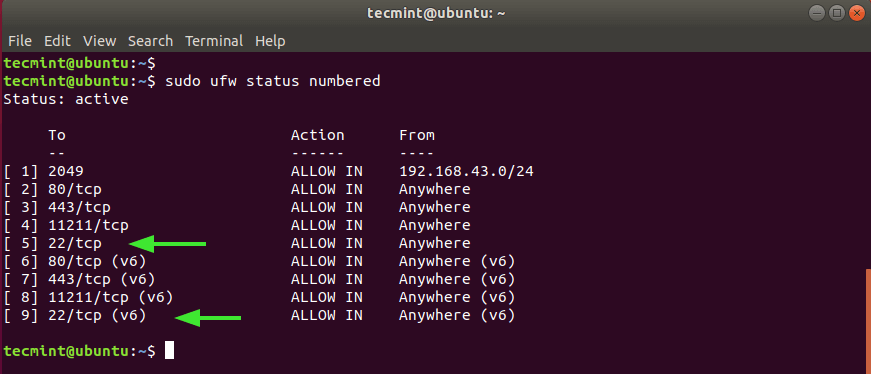
From the output, we can clearly see that SSH port 22 is open on both IPv4 and IPv6 protocols numbered 5 and 9 respectively.
We need to delete these two rules as shown, starting with the highest value – which is 9.
$ sudo ufw delete 9
$ sudo ufw delete 5
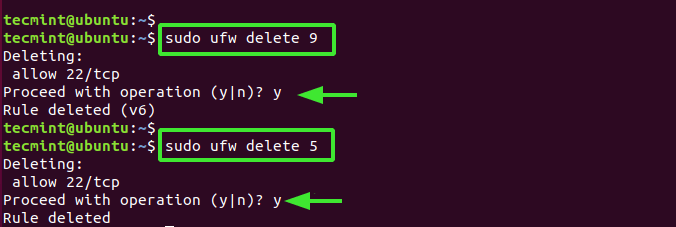
Now, if you attempt to log in remotely to the server, you will get a connection timeout error as shown.

Step 3: Configure a knock client to Connect to SSH Server
In the final step, we will configure a client and attempt to log in by first sending the knock sequence that we configured on the server.
But first, install knockd daemon just as you did on the server.
$ sudo apt install knockd
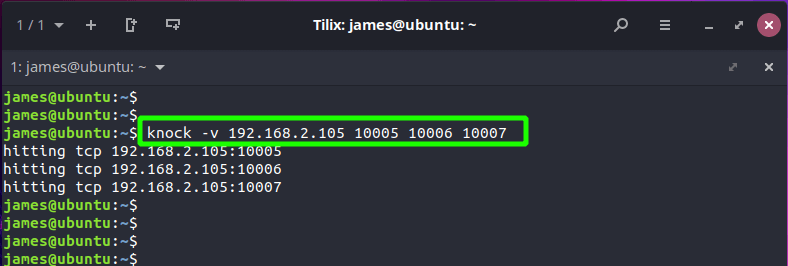
Once the installation is complete, send the knock sequence using the syntax shown
$ knock -v server_ip knock_sequence
In our case, this translates to:
$ knock -v 192.168.2.105 10005 10006 10007
You should get output similar to what we have, depending on your sequence. This shows that the knock attempts were successful.
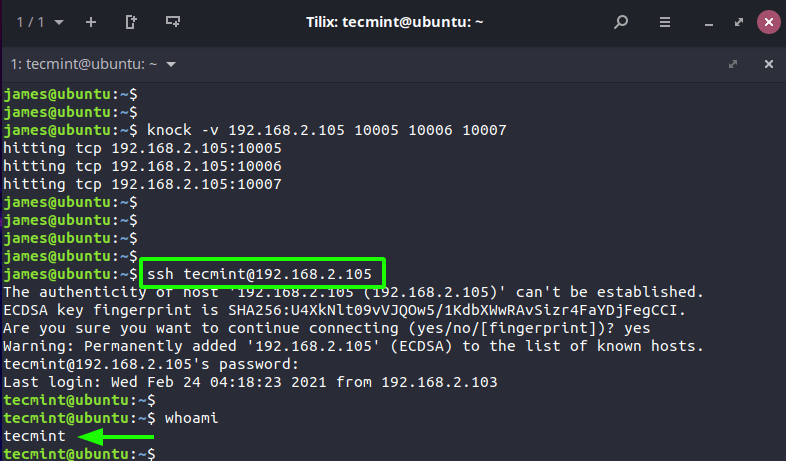
At this point, you should be in a position to successfully log in to the server using SSH.
Once you are done doing your job on the remote server, close the SSH port by sending the closing knock sequence.
$ knock -v 192.168.2.105 10007 10006 10005
Any attempts to log in to the server will fail as demonstrated.

Closing Thoughts
This wraps up this guide on how to leverage port knocking to secure the SSH service on your server. A better and easier approach would be to configure password SSH authentication using SSH key pairs. This ensures that only the user with the private key can authenticate with the server on which the public key is stored.



Hello, I’ve followed all the instructions but it seems like I cannot connect from my client server even if the sequence were accepted.
Do I need to install iptables even if I already have ufw set up? When I ran
iptables -L, it returned a lot of results while checking the systemctl status don’t. It just says service not found. But ufw is active.While this is security through obscurity, this is still a good enough approach if other security practices are still followed (no root, specific ip, complex password, preferably keys, etc.)
I would love it if the closing sequence is time-triggered rather than depending on users to knock to close. E.g. closes after 30 mins of opening.
Don’t do this in real life. This is security by obscurity which is another way of saying no security. It is regarded as a novelty, not a viable security technique.
https://en.wikipedia.org/wiki/Security_through_obscurity
I’d rather say “don’t *rely*” on this. Even if you configure port knocking don’t forget to also disable passwords and use secure RSA keys, etc. If you have strong security you are free to add port knocking as another “security measure” in case you have messed up something.