SimpleHTTPServer is a python module which allows you to instantly create a web server or serve your files in a snap. Main advantage of python’s SimpleHTTPServer is you don’t need to install anything since you have python interpreter installed. You don’t have to worry about python interpreter because almost all Linux distributions, python interpreter come handy by default.
You also can use SimpleHTTPServer as a file sharing method. You just have to enable the module within the location of your shareable files are located. I will show you several demonstrations in this article by using various options.
Step 1: Check for Python Installation
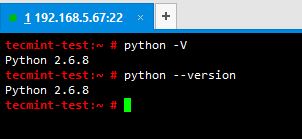
1. Check whether python is installed in your server or not, by issuing below command.
# python –V

OR

# python  --version
It will show you the version of the python interpreter you’ve got and it will give you an error message if it is not installed.
2. You’re lucky if it was there by default. Less work actually. If it was not installed by any chance, install it following below commands.
If you have a SUSE distribution, type yast in the terminal –> Go to Software Management –> Type ‘python’ without quotes –> select python interpreter –> press space key and select it –> and then install it.
Simple as that. For that, you need to have SUSE ISO mounted and configured it as a repo by YaST or you can simple install python from the web.

If you’re using different operating systems like RHEL, CentOS, Debian, Ubuntu or other Linux operating systems, you can just install python using yum or apt.
In my case I use SLES 11 SP3 OS and python interpreter comes installed by default in it. Most of the case you won’t have to worry about installing python interpreter on your server.
Step 2: Create a Test Directory and Enable SimpleHTTPServer
3. Create a test directory where you don’t mess with system files. In my case I have a partition called /x01 and I have created a directory called tecmint in there and also I have added some test files for testing.
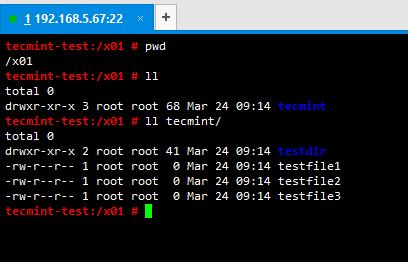
4. Your prerequisites are ready now. All you have to do is try python’s SimpleHTTPServer module by issuing below command within your test directory (In my case, /x01//).
# python –m SimpleHTTPServer
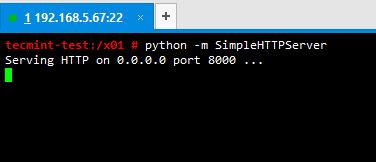
5. After enabling SimpleHTTPServer successfully, it will start serving files through port number 8000. You just have to open up a web browser and enter ip_address:port_number (in my case its 192.168.5.67:8000).
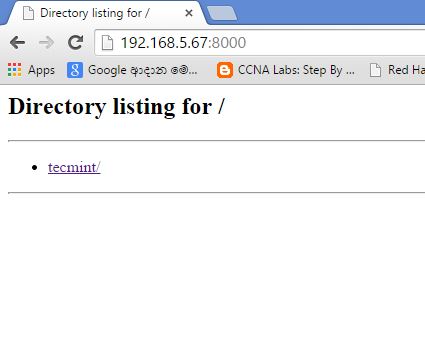
6. Now click on link 'tecmint' to browse files and directories of tecmint directory, see the screen below for reference.
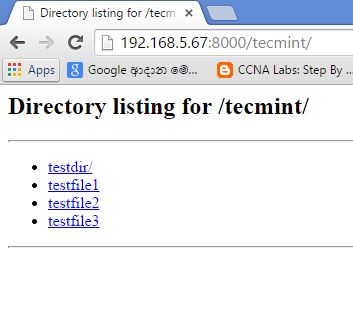
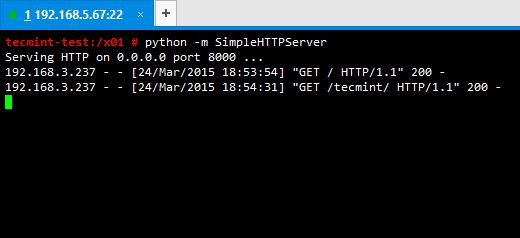
7. SimpleHTTPServer serves your files successfully. You can see what has happened at the terminal, after you accessed your server through web browser by having a look at where you executed your command.
Step 3: Changing SimpleHTTPServer Port
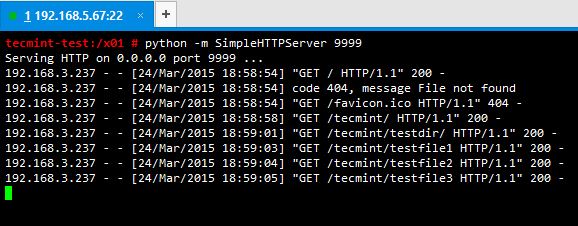
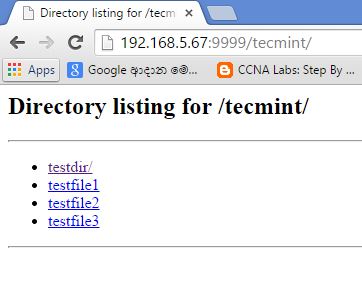
8. By default python’s SimpleHTTPServer serves files and directories through port 8000, but you can define a different port number (Here I am using port 9999) as you desire with the python command as shown below.
# python –m SimpleHTTPServer 9999
Step 4: Serve Files from Different Location
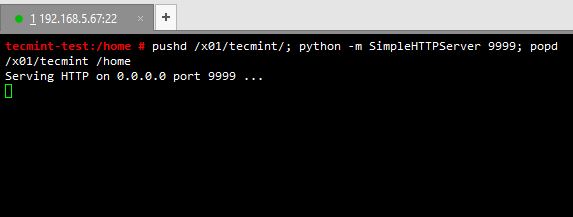
9. Now as you tried it, you might like to serve your files in a specific location without actually going to the path.
As an example, if you are in your home directory and you want to server your files in /x01/tecmint/ directory without cd in to /x01/tecmint, Let’s see, how we will do this.
# pushd /x01/tecmint/; python –m SimpleHTTPServer 9999; popd;

Step 5: Serve HTML Files
10. If there’s a index.html file located in your serving location, python interpreter will automatically detect it and serve the html file instead of serving your files.
Let’s have a look at it. In my case I include a simple html script in the file named index.html and locate it in /x01/tecmint/.
<html>
<header><title>TECMINT</title></header>
<body text="blue"><H1>
Hi all. SimpleHTTPServer works fine.
</H1>
<p><a href="https://www.tecmint.com">Visit TECMINT</a></p>
</body>
</html>
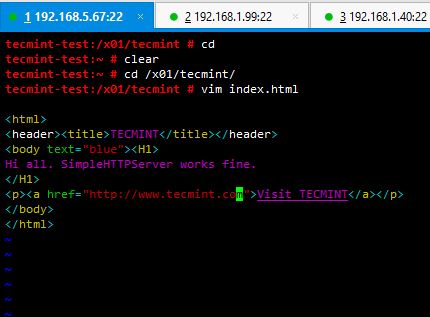
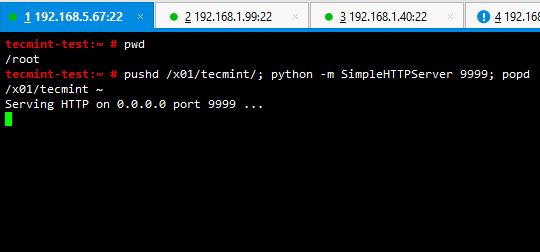
Now save it and run SimpleHTTPServer on /x01/tecmint and go to the location from a web browser.
# pushd /x01/tecmint/; python –m SimpleHTTPServer 9999; popd;
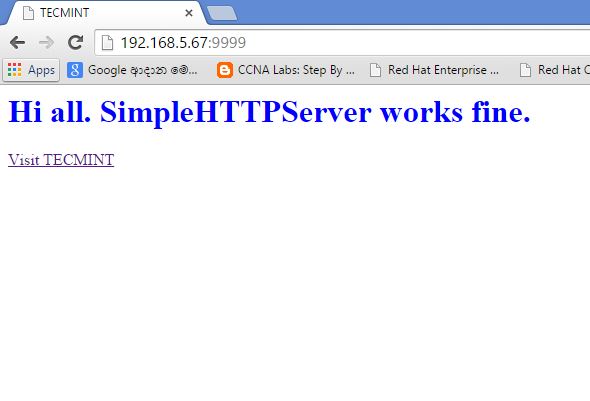
Very simple and handy. You can serve your files or your own html code in a snap. Best thing is you won’t have to worry about installing anything at all. In a scenario like you want to share a file with someone, you don’t have to copy the file to a shared location or making your directories shareable.
Just run SimpleHTTPServer on it and it is done. There is a few things you have to keep in mind when using this python module. When it serves files it runs on the terminal and prints out what happens in there. When you’re accessing it from the browser or download a file from it, it shows IP address accessed it and file downloaded etc. Very handy isn’t it?
If you want to stop serving, you will have to stop the running module by pressing ctrl+c. So now you know how to use python’s SimpleHTTPServer module as a quick solution to serve your files. Commenting below for the suggestions and new findings would be a great favour to enhance future articles and learn new things.




How can you kill this using the command line?
shows nothing.
ps ax | grep SimpleHTTPServer | grep -v grep | awk ‘{print $1}’ | xargs kill -9
Nice howto guide. It’d deserve a thumbs up, a star or something alike.
How start in boot (service)?
Is it possible to access the SimpleHTTPServer from outside the LAN, like over DNS?
@Igor,
As far as you’ve static IP address, you can access SimpleHTTPServer from anywhere in the world using IP address and port..
Hi Thilina, thanks for the awesome post! I ran this as instructed (nohup python -m SimpleHTTPServer 80 &) however after 1-2 days, the server stops. Then I have to ps ax and kill SimpleHTTPServer manually and run again. Can you give me some advice- where to look at, why it stops after some time?
Hi aerin,
I think this can be happen due to a shell change. Cannot tell the exact reason without looking at it. But can you try using absolute path for the “nohup” command.
Step 01. Enter “which nohup” in your logging shell.
Below is the sample output.
[root@tecminttest ~]# which nohup
/usr/bin/nohup
Step 02. Enter your command with absolute path for the “nohup” command.
Eg:
[root@tecminttest ~]# /usr/bin/nohup python -m SimpleHTTPServer 80 &
Try this and let me know if the error still exists.
Thanks a lot and like to see more python solution.
Thanx Obaidulla,
There’s a lot. Will post them eventually. :)
Hi,
Thanks, but do you know how to keep it running in the background? Whenever I log out of the ssh session, it cannot server again and gives 404 error!!
@Ahmad,
Just add & string at the end of the command to keep the process running in background even after you logout from your SSH session. For example,
@Ravi/Ahmad,
I don’t think that will work. If you ran the command by background and if you exit the terminal, it will get disconnected. Use below command instead. It will not disconnect the SimpleHTTPServer after you logout of the terminal.
nohup python -m SimpleHTTPServer 9999 &
Hope this will be useful
Hi Uwe,
Thanx for the correction :)
Hi, Thilina, there is a typo under point 4. : “(In my case, /x01/tecmint/)”. That should be “(In my case, /x01/)” as can be seen in the picture below. Best, Uwe
Thanx Alex :)
Very helpful. Thanks :)
Hi Setevoy,
We’ll look in to your request and do the needful in the future. Thanx :)
Hi Kumar, Thanx very much. :)
WIll be nice to see same useful article about CGIHTTPServer.
Nice article. I know python-3 has a simple inbuilt http server and I have seen it’s uses in django while testing. However, using this technique for serving files on an ad hoc basis in your LAN in your office or home is one of the easiest ways. When all you want is to send a few files to other machines in your LAN, you need not worry about the OS of the other machines or how to configure SAMBA, NFS, SSH etc cause python’s built in http sever makes it trivial. You can even share files like this to your mobiles phones as well.