Libav is a set of cross-platform libraries and tools that are used to deal with multimedia files, streams and protocols, it was originally forked from the ffmpeg project. Libav includes many sub-tools like:
- Avplay: a video & audio player.
- Avconv: a multimedia converter plus a video & audio recorder from different sources.
- Avprobe: a tool that connects to the multimedia file stream and returns many useful information and statistics about it.
- Libavfilter: a filtering API for different Libav tools.
In this article, we’ll explain how to record the Linux desktop’s video & audio using the ‘Avconv’ program on Debian/Ubuntu/Linux Mint distributions.
Step 1: Installing Avconv Tool
1. avconv is a part from the “libav-tools” package, which is available to install from the official repositories for all Debian-based distributions like Ubuntu and Mint, using following commands.
$ sudo apt-get update
$ sudo apt-get install libav-tools
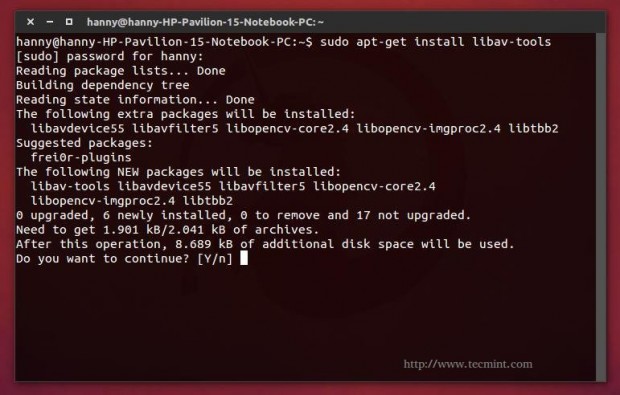
Note: Installing packages from default repositories, might give you a little older version of ‘avconv‘ tool. Thus, we recommend you to get the latest version from the official git repository, as shown below.
$ sudo apt-get install yasm
$ git clone git://git.libav.org/libav.git
$ cd libav
$ ./configure
$ make
$ sudo make install
Note: You will have to run “./configure –help” in order to list all the available options for the configuration file and install codecs and libraries that you want, you will also need to do a lot of work in order to install the dependencies.
Also note, if you’re used the compile-from-source way, you’ll always have to use “sudo avconv” instead of “avconv” to run the tool.
Step 2: Start Video Recording of Desktop
2. You’re ready now, all what you have to do is to record your desktop video by issuing following command.
$ avconv -f x11grab -r 25 -s 1920x1080 -i :0.0 -vcodec libx264 -threads 4 $HOME/output.avi
Now let’s explain the command in short:
- avconv -f x11grab is the default command to capture video from the X server.
- -r 25 is the frame rate you want, you may change it if you like.
- -s 1920×1080 is your system’s screen resolution, change it to your current system resolution, it’s very important to do this.
- -i :0.0 is where we want to set our recording start point, leave it like this.
- -vcodec libx264 is the video codec that we’re using to record the desktop.
- -threads 4 is the number of threads, you may change it as well if you like.
- $HOME/output is the destination path where you want to save the file.
- .avi is the video format, you may change it to “flv”, “mp4”, “wmv”, “mov”, “mkv”.
3. After you enter the command, the recording will start automatically as a process running from the terminal, in order to stop it, hit “Ctrl + C” keys inside the terminal window.
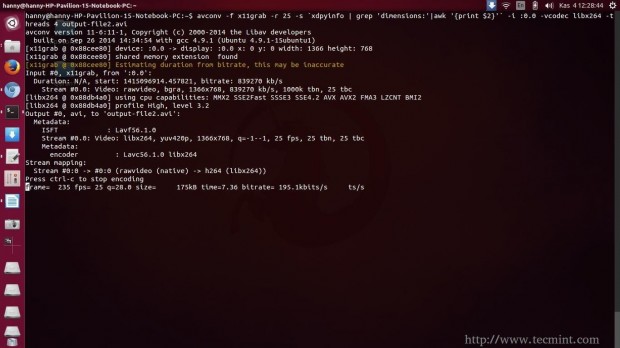
4. Now, you may run the file using VLC or any other multimedia player, or you may run it using “avplay” tool which is a multimedia player from the same Libav package.
$ avplay $HOME/output.avi
Note: Don’t forget to replace the destination file path. The recording’s quality is pretty good.
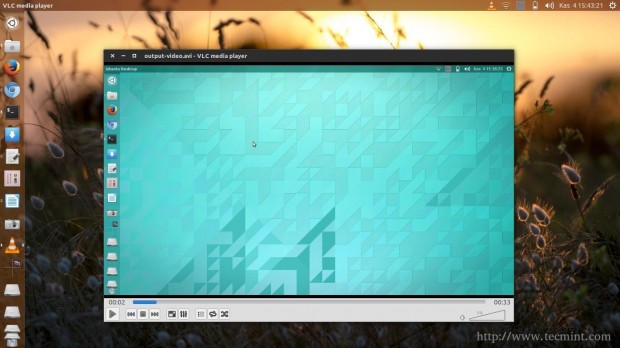
Here’s a video that I’ve recorded using the “avconv” tool.
Step 3: Start Video & Audio Recording of Desktop
5. If you want to record the audio as well, first run this command to list all the available input sources for the audio.
$ arecord -l
It will give you some output like this.

In my case, I’ve one input source for audio only, and its number is “1”, that’s why I am going to use the following command to capture both video & microphone audio.
$ avconv -f alsa -i hw:1 -f x11grab -r 25 -s 1920x1080 -i :0.0 -vcodec libx264 -threads 4 output-file2.avi
You see that part which is colored in yellow? It’s the only modification that I did for the command. Now let’s explain the command in short:
- -f alsa is an option to capture the sound from the alsa device.
- -i hw:1 is an option to take the audio input source from the “hw:1” device which is the first – and the only – input sound device in my computer.
Note: Don’t forget to replace the “1” number with the number of the input device that you want when you list the available audio input sources using the arecord -l command.
To stop the recording, you may hit the “Ctrl + C” keys again.
Step 4: Start Audio Recording of Desktop
6. If you want to record the audio only, you may use the following command.
$ avconv -f alsa -i hw:1 out.wav
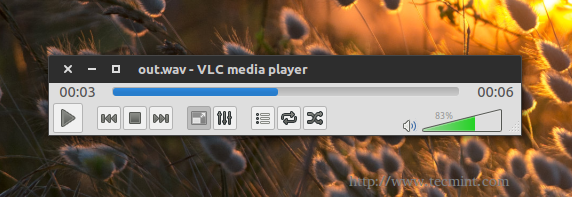
7. You may replace .mp3 with any supported audio format by Libav, you can now play the out.wav using any mutlimedia player like VLC.
Conclusion
“avconv” tool can be used to do many other things, not just to record the desktop’s video and audio. For further usage and details about the “avconv” tool, you may visit the official guide at.
Read Also: 10 Avconv Commands to Record and Convert Multimedia Files
Have you used the “avconv” tool before to record your desktop? What do you think about it? Is there any other tools that you use to record your desktop? Share them with us in the comments.
Read Also: Record Programs and Games Using Simple Screen Recorder





Thanks for taking the time for making this tutorial, really appreciated. I always create screencast with a web-based software calls Acethinker Online Screen Recorder, It is an online tool that lets you record your screen right from the browser. Share it here as an alternative method.
Thanks. I finally created this script:
#!/bin/bash
echo $’\n'” Video Grab Desktop”
echo $’————————-\n\a’
echo ” Syntaxe: $(basename 0) [directory]”
echo ” Output: /directory/$(date +%Y-%m-%d_%H-%M-%S ).avi”
echo -e “Attention: Records mouse cursor too.\n”
read -n1 -p “Press CTRL-C to stop encoding.
Continue? Y/n ”
if [ ! “a${REPLY,,}” == “an” ];then
avconv -f x11grab -r 15 -s 1366×768 -i :0.0 -vcodec wmv1 -acodec pcm_s16le -q 7 $1$(date +%Y-%m-%d_%H-%M-%S ).avi
fi
@Xerostomus,
Yeah that’s really great, why not you share this script at github? let other users download and enhance the functionality of script more better..
Hi,
Is it possible to record something in the future with this, and make it stop after some time?
I want to Record the video for 30 minutes for example, how do i include it on the code?
@Zeeshan,
I suggest you to use Simple Screen Recorder tool for recording Desktop, here is the guide on how to do it: https://www.tecmint.com/screencasting-with-simple-screen-recorder-in-linux/
This is not working. How can i just uninstall this app?
@Mark,
The only way to uninstall source package installations, find and delete the folders which contains libav files.
Hello I’m getting this error : Unknown input format: ‘X11grab’
I’m running Ubuntu14.04 LTS on a hp compaq 6910 laptop
eve using x11 or X11 always gives the same error
Would you please tell me what’s wrong ?
Thanks in advance for your kind answer
Before updating avconv with following commands youtube-dlg was running fine on Mint 17.1.
$ sudo apt-get install yasm
$ git clone git://git.libav.org/libav.git
$ cd libav
$ ./configure
$ make
$ sudo make install
But if i want to convert audio of a youtube video to mp3 now, i receive the error-message:
ERROR: audio conversion failed: Unknown encoder ‘libmp3lame’
libmp3lame-dev and libmp3lame0 are installed.
Please can you help me to fix the error?
Hello,
I compiled the avconv command on Ubuntu 14.04 LTS, and received the following error:
davidg@machine:~$ avconv -f alsa -i hw:1 -f x11grab -r 25 -s 1920×1080 -i :0.0 -vcodec libx264 -threads 4 output-file2.avi
avconv version v12_dev0-1240-gcfdaa4d, Copyright (c) 2000-2015 the Libav developers
built on Apr 24 2015 10:24:42 with gcc 4.8 (Ubuntu 4.8.2-19ubuntu1)
Unknown input format: ‘alsa’
i got the same as David
Q1. I am playing a game. The game has a very interesting sound theme. If I record my desktop, I can’t capture that sound theme right now. Is there any options to grab the sounds that come from the system.
Q2. With this command, is it possible to record in tty (text terminals)?
Hello Tom.
A1. You may take a look at: http://askubuntu.com/questions/291910/how-to-capture-desktop-sounds-pulse-audio-output-from-avconv
A2. Sure you can, run:
sudo avconv -f fbdev -r 30 -i /dev/fb0 out.avi
Replace “out.avi” with the file name you want, and replace “-r 30” with the number of frames you want per second.
Thanks.
You can also try ScreenStudio as a gui for avconv. It allows you to record your desktop and add other things like a logo and a small blurb as a title for your screencast, and also capture the picture from your webcam.
it can also allow you to stream what you get to either Youtube live and a few other sites.
Check it out at: http://screenstudio.crombz.com/
yeah, besides, other ubuntu screen recorder like Krut Computer Recorder also works fine for making screencast. And it even allows for moving recording region while recording. More ubuntu screen recorder can be found here, you can check it out here and take your pick.
http://www.apowersoft.com/ubuntu-screen-recorder.html
Yes, there are many good GUI recorders for Ubuntu, but i think that using the command line via avconv is more delicious :D