Remmina is a free and open-source, feature-rich, and powerful remote desktop client for Linux and other Unix-like systems, written in GTK+3. It’s intended for system administrators and travelers, who need to remotely access and work with many computers.
It supports several network protocols in a simple, unified, homogeneous, and easy-to-use user interface.
Remmina Features
- Supports RDP, VNC, NX, XDMCP, and SSH.
- Enables users to maintain a list of connection profiles, organized by groups.
- Supports quick connections by users directly putting in the server address.
- Remote desktops with higher resolutions are scrollable/scalable in both window and fullscreen modes.
- Supports viewport fullscreen mode; here the remote desktop automatically scrolls when the mouse moves over the screen edge.
- Also supports a floating toolbar in fullscreen mode; enables you to switch between modes, toggle keyboard grabbing, minimize, and beyond.
- Offers tabbed interface, optionally managed by groups.
- Also offers a tray icon, which allows you to quickly access configured connection profiles.
In this article, we will show you how to install and use Remmina with a few supported protocols in Linux for desktop sharing.
Prerequisites
- Allow desktop sharing in remote machines (enable remote machines to permit remote connections).
- Install SSH services on the remote machines.
How to Install Remmina Desktop Sharing Tool on Linux
Remmina and its plugin packages are already provided in the official repositories of all if not most of the mainstream Linux distributions.
Run the commands below to install it with all supported plugins:
------------ On Debian/Ubuntu ------------
$ sudo apt install remmina remmina-plugin-*
------------ On CentOS/RHEL/Alma & Rocky ------------
# yum install epel-release
# yum copr enable castor/remmina
# yum install 'remmina*'
------------ On Fedora 22+ ------------
$ sudo dnf copr enable hubbitus/remmina-next
$ sudo dnf upgrade --refresh 'remmina*' 'freerdp*'
$ sudo emerge -a net-misc/remmina  [On Gentoo Linux]
$ sudo apk add remmina             [On Alpine Linux]
$ sudo pacman -S remmina           [On Arch Linux]
$ sudo zypper install remmina      [On OpenSUSE]
How to Connect to a Remote Linux System
Once you have installed it, search for remmina in the Ubuntu Dash or Linux Mint Menu, then launch it:
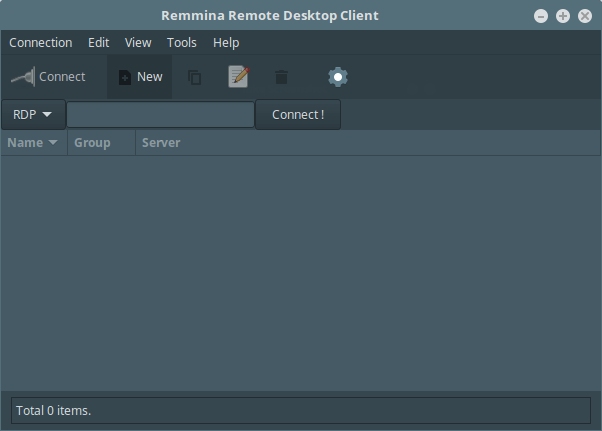
You can perform any configurations via the graphical interface or by editing the files under $HOME/.remmina or $HOME/.config/remmina.
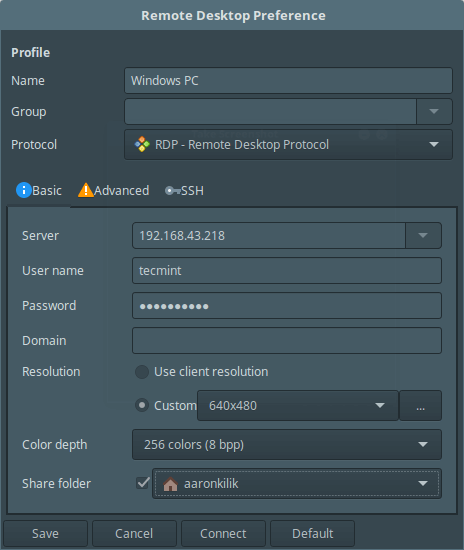
To set up a new connection to a remote server press [Ctrl+N] or go to Connection -> New, and configure the remote connection profile as shown in the screenshot below. This is the basic settings interface.
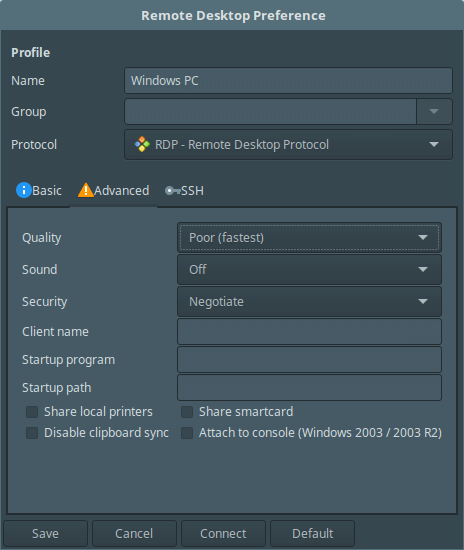
Click on Advanced from the interface above to configure advanced connection settings.
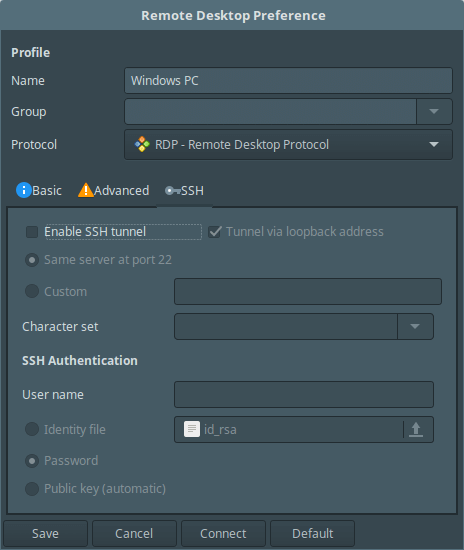
To configure SSH settings, click on SSH from the profile interface above.
Once you have configured all the necessary settings, save the settings by clicking on the Save button, and from the main interface, you’ll be able to view all your configured remote connection profiles as shown below.
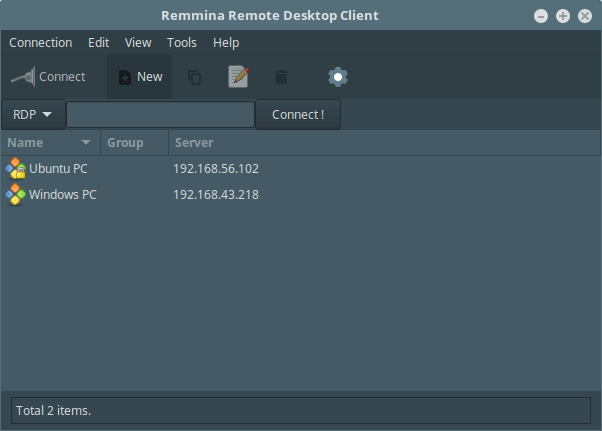
Remmina – Connect to Remote Linux Using sFTP
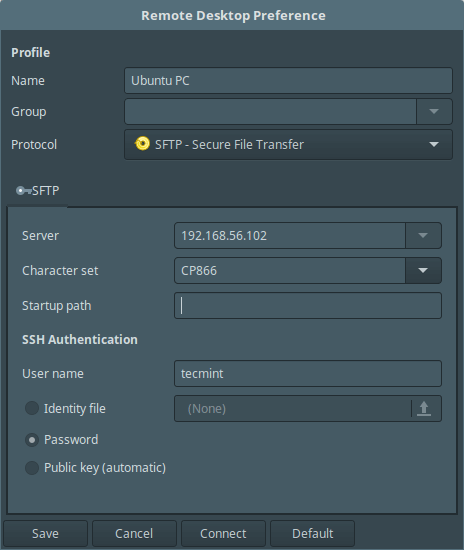
Choose the connection profile and edit the settings, choose SFTP – Secure File Transfer from the Protocols down menu. Then set a startup path (optional) and specify the SSH authentication details. Lastly, click Connect.
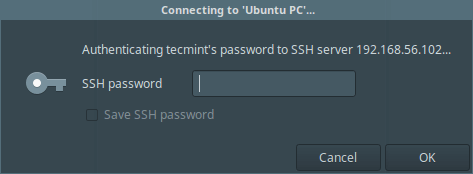
Enter your SSH user password here.
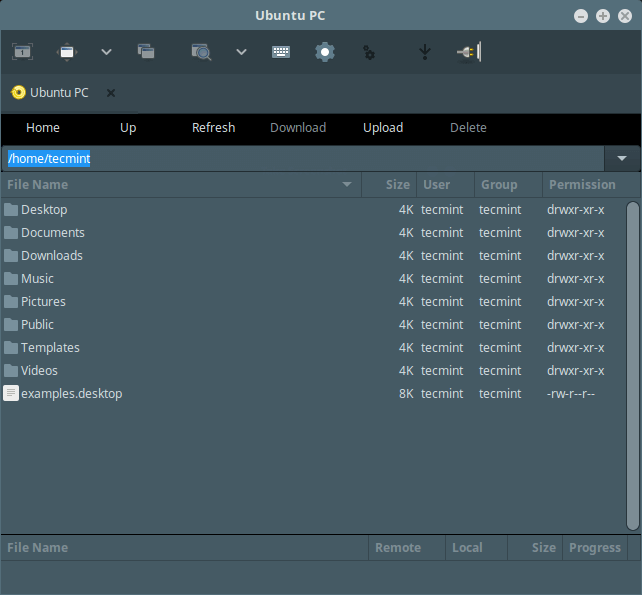
If you see the interface below, then the SFTP connection is successful, you can now transfer files between your machines.
Remmina – Connect to Remote Linux Using SSH
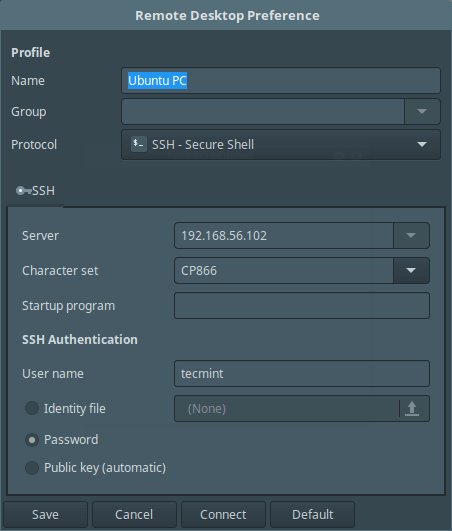
Select the connection profile and edit the settings, then choose SSH – Secure Shell from the Protocols down menu and optionally set a startup program and SSH authentication details. Lastly, click Connect, and enter the user SSH password.
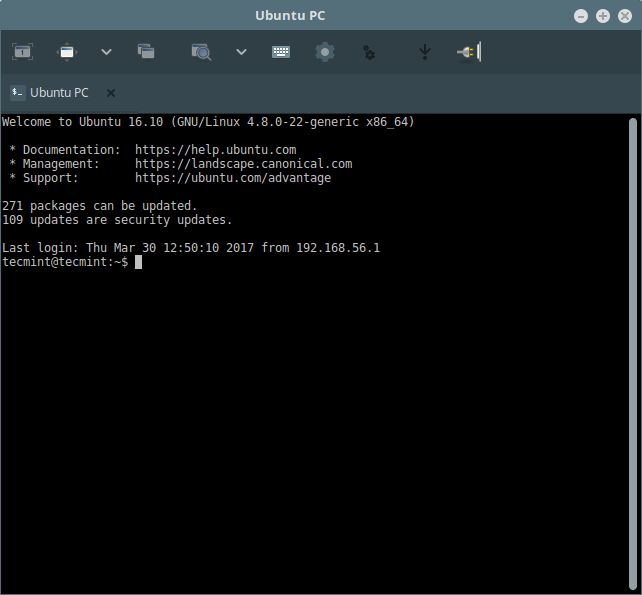
When you see the interface below, it means your connection is successful, you can now control the remote machine using SSH.
Remmina – Connect to Remote Linux Desktop Using VNC
Choose the connection profile from the list and edit the settings, then select VNC – Virtual Network Computing from the Protocols down menu. Configure basic, advanced, and ssh settings for the connection and click Connect, then enter the user SSH password.

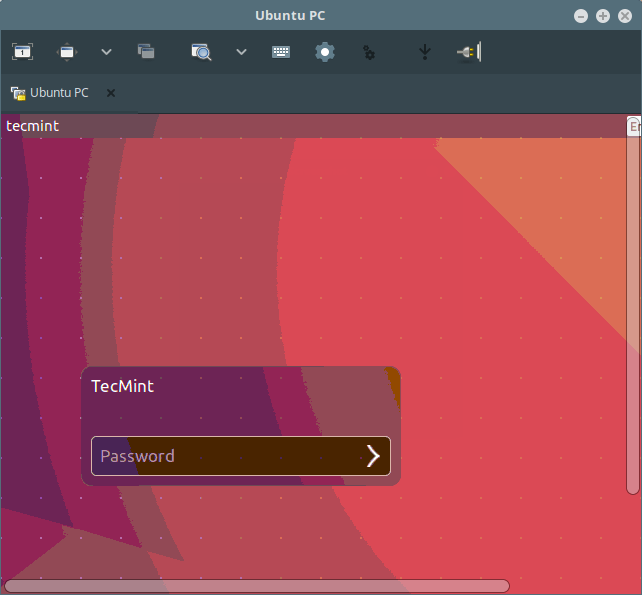
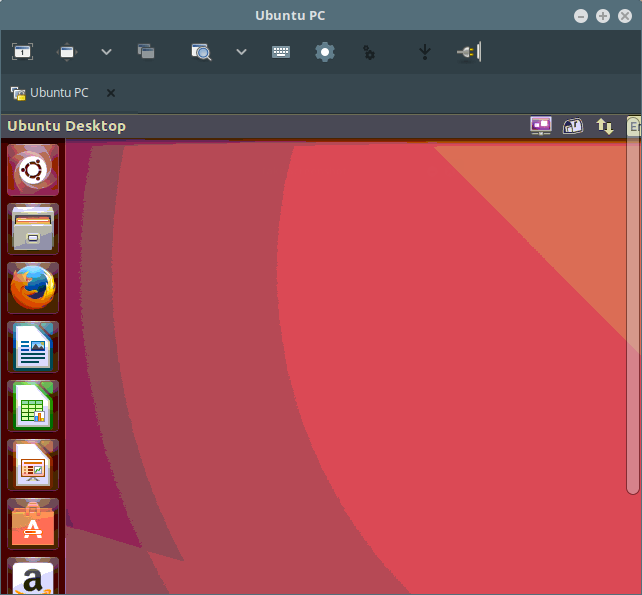
Once you see the following interface, it implies that you have successfully connected to the remote machine using the VNC protocol.
Enter the user login password from the desktop login interface as shown in the screenshot below.
Simply follow the steps above to use the other remaining protocols to access remote machines, it’s that simple.
That’s all! In this article, we showed you how to install and use Remmina remote connection client with a few supported protocols in Linux. You can share any thoughts in the comments via the feedback form below.






Hello everyone, I tried to install Remmina on RHEL Workstation using the instructions provided above, but I was unable to install it.
I am using Red Hat Enterprise Linux 9.4 (Plow).
Is the Remmina desktop project still active?
@Tomas,
Yes, the Remmina desktop project is still active and can be installed on Red Hat Enterprise Linux 9.4 (Plow) using the following commands.
After these steps, Remmina should be installed on your system. You can start it from the application menu or by running
remminain the terminal.Guide on how to log in with keyfile? I know how to generate the keyfile and upload it to the server, I don’t get how to add it reminna…
I am trying to install sudo apt-get install remmina remmina-plugin-* in debian, after “apt-get update” but it can’t find the remmina packages .
I am getting this errors.
is there any help? thanks
@tyty
Run these commands on Debian 9:
$ echo 'deb http://ftp.debian.org/debian stretch-backports main' | sudo tee --append /etc/apt/sources.list.d/stretch-backports.list >> /dev/null

$ sudo apt update

$ sudo apt install -t stretch-backports remmina remmina-plugin-rdp remmina-plugin-secret
@Marin — try Filezilla …
@Larry
Thanks for sharing, FileZilla is a great software for the desired purpose.
When running yum install remmina remmina-plugin-* I get:
Any idea how I can install remmina on CentOS 7 ?
Kr
@Edwin
You need to enable the EPEL repo, followed by the NUX repository, like this:
#yum -y install epel-release && rpm -Uvh http://li.nux.ro/download/nux/dextop/el7/x86_64/nux-dextop-release-0-5.el7.nux.noarch.rpm
Then install remmina as shown.
The “yum install remmina remmina-plugin-*” command doesn’t work, say there is no package. In fact I only found a old version of remmina for Cent OS, probably would need to compile it, something I don’t remember how to do anymore hehehehe.
This is what you need to do.
With that I was able to get 1.2.0-rcgit-18 installed on my CentOS 7 workstation.
Executed the following command.
Got the error..
Running as root.
Any idea how I can get remmina installed in this way on CentOS7 ?
That is because the command is wrong, the correct command is:
##pluginS is plural. yum search remmina for all those packages.
Thanks, Aaron!
Sorry for not having been clear enough. I’m not looking for a tool on Linux to access mainly Windows boxes (via rdp), but a tool that can connect to other Linux boxes and offers drag & drop – like MobaXterm.
Am fully aware of that most file managers in Linux support sftp. However, I’d prefer a separate, file manager independent solution – like Remmina, but with drag & drop when in sftp mode.
Hope this time I was clear enough :)
@Marin
Okay, we’ll check this out and get back to you. Thanks for following us.
Is there a similar tool like Remmina but with drag & drop capability in sftp mode?
Like it’s nicely implemented in MobaXterm.
@Marin
Sure, there could be one, you can check out rdesktop, FreeRDP and KRDC.