Securing your web server is always one of the key factors that you should consider before going live with your website. A security certificate is critical for securing traffic sent from web browsers to web servers and in so doing, it’ll inspire users to exchange data with your website in the full knowledge that the traffic sent is secured.
In most cases, security certificates are paid for and renewed annually. Let’s Encrypt certificate is a free, open, and automated certificate authority that you can use to encrypt your site. The certificate expires after every 90 days and auto-renews at absolutely no cost.
Recommended Read: How to Secure Nginx with Let’s Encrypt on CentOS 8
In this article, we will show you how you can install the Let’s Encrypt Certificate with Certbot for the Apache web server and later, configure the certificate to renew automatically on CentOS 8.
Prerequisites
Before you get started, ensure that you have the following in place:
1. An instance of CentOS 8 server with Apache HTTP web server installed and running. You can confirm that your apache web server is up and running.
$ sudo dnf install httpd
$ sudo systemctl status httpd

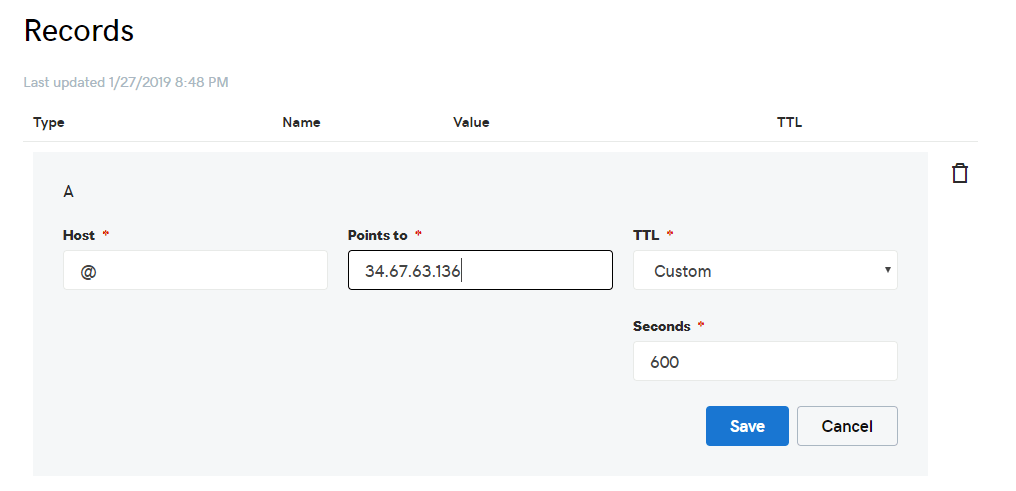
2. A Fully Qualified Domain Name (FQDN) pointing to your web server’s public IP address on your DNS web hosting provider. For this guide, we will use linuxtechwhiz.info pointing to the server’s IP 34.67.63.136.
Step 1. Install Certbot in CentOS 8
Certbot is a client that automates the installation of the security certificate. It fetches the certificate from Let’s encrypt authority and deploys it on your web server without much of a hassle.
Certbot is absolutely free and will enable you to install the certificate in an interactive way by generating instructions based on your web server’s configuration.
Before downloading the certbot, first, install packages that are necessary for the configuration of an encrypted connection.
We will start off by installing the EPEL repository which provides high-quality additional packages for RHEL-based systems:
$ sudo dnf install epel-release
Next, install the mod_ssl and openssl packages.
$ sudo dnf install mod_ssl openssl
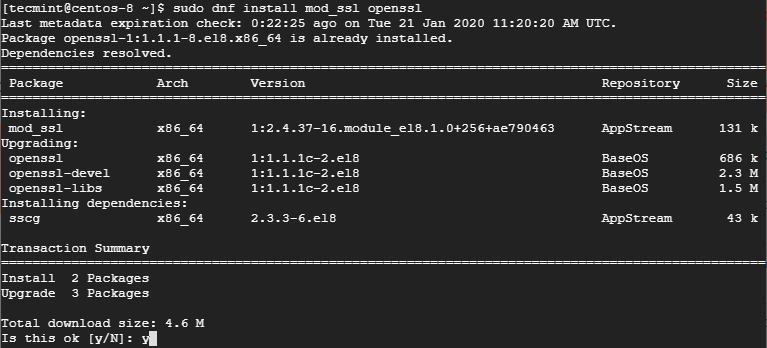
Once all the dependencies have been installed, install Certbot and the Apache module for Certbot.
$ sudo dnf install certbot python3-certbot-apache

The command installs Certbot, the Apache module for Certbot, and other dependencies.
Step 2: Create an Apache Virtual Host
The next step will be to create a virtual host file for our domain – linuxtechwhiz.info. Begin by first creating the document root where you will place your HTML files.
$ sudo mkdir /var/www/linuxtechwhiz.info.conf
Create a test index.html file as shown.
$ sudo echo “<h1>Welcome to Apache HTTP server</h1>” > /var/www/linuxtechwhiz.info/index.html
Next, create a virtual host file as shown.
$ sudo vim /etc/httpd/conf.d/linuxtechwhiz.info
Append the configuration below.
<VirtualHost *:443>
  ServerName linuxtechwhiz.info
  ServerAlias www.linuxtechwhiz.info
  DocumentRoot /var/www/linuxtechwhiz.info/
  <Directory /var/www/linuxtechwhiz.info/>
      Options -Indexes +FollowSymLinks
      AllowOverride All
  </Directory>
  ErrorLog /var/log/httpd/www.linuxtechwhiz.info-error.log
  CustomLog /var/log/httpd/www.linuxtechwhiz.info-access.log combined
</VirtualHost>
Save and exit.
Assign the permissions to the Document root as shown.
$ sudo chown -R apache:apache /var/www/linuxtechwhiz.info
For the changes to come into effect, restart the Apache service.
$ sudo systemctl restart httpd
Step 3: Install Let’s Encrypt SSL Certificate on CentOS 8
Now run certbot as shown to commence the installation of the Let’s Encrypt certificate.
$ sudo certbot --apache -d domain.com
In our case, this will be:
$ sudo certbot --apache -d linuxtechwhiz.info
The command will take you through a series of prompts to enable you to configure Lets Encrypt for your domain. Be sure to provide your email address, Accept the Terms of Service and specify the domain names you wish to use the HTTPS protocol which is the encrypted version of HTTP.
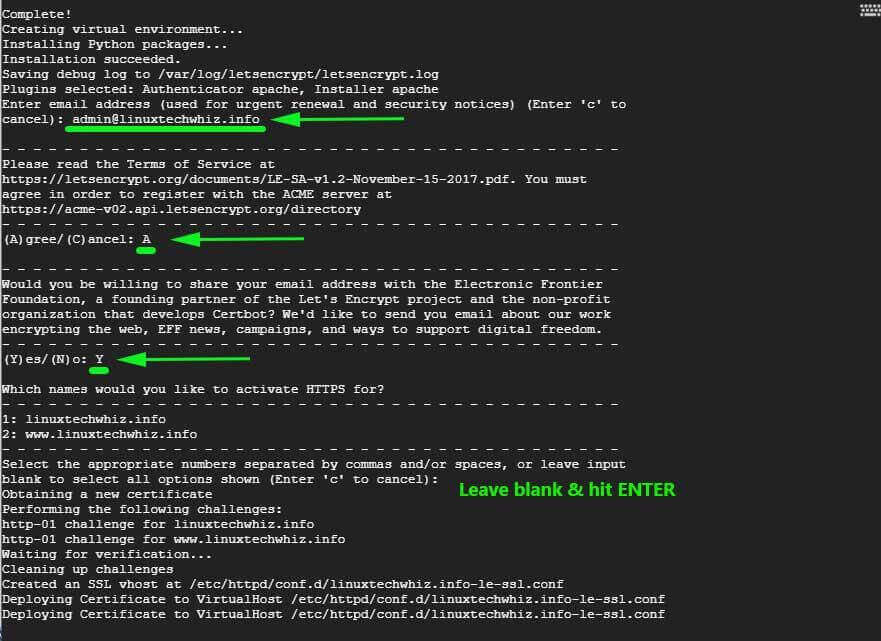
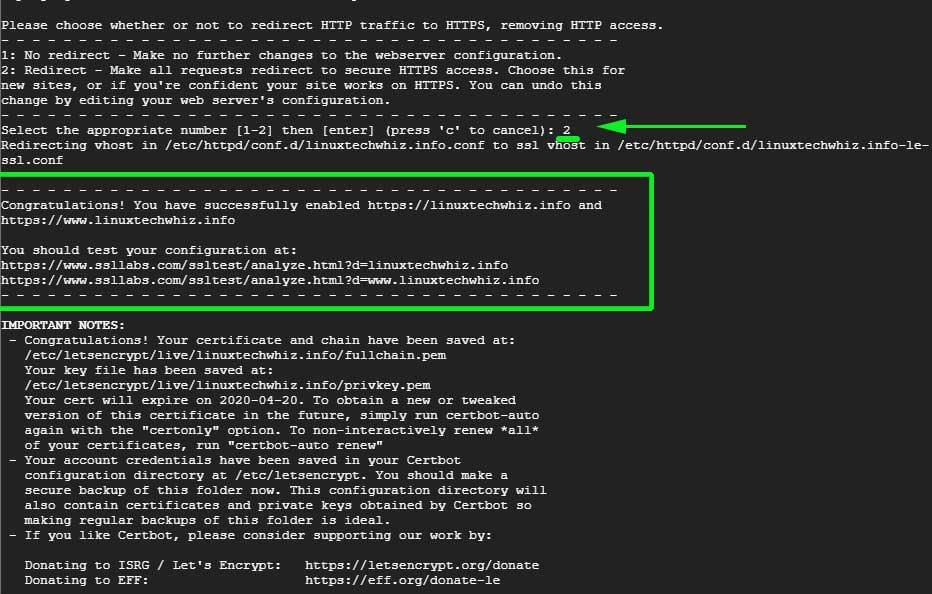
If all went well, you should get a congratulatory message at the end informing you that your site has been secured using Let’s Encrypt certificate. Your certificate’s validity will also be displayed – which is usually after 90 days after deployment.
Now head back to your virtual host file and append the following lines of configuration.
SSLEngine On
 SSLCertificateFile    /etc/letsencrypt/live/linuxtechwhiz.info/fullchain.pem
 SSLCertificateKeyFile  /etc/letsencrypt/live/linuxtechwhiz.info/privkey.pem
Save and exit.
The final Apache virtual host configuration will look something like this:
<VirtualHost *:443>
  ServerName linuxtechwhiz.info
  ServerAlias www.linuxtechwhiz.info
  DocumentRoot /var/www/linuxtechwhiz.info/
  <Directory /var/www/linuxtechwhiz.info/>
      Options -Indexes +FollowSymLinks
      AllowOverride All
  </Directory>
  ErrorLog /var/log/httpd/www.linuxtechwhiz.info-error.log
  CustomLog /var/log/httpd/www.linuxtechwhiz.info-access.log combined

 SSLEngine On
 SSLCertificateFile    /etc/letsencrypt/live/linuxtechwhiz.info/fullchain.pem
 SSLCertificateKeyFile  /etc/letsencrypt/live/linuxtechwhiz.info/privkey.pem
</VirtualHost>
Once again, restart Apache.
$ sudo systemctl restart httpd
Step 4: Verifying the Let’s Encrypt SSL Certificate
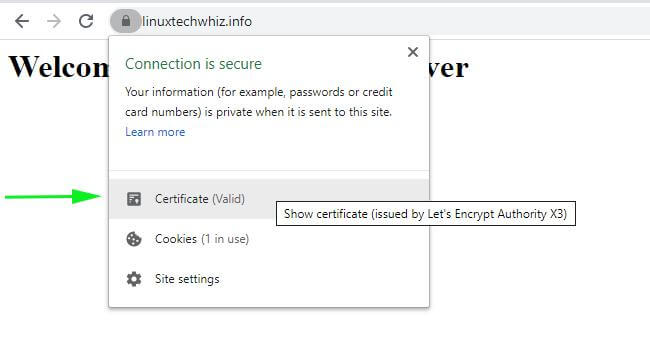
To verify that everything is working, launch your browser and visit your server’s IP address. You should now see a padlock symbol at the beginning of the URL.

To get more details, click on the padlock symbol & click on the ‘Certificate’ option on the pull-down menu that appears.
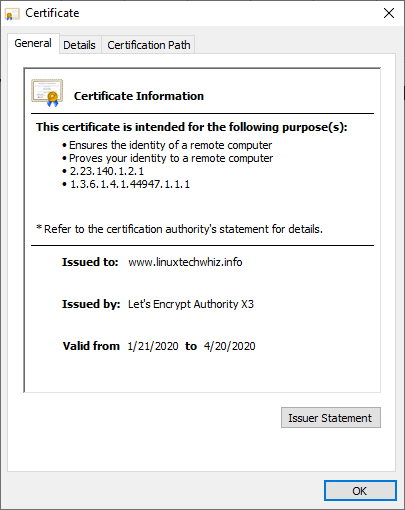
The certificate details will be displayed on the next pop-up window.
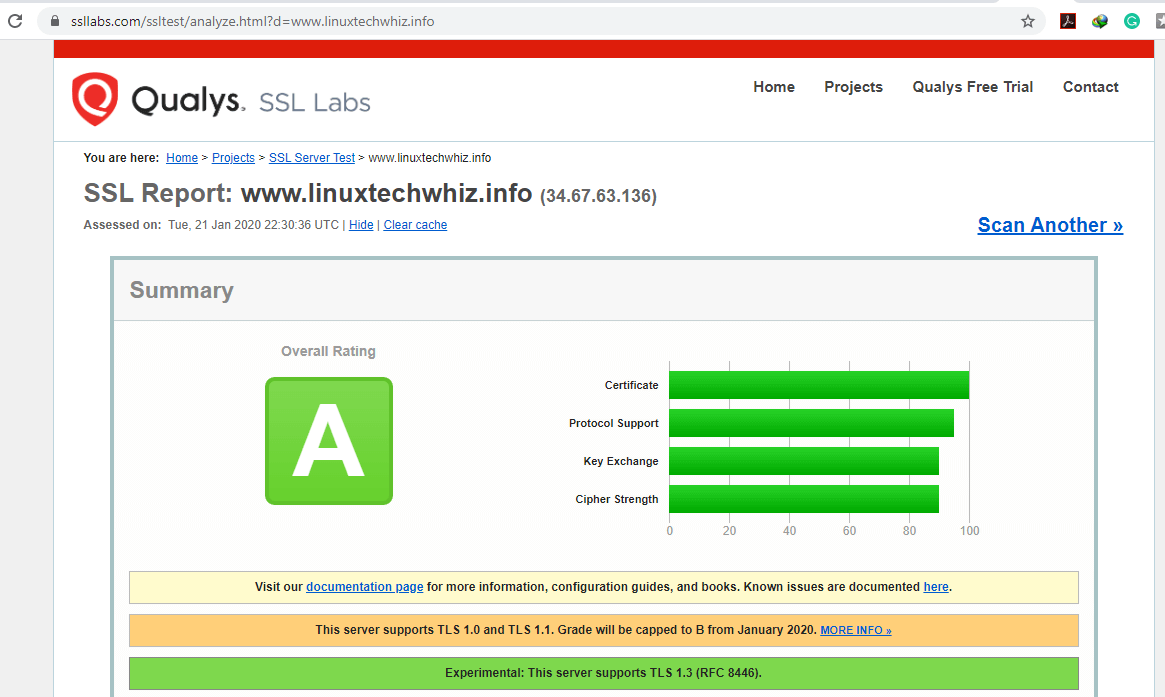
Also, you can test your server at https://www.ssllabs.com/ssltest/ and your site should get an ‘A’ grade as shown.
Step 5: Auto-Renew Let’s Encrypt SSL Certificate
Let’s Encrypt is only valid for 90 days only. Usually, the renewal process is carried out by the certbot package which adds a renew script to /etc/cron.d directory. The script runs twice daily and will automatically renew any certificate within 30 days of expiry.
To test the auto-renewal process, conduct a dry run test with certbot.
$ sudo /usr/local/bin/certbot-auto renew --dry-run
If no errors were encountered, then it implies you are good to go.
This brings us to the end of this guide. In this guide, we demonstrated how you can use certbot to install and configure the Let’s Encrypt certificate on Apache webserver running on a CentOS 8 system.


Failed redirect for
domain.com– Unable to set the redirect enhancement fordomain.com.Unable to find corresponding HTTP vhost; Unable to create one as intended addresses conflict; Current configuration does not support automated redirection
can you please help me here?
THIS IS A MISLEADING GUIDE!!
It’s designed for Ubuntu, NOT Centos!
You don’t create directories named sites-available and sites-enabled on a Centos environment, you got conf.d for that.
Hey Tal. I think you are greatly mistaken, There’s nowhere in the guide where we have created the directories called sites-available and sites-enabled. Kindly go through the article once more.
This helped. Though I ended up with online one sub-folder in “/etc/letsencrypt/live/” but I am installing SSL for multiple domains.
I am getting the following error when installing Let’s Encrypt SSL on my domain:
Waiting for verification…
Challenge failed for domain
dns-01 challenge for domain.com
Cleaning up challenges
Some challenges have failed.
Hey Sima, ensure that you have an
Arecord for your domain and that your virtual host configuration file is correct: There is an error in step 2 correct as follows.I struggled with this, as it couldn’t’ find any domains and unable to find a virtual host listening on port 80.
This line:
Changed to:
Now it can see my domains when I run set up
Hey Curly, Thanks for that observation. We’ll make the changes.
What I also neglected to say is great article really helped me! I also think there is a cron tab command to renew the certificate as it only lasts three months?
A great article, sir is it possible wildcard SSL certificate with Let’s Encrypt for all my auto-generate subdomain (*.example.com)?
Installing certbot this way is not recommended by RH.
Instead of the manual certbot install, it may be better to use the epel repo rpm, so it gets updated.
Thanks for your feedback. We will look into that.
How if I want to try on a local server with local domain? And how if I use Apache reverse proxy server, in which server I have to install the certbot? The virtual host is configured both on the reverse proxy server and backend server
Hey Nugroho. Firstly, you need to have a domain registered with a web hosting company. Thereafter, point the domain to the public IP address of your local server. In this case, port forwarding is required to link the private IP of your server with the public IP address given to you by the ISP.