Basic HTTP authentication is a security mechanism to restrict access to your website/application or some parts of it by setting up simple username/password authentication. It can be used essentially to protect the whole HTTP server, individual server blocks (virtual hosts in Apache) or location blocks.
Read Also: How to Setup Name-based and IP-based Virtual Hosts (Server Blocks) with NGINX
As the name suggests, it is not a secure method to rely on; you should use it in conjunction with other more reliable security measures. For instance, if your web application is running on HTTP, then user credentials are transmitted in plain text, so you should consider enabling HTTPS.
The purpose of this guide is to help you add a small but useful layer of security to protect private/privileged content on your web applications (such as, but not limited to administrator sides). You can also use it to prevent access to a website or application which is still in the development phase.
Requirements
Create HTTP Authentication User File
You should start by creating a file that will store username:password pairs. We will use the htpasswd utility from Apache HTTP Server, to create this file.
First check that apache2-utils or httpd-tools, the packages which provide htpasswd utility are installed on your system, otherwise run the appropriate command for your distribution to install it:
# yum install httpd-tools		[RHEL/CentOS]
$ sudo apt install apache2-utils	[Debian/Ubuntu]
Next, run htpasswd command below to create the password file with the first user. The -c option is used to specify the passwd file, once you hit [Enter], you will be asked to enter the user password.
# htpasswd -c /etc/nginx/conf.d/.htpasswd developer
Add a second user, and do not use the -c option here.
# htpasswd /etc/nginx/conf.d/.htpasswd admin
Now that you have the password file ready, proceed to configure the parts of your web server that you want to restrict access to. To view the password file content (which includes usernames and encrypted passwords), use the cat command below.
# cat /etc/nginx/conf.d/.htpasswd

Configure HTTP Authentication for Nginx
As we mentioned earlier on, you can restrict access to your webserver, a single web site (using its server block) or a location directive. Two useful directives can be used to achieve this.
- auth_basic – turns on validation of user name and password using the “HTTP Basic Authentication” protocol.
- auth_basic_user_file – specifies the password file.
Password Protect Nginx Virtual Hosts
To implement basic authentication for the whole web server, which applies to all server blocks, open the /etc/nginx/nginx.conf file and add the lines below in the http context:
http{
	auth_basic           "Restricted Access!";
    	auth_basic_user_file /etc/nginx/conf.d/.htpasswd;
	……...
}
Password Protect Nginx Website or Domain
To enable basic authentication for a particular domain or sub-domain, open its configuration file under /etc/nginx/conf.d/ or /etc/nginx/conf/sites-available (depending on how you installed Nginx), then add the configuration below in server block or context:
server {
	listen 			80;
	server_name    	  example.com;
	auth_basic           	"Restricted Access!";
    	auth_basic_user_file 	/etc/nginx/conf.d/.htpasswd;
	location /  {
		……..
	}
	……...
}
Password Protect Web Directory in Nginx
You can also enable basic authentication within a location directive. In the example below, all users trying to access the /admin location block will be asked to authenticate.
server {
	listen 			80;
	server_name    	example.com www.example.com;

	location / {
		……..
	}
	location /admin/ {
		auth_basic           	"Restricted Access!";
    		auth_basic_user_file 	/etc/nginx/conf.d/.htpasswd;
	}

	location /public/{
		auth_basic  off;	#turns off basic http authentication off for this block
	}
	……..
}
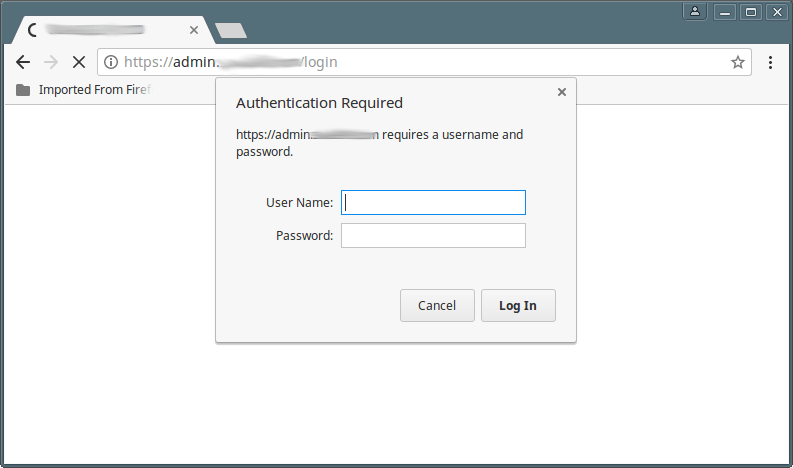
If you have configured basic HTTP authentication, all user who tries to access your webserver or a sub-domain or specific part of a site (depending on where you implemented it), will be asked for a username and password as shown in the screenshot below.
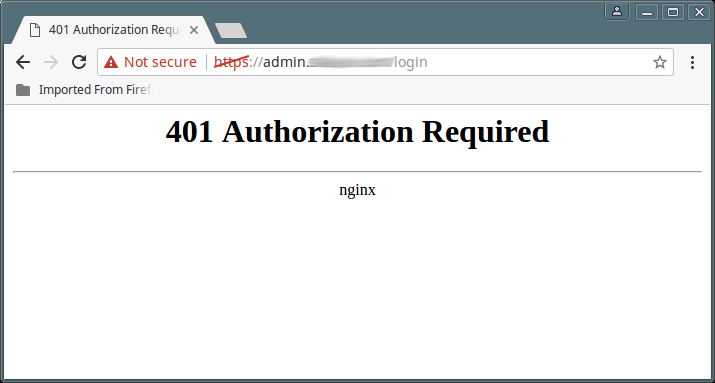
In case of a failed user authentication, a “401 Authorization Required” error will be displayed as shown below.
You can find more information at restricting Access with Basic HTTP Authentication.
You might also like to read these following useful Nginx HTTP server related guides.
- How to Password Protect Web Directories in Nginx
- The Ultimate Guide to Secure, Harden and Improve Performance of Nginx
- Setting Up HTTPS with Let’s Encrypt SSL Certificate For Nginx
In this guide, we showed how to implement basic HTTP authentication in Nginx HTTP web server. To ask any questions, use the feedback form below.



Passwords in .htpasswd are hashed, not encrypted, and in this case, using MD5.
PS. Do not forget to mention what linux distribution version was used and the nginx version.
Cheers
Thank you for the tutorial.
There’s one thing I want to ask. In the last picture, I can’t see the Nginx version. How can I do this?
@Naufal
Read this guide: https://www.tecmint.com/hide-nginx-server-version-in-linux/
Thank you for the instructions.
There is a typo in the http block, the instructions have htpp.
@Ray,
Thanks for notifying about that typo, corrected in the article..
I need to do load balancing of single nginx web server where my application server is on nodejs two servers all user will try to login this web when i configure and setup the the load balance i am able to site the web page but unable to login to my application server.
config file on nginx:
nginx.config

 upstream tr{
  server 10.10.2.76;
  server 10.10.2.77;
  server  10.26.2.50;

}
server {
listen 80;

location / {
proxy_set_header Host $host;
proxy_pass http://tr;
}

}
Can you help me on this do i need to install any module to get connected
@vikram
We will prepare a new guide about this topic. Thanks for the feedback.