Ubuntu 17.04 released, codenamed “Zesty Zapus”; bringing yet another version of a remarkable operating system in the Ubuntu ecosystem, with the latest and some of the greatest open source technologies in a high-quality, easy-to-use Linux distribution.
It will be supported for 9 months until January 2018 and it ships in with several improvements, a few new features, and many bug fixes: the default DNS resolver is now systemd-resolved, fresh installations will use a swap file instead of a swap partition. It is based on the Linux version 4.10 series.
What’s New in Ubuntu 17.04 Desktop
Many incremental improvements, the notable being:
- Unity 8 is only present as an alternative session.
- All apps offered by GNOME have been updated to 3.24.
- Gconf is no longer installed by default.
- Newer versions of GTK and Qt.
- Updates to major packages like Firefox and LibreOffice.
- Stability improvements to Unity and many more.
What’s New in Ubuntu 17.04 Server
The notable improvements include:
- Ocata release of OpenStack, together with a number of time saving deployment and management tools for devops teams.
- A number of key server technologies have been updated to new formidable versions with a variety of new features, from MAAS to juju and many more.
In this article, we will show you how to upgrade from Ubuntu 16.10 to 17.04 in two possible ways: using the command line and the Software Updater application. You will get the same end result no matter the method you choose to use.
Important: First, backup your existing Ubuntu installation before you update your computer and perform the actual upgrade. This is recommended because upgrades do not always go well as expected, a few times you may encounter certain failures that can cause data loss.
Then ensure that you system is fully up-to-date, run the commands below:
$ sudo apt update && sudo apt dist-upgrade
Upgrade Ubuntu 16.10 to 17.04
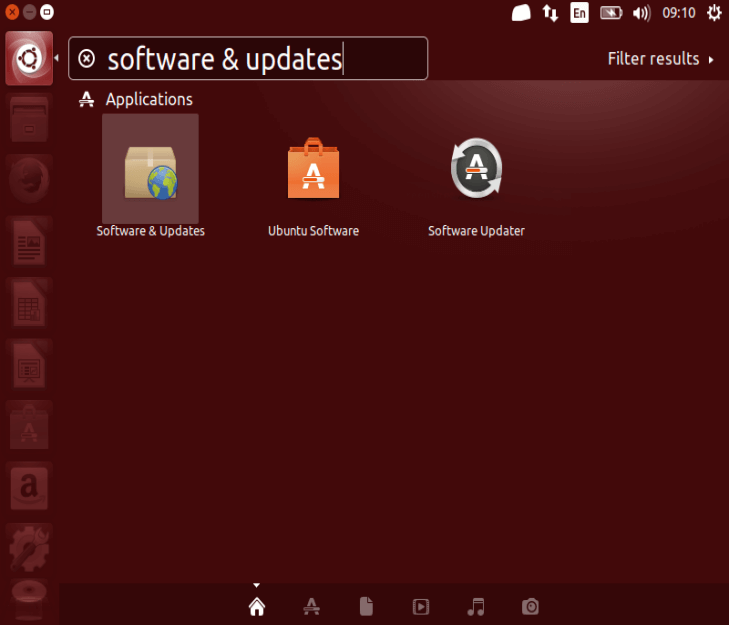
To upgrade on a desktop system, search for “Software & Updates” in the Dash and launch it.
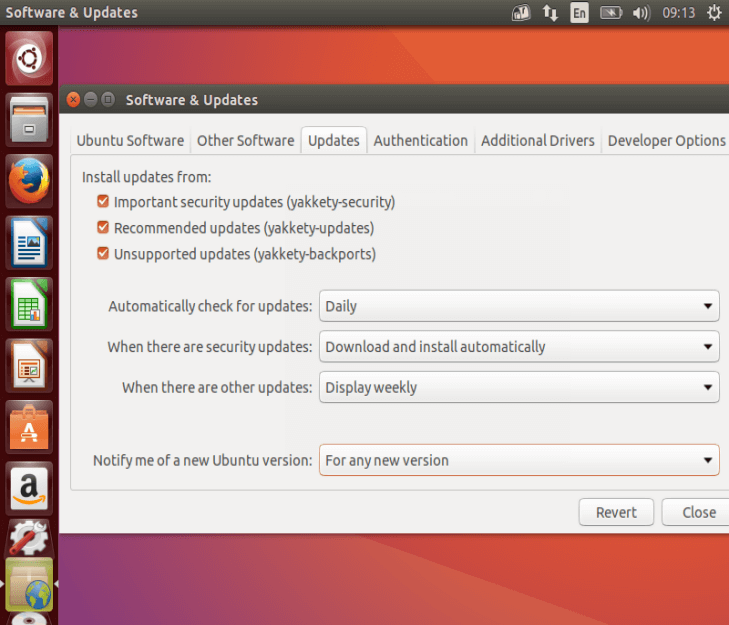
From the “Software & Updates” interface, select the third Tab called “Updates” and set the “Notify me of a new Ubuntu version” dropdown menu to “For any new version“.
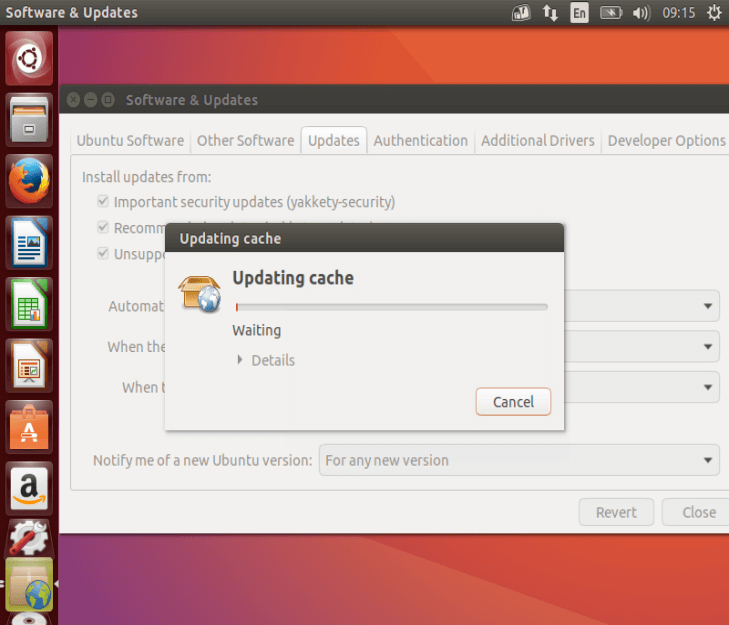
Then the system will start updating the cache as shown in the following screenshot.
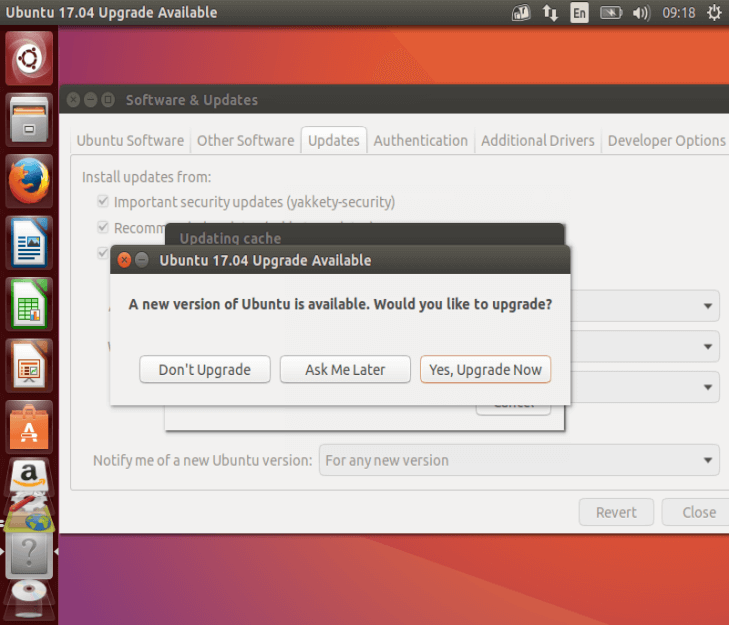
As the cache updates you’ll see the message “A new version of Ubuntu is available. Would you like to Upgrade”. Click on “Yes, Upgrade now”.
Alternatively, you can use “/usr/lib/ubuntu-release-upgrader/check-new-release-gtk“. Click Upgrade and follow the on-screen instructions.
If you are using Ubuntu 16.10 Server, follow below instructions to upgrade to Ubuntu 17.04.
Upgrade Ubuntu 16.10 Server to 17.04 Server
To upgrade to Ubuntu 17.04 from the terminal (especially on servers), install the update-manager-core package if it is not already installed.
$ sudo apt install update-manager-core
Then ensure that the prompt option in /etc/update-manager/release-upgrades is set to normal as shown in the screenshot below.
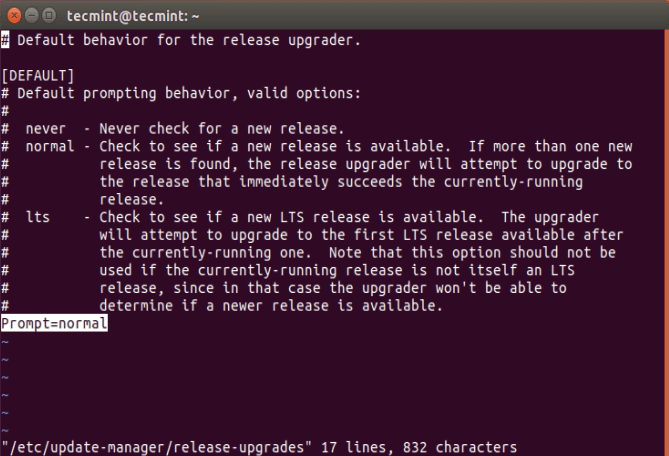
Afterwards, launch the upgrade tool with the command below:
$ sudo do-release-upgrade
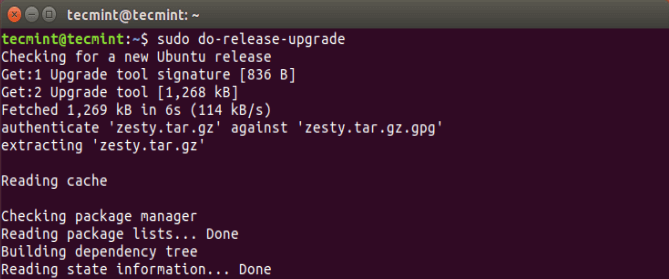
From the screenshot below, enter y to continue with the upgrade process (Or view all packages to be installed by entering d). And follow the on-screen instructions.
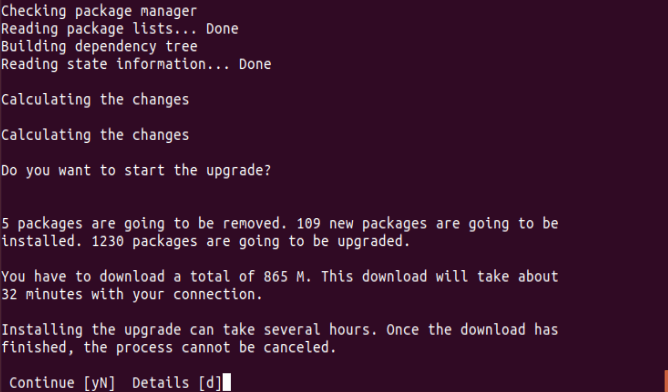
Wait for the upgrade process to complete, then reboot your machine, then login into Ubuntu 17.04.
Note: For Ubuntu 16.04 users, you’ll have to upgrade to Ubuntu 16.10 then to 17.04.
That’s it! In this article, we described how to upgrade from Ubuntu 16.10 to 17.04 in two ways: using the command line as well as the Software Updater application. Remember to share any thoughts with us via the feedback form below.



I tried this running 16.04 (my machine is i386)
now i can’t get my wired connection to the internet
What do i do?
@bewildered
Read more about this here:
Ubuntu 17.04: New privacy feature in NetworkManager stops some WiFi adapters from working (mac address randomization)
Try this:
edit the /etc/NetworkManager/NetworkManager.conf file
And add:
[device]
wifi.scan-rand-mac-address=no
Then restart the networkmanager service and test if it’s working.
Thanks it worked, I successfully upgraded from Ubuntu 16.10 to Ubuntu 17.04..:)
@Fanyit
Great, thanks for the feedback. Enjoy!
No problem always is good to have Useful guides such this. Thanks